Table of Contents
Advertisement
Quick Links
IN GROUND POOL/SPA HEAT PUMP HEATERS
INSTALLATION & OPERATIONS MANUAL
FOR YOUR SAFETY
This Heat Pump is listed by ETL as complying
with the latest edition of the UL Standard for
Safety for Heating and Cooling Equipment",
UL1995 and CSA C22.2 No. 236.
All Heat Pumps must be installed in accordance
with all applicable National and Local codes. In
the absence of local codes, refer to the latest
edition of the National Electric Code (NEC) in the
United States and the Canadian Electric Code
(CEC) in Canada.
FOR YOUR SAFETY:
This product must be installed and serviced by
authorized personnel, qualified in pool/spa heater
installation. Improper installation and/or
operation can cause death, serious injury
and/or property damage.
SAVE THESE
INSTRUCTIONS
CONTENTS
USE ONLY GENUINE REPLACEMENT PARTS
51300003301G
Pg.
2
11
11
13
16
17
18
23
23
23
24
25
26
29
1
Advertisement
Table of Contents

Related Manuals for HeatPRO 140


Summary of Contents for HeatPRO 140
-
Page 1: Table Of Contents
51300003301G IN GROUND POOL/SPA HEAT PUMP HEATERS INSTALLATION & OPERATIONS MANUAL FOR YOUR SAFETY CONTENTS This Heat Pump is listed by ETL as complying GETTING STARTED with the latest edition of the UL Standard for Safety for Heating and Cooling Equipment”, INSTALLATION UL1995 and CSA C22.2 No. -
Page 2: Getting Started
51300003301G GETTING STARTED WHAT TO EXPECT WHEN OPERATING YOUR POOL HEATER This Flow Chart will provide steps to follow to protect your pool users as well as the heater by maintaining a high water quality pool USE ONLY GENUINE REPLACEMENT PARTS... - Page 3 51300003301G PLEASE READ BEFORE PROCEEDING Basic safety precautions should always be followed, including the following: Failure to follow instructions can cause death and/or severe injury. This is the safety-alert symbol. When you see this symbol on your equipment or in this manual, look for one of the following signal words and be alert to the potential for personal injury.
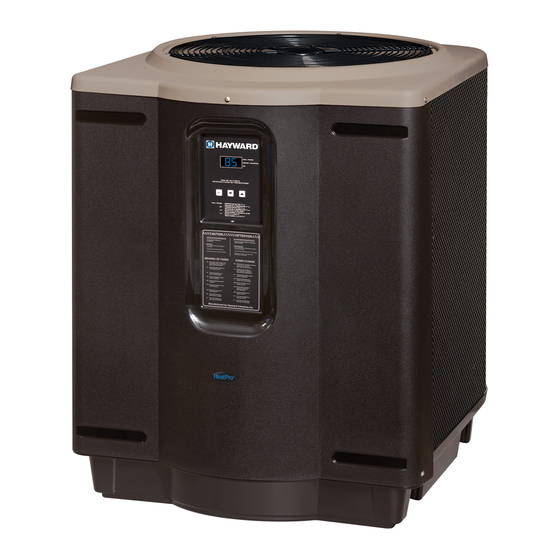
- Page 4 51300003301G HEATER CONSTRUCTION Names of heat pump heater components Figure1: Sub-Assemblies Control Board Fan Top Fan Motor Fan Blade Control Box Evaporator Front Panel Compressor Condenser USE ONLY GENUINE REPLACEMENT PARTS...
- Page 5 High (590PSI) and low (80PSI) refrigerant pressure switches monitoring extreme operation Compressor sound blanket Corrosion resistant evaporator fins Models 120 H/C Height (“A” inches) Voltage/Phase/Hz 240/1/60 240/1/60 240/1/60 240/1/60 240/1/60 208-230/3/60 Capacity (Btu/h) 120,000...
- Page 6 51300003301G Wiring Connection Diagram WARNING – Risk of Electric Shock Before working on any electrical equipment, turn off power supply to the equipment. WARNING – Risk of Electric Shock. All electrical wiring MUST conform to applicable local codes, regulations, and the National Electric Code (NEC). Hazardous voltage can cause death, shock, burn, and/or serious property damage.
- Page 7 51300003301G Figure 2b 208/230 VAC/60 Hz Three Phase Wiring Diagram Three Phase Connections USE ONLY GENUINE REPLACEMENT PARTS...
- Page 8 51300003301G Table2: CERTIFICATION AND COMPLIANCE CERTIFICATION CODES AND STANDARDS CANADA DESIGN CERTIFIED ETL/ITS ETL/ITS DESIGN COMPLIANT UL1995 CSA C22.2 No. 236 ANSI/NFPA 70 CSA C22.1 – Canadian INSTALLATION COMPLIANT ELECTRIC Electrical Code, Part I CONFORMANCE WITH CODES: The heater shall be installed in accordance with all local and state codes and with the requirements of the authority having jurisdiction of the installing site.
- Page 9 51300003301G WARNING – Hazardous Pressure. Pool and spa water heating and circulation systems operate under hazardous pressure during start up, normal operation, and after pump shut off. Stand clear of circulation system equipment during pump start up. Failure to follow safety and operation instructions could result in violent separation of the pump housing and cover, and/or filter housing and clamp due to pressure in the system, which could cause death, severe personal injury and/or property damage.
- Page 10 51300003301G 7. Persons with a medical history of heart disease, circulatory problems, diabetes or blood pressure problems should obtain a physician’s advice before using spas or hot tubs. 8. Hyperthermia occurs when the internal temperature of the body reaches a level several degrees above normal body temperature of 98.6°F [37°C].
-
Page 11: Installation
51300003301G INSTALLATION This manual contains instructions for installation, operation, maintenance, troubleshooting, and parts lists for the proper operation of the swimming pool heaters. Manufacturer strongly recommends that the installer read the manual before installing the swimming pool heater. If after reviewing the manual any questions remain unanswered, contact the factory or local representative. Following heater installation, the installer should leave all manuals with the consumer for future reference. - Page 12 51300003301G Suitable electrical supply line. See rating plate on the heat pump units for electrical specifications. A junction box is not needed at the heat pump; connections are made inside the heat pump electrical compartment. Minimum wire size to be selected per NEC based on unit MCA.
-
Page 13: Water Piping
51300003301G EQUIPMENT PAD : Place the heat pump on a level surface such as concrete or a fabricated slab (pad). This allows proper drainage of condensation and rainwater from the base of the unit. If possible, the pad should be placed at the same level or slightly higher than the filter system equipment pad. - Page 14 51300003301G Figure5: Pad Plumbing Layout CAUTION: Improperly adjusted manual bypass valves will result in damage to the heater if the flow rates are not maintained under all operating conditions as specified in listed SPECIFICATION. The heat exchanger will fail and this damage will not be covered under the manufacturer’s warranty.
- Page 15 51300003301G the heater is installed less than three (3) feet Figure7: Heater Installation Above Pool above the surface of the pool/spa water, install eyeball fittings or directional flow fittings on the end of the return water line to the pool/spa to create adequate back pressure at the heater to operate the pressure safety switch when the pump is running.
-
Page 16: Electrical Connections
51300003301G AUTOMATIC Figure10: Automatic Chlorinator CHLORINATORS AND CHEMICAL FEEDERS: If used, a chlorinator must be installed downstream from the heater in the pool return line and at a lower elevation than the heater as shown in Figure10. Install a separate positive seal corrosion resistant check valve between the heater outlet and the chlorinator to prevent highly... -
Page 17: Check-Out & Start-Up
51300003301G ELECTRICAL CONNECTIONS: REMOTE CONTROL CONNECTION: Turn OFF source power The heater is equipped for remote control via independent 2-wire to the heat pump before working on electrical connections. Any connections. Heat Only models connect the remote relay to unused openings must be plugged and all wiring secured for terminal J7. -
Page 18: Control Setup
51300003301G Figure13: Location of Components (heating operation flow shown) The heat pump takes heat from the environment and uses it to heat the pool water. During heat pump operation, high temperature, high-pressure sub cooled liquid Refrigerant (A) is throttled by Metering Device (TXV) and turned into low temperature, low-pressure saturated liquid (B). - Page 19 51300003301G Heat Only Figure14a: Heat Only User Interface Keypad USER PANEL AND KEYPAD INPUTS: The control accepts user inputs via the keypad on the user panel. Display Window When power is supplied to the unit and the display will either show sensor temperature (in degrees F or C) or the diagnostic code.
- Page 20 51300003301G AUTOMATIC RESET TIME: The heater will automatically reset when an error condition is corrected and resume operation. TEMPERATURE ADJUSTMENT: This control allows the user to have 2 individual pre-set temperature settings, “SPA” and “Pool”. To adjust the temperature while in SPA or POOL mode, use the (Plus) and (Minus) buttons. When the numeric display adjustment is complete, the control will return to displaying the actual measured water temperature.
- Page 21 51300003301G Heat/Cool Figure14b: Heat/Cool User Interface Keypad USER PANEL AND KEYPAD INPUTS: The control accepts user inputs via the keypad on the user panel. Display Window When power is supplied to the unit the display will either show sensor temperature (in degrees F or C) or the diagnostic code.
- Page 22 51300003301G AUTOMATIC RESET TIME: The heater will automatically reset when an error condition is corrected and resume operation. TEMPERATURE ADJUSTMENT: This control allows the user to have 3 individual pre-set temperature settings, Heating (“HE”), Cooling (“COL”) and Automatic (“AUt”). To adjust the temperature while in Heating, Cooling or Automatic mode, use the (Plus) and (Minus) buttons.
-
Page 23: Water Testing
51300003301G WATER TESTING WATER PRESSURE SWITCH TEST / ADJUSTMENT PROCEDURE: The pressure switch is preset at the factory for most typical pad level installations. When the heater is located above or below the level of the pool or spa, the pressure switch will require adjustment to compensate for the change in static pressure. -
Page 24: Winterization
51300003301G improper addition of sanitizer into the water is NOT covered under the terms of the warranty. The following factors are critical to heat exchanger protection. Follow these guidelines to help prevent pre-mature damage or failure to your heater and heat exchanger. -
Page 25: Component Service
51300003301G DRAINING THE HEAT EXCHANGER: This procedure applies to installations where the heater is located higher than the pool water level. If itis necessary to drain a pool heater located below the pool water level, you must either partially drain the pool, or isolate the pool heater from the pool using valves, then perform draining the heat exchanger. -
Page 26: Troubleshooting
51300003301G SWITCH TEST / ADJUSTMENT PROCEDURE. NOTICE: Do not operate the pool heater without the function of a properly adjusted pressure switch or flow switch. To replace the pressure switch: 1. Turn pump, and heater power “OFF”. 2. Remove hose from switch body external to control box. 3. - Page 27 51300003301G Table 5: Display Code Index Display Problem Possible Cause Information Tripped circuit breaker/ Check breaker and ensure that the unit is No power to heat pump no power supply properly installed. Faulty electrical (blank) Call for service. component Unit will not turn on Master power switch off Turn on master power switch Unit on 5-minute delay...
- Page 28 51300003301G Table 6: Troubleshooting Lookup Chart Problem Possible Cause Possible Solution(s) No power to unit Make sure power is on. Breaker is tripped Check the breaker / see note above Thermostat not turned up Turn thermostat up until unit comes on high enough 5 minute delay timer still Be sure the 5 minute delay has passed...
-
Page 29: Parts
51300003301G PARTS Figure16: Service Parts Exploded View USE ONLY GENUINE REPLACEMENT PARTS... - Page 30 51300003301G Table 7: Service Kits Item Description 120 H/C FAN GUARD SMX010171101 PANEL-TOP KIT, BLACK SMX30904754 SMX305000004 PANEL-TOP KIT, TAUPE SMX309077011 SMX305000004 FAN MOTOR SMX300055036 SMX305000004 FAN BLADE SMX303140003 SMX305000004 EVAPORATOR SMX24024408 SMX24024414 SMX24013468 SMX24024408 SMX305099004 SMX305000004 COMPRESSOR SMX11012754 SMX11012751...
- Page 31 51300003301G USE ONLY GENUINE REPLACEMENT PARTS...
Need help?
Do you have a question about the 140 and is the answer not in the manual?
Questions and answers