Table of Contents
Advertisement
Quick Links
Advertisement
Table of Contents
Troubleshooting

Related Manuals for Letatwin LM390


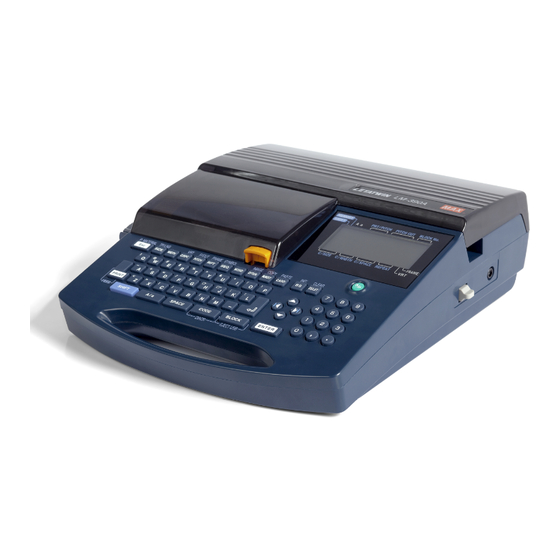
Summary of Contents for Letatwin LM390
-
Page 1: Be Sure To Read
USER MANUAL LM390 MK9-USB... -
Page 2: Introduction
Fel! Använd fliken Start om du vill tillämpa 見出し 1 för texten som ska visas här. BE SURE TO READ 1-1 INTRODUCTION Thank you for your purchasing MAX TUBE MARKER LM-390A/PC. This machine is equipped with a variety convenient features that are designed to print on tubes and tapes. - Page 3 Fel! Använd fliken Start om du vill tillämpa 見出し 1 för texten som ska visas här. WARNING Never disassemble or remodel the machine –– it can cause a fire, electric shock, or trouble. Do not put any foreign substance, such as a finger, a pen, or wire, inside the machine ––...
- Page 4 Fel! Använd fliken Start om du vill tillämpa 見出し 1 för texten som ska visas här. In order to prevent problems with the machine, follow the precautions below. 1. This machine and AC adopter are precision products. Handle them carefully, and do not drop them or allow them to receive any shock or impact.
- Page 5 Fel! Använd fliken Start om du vill tillämpa 見出し 1 för texten som ska visas här. 9. Do not place any heavy materials on the 14. If you bring the machine from the cold machine or power cord. outside into a warm room, there may be dew condensed within the machine due to the rapid change of the temperature.
-
Page 6: Table Of Contents
Fel! Använd fliken Start om du vill tillämpa 見出し 1 för texten som ska visas här. 1-3 CONTENTS BE SURE TO READ ....................... 1 1-1 INTRODUCTION ......................... 2 1-2 PRECAUTIONS FOR USE....................2 1-3 CONTENTS ......................... 6 BEFORE USE ......................... 8 2-1 MAIN FEATURES........................ - Page 7 7-3 CONTINUE PRINTING AFTER THE CONSUMABLES RUNNING OUT ......57 EDITING DATA AND PRINTING BY A PERSONAL COMPUTER ........59 8-1 INSTALLING “LETATWIN PC EDITOR” AND PRINTER DRIVER TO A PERSONAL COMPUTER ........................59 8-2 EDITING DATA ON A PERSONAL COMPUTER .............. 59 8-3 PRINTING DIRECTLY FROM “LETATWIN PC EDITOR”...
-
Page 8: Before Use
High-speed printing (up to 35mm/s) and high durability. MAX original application software (Letatwin PC Editor) is included. Data created with “Letatwin PC Editor” can be directly printed by USB connection or imported from your PC to LM-390A/PC through USB memory. -
Page 9: Confirming The Package Contents
Fel! Använd fliken Start om du vill tillämpa 見出し 1 för texten som ska visas här. 2-2 CONFIRMING THE PACKAGE CONTENTS This machine comes with the following accessories. Confirm that they are included before using the machine. Main unit Carrying case Instruction manual Ribbon case Ink ribbon: black... -
Page 10: Name Of Each Section
Fel! Använd fliken Start om du vill tillämpa 見出し 1 för texten som ska visas här. 2-3 NAME OF EACH SECTION AC adapter inlet Hook Cassette cover LCD display Cutter button USB cable port Keyboard USB memory slot cover (at the bottom) USB Memory slot Grip Half cutting... -
Page 11: Name Of Keys And Their Functions
Fel! Använd fliken Start om du vill tillämpa 見出し 1 för texten som ska visas här. 2-4 NAME OF KEYS AND THEIR FUNCTIONS <1> Keyboard layout <2> Keys and their functions ON/OFF Press this key to turn ON/OFF power. Press this key to return to the previous menu and not to make any changes. When printing or displaying an “IMAGE,“... - Page 12 Press this key to enter “OPTION”, to enter “DIRECT FILE TRANSFER FROM PC” or to enter “DIRECT PRINTING FROM PC”. (See 6-13: OPTION OPTION, 8-3:PRINTING DIRECTLY FROM “LETATWIN PC EDITOR” or 8-4: SAVING DATA DIRECTLY FROM “LETATWIN PC EDITOR”) IMAGE Press these keys to display the printing image.
-
Page 13: Input Screen
Fel! Använd fliken Start om du vill tillämpa 見出し 1 för texten som ska visas här. A / a Press this key to switch capital letters to small letters, or vice versa Press this key to access secondary characters on the key or the secondary SHIFT functions of group (3), (4), (8), (9) and (13). -
Page 14: Selecting The Screen Language
LM-390A/PC CE [HOW TO SELECT] 1. Turn the power on, while pressing L and G at the same time. The [LANGUAGE MODE screen] appears after displaying the LETATWIN logotype. [ M O D E ] [LANGUAGE MODE screen] C h i n e s e ( T )... -
Page 15: Cleaning The Platen Roller Or Removing Jammed Tube("Feed" Function)15
Then, release ON/OFF first while displaying the logo of “LETATWIN.” 3. [FEED screen] appears. F E E D 4. Slide the switching lever (silver) until it stops, as shown in the figure. 5. Put wet cloth with water or alcohol to the platen roller and clean it using key. -
Page 16: Adjusting The Half Cutting Depth
Fel! Använd fliken Start om du vill tillämpa 見出し 1 för texten som ska visas här. 2-8 ADJUSTING THE HALF CUTTING DEPTH Half cutting depth can be adjusted with the ”Half cutting depth adjustment lever”, when half cutting depth is not adequate. Deep Note: ●... -
Page 17: Loading The Consumables
Fel! Använd fliken Start om du vill tillämpa 見出し 1 för texten som ska visas här. LOADING THE CONSUMABLES Follow the steps bellow. (1) Installing the ink ribbon to the ink ribbon case. (2) Loading the tube or tape. (3) Loading the ink ribbon case. 3-1 INSTALLING OR REPLACING THE INK RIBBON Name of each section The side with letters comes the top. - Page 18 Fel! Använd fliken Start om du vill tillämpa 見出し 1 för texten som ska visas här. 3. While pressing “Button A,” set the Insert winding core (black) as shown in the figure. Then, release “Button A” to lock the ribbon. Press Button A Release...
-
Page 19: Loading The Tubes And The Ink Ribbon Case
Fel! Använd fliken Start om du vill tillämpa 見出し 1 för texten som ska visas här. 3-2 LOADING THE TUBES AND THE INK RIBBON CASE 1. Open the cassette cover. 2. Push the head release lever (green). Head release lever 3. - Page 20 Fel! Använd fliken Start om du vill tillämpa 見出し 1 för texten som ska visas här. The tube has been loaded. Make sure the tube is loaded as illustrated bellow. 6. Make sure the ribbon is not slack. If the ribbon is slack, rotate the winding core (black) toward the direction of the arrow to remove the slack of the ribbon.
- Page 21 Fel! Använd fliken Start om du vill tillämpa 見出し 1 för texten som ska visas här. 8. Pull the head release lever (green). 9. Close the cassette cover until it clicks. (Removing the tube) 1. Open the cassette cover. 2. Push the head release lever. 3.
-
Page 22: Loading The Tape Cassette And The Ink Ribbon Case
Fel! Använd fliken Start om du vill tillämpa 見出し 1 för texten som ska visas här. 3-3 LOADING THE TAPE CASSETTE AND THE INK RIBBON CASE 1. Open the cassette cover. 2. Push the head release lever (green). Head release lever 3. - Page 23 Fel! Använd fliken Start om du vill tillämpa 見出し 1 för texten som ska visas här. 6. Hold the ink ribbon case as illustrated below and load it Proper loading Note: Make sure the ribbon is not slack. 7. Pull the head release lever (green). 8.
-
Page 24: Replacing The Half Cutter
Fel! Använd fliken Start om du vill tillämpa 見出し 1 för texten som ska visas här. REPLACING THE HALF CUTTER 1. Open the cassette cover. Half cutter 2. Pull out the half cutter. (yellow color) 3. Engage the guide of the half cutter to the groove of the half cutter holder and insert it completely. -
Page 25: Basic Operation
Fel! Använd fliken Start om du vill tillämpa 見出し 1 för texten som ska visas här. BASIC OPERATION 1. Open the cassette cover and load the consumables to use. (See 3: LOADING THE CONSUMABLES) Then, close the cassette cover and turn the power on. 2. -
Page 26: Printing On The Tube (Pitch Print)
Fel! Använd fliken Start om du vill tillämpa 見出し 1 för texten som ska visas här. 4-1 PRINTING ON THE TUBE (PITCH PRINT) Printing the following contents on the tube. Tube size=φ3. 2 mm Pitch length= 18mm X1005 X1006 X1007 1pcs. - Page 27 Fel! Använd fliken Start om du vill tillämpa 見出し 1 för texten som ska visas här. 7. Input C M . Press BLOCK to create a ▲ 1 8 .0 C U T 0 0 3 new block. U 1 C...
-
Page 28: Printing On The Tape
Fel! Använd fliken Start om du vill tillämpa 見出し 1 för texten som ska visas här. 4-2 PRINTING ON THE TAPE 4-2-1 PITCH PRINT ON THE TAPE Printing the following contents on the tape. Tape size= 9mm Pitch length=15mm 15mm 15mm 15mm 15mm... - Page 29 Fel! Använd fliken Start om du vill tillämpa 見出し 1 för texten som ska visas här. 7. Pressing ENTER . Set the “START NUMBER” and “END NUMBER.” ▲ 1 5 .0 L I N E 0 0 2 Input 1 8 in the “START.”...
-
Page 30: Normal Print On The Tape
Fel! Använd fliken Start om du vill tillämpa 見出し 1 för texten som ska visas här. 4-2-2 NORMAL PRINT ON THE TAPE Printing the following contents on the tape. MAX LETATWIN 12mm LM-390A/PC 40mm 1. Set “MATERIAL=TAPE” and “SIZE=12mm” in the [PRINTED MATERIAL setting screen]. - Page 31 T A P E 1 2 m m 3.0 STD STD 001 Input SPACE SHIFT → A A SHIFT → F 7. Press PRINT to start printing. (See 7: PRINTING) 8. The printed result is as shown below. MAX LETATWIN LM-390A/PC...
-
Page 32: Inputting And Deleting Characters
Fel! Använd fliken Start om du vill tillämpa 見出し 1 för texten som ska visas här. INPUTTING AND DELETING CHARACTERS 5-1 INPUTTING CHARACTERS 1. To input the capital letter “A.” Press A/a and make sure that the arrow symbol “▲” is indicating “A” = capital letters. -
Page 33: Inputting Characters With "Code" Function
Fel! Använd fliken Start om du vill tillämpa 見出し 1 för texten som ska visas här. 5-3 INPUTTING CHARACTERS WITH “CODE” FUNCTION ・ Using the “CODE” function, you can input the characters according to the following table. (When English is selected as the screen language.) [ The Table of Code ] Code “... -
Page 34: Functions
Fel! Använd fliken Start om du vill tillämpa 見出し 1 för texten som ska visas här. FUNCTIONS The following table shows the setting items and their default values. SETTING ITEM DEFAULT VALUE SETTING ITEM DEFAULT VALUE Printed material MAX tube Sequence No setting Size of printed material... -
Page 35: Width
Fel! Använd fliken Start om du vill tillämpa 見出し 1 för texten som ska visas här. Note: ● Only when the “AUTO” is selected to “OFF”, the size setting is available. ● The selectable “CHARACTER SIZE” varies depending on the size of the material, the “PITCH LENGTH”... -
Page 36: Character / Line Space
Fel! Använd fliken Start om du vill tillämpa 見出し 1 för texten som ska visas här. 6-3 CHARACTER / LINE SPACE Setting the “CHARACTER / LINE SPACE” for the document. Selectable items: “CHARACTER SPACE” = STD (STANDARD), CLS (CLOSE), CNT (CONTACT), WID (WIDE) “LINE SPACE”... -
Page 37: Pitch Print
Fel! Använd fliken Start om du vill tillämpa 見出し 1 för texten som ska visas här. 6-4 PITCH PRINT [PITCH PRINT MODE] on the top of the document means that LM-390A is in the [PITCH PRINT MODE]. By deleting the , it switches to the [NORMAL PRINT MODE]. -
Page 38: Pitch Length
Fel! Använd fliken Start om du vill tillämpa 見出し 1 för texten som ska visas här. 6-4-1 PITCH LENGTH Setting the “PITCH LENGTH” at the cursor position. Setting range: “Tube” = AUTO or 10.0~60.0mm, “Tape” =AUTO or 4.0~60.0mm ▲ 2 0 . 0 C... -
Page 39: Normal Print
Fel! Använd fliken Start om du vill tillämpa 見出し 1 för texten som ska visas här. 6-5 NORMAL PRINT [NORMAL PRINT MODE] In the [NORMAL PRINT MODE], the pitch print function is not available. In this mode, the maximum total printing length is 300mm. Deleting in the [INPUT screen]. -
Page 40: Vertical
Fel! Använd fliken Start om du vill tillämpa 見出し 1 för texten som ska visas här. 6-6 VERTICAL Setting to print the texts in the vertical orientation. Selectable items: YES (vertical), NO (horizontal) Note: The printed result varies depending on the selected “PRINT MODE.” You can select “PRINTING DIRECTION”... -
Page 41: Sequence
Fel! Använd fliken Start om du vill tillämpa 見出し 1 för texten som ska visas här. 1. Press RPT . The [REPEAT setting screen] ▲ 2 0 .0 C U T 0 0 1 A B C appears. R E P E A T = 2... -
Page 42: Frame
Fel! Använd fliken Start om du vill tillämpa 見出し 1 för texten som ska visas här. 5. Press ENTER . Note: ● Make sure to set both the “START” number and the “END” number. ● In the [PITCH PRINT MODE], you can set only one series of “SEQUENCE” in one block and up to 15 series of “SEQUENCE”... -
Page 43: Symbol
Fel! Använd fliken Start om du vill tillämpa 見出し 1 för texten som ska visas här. 6-10 SYMBOL Inputting various symbols. Selectable group of symbols: NUMERAL, ALPHABET IN CIRCLE, UNIT,OFFICE SYMBOLS, SUPERSCRIPT, SUBSCRIPT, ELECTRICAL INSTALLATION ①~③, ITALIC, GREEK LARGE RUSSIAN, SMALL RUSSIAN Note: “LARGE RUSSIAN”... -
Page 44: Registration Of Word
Fel! Använd fliken Start om du vill tillämpa 見出し 1 för texten som ska visas här. 6-11 REGISTRATION OF WORD Up to 30 words can be saved in the internal memory. Up to 15 characters can be included in a word. Note: cannot be saved. - Page 45 Fel! Använd fliken Start om du vill tillämpa 見出し 1 för texten som ska visas här. [RECALL] Recalling the saved “WORD.” 1. Select “RECALL”. And then press ENTER . ▲ 2 0 .0 C U T 0 0 1 [ M E M O R Y O...
-
Page 46: Image
Fel! Använd fliken Start om du vill tillämpa 見出し 1 för texten som ska visas här. 6-12 IMAGE Press SHIFT → OPTION (IMAGE). Previewing a document to get the following information about tubes and tapes before printing. 1) Total print length 2) Preview of the document ▲... -
Page 47: Printing Density
Fel! Använd fliken Start om du vill tillämpa 見出し 1 för texten som ska visas här. 6-13-1 PRINTING DENSITY Adjusting the “PRINTING DENSITY.” When you need to print darker or clearer, adjust it to higher level. When the ink ribbon adhered to the TUBE or TAPE, adjust it to lower level. -
Page 48: 6, 9" Mark
Fel! Använd fliken Start om du vill tillämpa 見出し 1 för texten som ska visas här. 6-13-4 “6, 9” MARK Setting the printing style of 6 and 9 for a document. After selecting the item by pressing ▲/▼ key, press ENTER to register the setting. Selectable items: (6 9), (6_ 9_), (6. -
Page 49: Auto Power-Off
Fel! Använd fliken Start om du vill tillämpa 見出し 1 för texten som ska visas här. 6-13-7 AUTO POWER-OFF Setting the “AUTO POWER- OFF”. After selecting the item by pressing key, press ENTER to register the setting. [ A U T O P... -
Page 50: Justification
Fel! Använd fliken Start om du vill tillämpa 見出し 1 för texten som ska visas här. 6-13-10 JUSTIFICATION Setting the “JUSTIFICATION” for a document in the [NORMAL PRINT MODE]. Note: ● This setting is only applied to the [NORMAL PRINT MODE]. ●... -
Page 51: Lcd Brightness
Fel! Använd fliken Start om du vill tillämpa 見出し 1 för texten som ska visas här. 6-13-12 LCD BRIGHTNESS Adjusting the “LCD BRIGHTNESS.” When the screen is not visible enough, adjust the “LCD BRIGHTNESS” level. By pressing / key, increase or decrease the “LCD BRIGHTNESS” level. Press ENTER to register the “LCD BRIGHTNESS”... -
Page 52: Copy / Paste
Fel! Använd fliken Start om du vill tillämpa 見出し 1 för texten som ska visas här. 6-14 COPY / PASTE Copying a block in the document and pasting it to the cursor position. The setting value (size, character width, repeat and sequential number) of a block can also be copied and pasted. -
Page 53: Memory
Fel! Använd fliken Start om du vill tillämpa 見出し 1 för texten som ska visas här. 6-15 MEMORY 6-15-1 INTERNAL MEMORY The created documents and their setting values can be saved in the internal memory. The saving capacity is up to 50 files and up to 100,000 characters in total (depending on the file contents). - Page 54 Fel! Använd fliken Start om du vill tillämpa 見出し 1 för texten som ska visas här. [RECALL] Recalling the saved document. [ R E C A L L ] 1. Select RECALL . And then press ENTER . F I L E N...
-
Page 55: External Memory
● The “CSV” data can be edited by Excel® for Windows® personal computer. However, it does not include setting values, such as character size. ● The “LMF” data can be edited by MAX original application software “LETATWIN PC EDITOR” for Windows® personal computer. - Page 56 Selects “LMF” or “CSV.” LMF: ● This is an original extension for LM-390A/PC. All contents of the document and setting are saved. ● To edit the file with “LETATWIN PC EDITOR” in a personal computer, the file must be saved as “LMF” file.
-
Page 57: Printing
Fel! Använd fliken Start om du vill tillämpa 見出し 1 för texten som ska visas här. PRINTING Printing the created document. 7-1 PRINT RANGE SETTING SCREEN Not only prints all the blocks, a certain range of blocks can be printed as well. 1. -
Page 58: Continue Printing After The Consumables Running Out
Fel! Använd fliken Start om du vill tillämpa 見出し 1 för texten som ska visas här. 7-3 CONTINUE PRINTING AFTER THE CONSUMABLES RUNNING OUT When the consumables, such as TUBE and/or INK RIBBON, run out during printing, it is possible to continue printing after replacing them with new ones. 1. -
Page 59: Editing Data And Printing By A Personal Computer
4. Proceed with the installation process, according to the message displayed on the screen. Note: If the previous version of “LETATWIN PC EDITOR” has been installed to the computer already, make sure to uninstall them first, by using the Setup menu of the “LETATWIN PC EDITOR”... - Page 60 1. Prior to installing the printer driver, terminate other application software and resident-type software. Note: If the previous version of “LETATWIN PC EDITOR” and/or the driver has been installed to the computer already, make sure to uninstall them first, by using the Setup menu of the “LETATWIN PC EDITOR”...
- Page 61 て貼付下さい。(Vista) 13. Restart the computer. Installation complete. EDITING DATA ON A PERSONAL COMPUTER The “CSV” and “LMF” data can be created and be edited with “LETATWIN PC EDITOR” in the personal computer. “CSV” data includes only document data. “LMF” data includes document and setting data.
-
Page 62: Saving Data Directly From "Letatwin Pc Editor
Fel! Använd fliken Start om du vill tillämpa 見出し 1 för texten som ska visas här. PRINTING DIRECTLY FROM “LETATWIN PC EDITOR” With using USB cable connection and “LETATWIN PC EDITOR” for Windows® personal computer, the edited document can be directly printed. - Page 63 R E C E I V E D A T A 6. Operate “TRANSFER DATA ” on the “LETATWIN PC EDITOR”. Select the file no. to save the data. SETTING RANGE : 0~50. When “0” is selected, the data is loaded into the “INPUT SCREEN”.
-
Page 64: Trouble Shooting
Fel! Använd fliken Start om du vill tillämpa 見出し 1 för texten som ska visas här. TROUBLE SHOOTING 9-1 ERROR MESSAGE LIST Error message Contents Countermeasure OVER INPUT Number of characters input has Characters more than 5,000/file CHARACTER NO. exceeded 5,000 characters/file. cannot be input. - Page 65 Fel! Använd fliken Start om du vill tillämpa 見出し 1 för texten som ska visas här. Error message Contents Countermeasure Attempted to initialize the setting Implement the initialization of setting INITIALIZE AFTER without deleting/clearing the data after deleting/clearing the data in the DELETE ALL FILES in a document.
- Page 66 PRIOR START Attempt to start printing from PRINTING, LOAD THE “LETATWIN PC EDITOR” on a Set the print material, prior to start MATERIAL computer, without setting the print printing. (TUBE/TAPE) material in the LM-390A/PC.
-
Page 67: Troubleshooting
Fel! Använd fliken Start om du vill tillämpa 見出し 1 för texten som ska visas här. 9-2 TROUBLESHOOTING Problem Countermeasure 1. The power is on but: Make sure that the plug and the power cord is securely 1) The screen does not turn on. 2) The screen is dark (or too connected to the wall socket, the adapter and the light) - Page 68 Cannot access LM-390A/PC from “LETATWIN between LM-390A/PC and a computer. Check that the “LETATWIN PC EDITOR” and the driver is PC EDITOR” on a personal computer. properly installed. ● In case the problem is not solved with the above countermeasures, contact your dealer for...
-
Page 69: Product Specifications
Fel! Använd fliken Start om du vill tillämpa 見出し 1 för texten som ska visas här. PRODUCT SPECIFICATIONS ITEMS CONTENTS Dimensions 290(W)x300(D)x95(H)mm Weight Printing method Thermal transfer method (300 dpi) Display LCD dot matrix: 64 X 160 pixel (Backlit) 35mm/s (Standard) Printing speed 20.0mm/s (Low temperature mode) Maximum printing length... - Page 70 Fel! Använd fliken Start om du vill tillämpa 見出し 1 för texten som ska visas här. FCC Notice (Class B : LM-390A/PC A11) Note : This equipment has been tested and found to comply with the limits for Class B digital device, pursuant to Part 15 of the FCC rules.
-
Page 71: Appendices (Incl. Ce Declaration Of Conformity)
Fel! Använd fliken Start om du vill tillämpa 見出し 1 för texten som ska visas här. APPENDICES GREEK... - Page 72 Fel! Använd fliken Start om du vill tillämpa 見出し 1 för texten som ska visas här. CE 自己宣言書コピーを貼付...
- Page 73 Fel! Använd fliken Start om du vill tillämpa 見出し 1 för texten som ska visas här.
- Page 74 Fel! Använd fliken Start om du vill tillämpa 見出し 1 för texten som ska visas här.
- Page 75 Fel! Använd fliken Start om du vill tillämpa 見出し 1 för texten som ska visas här.
Need help?
Do you have a question about the LM390 and is the answer not in the manual?
Questions and answers