
Related Manuals for Agri-Spread AS85


Summary of Contents for Agri-Spread AS85
- Page 1 LIME & FERTILISER SPREADER OPERATING MANUAL AS35, AS55, AS85, AS100, AS120 & AS120-T MODELS Original Instructions ©Copyright Agrispread September 2014 830 Belt Spreader...
-
Page 2: Table Of Contents
Wheel Tightening Torque ..........................20 Servicing Axles .............................. 21 Tighting Torques for Underslung Suspension ....................22 Replacing Filter Element ..........................23 Agri-Spread Density Metres ........................... 25 Headland Control Valve ..........................25 Mounting Spreader to Tractor ......................... 26 Dismounting Spreader from Tractor ........................ 27 Connecting Up Hydraulics to Your Trailer ...................... -
Page 3: Product Details
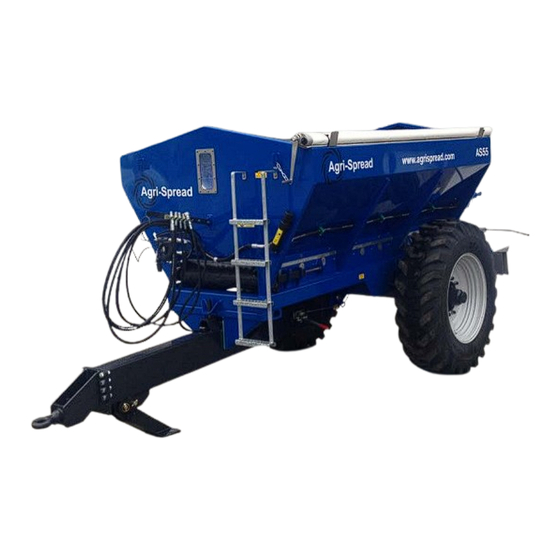
Product Details Agrispread Model No: ………………………….. Serial Number….2013/ Spinner motor size: ………………………………………………………….…. Hydraulic valve No: …………………………………………………………… Wheel & tyre spec: ……………………………………………………..……… Recommended Pressure: …………………………. Max.: …………………….. Notes Figure 1: Location of Machine Serial Plate ©Copyright Agrispread September 2014 830 Belt Spreader... - Page 4 Important Safety Precautions Never exceed the spreader’s speed rating as this could lead to death or serious injury. Never carry out adjustments or maintenance on machinery while it is in operation, as this could lead to death or serious injury. Never attempt to clear a blockage while the spreader is in operation as this could lead to death or serious injury.
- Page 5 All maintenance work must be carried out when the machine is turned off and the key removed. Failure to comply with the instructions given in this manual may lead to the following dangers: Danger of entrapment due moving conveyer type floor Danger of entanglement with spinners Danger of getting entangled in the shaft transmission parts if the guards are removed;...
-
Page 6: Setting Spinner Speeds And Rear Deflectors
Setting Spinner Speeds and Rear Deflectors Spinner Speed is the most important factor in achieving an accurate spread pattern. The spinner speed is adjusted by altering the control on the valve at the front of the machine (shown in Figure 1 below). Guideline spinner speeds for various different materials are given in Table 1 : Recommended Spinner Speeds For Spreading on page 38. -
Page 7: Setting The Application Rate
Setting the Application Rate The application rate of material is controlled by the back door settings and gear selection. Refer to the rate charts in Appendix 1 - Setting your Spreading Rate. At the back of this manual for guideline settings of the door opening in millimetres and which gear should be selected. - Page 8 Feed Plate Adjustments Centre deflectors Rear Cross Bar To spread less material behind spreader, increase the angle of the centre deflectors. Spread width modifiers Vane Settings Centre V Insert Extend this end of plate A to reduce the amount of material directly behind the spreader Contact Plate A...
-
Page 9: Gear Box Parts
Gear Box Parts Gear Selection Details Gear Change: To change gear, remove “R” Clip from gear selector. Complete gear change by moving gear selector to gear required. (See Figure 3 below) When selecting gear it is necessary to rotate the Jockey wheel manually in order to select required gear. - Page 10 Figure 3: Gearbox Settings ©Copyright Agrispread September 2014 830 Belt Spreader...
- Page 11 Removing Belt for Replacement Should it be necessary to remove the belt, the following procedure should be adopted. 1. Slacken the both front adjuster’s worm drives right off. 2. Separate the bearing block carriers from the front adjuster’s on both sides of the trailer.
-
Page 12: General Maintenance
General Maintenance All maintenance work must be carried out when the machine is turned off and the key removed. Belt Maintenance and Adjustment The belt has been aligned in the factory before delivery of the spreader with no load. After several initial loads, the belt will stretch and may need to be re-tensioned. - Page 13 Figure 4: Location of Front Adjuster Belt Alignment: If the belt drifts to this side of the spreader (left hand side), the left hand adjuster only should be tensioned 1/8 of a turn at a time. After each turn run the belt for 3 minutes. If the belt continues to drift to this side repeat the process.
-
Page 14: Belt Care
Belt Care Keep the rear stripper bar clean to prevent build up as this will cause premature belt wear and alter the spread pattern. Remove material build up from behind and under skirting for the same reason. End of Season ... - Page 15 Check couplings (item 4) and coupling insert (item 5) to ensure it is in good condition. Ensure both side skirts (item 6) are in good condition, free of holes and damage, if side skirts are damaged replace immediately as failure to do so is likely cause further damage.
- Page 16 Check calibration sticker is legible and still functioning correctly (e.g. when door is fully closed door pointer should be at zero, when at 50mm it should be opened 50mm etc. ).To recalibrate close door fully loosen door pointer nuts ,set pointer to zero and retighten door pointer nuts.
-
Page 17: Maintenance Of Bearings
Maintenance of Bearings All bearings should be greased regularly. Each bearing has a grease nipple attached. The locations of bearings are shown in Figure 5 below. (Warning Machine should not be operating while maintenance is being carried out).All bearings are marked with “grease “Label. - Page 18 Each Spinner has a grease nipple for the purpose of lubrication. Spinners should be greased before each use. Figure 6 : Location of spinner grease nipples ©Copyright Agrispread September 2014 830 Belt Spreader...
- Page 19 The drawbar should be checked to ensure that chassis is free from corrosion and cracks. The drawbar should be greased after every use via the grease nipple shown in diagram below. ©Copyright Agrispread September 2014 830 Belt Spreader...
-
Page 20: Maintenance Of Land Driven Gearbox
Maintenance of Land driven Gearbox Grease details: Recommended Oil: 80 W 90, 1 part oil Recommended Grease: Lithium Complex Grease. 6 part Grease Gearbox should be checked for grease regularly. Gearbox does not need to be emptied out, just top up when necessary There are 8 grease nipples on the gear box these should be greased regularly ©Copyright Agrispread September 2014 830 Belt Spreader... -
Page 21: Maintenance Of Hydraulic Gearbox
Maintenance of Hydraulic Gearbox The Gearbox which drives the conveyer belt shown below should have its oil checked regularly. Replace existing oil with gear oil (EP 80/90) every six months to a year depending on usage. ©Copyright Agrispread September 2014 830 Belt Spreader... -
Page 22: Wheel Tightening Sequence
Wheel Tightening Sequence To achieve correct tension in each of the wheel locating bolts, and thus optimum wheel security, Tighten wheel nuts in the order shown below. Wheel Tightening Torque Tightening Torques Ft.Lb Wheel nuts - BSF / DIN 400 - 450 550 - 600 ©Copyright Agrispread September 2014 830 Belt Spreader... -
Page 23: Servicing Axles
Servicing Axles In order to achieve maximum performance from your axle it requires regular servicing outlined below.( Service intervals depend on operating conditions) Service intervals depend on operating conditions. It is recommended that records of this servicing are kept for future reference. On Initial Receipt >... -
Page 24: Tighting Torques For Underslung Suspension
Tighting Torques for Underslung Suspension ©Copyright Agrispread September 2014 830 Belt Spreader... -
Page 25: Replacing Filter Element
Replacing Filter Element ©Copyright Agrispread September 2014 830 Belt Spreader... - Page 26 To get correct spread pattern spreader must be pan tested. Kit descriptions are as follows 1) Agri-spread Tachometer (spinner shaft already has magnet fitted) 2) Rev counter with magnet and sensor mount 3) Plug kit for trailers or trucks with demountable bins.
-
Page 27: Agri-Spread Density Metres
Agri-Spread Density Metres The Agri-Spread density metres are a quick and easy way to find out the density of fertiliser even on al load by load basis. Up until now we have only been able to measure cubic density by very accurate scales which are expensive and easily broken. The Agri-spread density metre gives you a robust, light and simple alternative that can even be carried out in the cab. -
Page 28: Mounting Spreader To Tractor
Mounting Spreader to Tractor The spreader should be attached to tractor via hitch eye. The drawbar shoe should be place in closed position while spreader is mounted to tractor .To mount spreader to tractor correctly: 1. Ensure both the tractor pick-up hitch and the spreader towing eye is serviceable and undamaged. -
Page 29: Dismounting Spreader From Tractor
Dismounting Spreader from Tractor To this dismount spreader from tractor, first ensure ground is firm and level where the machine will be parked. Then set the drawbar shoe in opened position. Disconnection of the Agrispread lime spreader from the tractor is the reverse of the above, except that the spreader’s hydraulic hoses should be fitted to the anchors provided on the spreader. -
Page 30: Connecting Up Hydraulics To Your Trailer
Connecting Up Hydraulics to Your Trailer 1. Connect the large diameter return hose to the return line breakaway coupling on your tractor. 2. Connect the small diameter pressure hose to the pressure line breakaway coupling on your tractor. 3. With the tractor at an idle, engage your hydraulic spinners. The right hand spinner should rotate anticlockwise. -
Page 31: Adjusting Height Of Hitch
Adjusting Height of Hitch It is possible to raise or lower the hitch as shown in figure below. To lower the hitch 1. Remove bolt and nuts using a size 30 spanner. 2. If the hitch requires to be lowered, lower the swivel hitch one hole. 3. -
Page 32: Maintenance Of Hitch
Maintenance of Hitch Hitch should be inspected regular to ensure that all nuts and bolts are tight. The hitch should be free from corrosion and cracks. If hitch is swivel type the hitch should be greased weekly via the grease nipple shown in diagram below. The swivel hitch should be rotated by hand to ensure even film of grease. -
Page 33: Operating Handbrake
Operating Handbrake In order to engage parking brake on Machine, pull the handbrake lever towards the rear of the machine. The Handbrake operates on a handbrake mechanism therefore the above action should be repeated continually until the brakes are engaged. To disengage brake, sharply pull the hand brake towards the hitch. -
Page 34: Maximum Tyre Inflation Pressure
Maximum Tyre Inflation Pressure Model Tyre Spec Max Inflation Pressure AS35 & AS55 550/60 22.5 8 STUD 2.8 bar / 40 psi AS85, AS100 & AS120 800/45 26.5 10 STUD 2.2 bar/32 psi AS120-T 600/55 26.5 (TRELLEBORG) 2.3 bar / 34 PSI AS120-T 600/55 26.5 (BKT FL630) - Page 35 ©Copyright Agrispread September 2014 830 Belt Spreader...
-
Page 36: Bout Width Testing Form
Bout Width Testing Form Test Number ……………………………………………….……Date……………………………………… ………………………….. TestMaterial……………………………………………………..SpreaderIdentification...…… …………………..………… Spinner Size ………………………………..……………………Spinner Speed ………………………………….….………….. Bout Width ………………………………………………………Rate …………………...………………………………….... Number of Runs …………………………………………….. Direction Spread: Up & down / Round & Round Width/Measurement of Bins Bin Number Left Centre Right Bin 1 Bin 2 Bin 3... - Page 37 ©Copyright Agrispread September 2014 830 Belt Spreader...
-
Page 38: Appendix 1 - Setting Your Spreading Rate
Driving Inaccurately. Although your Agri-spread unit has a ground related conveyor belt, driving inaccuracies can affect your rate per hectare. If your machine is set for a 12 M bout width any variation from this in your rows will be reflected in the error of rate of application. -
Page 39: How To Use Rate Charts
How to use Rate Charts: Step 1: Find the material density by using the Agri-spread density metre as described in the operator’s manual. Step 2: When you have the density of the material go to the appropriate density chart. The density is shown on each chart on the top left hand side of the chart. -
Page 40: Recommended Spinner Speeds For Spreading
Recommended Spinner Speeds For Spreading Spread Width With Standard Spinner Disks (See Figure A) Material 12 M Deflector 18 M Deflector Deflector /Cross Bar /Cross Bar /Cross Bar Position Position Position Lime 450-650 See Figure 1 _________ _________ _________ _________ / Figure 2 Fertiliser 600-650... - Page 41 Figure 1 (Spreading Lime Products ) Cross Bar Folded Up Center V Removed (Marked ©Copyright Agrispread September 2014 830 Belt Spreader...
- Page 42 Figure 2 & 3 (Granular Material ) Cross Bar Folded Up Cross Bar Folded Up & Center V In Some Lime Products Can Be Spread With Centre V In. ©Copyright Agrispread September 2014 830 Belt Spreader...
- Page 43 Figure 4 Extend This End Of Plate A To Reduce The Amount Of Material Directly Behind The Spreader Cross Bar May Be Required To Be Folded Down To Spread Less Material Behind The Spreader, Increase The Angle Of The Centre Deflectors I.E.
- Page 44 Spread Width With Wide Spread Spinner Disks (See Figure B) Material 21 M 24 M 27 M 27-36M Deflector Position Lime Fertiliser 700-800 Rpm 750-850 RPM 750-850 RPM 850-1,000 RPM Figure 5 Sand Figure B: Wide Spread Spinner Disks GRANULAR MATERIAL ONLY (NOT FOR LIME USE) Test Start At Notch 3...
- Page 45 Figure 5 (Wide Spread Disks) Cross Bar Folded Up & Center V Inserted Contact Plate B at 3 Notch Contact Plate A Meeting Plate B & Parallel With Ground Intial Tray Test Setup Start Up Position ©Copyright Agrispread September 2014 830 Belt Spreader...
Need help?
Do you have a question about the AS85 and is the answer not in the manual?
Questions and answers