Table of Contents
Advertisement
Payter B.V.
Rozenlaan 115
3051 LP Rotterdam
The Netherlands
P6X User Manual
Document version
: 3.0
Document status
: Release
Date
: 30-01-2017
Document ID
: PTR-40-10-ML-C-0003-03
NOTICE
This manual contains intellectual property, including but not limited, to trade
secrets and know-how, operating procedure and production procedures that
belong solely to Payter B.V.
Disclosure and/or use and/or reproduction of any part of this document strictly
forbidden, except under a written license from Payter B.V.
All rights reserved. No part of this document may be reproduced in any form by print, photo print, microfilm, electronic copy or any other
P6X User Manual
Copyright © 2010 Payter..
means without written permission by Payter BV.
Advertisement
Table of Contents
Troubleshooting

Related Manuals for Payter P66


Summary of Contents for Payter P66
- Page 1 Payter B.V. Disclosure and/or use and/or reproduction of any part of this document strictly forbidden, except under a written license from Payter B.V. P6X User Manual Payter B.V.
-
Page 2: Revision History
Updated Vending setting screenshots, minor Payter corrections Added P66, P66S models Payter Copyright © 2014 PAYTER BV. All rights reserved. No part of this document may be reproduced in any form by print, photo print, microfilm, electronic copy or any other... - Page 3 Secure Authentication module Software Development Kit Subscriber Identification Module Universal Serial Bus Vending Machine Controller Copyright © 2014 PAYTER BV. All rights reserved. No part of this document may be reproduced in any form by print, photo print, microfilm, electronic copy or any other...
-
Page 4: Table Of Contents
Connection Setup ....................27 7.2.2 Applicable Settings ....................28 Terminal Configuration ................ 29 Copyright © 2014 PAYTER Installing Vending Settings Tool ..................29 BV. All rights reserved. No Connecting to the terminal ..................... 29 part of this document may be reproduced in any form by Dimensions &... - Page 5 FCC Compliance Statement (P68 only) ..........47 CE Declaration of Conformity ............... 48 Licenses ....................50 LWIP ..........................50 SPIFFS ..........................50 Copyright © 2014 PAYTER BV. All rights reserved. No part of this document may be reproduced in any form by print, photo print, microfilm,...
-
Page 6: Introduction
Multi Drop Bus (MDB) or potential free pulse contact. Also available are proprietary interface options (RTP, PVP), that uses either Ethernet, USB or RS232 to connect the P6X terminal using a Payter proprietary protocol. An internet connection, required for transaction processing, can be provided to the terminal by connecting to a LAN network. -
Page 7: P6X Terminal Overview
Triangle Button Multifunction button Buzzer Indicates a successful/failed transaction Table 1 – Front Item description Copyright © 2014 PAYTER BV. All rights reserved. No part of this document may be reproduced in any form by print, photo print, microfilm, electronic copy or any other... -
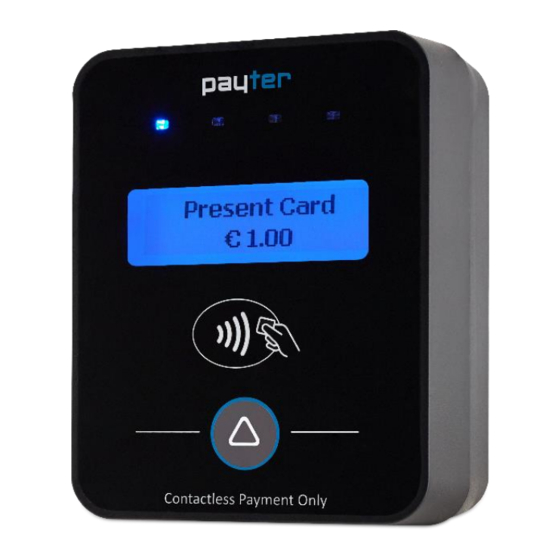
Page 8: P66 Contactless Only Terminal
Triangle Button Multifunction button Buzzer Indicates a successful/failed transaction Table 2 – Front Item description Copyright © 2014 PAYTER BV. All rights reserved. No part of this document may be reproduced in any form by print, photo print, microfilm, electronic copy or any other... -
Page 9: P66 Split Build On Top Terminal
Front (Reader) Unit Ribbon Cable Communication Unit Vending Machine Section View Copyright © 2014 PAYTER BV. All rights reserved. No part of this document may be reproduced in any form by print, photo print, microfilm, electronic copy or any other... -
Page 10: Rear View
To connect the Card Reader front unit in (Split units only) the P66 Split configuration Table 3 – Rear view item description Copyright © 2014 PAYTER BV. All rights reserved. No part of this document may be reproduced in any form by... -
Page 11: Basic Connectivity Features
Pulse i/0 Etc. Host Machine Hardware Fig. 4 - Connectivity Diagram Copyright © 2014 PAYTER BV. All rights reserved. No part of this document may be reproduced in any form by print, photo print, microfilm, electronic copy or any other... -
Page 12: Host Machine Interface
Table 6 – Available Internet connection Refer to chapter 7 for more detailed information about configuring internet. Copyright © 2014 PAYTER BV. All rights reserved. No part of this document may be reproduced in any form by print, photo print, microfilm,... -
Page 13: Terminal Configuration
A 3G/HSPA MODEM option requires a data SIM with access to mobile internet services. A SIM card can be provided by either your local mobile internet provider or by Payter. Table 7 – Terminal Configuration items Copyright © 2014 PAYTER BV. -
Page 14: Payment Flow
P68 terminal. Table 8 - Accepted card types Fig. 5 – Accepted payment types Copyright © 2014 PAYTER BV. All rights reserved. No part of this document may be reproduced in any form by... -
Page 15: Transaction & Display Messaging
P68 only functionality Some messages may be presented differently for different payment service provider, but in essence the pay flow is the same. Copyright © 2014 PAYTER BV. All rights reserved. No part of this document may be reproduced in any form by... - Page 16 If during the transaction a fault occurs that is not indicated by one of the previous messages a result code may be returned. Refer to chapter 11.1 for the meaning of the result code. Copyright © 2014 PAYTER BV. All rights reserved. No...
-
Page 17: Modes Of Operation
National Automatic Merchandising Association, or NAMA.” In general: The Payter Vending terminals will support all Vending Machines that comply with the MDB specifications. Level 1-3. This mode of operation is commonly used for vending machines. -
Page 18: Pay Flow
Note this is only applicable when not in “always idle” mode. Table 11 - MDB settings Copyright © 2014 PAYTER BV. All rights reserved. No part of this document may be... -
Page 19: Executive Mode
1980's to interface peripherals to electronically controlled vending machines. The definitive Protocol A specification is produced by Mars Electronics International.” Support for the MDB comes standard with the Payter terminal in case the Vending Machine only supports the Executive protocol an additional converter (Payter VendBox) is required which can be placed in between the terminal and the Vending Machine. -
Page 20: Potential Free Pulse Contact (Autoscan Mode)
6.3.4 Applicable Settings The following settings control the behavior of the Autoscan Pulse Contact mode. Copyright © 2014 PAYTER BV. All rights reserved. No part of this document may be... - Page 21 Indicates the delay between the transaction result and the start of a new transaction. Table 12 - Autoscan Pulse settings Copyright © 2014 PAYTER BV. All rights reserved. No part of this document may be reproduced in any form by...
-
Page 22: Rtp Mode
RTP Mode 6.4.1 Description The Remote Terminal Protocol (RTP) is a proprietary protocol used to interface with Payter terminals from host systems such as Cash Registers or other PC applications. To integrate the P6X Terminal functionality in your application, a dotNET SDK is available that can be used to perform transactions. -
Page 23: Cci Mode
Indicates the time period, in ms, for selecting a product after the START button is pressed. Note this is only applicable when not in “always idle” mode. Copyright © 2014 PAYTER Table 13 - CCI settings BV. All rights reserved. No... -
Page 24: Pvp Mode
PVP Mode 6.6.1 Description The Payter vending protocol is a message based protocol over a RS232 connection, that allows basic functionality needed for vending machines and terminal communication. It can handle scenarios most common for vending machines. Refer to PVP documentation for in depth information about this interface. -
Page 25: Setting Up Internet
7.1.1 Applicable Settings Fig. 14 – Ethernet Settings Copyright © 2014 PAYTER BV. All rights reserved. No part of this document may be reproduced in any form by... - Page 26 Note that the terminal only supports a single DNS address when configured with Static IP. Table 15 - Ethernet/LAN settings Copyright © 2014 PAYTER BV. All rights reserved. No part of this document may be reproduced in any form by...
-
Page 27: Gprs/Egde/3G/Hspa Modem
‘i’ will be blinking. As soon as the ‘i‘ is on the connection has been established with the 3G/HSPA network and the modem is working properly. Fig 16 – Signal strength icon Copyright © 2014 PAYTER BV. All rights reserved. No part of this document may be... -
Page 28: Applicable Settings
SIM card requiring it to be unlocked using the secondary PIN (PUK) code. Table 16 - Mobile Internet settings Copyright © 2014 PAYTER BV. All rights reserved. No part of this document may be... -
Page 29: Terminal Configuration
P6X Series User Manual 8. Terminal Configuration Installing Vending Settings Tool Download the Vend Settings Tool from the www.payter.com. Install the program by clicking on the install package. Please follow the installations instructions on the screen to successfully finish the install process. -
Page 30: Dimensions & Mounting
If no weld studs are available an optional mounting frame, with weld studs, can be ordered. Drill mounting holes of 4 mm on the same positions as the indicated weld studs to allow mounting of the frame. Copyright © 2014 PAYTER BV. All rights reserved. No part of this document may be... -
Page 31: Mounting Options
Mounting options Installation option 1: In case no weld studs are provided as indicated in Fig 19, Payter can provide a mounting frame which can be secured through 4mm mounting holes, located at the indicated weld stud positions. EVA Front Mounting Set Section View Fig. - Page 32 The cover plate is secured with double sided adhesive for a strong connection. Fig. 21 Terminal with cover plate Front Cover Vending Machine Copyright © 2014 PAYTER BV. All rights reserved. No part of this document may be reproduced in any form by...
-
Page 33: Dimensions P68 The Arc
The thickness of the Vending Machine or cabinet should not exceed 10 mm to ensure a proper magnetic stripe card swipe. Fig. 22 – P68 The Arc Measurements Copyright © 2014 PAYTER BV. All rights reserved. No part of this document may be... -
Page 34: Dimensions P66 The Plane
P6X Series User Manual Dimensions P66 The Plane Fig. 23 – P66 The Plane Measurements Copyright © 2014 PAYTER BV. All rights reserved. No part of this document may be reproduced in any form by print, photo print, microfilm, electronic copy or any other... -
Page 35: Dimensions The Angle Casing
P6X Series User Manual Dimensions The Angle Casing All dimensions are in mm. Copyright © 2014 PAYTER BV. All rights reserved. No part of this document may be reproduced in any form by print, photo print, microfilm, electronic copy or any other... -
Page 36: Installation P66 Split
The communication unit can be mounted using the EVA dimensions for securing the unit. Communication Unit Section View Copyright © 2014 PAYTER BV. All rights reserved. No part of this document may be reproduced in any form by Vending Machine... -
Page 37: Dimensions P66S Split Unit
P6X Series User Manual Dimensions P66S Split Unit Front Unit Communication Unit Copyright © 2014 PAYTER BV. All rights reserved. No part of this document may be reproduced in any form by print, photo print, microfilm, electronic copy or any other... -
Page 38: Technical Specifications
70°C Remote Terminal Protocol over Ethernet Humidity 10 – 90%RH (100BASE-TX, 10base-10) or Full speed Non-condensing USB 2.0 Payter Vending Protocol over RS232 Network Connections Ethernet (100BASE-TX, 10base-10) network connection GSM/GPRS/EDGE/3G/HSPA MODEM (optional) Table 17 – Specifications Overview A dotNETSDK is available Implemented in the P68 Terminal only Copyright ©... -
Page 39: Troubleshooting
SSL Version not allowed, contact local supplier on how to solve this issue. SSL Certificate Error, contact local supplier on how to solve this issue. Copyright © 2014 PAYTER BV. All rights reserved. No part of this document may be reproduced in any form by... - Page 40 Check the settings for is not receiving commands from the MDB/PVP/CCI. vending machine. Table 20 – Display message description Copyright © 2014 PAYTER BV. All rights reserved. No part of this document may be reproduced in any form by print, photo print, microfilm,...
-
Page 41: Lan Troubleshooting
URL’s listed. Table 21 – LAN Troubleshooting Copyright © 2014 PAYTER BV. All rights reserved. No part of this document may be reproduced in any form by... - Page 42 Use the Diagnostics features of the Vend Settings Tool to see if and how the terminal is connected to the network. Fig. 24 - LAN status information Copyright © 2014 PAYTER BV. All rights reserved. No part of this document may be...
-
Page 43: Mobile Internet Troubleshooting
Consult with your mobile internet service provider if this happens regularly. Table 22 – Mobile Internet troubleshooting Copyright © 2014 PAYTER BV. All rights reserved. No Fig. 25 - Mobile Internet Status Information part of this document may be... -
Page 44: Warnings
Warranty Certificate Payter B.V. warrants to the original purchaser that this product is free from defects in material or workmanship for the period of one year from the date of purchase. This warranty does not apply to damage incurred due to misuse; unapproved repairs or alterations. -
Page 45: Installation Guide
P6X Series User Manual 14. Installation Guide Copyright © 2014 PAYTER BV. All rights reserved. No part of this document may be reproduced in any form by print, photo print, microfilm, electronic copy or any other means without written Page 45 / 50... - Page 46 P6X Series User Manual Copyright © 2014 PAYTER BV. All rights reserved. No part of this document may be reproduced in any form by print, photo print, microfilm, electronic copy or any other means without written Page 46 / 50...
-
Page 47: Fcc Compliance Statement (P68 Only)
Connect the equipment into an outlet on a circuit different from that to which the receiver is connected. • Consult the dealer or an experienced radio/TV technician for help. Copyright © 2014 PAYTER BV. All rights reserved. No part of this document may be reproduced in any form by... -
Page 48: Ce Declaration Of Conformity
P6X Series User Manual 16. CE Declaration of Conformity Copyright © 2014 PAYTER BV. All rights reserved. No part of this document may be reproduced in any form by print, photo print, microfilm, electronic copy or any other means without written Page 48 / 50 permission by Payter BV. - Page 49 P6X Series User Manual Copyright © 2014 PAYTER BV. All rights reserved. No part of this document may be reproduced in any form by print, photo print, microfilm, electronic copy or any other means without written Page 49 / 50...
-
Page 50: Licenses
IN AN ACTION OF CONTRACT, TORT OR OTHERWISE, ARISING FROM, OUT OF OR IN CONNECTION WITH THE SOFTWARE OR THE USE OR OTHER DEALINGS IN THE SOFTWARE. Copyright © 2014 PAYTER BV. All rights reserved. No part of this document may be...
Need help?
Do you have a question about the P66 and is the answer not in the manual?
Questions and answers