Table of Contents
Advertisement
Advertisement
Table of Contents

Related Manuals for Carlsbro CSD130


Summarization of Contents
Taking Care of Your Digital Drum Set
Location
Avoid exposing the unit to direct sunlight, high temperatures, or cars.
Power Supply
Use the correct AC adaptor and ensure outlet voltage matches. Turn off when not in use.
Handling and Transport
Handle with care, avoid excessive force, dropping, or placing heavy objects.
Cleaning
Clean with a dry soft cloth. Avoid chemical cleaners and vinyl objects on top.
Electrical Interference
Keep away from radios/TVs to prevent signal interference.
Turn Power OFF When Making Connections
Always switch off power for all devices before connecting/disconnecting cables.
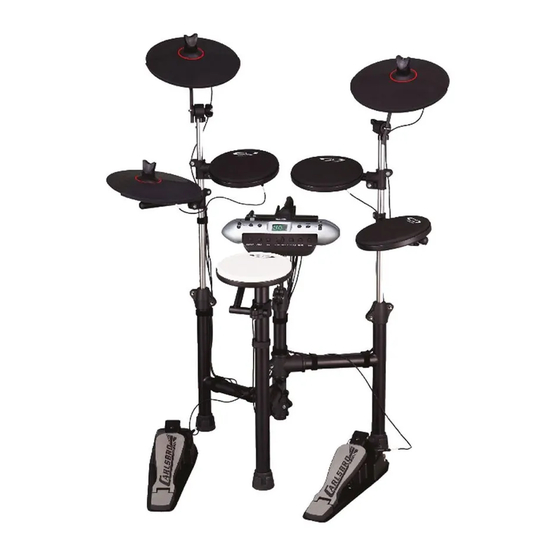
1. Assembly
Drum Stand Assembly
Step-by-step guide for assembling the drum stand structure and its components.
Assemble the Pads
Instructions for attaching the Tom and Snare pads to the stand tubes.
Assemble the Cymbals
Guide for mounting the HI-HAT and CRASH/RIDE cymbals onto the stand rods.
Assemble the Module
Steps to mount the drum module onto its designated stand.
Assemble the Bass Drum
Instructions for assembling the bass drum and its stand for the CSD130 model.
Assemble the Pedal and the Bass Drum
Proper placement of the pedal and bass drum on the floor.
Connect the Pads
Connecting the pads to the module using cables and securing them.
2. Fold the Drum Stand
Arrange the Pad Cables
Disconnect, rearrange, and bind pad cables for compact storage.
Fold the CRASH
Instructions for loosening and folding the CRASH cymbal for transport.
Fold the Hi-Hat-CYMBAL and TOM1
Guide for folding the Hi-Hat cymbal and TOM1 pad by rotation.
Fold the RIDE
Steps to loosen, fold, and tighten the RIDE cymbal for storage.
Fold TOM2 and TOM3
Instructions for folding TOM2 and TOM3 pads by adjusting collars.
Fold SNARE
Steps to loosen screws, adjust position, and secure the SNARE pad.
Fold the Whole Set
Instructions for folding the entire drum stand by rotating and securing parts.
3. Module Function
Front Panel
Overview of the module's front panel buttons, display, and their operational functions.
Rear Panel
Description of the module's rear panel connectors and interfaces for external devices.
LED Display
Explanation of the LED display indicators for drum kit, voice, and song numbers.
4. Connect with External Devices
Connecting with Audio System or Drum Speaker Cabinet
Guide for connecting the module's audio output to external sound systems.
Connect with Headphones
Instructions for connecting headphones to the module's stereo output.
Connect with MP3 or CD Player
Connecting external audio players to the module's AUX IN for mixed playback.
Connect with PC
Methods for connecting the module to a PC via USB or MIDI for data exchange.
Connect with MIDI Keyboard
Connecting a MIDI keyboard to control the module or use it as an audio source.
Power Supply
Steps for connecting the power adapter and initial power-on procedures.
5. Operation
Power Switch
Procedure for turning the module on and off.
Adjust the Master Volume
How to strike pads and use the volume knob to set master audio levels.
Select Drum Kit and Reverb
Selecting drum kits and adjusting reverb effects using specific buttons.
Pad Parameter Setting
Adjusting voice, volume, pan, and tuning for individual drum pads.
Establish User Drum Kit
Creating and saving custom drum kits by configuring pad parameters.
Song Setting
Features for selecting, playing demo songs, and managing accompaniment volume.
Select Song
Choosing demo songs from the available list.
Song Playing
Starting, stopping, and changing songs during playback.
Accompaniment Volume
Adjusting the volume of accompaniment tracks.
Drum Sound Volume of the Song
Adjusting the volume of drum sounds within demo songs.
Song Tempo
Modifying the tempo of DEMO SONGS.
Drum Sound of the Song (Percussion)
Function to enable or disable drum sound output.
Tempo Setting and the Metronome Click
Configuring metronome tempo, click, and beat settings.
Tempo
Setting the metronome click and song tempo.
Metronome
Starting, stopping, and selecting metronome voices and beat types.
6. Record and Replay
Record Quickly
Procedures for capturing pad strikes and user performances.
Play the Recorded Song
How to replay recorded performances using playback controls.
7. Practical Setting
Trigger Sensitivity
Adjusting the sensitivity level for individual drum pad triggers.
Crosstalk Rejection
Setting the rejection level to prevent unintended triggers from vibration.
Trigger Curve
Selecting trigger curves to modify the relationship between strike force and loudness.
Save the Set-up
Saving current settings for sensitivity, crosstalk, and striking force.
Local Control
Configuring local control for trigger detection and audio source sequencer interaction.
9. MIDI Setting
MIDI Connection
Details on connecting the module via MIDI IN/OUT ports and USB for MIDI communication.
Connect with External Audio Source Equipment
Using the module to send information to external sequencers for recording performances.
Used as Audio Source Equipment
Utilizing the module to play signals received via MIDI OUT/USB from external sequencers.
Need help?
Do you have a question about the CSD130 and is the answer not in the manual?
Questions and answers