Table of Contents
Advertisement
Quick Links
Advertisement
Table of Contents

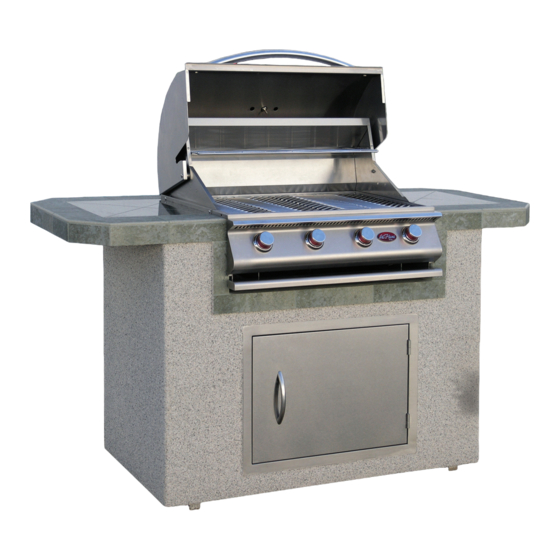
Related Manuals for Calflame BBQ18G04


Summary of Contents for Calflame BBQ18G04
- Page 1 LTR50001050, Rev. P 7/28/20...
-
Page 2: Table Of Contents
Table of Contents WARNING If the information in this manual is not followed exactly, a fire or explosion may result causing Safety Instructions property damage, personal injury or loss of life. Placement and Location . . . . . . . . . . . . . . . . 1 Do not store or use gasoline or other flammable Set-Up . -
Page 3: Safety Instructions
Safety Instructions WARNING: Improper installation, adjustment, alteration, service or maintenance can cause injury or property damage. Read the installation, operating and maintenance instructions thoroughly before installing or servicing this equipment. the grill and is visible when the hood is lowered or Placement and Location on the right side of the chassis. -
Page 4: Maintenance And Repair
• When handling LP gas line and connectors, Maintenance and Repair do not allow them to come in contact with any metal surfaces of the cabinet. Do not drop LP connectors. • Spiders and other insects can nest in the burners of the grill and block the gas and airflow to the •... -
Page 5: Proper Location Of The Grill
Proper Location of the Grill Here some general considerations when The sides, bottom and back of the grill enclosure should not be any closer than 24” to combustible determining where to place your new barbecue island. construction. Be certain that your installation will meet all city and local safety codes and requirements. -
Page 6: Construction Materials
Built-in Construction Note: The terms “built-in construction” and “grill must be used in a safe manner that will not void your enclosure” as used in these instructions refer to any warranty. If you plan to do this, use the information in method for installing a barbecue island for use. -
Page 7: Built-In Dimensions
12” Minimum Distance tween Grill and Side Burner The dimensions shown below are for Cal Flame appliances only. DEPTH Model Description Width Depth Height BBQ18G03 G3 three burner grill 23 3/8” 22” 9 ¼” BBQ18G04 G4 four burner grill 31” 22”... - Page 8 DEPTH HEIGHT Minimum Clearance The dimensions shown below are for Cal Flame appliances only. Model Description Width Depth BBQ18953P Side By Side Flat Burner 24 ¼” 19 ¾” BBQ18852P Single Flat Side Burner 11 ½” 17 ¾” DEPTH HEIGHT DEPTH WIDTH Top view of enclosure DEPTH...
-
Page 9: Enclosure Ventilation
Enclosure Ventilation For proper ventilation, the base structure must be constructed using one of two designs: An enclosure with one side open An enclosure having four sides, a top, and bottom The second type of enclosure must be constructed with the following specifications: •... -
Page 10: Gas Supply Requirements
Gas Supply Requirements Gas Requirements Gas Requirements and Connection IMPORTANT: The Cal Flame grill is manufactured to operate on liquid propane (LP). However, it can be converted to operate on natural gas (NG) by an authorized service technician. This barbecue grill does not include the parts for converting to NG. The gas conversion kit can be ordered separately. - Page 11 Natural Gas NG Service Installation and Connection Natural gas installation of this appliance must conform with local codes or, in the absence of local codes, to the national fuel gas code, ANSI Z223.1a-1998. Installation in Canada must be in accordance with the standard CAN/CGA-B149.2, Propane Installation Code.
-
Page 12: Connecting The Grill And Side Burner
Installation and Connection Connecting the Grill and Side Burner These instructions show you how to connect a grill only or a grill and side burner combination. If you plan to convert to your grill from LP to NG, you need to do this before it is connected to a gas source. Grill conversion instructions can be found on page 28 and ordering information can be found in this manual on page 31. - Page 13 Connect the Gas Line to the Grill Note: Make sure you have converted the grill for natural gas before connecting the gas line to the regulator. See page 28 for instructions on converting the grill from LP to NG. Connecting the grill only If you have a grill and side burner combination, go to step 3.
- Page 14 Connect the Gas Line to the Grill and Side Burner Note: This is only necessary if you have a side burner. LP CONNECTION a . Assemble the T Connection Connect to grill Items required for connection (NOT 3/8” tee adapter 1/2”...
-
Page 15: Leak Testing Procedure
Connect to a Gas Source Liquid Propane Connection Use the pressure regulator and hose assembly supplied with the grill, or a regulator and hose assembly with the same specifications. Replacement LP regulator and hose must have a coupling nut that will connect to a QCC-1 cylinder valve on one end and a female fitting that will connect to a 3/8”... -
Page 16: Using Your Grill
Using Your Grill Read all instructions before you operate your grill . We recommend you wash your entire grill with soap designed for. and water prior to lighting it for the first time. Oils • Do not use charcoal in a gas grill or side burner. are used during the manufacturing process and some residual oil may still be on the stainless steel parts •... -
Page 17: Grill Controls
Grill Controls The controls shown below are for the G4 grill. Familiarize yourself with these controls before using your Cal Flame™ barbecue. Off High Burners Grill Knob Opera on Lighting the Burners Each time you light the grill, check the following: spect the rubber hose attached to the regulator before each use. - Page 18 Manually Lighting the Burners WARNING: Do not use standard matches or cigarette 6. Push in and turn the control knob just past the lighters to perform match lighting procedures. LIGHT position to HIGH. Serious burns can occur and lighters can explode. 7.
-
Page 19: Gas Cylinder Orientation
Gas Cylinder Orientation LP gas cylinder must be up oriented upright during operation for proper vapor withdrawal. Operating the grill with the cylinder on its side will allow liquid gas to flow into the regulator. Erratic gas flow will occur, resulting in possible flare-ups or explosion. -
Page 20: Optional Grill Accessories
Optional Grill Accessories These grill accessories are optional and may be ordered directly from www.quickbbqparts.com. Sear Zone Infrared Burner The Sear Zone infrared burner can be used in place of any regular burner. Producing intense infrared heat, it cooks quickly with searing heat to seal in juices. -
Page 21: Charcoal Tray
Charcoal Tray Turn part of your Cal Flame grill into a charcoal and gas grill. Turn off the gas and wait for the grill to cool before setting the Charcoal Tray in place. Placement 1. Remove two grates (left or right side) and the flame tamers (the angular metal pieces covering the burners). -
Page 22: Griddle Tray
Deep Fryer Helper Set The Deep Fryer Helper can turn part of your grill into a deep frying station. It is designed to fit in any Cal Flame grill. The Deep Fryer Helper Set is shipped with its own instructions for placement and use . Read them carefully before use . -
Page 23: Cleaning And Maintenance
Cleaning and Maintenance To ensure safe and proper maintenance, please follow these directions carefully. Clean internal parts of the grill regularly as determined by the amount of use and foods cooked. The entire grill should be cleaned at least once a year. In addition, keep the area around your grill clear and free from combustible materials, gasoline, and other flammable vapors and liquids. -
Page 24: Cleaning The Interior Of Your Grill
There are two methods of rust removal we recommend: towel until surface is free of rust. If there is significant rust or corrosion, use a Scotch-Brite scrubber. 1 . Rust removal with Instant Rust Out: Both of these products will act as a surface protectant Spray exterior stainless steel surfaces with Instant and help resist smudges, stains, and rust. -
Page 25: Covering Your Grill
Drip Pan IMPORTANT: Prior to starting this procedure, turn OFF all of the gas control knobs, shut off the fuel supply, The full width drip pan will collect grease from the and disconnect the fuel line. main grill area. The pan should be cleaned after every use to avoid the possibility of a grease fire. -
Page 26: Seasonal Cleaning
Seasonal Cleaning If you haven’t used your grill in a few months, we recommend that you clean the burners and the interior of your grill. Cleaning the burners periodically will keep them burning evenly and cleanly and help prevent “flashback”, a type of fire in and around the gas tubes. This happens when spiders and small insects inhabit or make nests in the burner tubes, obstructing the gas flow. - Page 27 4 . Clean the grill interior While the burners are out of the grill, you can use this opportunity to clean the interior of your grill thoroughly. You should still have the drip pan in place to catch water and grime as you clean the grill interior. When the grill interior is clean, remove the drip pan.
-
Page 28: Appendix
Appendix Troubleshooting Problem: Smell of gas is present Solution: Check for loose connections in the gas line. Perform a leak test following the procedure described in this manual. Problem: Burner does not ignite Solution: Note: Turn off the gas at the source while troubleshooting. Use the following procedure with the figure below. - Page 29 Problem: Yellow Flame Solution: Once the entire burner is operating, check the flame color to be sure that it is mostly blue. Some yellow at the tips may be present due to impurities in the fuel. If the flame is golden or yellow in color, the reason could be seasoning salts, oil film, or other foreign matter on the burner.
-
Page 30: Converting From Lp To Ng
Converting from LP to NG WARNING! You must have an authorized service technician perform this procedure . If these instructions are not followed exactly, a fire or explosion may result causing property damage, personal injury or loss of life . Lloyd’s Material Supply (LMS) will not be held responsible for an improperly converted gas grill . - Page 31 Step 2: Changing the burner orifices 1 . Replace the main burner orifices You will need: • 6mm socket or nut driver a. Remove the grates, flame tamers, and drip • Two to five 1.9mm orifices (depending on your tray from the grill. See figure below. grill) •...
- Page 32 2 . Replace the side burner orifices a. Remove the grate, burner cap and burner You will need: diffuser from the side burner. • 7mm wrench, socket, or nut driver b. Using a 7mm wrench, remove the orifice for • One or two 1.75mm orifices (depending on the burner.
-
Page 33: Replacement Parts
Replacement Parts See following page for part numbers. To order replacement parts: • contact an authorized selling dealer. • Call LMS Customer Service at (800) 225-7727. • Visit us at www.quickbbqparts.com. G Series Gas Grills LTR50001050, Rev. P www.cal amebbq.com... - Page 34 All parts can be used on all three grill sizes except where described below. Item No . Part Grill Size Part # 3 burner BBQ10104049-CC Control panel 4 burner BBQ07104050 5 burner BBQ09104051-CC 3 burner BBQ07100587-CC Hood 4 burner BBQ07100588-CC 5 burner BBQ07100589-CC 3 burner...
-
Page 35: Installing Sear Zone Burners
Installing Sear Zone Burners 1. Disconnect or shut off the LP or natural gas line connected to the grill. Wait until the burners cool down. 2. Open the hood and remove the grate and flame tamer on top of the stainless steel burner you want to replace. -
Page 36: Limited Warranty
Limited Warranty This Limited Warranty is extended to the original purchaser of a Cal Flame G Series grill manufactured after January 1, 2020 and installed for residential use in the United States and Canada. 10 Year Structure Cal Flame grill structure or frame housing is warranted against rust-through, due to defects in material or workmanship in normal household use for ten years from the original date of purchase. - Page 37 and its designated representatives. acts of God or other causes beyond the control of the Manufacturer. Neglect, misuse and abuse include any installation, operation or maintenance of the grill other than in accordance with the instructions contained in the owner’s manual provided with the grill. Corrosion, scratching and discoloration due to improper use and care of this outdoor product, is excluded from this warranty.
- Page 38 G Series Gas Grills LTR50001050, Rev. P www.cal amebbq.com...
- Page 39 G Series Gas Grills LTR50001050, Rev. P www.cal amebbq.com...
- Page 40 Locating the product serial number The serial number of your Cal Flame grill is located on the back and is visible when the hood is down. You will need this number to properly register your grill and activate coverage. Write this information in the space provided below. Grill model: ___________________________________________________________________________ Grill serial number: _____________________________________________________________________ Type of fuel (circle one):...
Need help?
Do you have a question about the BBQ18G04 and is the answer not in the manual?
Questions and answers