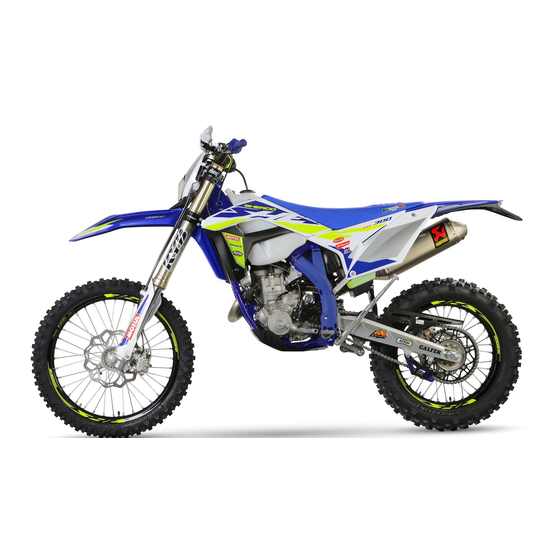
Summarization of Contents
Engine: Cylinder Head Removal
Preparation for Engine Dismantling
Steps before dismantling the engine.
Removing the Cam Chain Tensioner
Procedure to remove the cam chain tensioner.
Engine: Camshaft Removal
Removing the Cylinder Head
Steps to remove the cylinder head.
Individual Parts Inspection: Engine Top End
Cylinder Wear Inspection
How to check the cylinder for wear and tolerance limits.
Individual Parts Inspection: Piston
Piston Ring and Groove Inspection
Checking clearance between piston rings and grooves.
Inspect Connecting Rod, Piston Pin, and Piston
Visual and dimensional inspection of these parts.
Individual Parts Inspection: Camshafts
Camshaft and Journal Wear Check
Assessing wear on camshafts and their journals.
Camshaft Eccentricity Check
How to measure and check camshaft runout.
Individual Parts Inspection: Cylinder Head
Cylinder Head Flatness Inspection
Checking cylinder head for warpage.
Timing Chain Damage Inspection
Visual inspection of the timing chain and related components.
Valve and Guide Clearance
Measuring valve and guide clearances.
Reassembling Top End: Final Steps
Valve Clearance Adjustment
Checking and adjusting valve clearance.
Timing Chain Replacement
Procedure for replacing the timing chain.
Disassembling Cover: Right Side - Clutch
Clutch Inspection
Checking clutch plate thickness and deformation.
Clutch Spring Length Check
Measuring clutch spring free length.
Disassembling Cover: Right Side - Water Pump
Water Pump Seal Replacement
Steps for changing the water pump shaft seal.
Disassembling Cover: Right Side - Clutch Hub
Reassembling Clutch Hub Components
Steps for reassembling clutch hub components.
Disassembling Cover: Left Side - Ignition Case
Stator and Sensor System Replacement
Procedure for replacing stator and sensor systems.
Disassembling Cover: Left Side - Rotor
Freewheel and Needle Bearing Inspection
Inspection of freewheel and needle bearings.
Disassembling Crankcases: Crankcase Check
Central Crankcase Assembly Reassembly
Steps for reassembling the central crankcase.
Injector Body: Cleaning
Cleaning Materials
Tools and materials required for cleaning.
Removing the Injector Body
Steps to remove the injector body.
Injector Body: Procedures
Detailed Injector Body Cleaning
Detailed procedure for cleaning the injector body.
Injector Body Replacement
Steps for replacing the injector body.
Electrical Installation Checking
Fan Control Check
Checking the fan's electrical operation.
CDI Check
Verifying the functionality of the CDI unit.
Fuel Pump Control
Testing fuel pump operation and pressure.
Electrical Installation Checking
Fall Sensor Control
Measuring fall sensor output voltage.
Voltage Regulator Check
Inspecting the voltage regulator and diode bridge.
Battery Control
Testing battery voltage and condition.
Electrical Installation Checking
Map Sensor Control
Checking Map sensor output voltage.
TPS Sensor Control
Verifying TPS sensor output and input voltages.
Electrical Installation Checking
Stepper Motor Control
Checking stepper motor coil continuity.
Injector Control
Measuring injector input voltage.
Starter Control
Testing the starter motor functionality.
Electrical Installation Checking
Alternator Check
Checking alternator windings resistance and output voltage.
Hall Sensor Control (Crankshaft)
Testing Hall sensor resistance and voltage.
Electrical Installation Checking
Water Sensor Control
Checking water sensor resistance at different temperatures.
Ignition Coil Control
Measuring ignition coil primary and secondary resistance.
Wiring Harness
Homologated Light Wire Harness (8145)
Wiring diagram for the homologated light harness.
Wiring Harness
Racing Light Wire Harness (6845)
Wiring diagram for the racing light harness.
Wiring Harness
Main Wire Harness (7314)
Wiring diagram for the main wire harness.
Wiring Harness
Fan Wire Harness (3577)
Wiring diagram for the fan wire harness.
Synerject Injection System: Presentation
Injection System Overview
Overview of the Synerject injection system components.
Synerject Injection System: Diagnostic Tools
Exxodiag Diagnostic Tools Description
Description of the Exxodiag diagnostic tool.
Diagnostic Tool Kit Contents
Contents of the diagnostic tool kit.
Synerject Injection System: Diagnostic Tool Installation
Installing Software and Drivers
Steps for installing the software and drivers.
Synerject Injection System: Diagnostic Tool Installation
Continuing Installation Wizard
Proceeding through the setup wizard.
Selecting Installation Folder
Choosing the installation directory.
Synerject Injection System: Diagnostic Tool Installation
Navigating Installation Steps
Moving forward in the installation process.
Monitoring Installation Progress
Observing the installation process status.
Synerject Injection System: Diagnostic Tool Installation
Completing Setup Wizard
Finalizing the software installation process.
Accepting License Agreement
Reading and accepting the software license agreement.
Synerject Injection System: Connecting Diagnostic Tool
Connecting Cable to Motorcycle
Connecting the diagnostic cable to the motorcycle.
Synerject Injection System: Connection
Connecting with Keyless System
Procedure for connecting with keyless systems.
Synerject Injection System: Using Software
Launching Diagnostic Software
Starting the diagnostic software application.
Navigating Main Software Menu
Understanding the main software menu options.
Synerject Injection System: Software Settings
Configuration Menu
Adjusting software parameters like language and units.
Synerject Injection System: Update Menu
Update Menu and Synchronization
Updating diagnostic software and synchronizing.
Updating Diagnostic Software Tool
Procedure for updating the diagnostic software.
Synerject Injection System: Update Menu
Starting Update Download
Initiating the software download process.
Download Confirmation Message
Confirmation message after update download.
Internet Access Parameter Configuration
Setting up proxy for internet access.
Synerject Injection System: Using Software
General Software Usage
General overview of software operation.
Vehicle Identification
Checking vehicle identification details.
Synerject Injection System: Parameter Measurements
Engine Information Parameters
Displaying key engine operating parameters.
Synerject Injection System: Reading Default Codes
Reading Default Codes Procedure
Procedure to read trouble codes.
Synerject Injection System: Erasing Default Codes
Erasing Default Codes Procedure
Steps to erase default trouble codes.
Synerject Injection System: Erasing Default Codes
Confirming Code Erasure
Confirming the code erasure process.
Return to Code Reading Menu
Navigating back to the code reading menu.
Synerject Injection System: Testing Actuators
Ignition Coil Test
Testing the ignition coil functionality.
Injector Test
Testing the injector functionality.
Synerject Injection System: Testing Actuators
Fuel Pump, Fan, and Stepper Test
Testing fuel pump, fan, and stepper motor.
Synerject Injection System: Updating Computer
Updating the Computer (ECU)
Procedure for updating the ECU and calibration files.
Synerject Injection System: Updating Computer
Confirm ECU Update
Confirming the ECU update process.
Select and Download Calibration File
Selecting and downloading the calibration file.
Synerject Injection System: Screen Printing Function
Screen Printing Function
Capturing screen data for technical support.


Need help?
Do you have a question about the 300 SEF FACTORY and is the answer not in the manual?
Questions and answers