Table of Contents
Advertisement
Advertisement
Table of Contents

Related Manuals for Volvo Penta TAMD42


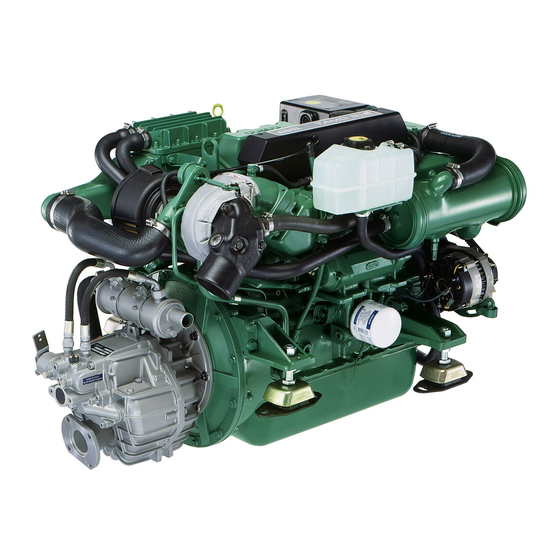
Summary of Contents for Volvo Penta TAMD42
- Page 1 Installation Inboard Marine 1(1) Diesel Engines TAMD31/41/42, KAMD43/44/300...
-
Page 3: Table Of Contents
Installation Inboard Marine Diesel Engines TAMD31/41/42, KAMD43/44, KAMD300 Contents Safety precautions ..........Fuel system ............51 General ............51 General information ..........Fuel tanks ............52 Piping ............. 54 PLANNING Checking feed pressure ........55 Engine application ratings ......... Marine engine environment ........ 12 Cooling system ........... - Page 4 Dimensions of air intakes and ducts ....105 Extra alternators ..........125 Location of ventilators and air intakes ..... 109 Universal bracket TAMD31, TAMD41 ..... 127 Soundproofing ..........110 Oil and coolant drain systems ......128 Belt guards and protections ....... 112 Steering ...............
-
Page 5: Safety Precautions
This Installation Manual contains the information you requires a running engine. Approaching an engine will need to install your Volvo Penta product correctly. that is running is a safety risk. Loose clothing or Check that you have the correct Installation Manual. - Page 6 Safety precautions Hot oil can cause burns. Avoid skin contact with All fuels and many chemicals are inflammable. hot oil. Ensure that the oil system is depressu- Keep away from naked flames or sparks. Gaso- rised before starting work on it. Never start or run line, some solvents and hydrogen from batteries the engine without the oil filler cap in place in the correct proportions with air are very inflam-...
- Page 7 Use the lifting eyes fitted on the engine/reverse nition system (gasoline/petrol engines) and in gear when lifting the drive unit. Always check the fuel system on Volvo Penta products are de- that the lifting equipment used is in good condi- signed and manufactured to minimise risks of tion and has the load capacity to lift the engine fire and explosion.
-
Page 8: General Information
(Lake Constance for the Volvo Penta organisation will be glad to offer as- example) pledges that this legislation is met by both sistance in finding a solution for your particular instal- new and currently operational engines. - Page 9 EU principles. For information and detailed de- erly and that Volvo Penta Genuine Parts as used. scriptions of the safety requirements that apply to oth- Certain systems (components in the fuel system for...
- Page 10 General information Conversion factors Metric to U.S. or IMP. conversion factors: U.S. or IMP. to metric conversion factors: To convert To convert from Multiply by from Multiply by Length inch 0.03937 inch 25.40 inch 0.3937 inch 2.540 foot 3.2808 foot 0.3048 Area mm²...
-
Page 11: Engine Application Ratings
Engine application ratings Rating 3 The engines covered by this manual are mainly used for five different operating conditions, Rating 1 – Rat- Light Duty Commercial ing 5, as described below. For commercial boats with high demands on speed Even at a very early stage, the output requirements and acceleration, planing or semiplaning hulls in cycli- and operating conditions for the installation concerned cal operation. - Page 12 Engine application ratings Examples of boats for medium and heavy duty commercial operation, Rating 1–2. Examples of boats for light and medium duty commercial operation, Rating 2–3. Examples of boats for light duty commercial operation, Rating 3–4.
- Page 13 Engine application ratings Examples of pleasure crafts, Rating 5.
-
Page 14: Marine Engine Environment
Marine engine environment The marine engine and its environment Power Marine engines, like engines for cars and trucks, are rated according to one or more power norms. The out- Power losses due to atmospheric conditions put is indicated in kW, usually at maximum engine speed. - Page 15 When the prototype and first production boat is built, a improve and provide better acceleration, even with a Volvo Penta representative and a boat manufacturer heavily loaded boat. should undertake a fully loaded trial of the vessel as...
- Page 16 Marine engine environment Typical sample of a planning hull and how displacement and engine output tolerances effects performance Thrust/ power Engine output / Thrust Displacement / hull resistance Speed Knots Max. tolerance range Nominal engine output Nominal displacement 13 tons Engine output ±3% Displacement ±...
-
Page 17: General Information About Classification
This means that if an installation needs to be classi- The major Classification Societies are: fied it must be stated clearly when addressing inquir- Det norske Veritas (DnV) ies and quotation requests to AB Volvo Penta. Lloyd’s Register of Shipping (LR) Bureau Veritas (BV) Special rules for different operational... - Page 18 To be able to classify an engine, the type of engine must first be type approved. In such cases, where Crankshaft, connecting rods, Volvo Penta is concerned, an application for type ap- heat exchanger, oil cooler, proval is sent to the Classification Society in ques-...
-
Page 19: Installation Tools And Literature
Installation tools and literature Special tools 884753 885151 885156 885309 9812410 9988452 9510060 9996065 9996666-5 9998496 9988452-0 Digital probe tester. . Checking electro- 884573-7 Flexible screwdriver for the tightening of the chemical corrosion. Used together with 885156 hose clamps 9996065-0 Manometer. Measuring fuel feed pressure 885151-1 Box with gauges, hoses andconnections. - Page 20 969299-7 Hollow screw M12x1 (TAMD41/42, KAMD43/ 18817-7 Washer x 4. Checking the fuel feed pressure 44/300) with locally made threaded hole. Checking the 25167-8 Hollow screw M14x1(TAMD31) with locally fuel feed pressue made threaded hole. Checking the fuel feed pressure 947093-1 Hose nipple x 2.
- Page 21 All installation instructions and templates are included in the kits. Chemicals A wide range of chemical products are available from Volvo Penta. Some examples are: Oil and coolant Sealant and grease Touch-up paint See "Volvo Penta Accessories & Maintenance Parts"...
-
Page 22: Design Concepts Of Propulsion Systems
There are different types of engines, reverse gears and drive systems, depending on the available space and oth- er requirements during the installation. Follow the manufacturer’s instructions when installing components and equipment not supplied by Volvo Penta. Reverse gear, various types... -
Page 23: Water Jet
Design concepts of propulsion systems Water Jet Water Jet drives work according to principles of jet There are different types of water jets, a direct drive or propulsion. A jet of water is generated whose thrust one with a marine gearbox enabling clutch in/out and sets the vessel in motion. -
Page 24: General Arrangement And Planning
Consult Volvo Penta lit- the information shown in the illustration below. Trial erature and computer programs or contact the Volvo and error is often needed to finally find the essential Penta organisation for assistance. -
Page 25: Installation Example
General arrangement and planning Installation example... - Page 26 General arrangement and planning Plan the engine room so that maintenance can be 1. Engine room layout easily carried out. Compare with the instruction book Only use updated and approved dimensional drawings. and make sure that all filter replacesments, oil chang- Study the drawings carefully.
- Page 27 General arrangement and planning 7. Electrochemical corrosion planned for. A condition for good sound insulation is a sealed engine room with ducts as the only openings. The potential problem of galvanic and stray current 9. Controls and steering corrosion must be considered when planning electri- cal installation and choosing the equipment to be Plan the routing of control cables, steering systems, used.
-
Page 28: Propeller Theory
Calculation of the correct propel- ler size can be done by the Volvo Penta organisation Below you will find a brief description of how propeller if so desired. In this case all details of the boat (pref- systems are designed. - Page 29 General arrangement and planning Check the shaft angle. If the shaft angle exceeds 12°, the use of a smaller propeller should be considered. ≈ ≈ ≈ ≈ ≈ This can be compensated by more blades or larger Radius R1 radius R2 blade area.
- Page 30 General arrangement and planning Single and twin installations Choice of reduction ratio The most effective method of propulsion is generally The propeller shaft usually has lower speed than the achieved with a single installation. If more power is re- engine. This is normally achieved with the reduction in quired two engines, each with a separate propeller the reverse gear.
-
Page 31: Engine Inclination
General arrangement and planning Engine inclination To ensure that the engine is sufficiently lubricated and Each engine type has a maximum permitted engine cooled, it is important that the maximum engine incli- inclination while the boat is under way. This inclina- nation is not exceeded. -
Page 32: Weight Distribution
General arrangement and planning Weight distribution Engine centre distance, twin installation General It is of major importance for the top speed running atti- tude etc. to locate the LCG properly. Generally a boat with high top speed should have the LCG more aft than a slower boat. - Page 33 General arrangement and planning Accessibility for checking, maintenance and repairs When designing the engine room always pay atten- tion to the accessibility needed to allow proper ser- vice and repairs to the engine. Also ensure that the complete engine can be removed without damage to the boat structure.
-
Page 34: Selection Of Engine Suspension
Flexible engine suspen- sion, rubber mount One condition for rubber mounts to be effective damp- Always follow the recommendations of Volvo Penta ers is that the engine bed is sufficiently rigid. The bed when selecting the engine suspension. The use of in-... - Page 35 General arrangement and planning V-drive Vertical Propeller component thrust Axial component Reverse gear rubber mount In all installations with a down angle propeller shaft This will create a lifting force to the engine mounts fit- there will be a lifting force transmitted from the propel- ted at the same end as the gear box.
- Page 36 General arrangement and planning Engine suspension vs propeller shafting NOTE! A flexible shaft coupling must never be fitted together with a flexible mounted stuffing box. This can cause vibration problems. Stainless steel propeller shafts are available in differ- ent diameters. The shaft dimension should be chosen based on the engine power output, gear ratio, distance between support points and propeller shaft material.
- Page 37 General arrangement and planning 3. Engine with fixed mounts and fixed shaft seal 1. Fixed engine mountings 2. Fixed shaft coupling. (Flexible cou- pling as an alternative.) 3. Fixed front stern bearing and shaft seal 4. Water lubricated stern bearing L.
-
Page 38: Engine Foundation
Engine foundation Design Aligning the boat The bed should have a design basis that enables it to absorb by an adequate margin the engine torque, the compressive force of the propeller, and the dynamic forces (mass forces) that occur during movement in rough sea. - Page 39 Engine foundation Fibreglass hull Example of an engine bed in a fibreglass hull. 1. Flat bar, galvanized 2. Spacer material 3. Fibreglass The engine bed in fibreglass should be designed so The engine bed can be built up separately and then that it is rigid, both vertically, longitudinally and trans- carefully measured and bonded to the hull, or be built versely, to distribute the load as far as possible to the...
- Page 40 Engine foundation Steel, aluminium or wooden hull Example of engine bed in a steel or aluminium hull. The bed frame in a steel or wooden boat should be de- If the engine has an extra PTO in the front end that re- signed as a welded steel structure.
-
Page 41: Building The Engine Bed
Engine foundation Building the engine bed The engine can be used as a fixture to determine the position of the engine bed. Install the engine, the propeller shaft and the stern bearing loosely in place. The engine must be connect- ed to the propeller shaft. - Page 42 Align the engine to the propeller shaft and mark up for the holes of the engine mounts. Drill and thread holes in bed and flat bars. Recommended bolt diameter for Volvo Penta elastic mounts: Engine and reverse gear excl. HS63V (V-drive): A 10–12 mm (0.4–0.5") thick galvanised flat bar with a...
-
Page 43: Propeller Shaft Systems
Propeller shaft systems Propeller shafts When selecting a propeller shaft for a particular appli- cation, there are many points to be taken into consid- eration. Shaft material and shaft sizes must suit the Single tapered shaft individual vessel designs and application. The shaft material must have good strength and be corrosion resistant. - Page 44 The maximum bearing distance has a major in- or equivalent. fluence for the calculation of shaft dimensioning. To determine the propeller shaft dimension and bear- ing distance, use the diagram below, the Volvo Penta computer program MACP2 or consult the shaft suppli- Distance between bearings (15.7)
-
Page 45: Propeller Shaft Couplings
Propeller shaft systems Propeller shaft coupling Reverse gear N x Hd MS25A/L 60H8 4 x 11.5 HS25A 108±0.2 63,5H8 –4* 4 x 11.5 HS45A 108±0.2 63,5H8 –4* 4 x 11.5 HS63A 108±0.2 63,5H8 –4* 4 x 11.5 HS63V 108±0.1 63,5H8 –4* 4 x 11.5 *) Female coupling, recessed in flange plane... -
Page 46: Shaft Seals
Propeller shaft systems Shaft seals There are different methods of lubrication for the shaft seal. The two most common are water and grease lu- bricated seals. Ensure easy access for maintenance and inspection of the seal. Some seals require a cer- tain clearance to the gearbox coupling in order to per- mit replacement of packing without disconnecting the shaft. -
Page 47: Installation Of Stern Tube And Shaft Bearing
Propeller shaft systems Grease lubricated shaft seal The grease is injected either with a grease cup fitted to the seal assembly or from a remote greaser. The bolt holding the seal should not be overtightened as this may cause overheating and excessive wear on the propeller shaft. - Page 48 Propeller shaft systems Push the propeller shaft into place and align the shaft 4 mm (0.16") and the stern bearing with the reverse gear’s output shaft (reverse gear’s flange). The clearance between the propeller shaft and tube for a To prevent the shaft from bending in the stern shaft flexible mounted engine should tube, the shaft can be centred as follows: be min.
-
Page 49: Engine Installation
NOTE! All engines and reverse gears are delivered NOTE! Installations in the engine room for the cooling from Volvo Penta without oil and coolant. Check that system, exhaust system, electrical system etc. the oil plug and draining cocks for coolant, hot water should be as complete as possible before the engine cocks etc. -
Page 50: Installing The Engine On The Engine Bed
Engine installation Installing the engine on the engine bed ∅ 34 mm (1.38") ↑ ± 8 mm (0.32") ∅ 34 mm ↓ (1.38") ∅ 40 mm (1.58") ∅ 40 mm (1.58") ± 7,5 mm (0.30") The engine bed on which the engine is located shall be on one plane. - Page 51 Engine installation Adjustable engine mounts shall have their basic posi- Before adjustments can be made, the engine must tion at the intermediate position with the fastening rest on the rubber mounts for at least twelve hours. plate hole in the bed’s longitudinally line. The fasten- Never use rubber mounts other than those intended ing plate has oval holes for adjusting, these can be for each particular engine type.
-
Page 52: Alignement
Engine installation Alignment V-drive rubber mounts Before the propeller shaft is connected to the reverse gear’s flange, check to make sure that the flanges are parallel. Install the rubber mounts for v-drive installations ac- Move the flanges together so that the guide engages. cording to the figure. -
Page 53: Fuel System
Fuel system Fuel tank Fuel filler Venting line Suction line Return line Remote controlled fuel shut-off valve Fuel level gauge Inspection hatch Draining General If the tanks are built in, the surrounding space should Installation of the fuel system components - fuel be provided with ventilation. -
Page 54: Fuel Tanks
NOTE! An extra fuel filter with water separator must The fuel tank has connections for filling, venting, suc- be installed for all Volvo Penta engines. tion line, return line, sender for tank gauge and an in- If a day tank is installed, then it is advisable to con- spection hatch with cover. - Page 55 Fuel system Position the tank on some kind of soft bedding. Do not position the tank on wooden blocks or on other type of uneven bedding. This might cause abnormal The tank must be properly vented. The tank venting stresses with subsequent risks of cracking in the line (1) should have an inner diameter of min.
-
Page 56: Piping
Fuel system Piping Copper piping All fuel lines should be led and properly clamped near bottom of the boat to avoid heat absorbing. The air temperature is lower at the bottom of the engine room. ∅ 3/8" Rubber hoses ∅ 10 mm (3/ 8") 1/4"-18NPTF 5/8"-18UNF... -
Page 57: Checking Feed Pressure
The table below shows the fuel flow at rated speed. TAMD31/41/42, KAMD43 USgal/h Drill and thread hollow screw to M10x1 as illustrated. TAMD31/41 24.3 TAMD31: Hollow screw M14, part no. 25167. TAMD42 31.7 TAMD41/42, KAMD43: Hollow screw M12, part no. KAMD43/44/300 31.7 969299. - Page 58 Fuel system KAMD44/300 Drill and thread hollow screw to M10x1 as illustrated. Use hollow screw M12, part no. 969299. Connect the fuel hose to the fuel injection pump using pipescrew 969299 and 2 x copper washers 18817. Close the fuel cocks. Remove any clamps for the wiring at the timing cover for better access.
- Page 59 Fuel system Measuring, all engines 9996065 9996666 Connect manometer 9996065 with the manometer quick-release connectors to tool 9996666. Open the fuel cock. Run the engine at an increased engine speed. Reduce the engine speed (rpm) to low idling speed. Read off the pressure within one minute.
-
Page 60: Cooling System
Penta Accessories & Maintenace Parts. Make The installer of the cooling system is responsible for sure that parts not supplied by Volvo Penta do not re- ensuring that the cooling system operates in accor- strict or reduce pressures and flow in the engine. -
Page 61: Seawater System
The engines should in most cases be equipped with a seawater filter The Volvo Penta cooling system is designed for sea- water temperatures of max. 32°C (90°F). Sea-water intake... - Page 62 Cooling system The pipeline must be made up in smooth curves to avoid unnecessary stresses and restriction losses. Use reinforced rubber hose in order to withstand the suction head. NOTE! The hose between the seawater intake (sea- water filter) and engine must not be tentioned but al- lowing flexibility.
-
Page 63: Freshwater System
The anti-siphoning valve (vacuum valve) should be NOTE! Always use Volvo Penta anti-freeze or anti- fitted in cases where the engine is installed so deep in corrosion agent. Both are available in concentrated the boat that the distance between the exhaust pipe form. -
Page 64: Filling With Coolant
40%, corrosion protection, cooling performance and frost protection is impaired. Anti-corrosion agent When there is no risk of freezing Volvo Penta anti-cor- Fill until the system is completely filled up, including rosion agent may be used the expansion tank. The coolant level should be be- tween the MIN and MAX levels. -
Page 65: Hot Water Connections
Connections for hot water outlets may be fitted to the thermostat housing (outlet) and circulation pump (in- let). The nipples from Volvo Penta are intended for a hose with an inner diameter of 16 mm (5/8"). Install the extra hot water circuit so that its highest point is at least 50 mm (2") lower than the coolant... -
Page 66: Extra Expansion Tank
Engine Max. additional volume including in extra circuit * heat exchanger lit (US gal.) TAMD31 9.0 (2.4) TAMD41/42 3.0 (0.8) KAMD44/300 3.0 (0.8) *) With the standard, engine mounted expansion tank... -
Page 67: Venting The System
Cooling system The expansion tank volume in the extra tank should be 15% of the total capacity of the cooling system. Of this volume: 5% is meant for coolant expansion when hot (ex- pansion volume), approx.5% 5% is meant for the difference between MAX and MIN levels 5% is reserve volume. -
Page 68: Engine Heater
3. Inlet 1/2" NPTF ∅ ∅ ∅ ∅ ∅ 16 mm (5/8") 2. Outlet 1/4" NPTF Nipple, Volvo Penta Part no. 856483-3 1. Engine heater 2. Outlet, 1/4" NPTF 3. Inlet, 1/2" NPTF 4. Connector with protective cap 5. Appliance plug with protective cap... -
Page 69: Exhaust System
Dry exhaust line, insulated and so that there is no risk of overheating any Most of the boats/vessels in Volvo Penta power adjacent parts of the boat. The demand for si- range with inboard engines are equipped with wet ex- lencing must also be met and the system ar- haust systems. - Page 70 When we also have a sheer body in motion, another into the engine room is negative for engine operation. problem arises. It is the phenomen we call the Wagon- Volvo Penta does not market complete dry exhaust back effect". systems but provides some of the key components.
-
Page 71: Wet Exhaust Line
Too high backpressure means output losses and can cause operating distur- Volvo Penta offers complete exhaust systems for bances like power losses, increased smoke level and these engines. shorter service life. For recommendations see dia- A wet exhaust line can mostly be made of oil and gram on page 78. - Page 72 Exhaust system Min. angle 15° (26%) (α α α α α ) Exhaust elbow angle (a) relative to water line, fig. A should be min 15° (26%). The silencer should be fitted as close to the engine as possible. The hose must be arranged with a continuos inclination into the silencer throughout the whole dis- tance, see fig.
- Page 73 The height of exhaust elbow above water line (E min), The inclination of the Volvo Penta silencer (A) should see fig. D, should be 200 mm (8"). If less an anti-si- be 5°–75° with the inlet facing upwards.
- Page 74 ) and silencer outlet (∅ ∅ ∅ ∅ ∅ Aqua-lift systems Engine Exhaust hose Exhaust hose inner diameter (∅ ∅ ∅ ∅ ∅ inner diameter (∅ ∅ ∅ ∅ ∅ TAMD31/41/42 89 mm (3.5") 89 mm (3.5") KAMD43/44 100 mm (4") 100 mm (4") KAMD300 100 mm (4")
- Page 75 Exhaust system Exhaust system, In-line silencer. Wet exhaust line ∅ ∅ ∅ ∅ ∅ Cmin ∅ ∅ ∅ ∅ ∅ Recommended hose diameter (innerdiameter) ∅ ∅ ∅ ∅ ∅ An in-line silenser is most suitable when the exhust ∅ ∅ ∅ ∅ ∅ outlet is located high in relation to the water line so an see table on page 72.
- Page 76 Maximum increase of height (A) at min. inclination 15° "Wagon-back effect" on page 68. compare with the standard exhaust elbow is approx. 135 mm (5.3"). Risers suitable to 89 mm (3.5") and 100 mm (4") ex- haust elbows are available from Volvo Penta.
- Page 77 Exhaust system Exhaust outlet through boat bottom – concept design Principle sketch, exhaust outlet through bottom 350 mm (14") Exhaust riser Exhaust hose Exhaust pipe (Full strength pipe) Exhaust outlet By-pass outlet In some installations an exhaust outlet through the Position the outlet in the bottom in a way so the ex- bottom of the boat might be the prefered alternative.
- Page 78 Volvo Penta has considerable know-how in the appli- forms in the boat and the exhaust fumes are drawn to- cation of custom-made exhaust boots, and can pro- wards it.
-
Page 79: Dry Exhaust Line
Exhaust system Dry exhaust line The figure shows an example of how a dry exhaust The exhaust line must be insulated throughout its line can be installed. The line should preferably be whole length, noting that the movements of the com- made of acid-proof stainless steel pipe, but a satisfac- pensator must not be obstructed. -
Page 80: Backpressure
These conditions produce overheating and excessive smoke from the installation, and reduce the service life of the valves and turbocharger. Allowed backpressure in exhaust line at rated rpm, kPa (psi) Acceptable Not acceptable TAMD31 TAMD41 TAMD42WJ KAMD43 KAMD44 KAMD300 (0.7) (1.5) -
Page 81: Measuring Exhaust Backpressure
Exhaust system Measuring exhaust backpressure Connect manometer 9996065 with pressure hose and a nipple 9996666 for connection to the measuring After the exhaust line has been installed, the back- flange. pressure must always be checked. This can be easily done with the aid of a transparent plastic hose con- Alternatively, a transparent plastic hose (2) can be nected to a measuring flange special tool no. -
Page 82: Electrical System
Electrical system Electrical installation Batteries General Battery terminology The electrical installation has to be planned very care- Capacity fully and carried out with the utmost care. Seek sim- Capacity is measured in ampere-hours (Ah). The start- plicity when designing the electrical system. er battery capacity (Ah) is usually stated as the bat- The wires and connectors used in the installation have tery’s 20 hour capacity, i.e. - Page 83 Electrical system Two batteries connected in series retain the capacity but double the voltage. During charging, each battery receives the current supplied by the charger. The total battery voltage must not exceed the battery voltage marked on the charger. 70Ah 70Ah 140Ah 70Ah...
- Page 84 The batteries should be fastened and only allowed to The battery sizes listed below are recommended for move max 10 mm (3/8"). Volvo Penta engines at a temperature down to –5°C (23°F), SAE norm/700A. Battery voltage is 12V and WARNING! The batteries, if they are not the 24V (TAMD41).
- Page 85 (+) terminal to the starter motor plus (+) terminal and To achieve sufficient power from the battery to the from the starter motor minus (–) terminal back to the starter motor Volvo Penta recommends cable areas battery minus (–) terminal . as below.
-
Page 86: Connections To Starter Motor
KAMD44P, KAMD300 Connecting the battery leads Installation instructions, EDC–system, see Installation EDC–Electronic Diesel Control. TAMD31/41, KAMD43 1–pole system: 10. The negative (–) pole on the battery is connected (earthed) on the flywheel housing. The positive (+) pole on the battery is connected to... -
Page 87: Charging Distributor
Electrical system Charging distributor D– B– – – + cable – cable 1. Start battery 2. Accessory battery 3. Sensor cable The charging distributor automatically provides charg- How to calculate the cable area is described in the in- ing of two battery circuits, independent of each other. stallation instruction included in the charging distribu- One circuit is used for starting the engine and the oth- tor kit. -
Page 88: Accessories
Electrical system Accessories 1 = Junction box for ground lead (–) 2 = Fuse box (+) 3 = Junction box, navigation lights Before installing extra accessories, such as naviga- Calculating the cable area feeder lead tion instruments, extra lighting, radio, depth sounder etc., carefully calculate the total electrical power con- sumption of these extras in order to be sure that the charging capacity in the boat is sufficient. - Page 89 Electrical system Calculating the cable area for power consumers Measure the distance from the terminal block to the refrigerator is three metres, a straight line should be accessory. Then multiply the distance by two. Then drawn between number 6 on the metre scale, and calculate the area in accordance with the table below.
-
Page 90: Battery Charging
For information about 12–24V extra alternators see menced. pages 125–126. • The capacity of the charger (how much current can Volvo Penta also offers extra alternators to supply be supplied from the charger). 220V. Please contact Volvo Penta for further informa- tion. •... -
Page 91: Instruments
Electrical system Risk of explosion Instruments Gas is formed in the battery during charging. Short cir- cuit, naked flames or sparks in the vicinity of the bat- tery can cause a powerful explosion. Ensure proper ventilation, especially if the battery is charged in a closed room. - Page 92 Electrical system Complete instrument panels for one or two stations Flybridge Flybridge Oil pressure sensor Coolant temp. sensor Tachometer NOTE! When two Full instrumentation panels, full instrumen- tation are used, make sure oil pressure sender and coolant temperature sender for two instruments Main are used.
- Page 93 Electrical system Instrument kits for customised dashboards NOTE! When two panels, full instru- Oil pressure sensor mentation are used, make sure oil pressure sender and coolant tempera- ture sender for two instruments are Coolant temp. sensor used. Flybridge, start/stop buttons Flybridge, key switch Tachometer or Tachometer or...
- Page 94 Electrical system Instrument kit – key switch Harness lengths: A → → → → → B 1. Panel kit 180 mm A → → → → → C Available as option: 760 mm A → → → → → D 2.
- Page 95 Electrical system Universal tachometer, 12V/24V. Instructions–how to set the code Before you start using the tachometer, the correct code for the respective engine must be set. Setting steps Shown on display A Notes Connected to sys- COdE tem voltage Press in pin B and release pin B.
- Page 96 Alternator (W) KAMD43 Cd14 Inductive KAMD44/300 Water in fuel filter alarm Volvo Penta offers the option of installing an indica- tion for water in the fuel pre-filter. The sender can be installed individually or connected to a second alarm panel.
-
Page 97: Electrochemical Corrosion
Electrochemical corrosion General Galvanic corrosion A boat that lies in the water constitutes a galvanic ele- NOTE! For more detailed information about electro- ment since different metals (or metal alloys) such as chemical corrosion see manual Marine Electrical steel and bronze are in electrical contact with each Systems Part 1 . - Page 98 Electrochemical corrosion Metals susceptible to corrosion From the table we can see that steel receives about -0.65 V and aluminium around -0.85 V in the voltage All metals can be physically listed in a galvanic volt- series. The higher up in the voltage series (the greater age series.
-
Page 99: Protection Against Electrochemical Corrosion
Electrochemical corrosion Protection against electrochemical corrosion To avoid galvanic corrosion on components sub- NOTE! This bonding system with its individual compo- merged in the water it is important that they are pro- nents should normally have no contact to the negative tected. -
Page 100: Stray Current
Electrochemical corrosion Stray current and shore power corrosion Electrons Stray current corrosion is similar to galvanic corrosion in the way it acts but differs in the way it is caused. In galvanic corrosion, it is the potential differences on the metal that initiate corrosion. As the name implies, stray current corrosion is caused by stray currents. - Page 101 Electrochemical corrosion Prevention of stray currents during installation NOTE! This diagram is only an example. Reprinted with permission of the American Boat and Yacht Council, Inc., from the Standards and Recommended Practices for Small Craft, section E-8 (18), page 17, © July 1998. 120–230V AC •...
-
Page 102: Checking Electrochemical Corrosion
When a given potential is Volvo Penta has produced a method for measuring reached, the corrosion current will have disappeared galvanic currents and stray currents using a calomel and the object has complete cathodic protection. - Page 103 Electrochemical corrosion Checking galvanic electricity, Checking for leakages from the calomel electrode electrical system Connect the calomel electrode, special tool 885156-0 to the Digital probe tester, special tool 9988452-0 A simple way of testing the boat’s electrical integrity measurement cable. is to employ the following procedure: Connect the probe tester tip to a good ground connec- First check that fuses and circuit breakers are fitted...
- Page 104 Electrochemical corrosion 3. Double-check to see the resistance in the circuit. 4. To find the leak. Charging Oil pressure Set the multimeter to Ohms. Connect the black test lead to the loosened negative connector, and the red test lead to the loosened positive connector. You should now see a reading of the resistance of the cir- cuit.
-
Page 105: Engine Room, Ventilation And Soundproofing
Engine room, ventilation and soundproofing Introduction Two main conditions must be fulfilled: Engine performance A. The engine must get enough air (oxygen) to allow Engine power is affected by a number of different fac- for the combustion of the fuel. tors. - Page 106 Engine room, ventilation and sound proofing Engine power output and air temperature Engine power output at high altitudes above sea level The engine’s stated power output applies at an air temperature of +25°C (77°F), air pressure of 100 mbar In most cases, marine engines are run at or near sea (750 mm Hg), relative humidity 30%, fuel temperature level.
-
Page 107: Dimensions Of Air Intakes And Ducts
Engine room, ventilation and sound proofing Dimension of air intakes Fans must never be installed in the inlet air ducts, as this could lead to overpressure in the engine room and ducts with the risk of gas or air leaking out into other parts of the boat. - Page 108 Engine room, ventilation and sound proofing Engine room depression Engine room ventilation Volvo Penta recommends that the depression in the To keep the engine room temperature down to the per- engine room does not exceed 0.5 kPa (0.07 psi) at full mitted values, a great deal of the radiant heat must be speed.
- Page 109 Engine room, ventilation and sound proofing Calculation of air ducts Example 2. Example 1. A diesel engine, 96 kW (129 hp) Two diesel engines, 210 kW (280 hp) Calculation of areas for one engine with 2 m (6.6 ft) Calculation of areas for two engines at 210 kW with a duct length, 2 bends and an ambient air temperature non-restricted air supply and an ambient air tempera- of +20°C (+68°F).
- Page 110 Engine room, ventilation and sound proofing Fig. 1 Calculation of areas Area, cm² (square inch) 1000(155) 800(124) 600(93) 400(62) 200(31) 210 kW Ex. 1 (134) (268) (402) (536) (670) (Hp) 1. Air consumption, 2. Ventilation air, diesel engines inlet and outlet Cross section area, cm²...
-
Page 111: Location Of Ventilators And Air Intakes
Engine room, ventilation and sound proofing Location of ventilators Example of how the inlet and outlet air ducts can be installed in pleasure boats and similar hulls using die- and air intakes sel engines. NOTE! Air intakes or outlet holes must never be in- For diesel engines the incoming ventilation air duct stalled in the transom. -
Page 112: Soundproofing
Engine room, ventilation and sound proofing Greatest possible care must be given to the task of Soundproofing screening the sound source as well as possible. The drive package must be installed in such a way as Screen all the way down to the hull but leave a small to minimise noise and vibration. - Page 113 Engine room, ventilation and sound proofing Insulation material applied on wood (plywood): 1. Wood (plywood) 2. Flame-proof absorption sheeting. Fuel hoses going through a bulkhead should rest in a 3. Flame-proof, reflecting soundproofing foil. grommet where they pass through the bulkhead. The grommet seals off and protects the hose against Above you can see an example of the build-up of an sharp edges, which might cause leakage.
-
Page 114: Belt Guards And Protections
Volvo Penta. Protections can also be built in the en- shielded. gine room by the boat builder. -
Page 115: Steering
Steering General Single steering positions For mechanical steering systems the length of the The following instructions state general information steering cable should not exceed 9 m (29.50 ft). This which should be observed for all types of installations. includes an installation with 3 × 90° bends and the ca- ble not clamped. - Page 116 Steering Location of steering head, Location of steering pump, mechanical steering hydraulic steering system Choose a suitable location for the steering pump. Select a suitable position for the installation of the Check that there is sufficient space for the steering steering head so that you will avoid bending the steer- wheel and pump.
-
Page 117: Cable Routing
Steering Cable routing Select a correct length of the steering cable. A + B + C = the length of the steering cable. Assemble the steering cable to the transom and the When installning a DS-unit make sure it is located in steering tiller arm. -
Page 118: Controls
Controls Example showing different control systems Single lever control - mechanical Single lever control - two stations - mechanical - DS-unit Two lever control - two stations - mechanical - serial connected Single lever control - electrical to mechanical General If the boat is to be manoeuvred and operated in a con- The control could be either a single lever control or venient and safe manner, then the operating station... -
Page 119: Alternative Operating Stations
Controls Controls for cable operated engines There are several types of control system alterna- tives available: NOTE! When the controls are installed, make sure that there is enough space for all movements of the Mechanical control systems control lever, forwards - aft - full throttle. With a mechanical control system communication be- For single installation side mounted controls are avail- tween the engine/reverse gear is done with push-pull... -
Page 120: Location, Cable Routing
Controls Location of the controls Cable routing The following must be considered before cutting holes for the controls. NEUTRAL Radius FORWARD REVERSE Approx. 600 mm (20") When selecting the location for the control it is impor- Approx. 300 mm (8") tant to take into consideration whether there is suffi- cient space for the control lever movement and suffi- cient space underneath the panel for the control... -
Page 121: Connecting The Speed Control Cable
Controls Connecting the speed control cable A. Single station B. Twin station (accessories) When double cables are connected as shown in fig- To increase of the engine speed, the speed control ure, the cables run freely through their attachments to cable must have a pulling movement on all engines. -
Page 122: Installing The Gear-Shift Control Cable
Controls Installing the gear-shift Connecting the gear-shift cable to the reverse gear control cable DS-unit, gear shift If two controls are connected to one reverse gear a 0.5xA DS-unit must be installed. 0.5xA Install the swivel and lock nut onto the cable. Pull out the cable out of the conduit and push it in as far as possible in order to check the axial clearance of the cable (A). - Page 123 Controls Propeller rotation Reverse gear type HS25A, HS45A, HS63A and HS63V For a single installation, a right-hand rotating propeller is recommended. Bracket, standard For twin installation, the starboard propeller should al- ways rotate clockwise and the port propeller anti- clockwise seen from the aft forward. Otherwise there is a risk that air bubbles will be drawn down into the water between the two propellers which can cause ventilation.
-
Page 124: Trolling Valve
Controls Verify gear-shift travel Trolling valve Trolling valves can be fitted on reverse gears HS25, HS45 and HS63 as an accessory. The trolling valve will reduce the oil pressure on the disc pack, which will make it slip in a controlled way. The speed of the propeller shaft can be reduced up to 80% compared to in a non-slipping condition. - Page 125 Controls 51 mm (2") 44 mm (1.7") Engine Position A: Maximum slipping Position B: Trolling fuction off Lever travel for the outer pivot point from position A to B: 51 mm (2") Lever travel for the inner pivot point from position A to B: 44 mm (1.7")
-
Page 126: Power Take-Off
Resultant force from belt (belts): ± 15° from the ver- tical line. Maximal torque extra V-belt pulley: 45 Nm (33lbf ft). The Volvo Penta universal bracket must be modified locally to be used for these engines. 15° 15°... -
Page 127: Recommendations To Front Power Take-Off With Drive Shaft
Extra alternators In order to facilitate the installation of extra alternators tailor made kits are available from Volvo Penta. For detailed installation instructions please see the mounting instruction that is delivered with the kits. KAMD43, KAMD44, KAMD300 Alternator 12V 60 Amp. - Page 128 Power take-off TAMD31, TAMD41, TAMD42WJ Alternator 12V 50 Amp. 24V 25 Amp. 376 mm (14.8 in) max. Alternator 12V 130 Amp. 24V 100 Amp. 411 mm (16.2 in) 411 mm (16.2 in)
-
Page 129: Universal Bracket Tamd31, Tamd41
Power take-off Universal bracket TAMD31, TAMD41, TAMD42WJ The front mounted universal bracket enables installa- tion of extra equipment such as fridge compressor or hydraulic pump. Maximum Power Take-off: 45 Nm (33 lbf. ft.) total load 15 Nm (11 lbf. ft.)/belt groove Dimensions in mm (in) 66 (2.6) -
Page 130: Oil And Coolant Drain Systems
Oil and coolant drain systems General Waste fluid Pump Valve block Coolant drain connection Engine installations in boats and vessels, carry the Engine oil drain connection Reverse gear oil drain connection potential for negative impact on the environment. The Pipe to drain the bilge liquids necessary are harmful and should be handled in a safe way. -
Page 131: Launching The Boat
Water lubricated stern bearings: Vent the rubber seal. Press thereafter approx. 1 cm water resist- ant grease into the rubber seal, Volvo Penta part no. 828250-1. Check that the water pipes are open and that the water lubrication is adequate while test running. - Page 132 Launching the boat Reverse gear oil. The oil capacity, oil quality and viscosity. See Operator’s Manual. NOTE! Since the marks on the dipstick apply at operating temperature with the engine idling and the control in neutral, the correct level before start- ing must be judged by experience.
- Page 133 Launching the boat Starting the engine Starting procedures: See Operator’s Manual for each engine. Check while the engine is running at idling: For leakage in fuel system and cooling system. Check pipes and hoses Instruments and gauges are working and showing correct values Oil level in reverse gear when engine has reached operating temperature.
-
Page 134: Sea Trial
Sea trial Check when test running the boat: Instruments Check engine rpm, oil pressure, coolant tempera- ture and charging voltage Check engine installation for water, coolant, oil and fuel leaks Check if the maximum engine speed can be ob- tained, see the Owner’s Manual. Should the maxi- mum engine speed not be obtained, the wrong size propeller might be installed. - Page 135 Notes...
- Page 136 Notes...
- Page 137 Notes...
-
Page 138: References To Service Bulletines
References to Service Bulletins Group Date Concerns .......................................................................................................................................................................................................................................................................................................................................................................................................................................................................................................................................................................................................................................................................................................................................................................................................................................................................................................................................................................................................................................................................................................................................................................................................................................................................................................... - Page 139 We would prefer you to write in English or Swedish. From: ....................................................................Refers to publication: ............................. Publication no.: ..............Issued: ..............Suggestion/reasons: ....................................................................................................................................................................................................................................................................................................................Date: ............Name: ............AB Volvo Penta Technical Information SE-405 08 Göteborg Sweden...
Need help?
Do you have a question about the TAMD42 and is the answer not in the manual?
Questions and answers