Table of Contents
Advertisement
Quick Links
Advertisement
Table of Contents

Related Manuals for Antech NANO


Summary of Contents for Antech NANO
- Page 1 DOSING PUMP USER MANUAL...
- Page 2 General User Information 1 İndex General User Information Description and Specifications Description General Features Electrical Design Technical Characteristics 3.4.1 Technical Features of the Dosage Pump 3.4.2 Raw Materials Used for Construction of Components of the Dosage Pump 6 3.4.3 Dimensions of the Dosage Pump Installation Electrical Connection 4.1.1...
- Page 3 General User Information Maintenance Faults Mechanical Faults Electrical Faults 7.2.1 Replacement of the Fuse Chemical Resistance List Pump Flow Rate Pressure Graphics 10 List of Models 11 Warranty 11.1 Warranty 12 Standards...
-
Page 4: General User Information
General User Information General User Information Please read the information below completely and thoroughly. This information will help you exploit the using instructions to the best. WARNING This symbol is used for potential risky situations. Ignoring this symbol may lead to fatal risk or serious injuries. ATTENTION This symbol is used for potential hazardous situations. -
Page 5: General Warnings
General User Information GENERAL WARNINGS ATTENTION • The air in the pump head must be vented prior to commissioning of the pump. • Securely fit the air vent sleeve after completion of the air venting operation. It is not necessary to remove the air vent hose. If the air vent sleeve is left loose, the chemical shall not move through the discharge line. -
Page 6: Description And Specifications
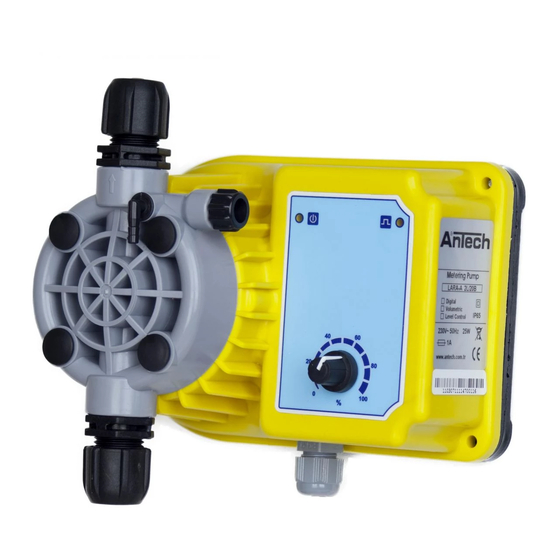
Description and Specifications Description and Specifications 3.1 Description Dosage pumps are precise dosing devices to be used where chemicals such as acid, chlorine, liquid fertilizers etc. should be supplied subject to dosing (in places like pools, potable water or agricultural irrigation, etc.). 3.2 General Features This operation manual can be used for all of our dosage pumps. - Page 7 Description and Specifications 3.4.2 Raw Materials Used for Construction of Components of the Dosage Pump Used Components LARA Series NANO Series Sleeves PP-PVDF** Pump Body Suction Kit EPDM, Viton, Silicon, Neoprene, Zirconium Ball Bearing Discharge Kit EPDM, Viton, Silicon, Neoprene, Zirconium Ball Bearing...
-
Page 8: Installation
Installation Installation SAFETY DATA WARNING • The device should not be humid or wet. The device should not be used in an open area without any protection (external box, cover for protection against rain etc.) ATTENTION • General safety precautions must be implemented for the installation. - Page 9 Installation 4.1.1 Electrical Connection for DC Models Electrical connection of 12 V DC dosage pump is as shown in this figure. The brown cable must be connected to the + end of the power source and the blue cable to the - end. If the length of the cable provided along with the pump is not adequate for the connection,...
- Page 10 Installation 4.2 Assembly 4.2.1 General Configuration Discharge Line Discharge Line Hose Safety Fuse DC Power Source AC Power Supply Cable DC Power Supply Cable Air Vent Hose Suction Line Hose • General configuration of the device must be performed as shown in the figure above. •...
- Page 11 Installation 4.2.2 Assembly to the Wall and Plastic Board • To fit your pump onto the wall, use the holes template suitable for the model of your pump • (Figure: 11–12–13). • Mark the surface onto which you wish to install in line with the dimensions provided herein.
- Page 12 • Before starting to install the pump on the wall, mark the surface on which the pump is to be installed in line with the template. • Ensure that the installation surface is dry and clean. LARA SERIES DOSAGE PUMPS Dimensions 76mm 23mm Ø...
- Page 13 Installation 4.2.4 Pump Assembly Position WRONG CORRECT NOTE • Place the dosage pump in vertical position ± 45º . Install the pump onto a wall or a vertical surface through two holes on it.
- Page 14 Installation 4.2.5 Installing the Hose to the Pump Head 1. The discharge sleeve (the one marked with arrow on the pump head) must always be on the side of the pump head where the chemical is dosed. 2. The suction sleeve must always be under the pump. 3.
- Page 15 Installation 4.2.6 3.2.6 Air Vent Operation 1. The air in the pump head must be vented prior to commissioning of the pump. 2. For this purpose, fit the PVC hose among the accessories to the air vent sleeve on the dosage pump with assembly and electrical connection completed, and place the discharge end of the hose to the chemical tank.
- Page 16 Installation 4.3 Discharge Line with Check-Valve and Ball Bearing • The discharge line must always be connected to the side of the pump indicated with arrow ( ) sign on the pump. • The parts of the discharge line must be installed in the order and direction shown in the figure below.
- Page 17 Installation 4.4 Suction Line • Suction line must always be connected to lower side of the pump, and immersed in the chemical tank. • The parts of the suction line must be installed in the order and direction shown in the figure below. •...
- Page 18 Installation 4.5 Head Kit 40 - 50 • The parts of the Head Kit 40 and 50 must be installed in the order and direction shown in the figure below. • The pump will not supply chemicals to the line if you modify the order or direction of the parts.
- Page 19 Installation 4.6 Head Kit 3 • The parts of the Head Kit 3 must be installed in the order and direction shown in the figure below. • The pump will not supply chemicals to the line if you modify the order or direction of the parts.
-
Page 20: Operation
Operation Operation The dosage pump operates with a diaphragm (PTFE) connected to an electromagnet driven by direct current. When the electromagnet pulls the piston, an amount of pressure is generated in the pump head, and the pressurized dosage liquid goes through the discharge valve. - Page 21 Operation 5.1.1 LARA APS Function Settings In LARA APS models, the pump can easily be operated with 10% of the total capacity by pushing number 5 10% button. Number 4 led turns on when the pump starts operation with 10% capacity. In LARA APS models, Liquid level sensor, Flow Rate Sensor operation mode parameter can be selected as default on - default off.
- Page 22 Service Service WARNING • The electrical connections must be unplugged prior to performing any service operations on the device. • 5x20 mm mini glass fuse must be used. • If the electrical cable of the device malfunctions, it must be replaced only by the authorized service department.
- Page 23 Service NOTE • Check the liquid level in the chemical tank periodically in order to avoid operating the pump without dosage liquid. • Check operation of the pump with at least 5 hours’ intervals. • Hydraulic parts should be cleaned periodically, but how often the cleaning should be performed depends on the type of implementation.
- Page 24 Faults Faults 7.1 Mechanical Faults • If the system is in complete silence (Stopped) there is likely to be an electrical or electronic fault rather than mechanical. • If there is loss in the dosage liquid with fixed intervals, sleeve covers may be loose; there may be cracks on the discharge pipe;...
- Page 25 Faults 7.2.1 Replacement of the Fuse WARNING • The electrical connections must be unplugged prior to performing any service operations on the device. • Use 1A glass fuse for AC Dosage Pumps. • Use 10A glass fuse for DC Dosage Pumps. First, unscrew the screws on the back cover by means of a proper screwdriver to replace the fuse of the...
- Page 26 Chemical Resistance List Chemical Resistance List Chemical Formula Glass PVDF PP PVC SS316 PMMA Hastelloy PTFE FPM EPDM NBR PE Neoprene Silicone Acetic Acid, COOH Max 75% Aluminum Sulphate Amines R-NH Calcium Ca(OH) Hydroxide Calcium Ca(OCl) Hypochlorite Copper CuSO Sulphate Ferric FeCl Chloride...
- Page 27 Chemical Resistance List Sodium Hypochlorite NaOCl+NaCl 12,5% Sulphuric Acid -85% Sulphuric Acid -98,5% 1 : Resistant Satisfactory Weak...
- Page 28 Pump Flow Rate Pressure Graphics Pump Flow Rate Pressure Graphics...
-
Page 29: List Of Models
List of Models 10 List of Models Maximum Maximum Ambient Chemical Strokes/mi Supply Temperatur Temperatur Max/Lt Max/P ml/Strokes Voltage Watt Weight Body MODEL Stroke Volt °C °C 0.278 12VDC 0.222 230 V AC 0.555 LARA A LARA APS 0.694 12VDC 1.111 0-45 0-40... -
Page 30: Warranty
Warranty 11 Warranty 11.1 Warranty • Dosage Pump has warranty for 2 years for any faults caused by material and production defects within the framework of legislative provisions. • Faults caused by normal wearing, overloading or improper operation are excluded from the warranty. - Page 31 Standards 12 Standards • TS EN 61000–6–1 • TS EN 61000–6–3 • IEC 60335–2–41 • IEC 60335–1 • EN 60332–41 • EN 60335–1...
Need help?
Do you have a question about the NANO and is the answer not in the manual?
Questions and answers