Table of Contents
Advertisement
Advertisement
Table of Contents

Related Manuals for Antech CLS Series


Summary of Contents for Antech CLS Series
- Page 2 www.antech.com.tr...
-
Page 3: Table Of Contents
DOSING PUMPS Please read the manual through completely before commissioning this equipment. Do not discard! Any part which has been subject to misuse is excluded from the warranty! Table Of Contents TABLE OF CONTENTS ............................. 2 1. GENERAL USER INFORMATION ......................... 3 2. -
Page 4: General User Information
DOSING PUMPS 1. General User Information Please read the following information carefully and complete. This information enables to the highest benefit to instructions for use. WARNING This symbol used for specify the potential risk situations. Ignoring safety information can endanger life or result in serious injury! CAUTION This symbol used for specify the dangerous situations. - Page 5 DOSING PUMPS GENERAL ADVICES WARNING Before working on the metering pump, always de-pressurise the discharge line, empty the liquid end and rinse out! Never allow the metering pump to operate when the stop valve on the discharge line is closed, as this can result in the rupture of the discharge line! CAUTION Install pump at a dry place far from heat sources and ambient temperature ...
-
Page 6: Definition And Features
Suction Line Max.Height 1,5mt Injection Line Max.Height 4 mt Body IP54 IP65 Ambient Temp. 0–50°C Chemical Temp. 0–45°C CLS Series LARA Series NANO Series Weight 2,3 Kg 2,2 Kg 1,7 Kg 2.4.2 Raw Metarials NANO Series Parts CLS Series LARA Series... - Page 7 DOSING PUMPS 2.4.3 Dimensions Dimensions 219mm 107.5mm 157mm Figure 1 Dimensions 185mm 107.5mm 156mm Figure 2 Dimensions 115mm 120mm 101mm 173mm Figure 3 Sayfa 6/34...
-
Page 8: Installation
DOSING PUMPS 3. Installation SAFETY INFORMATION WARNING The device shouldn’t be damp or wet. Not used open area without any protection (external box, cover protect from sun and rain.. etc.) CAUTION Implement all general safety precautions for installation! Read this user guide completely and carefully before installation ... - Page 9 Figure 5 Figure 5 show the CLS models electric connection diagram. If the CLS series dosing pumps electric cable attached into a safety box protected electric plug please control the electric line earth contact Should be use minimum 0,75mm cable for any addition for extend the electric cable.
-
Page 10: Assembly And Installation
DOSING PUMPS 3.2. Assembly and Installation 3.2.1 General Installation 1 ) Injection Line 2 ) Injection Line Pipe 3 ) Safety Fuse 4 ) DC Power Supply 5 ) AC Power Supply Cable 6 ) DC Power Supply Cable 7 ) Discharge Pipe 8 ) Suction Line Pipe 9 ) Liquid Level Sensor 10) Suction Line... - Page 11 DOSING PUMPS 3.2.2 Mounting on Wall Figure 8 For installation use the hole-template that compatible with your pump model. (Figure: 12–13–14–15). Mark the mounting the device surface according to the listed dimensions. Drill max.7mm hole for insert the 8mm rawplugs ...
- Page 12 The below figures does shown the mounting hole templates for the pumps. Mark the mounting the device surface according to the listed dimensions before installation Please make sure that the pump will be installed a clean and dry surface. CLS SERIES DOSING PUMPS Dimensions 35mm 149mm 11mm Ø...
- Page 13 DOSING PUMPS NANO SERIES DOSING PUMPS Dimensions 21,5mm 60mm Ø 5mm Figure 12 3.2.5 Pump Mounting Position Figure 13 Figure 14 Right Wrong NOTE Suction and discharge valves (bleed valves for self-degassing liquid ends) must be in a vertical position. (± 45º ) Sayfa 12/34...
- Page 14 DOSING PUMPS 3.2.6 Connecting Tubing Figure 15 Figure 16 When installing suction discharge and bypass lines, ensure they are free from all mechanical stress! Arrange the lines so that it is possible, if necessary, to pull the liquid end and the pump apart sideways! Ensure tubing length ends are cut straight across.
- Page 15 DOSING PUMPS 3.2.7 Discharge Pump Figure 17 Before working on the metering pump, always de-pressurise the discharge line Install PVC pipe to the discharge line and after assembly. Unscrewed the discharge record Run the dosing pump ...
-
Page 16: Injection Group With Ball And Checkvalve
DOSING PUMPS 3.3 Injection Group with Ball and Checkvalve NOTE Injection valve group must be fitted up side of the pump head that shown the arrow sign ( All parts of the injection group must be fitted same way and placement that ... -
Page 17: Suction Group
DOSING PUMPS 3.4 Suction Group Suction valve group must be fitted bottom side of the pump head that and immersed the chemical tank. All parts of the suction group must be fitted same way and placement that the figure below If it changes your pump doesn't work smoothly. -
Page 18: Combined Head Group 1-2-3
DOSING PUMPS 3.5. Combined Head Group 1-2-3 All parts of the combined head group must be fitted same way and placement that the figure below If it changes your pump doesn't work smoothly. Figure 22 Açıklama Açıklama Adet Adet Record 2 4x6 Ball 6.35mm... -
Page 19: Head Group 2
DOSING PUMPS 3.6 Head Group 2 All parts of the head group 2 must be fitted same way and placement that the figure below If it changes your pump doesn't work smoothly. Figure 23 Açıklama Adet Pump Head Group 2 Record 2 4x6 Record Cap 2 Conical pipe entrance 4x6... -
Page 20: Head Group 4
DOSING PUMPS 3.7 Head Group 4 All parts of the head group4 must be fitted same way and placement that the figure below If it changes your pump doesn't work smoothly. Figure 24 Açıklama Adet Pump Head Group 4 Record 2 4x6 Record Cap 2 Security Stopper Cap 2 4x6... -
Page 21: Level Sensor Installation
DOSING PUMPS 3.9 Level Sensor Installation Unscrew the record (shown in figure25 with arrow) and sepate the suction group for affix the level sensor. Figure 25 Insert the level sensor part (shown in figure 26 with arrow)between to the record and the body. Screw the record tightly. -
Page 22: Usage
DOSING PUMPS 4. Usage The dosing diaphragm is driven by an electromagnet, which is stimulated and controlled by a microprocessor. Chemical feed occurs as a result of pulsed deflections of the dosing diaphragm within the liquid end, which causes pressure differentiation between the suction side, the liquid end cavity and the discharge side. -
Page 23: Explanations For Digital Models
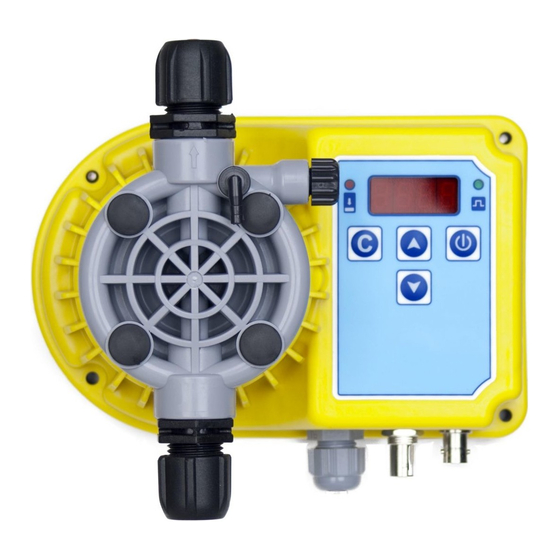
DOSING PUMPS Discharge Record %10 Button 4.2 Explanations for Digital Models Pump capacity and operation modes can be change with function keys. All keys and indicator leds placed on front panel of the pump. Operation paramaters details listed in following sections. BNC connector and external connector connection diagrams details in chapter 4.5. -
Page 24: Parameter Settings In Digital Models
DOSING PUMPS 4.4. Parameter Settings in Digital Models 4.4.1 General Diagram for Parameter Settings Figure 30 Sayfa 23/34... - Page 25 DOSING PUMPS 4.4.2 Parameter Settings Keep ON/OFF button pressed for a while. In this case, device enters the parameter adjustment. At first PAr and second P 1 messages displayed. Select parameter number, which will be change. Figure 31 Adjust value to wanted value with ▲up and down▼ button. Figure 32 Figure 33 Step 1...
- Page 26 DOSING PUMPS 4.4.3 Parameter List Factory Definition Value Description Default Sets the operating mode of the pump. There are 5 kinds of mode of operation. 0 : Manuel 0 – 4 Operationg Mode 1 : Auto 2 : Vol 1 3 : Vol 2 4 : 4-20 mA 1 –...
- Page 27 DOSING PUMPS 4.4.5 Parameter Explanations This parameter used for changing the pump operating mode.5 different operating mode it has. In this mode, pulse per minute changed with up and down buttons and pump 0_Manuel starts and stops with ON/OFF button. In this mode, pump operates like manual mode, but runs for open period 1_Auto adjusted in parameter P 2 (on time) and stops for closed period adjusted in...
-
Page 28: Details Of External Socket
DOSING PUMPS Maximum pulse value adjusted by user also this parameter adjusted analog input range maximum value. Device maximum pulse value used in Manuel, Auto and Analog operation modes This parameter uses for work the pump depending on a analog output source. Pulse/Minute value is calculated according to the value of analog input. -
Page 29: Password Usage
DOSING PUMPS 4.7 Password Usage Password protection is operative when the (P09) parameter adjusted “1” Password protection works after a period of time for any prosess. When password forgotten, keep ON/OFF button pressed more than 10 second, rES message displayed keep down button pressed. This resets (P 09) parameter and disables password. -
Page 30: Service
DOSING PUMPS Cleaning with Sodium hypochlorite (most used): Remove injection line pipe from injection line. Remove suction pipe with filter from liquid and insert to clean water. Run pump for 5-10 minutes. Insert filter to hydrochloric acid and wait until acid finishes cleaning. ... - Page 31 DOSING PUMPS 6.2.1 Fuse Replacement WARNING Cihazınıza herhangi bir servis işlemi yapmadan önce mutlaka elektrik bağlantısı kesilmelidir. AC Dozaj pompalarında 1A cam sigorta kullanınız. DC Dozaj pompalarında 10A cam sigorta kullanınız. Pompa sigortasını değiştirmek için öncelikle arka kapak üzerinde bulunan vidaları uygun bir tornavida kullanarak çıkartınız.
-
Page 32: Chemical Resistance List
DOSING PUMPS Digital Models If there is nothing at display Check electrical plug. Notice to electrical values are AC 220V 50-60 Hz. Digital Models with Liquid Level Controller If there is nothing at display Check electrical plug. Notice to electrical values are AC 220V 50-60 Hz. -
Page 33: Feed Rate Settings Graphs
DOSING PUMPS 8. Feed Rate Settings Graphs Sayfa 32/34... -
Page 34: Model List
Analog Adjust Output Lt/h min. Volt Input Input 2L/10B 0,277 5L/7B 0,694 230V/50Hz 2L/20B 0,277 CLS SERIES 10L/10B 1,388 230V/50Hz 20L/5B 2,777 NANO SERIES 5L/5B 0,492 230V/50Hz 2L10B 0,185 10. Guarantee 10.1. Guarantee Dosage Pump, 2-year warranty for material and production errors. - Page 35 www.antech.com.tr...
Need help?
Do you have a question about the CLS Series and is the answer not in the manual?
Questions and answers