Table of Contents
Advertisement
Quick Links
TABLE OF CONTENTS
SAFETY CONSIDERATIONS . . . . . . . . . . . . . . . . . . . 1
Rated Indoor Airflow . . . . . . . . . . . . . . . . . . . . . . . . . . 2
INSTALLATION . . . . . . . . . . . . . . . . . . . . . . . . . . . . . . 9
Jobsite Survey . . . . . . . . . . . . . . . . . . . . . . . . . . . . . . . 9
Step 1 - Plan for Unit Location . . . . . . . . . . . . . . . . 9
Step 3 - Inspect Unit . . . . . . . . . . . . . . . . . . . . . . . . . 9
Step 4 - Provide Unit Support . . . . . . . . . . . . . . . . . 9
Step 5 - Field Fabricate Ductwork . . . . . . . . . . . . . 11
Step 6 - Rig and Place Unit . . . . . . . . . . . . . . . . . . 11
Ductwork (when required) . . . . . . . . . . . . . . . . . . 12
Step 8 - Install Outside Air Hood . . . . . . . . . . . . . . 13
Step 9 - Units with Hinged Panels Only . . . . . . . . 14
Step 11 - Make Electrical Connections . . . . . . . . . 15
Economi$er® X (Factory Option) . . . . . . . . . . . . . . . 32
Manufacturer reserves the right to discontinue, or change at any time, specifications or designs without notice and without incurring obligations.
Catalog No. 04-53500242-01
Installation Instructions
Printed in U.S.A.
Form 50HCQ-4-6-02SI
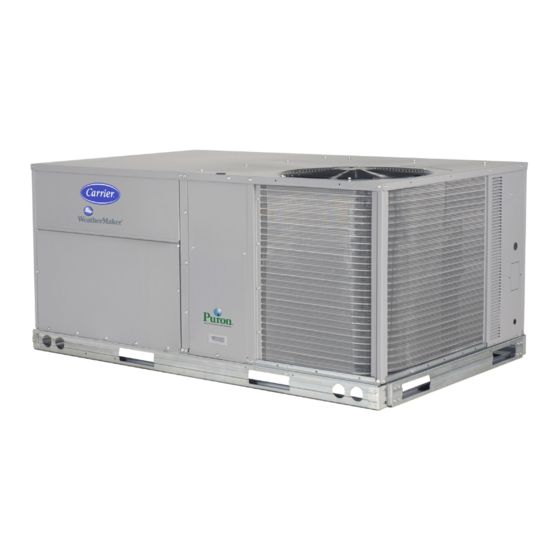
Single Package Rooftop Heat Pump
with Puron
®
• ECONOMIZER MODULE WIRING DETAILS
Smoke Detectors . . . . . . . . . . . . . . . . . . . . . . . . . . . .43
RTU Open Control System . . . . . . . . . . . . . . . . . . . .44
Controller Options . . . . . . . . . . . . . . . . . . . . . . . . . . .44
Step 12 - Adjust Factory-Installed Options . . . . . .44
Step 13 - Install Accessories . . . . . . . . . . . . . . . . .44
Step 14 - Check Belt Tension . . . . . . . . . . . . . . . . .45
Pre-Start and Start-Up . . . . . . . . . . . . . . . . . . . . . . . .45
Typical Unit Piping . . . . . . . . . . . . . . . . . . . . . . . . . . .45
START-UP CHECKLIST . . . . . . . . . . . . . . . . . . . . .CL-1
SAFETY CONSIDERATIONS
Installation and servicing of air-conditioning equipment can be
hazardous due to system pressure and electrical components. Only
trained and qualified service personnel should install, repair, or
service air-conditioning equipment.
Untrained personnel can perform basic maintenance functions of
cleaning coils and filters and replacing filters. All other operations
should be performed by trained service personnel. When working
on air-conditioning equipment, observe precautions in the litera-
ture, tags and labels attached to the unit, and other safety precau-
tions that may apply.
Follow all safety codes, including ANSI (American National Stan-
dards Institute) Z223.1. Wear safety glasses and work gloves. Use
quenching cloth for unbrazing operations. Have fire extinguisher
available for all brazing operations.
It is important to recognize safety information. This is the safety-
alert symbol
. When you see this symbol on the unit and in in-
structions or manuals, be alert to the potential for personal injury.
Understand the signal words DANGER, WARNING, CAUTION,
and NOTE. These words are used with the safety-alert symbol.
DANGER identifies the most serious hazards which will result in
severe personal injury or death. WARNING signifies hazards
which could result in personal injury or death. CAUTION is used
to identify unsafe practices, which may result in minor personal
injury or product and property damage. NOTE is used to highlight
suggestions which will result in enhanced installation, reliability,
or operation.
Pg 1
WeatherMaster
50HCQ*04-06
(R-410A) Refrigerant
12-19
Replaces: 50HCQ-4-6-01SI
®
Advertisement
Table of Contents

Related Manuals for Carrier WeatherMaster 50HCQ 06 Series


Summary of Contents for Carrier WeatherMaster 50HCQ 06 Series
-
Page 1: Table Of Contents
® WeatherMaster 50HCQ*04-06 Single Package Rooftop Heat Pump with Puron ® (R-410A) Refrigerant Installation Instructions • ENVIRONMENTAL TABLE OF CONTENTS • ECONOMIZER MODULE WIRING DETAILS SAFETY CONSIDERATIONS ....1 •... -
Page 2: Model Number Nomenclature And Dimensions
DANGER CAUTION ELECTRICAL SHOCK HAZARD PERSONAL INJURY HAZARD Failure to follow this warning will result in personal injury or Failure to follow this caution may result in personal injury. death. Sheet metal parts may have sharp edges or burrs. Use care and Before performing service or maintenance operations on unit, wear appropriate protective clothing, safety glasses and gloves turn off main power switch to unit and install lock(s) and lock-... - Page 3 9 10 11 12 13 14 15 16 17 18 Packaging Options 0 - Standard Series - Weathermaster 1 - LTL 50HC - Packaged Rooftop - High Efficiency Electrical Options A - None C - Non-Fused Disconnect Q - Heat Pump D - Thru-The-Base Connections F - Non-Fused Disconnect and Thru-The-Base Connections...
-
Page 9: Installation
Install outdoor air hood. INSTALLATION Install condensate line trap and piping. Jobsite Survey Make electrical connections. Complete the following checks before installation. Install other accessories. Consult local building codes and the NEC (National Elec- trical Code) ANSI/NFPA 70 for special installation PAD-MOUNTED INSTALLATION requirements. - Page 10 ROOFCURB UNIT SIZE ACCESSORY 1’ - 2” CRRFCURB001A02 [356] 50HCQA04-06 2’ - 0” CRRFCURB002A02 [610] Fig. 7 — Roof Curb Details...
-
Page 11: Alternate Unit Support (In Lieu Of Curb Or Slab Mount)
ALTERNATE UNIT SUPPORT (IN LIEU OF CURB OR Outlet grilles must not lie directly below unit discharge. SLAB MOUNT) NOTE: A 90 degree elbow must be provided in the ductwork to comply with UL (Underwriters Laboratories) code for use with A non-combustible sleeper rail can be used in the unit curb sup- electric heat. -
Page 12: Step 7 - Convert To Horizontal And Connect Ductwork (When Required)
"B" DETAIL "A" 36"- 54" PLACE ALL SEAL STRIP IN PLACE REQUIRED (914-1371) BEFORE PLACING UNIT ON ROOF CURB. SPREADER BARS DUCT END "C" "A" SEE DETAIL "A" DIMENSIONS MAX WEIGHT UNIT 50HCQA04 74.5 1890 48.5 33.5 50HCQA05 74.5 1890 37.5 41.5 1055... -
Page 13: Step 8 - Install Outside Air Hood
SCREWS REMOVE HOOD PARTS CUT PLASTIC TIES (2) PLACES ECONOMIZER DUCT COVERS SHEET METAL FACE UP BASEPAN Fig. 14 — Economizer Wiring TWO-POSITION DAMPER HOOD REMOVAL AND SETUP (FACTORY OPTION) The hood is shipped in knock-down form and assembled to a met- al support tray using plastic stretch wrap. -
Page 14: Step 9 - Units With Hinged Panels Only
Swing out indoor coil access panel and insert the hood sides under the panel (hood top). Use the screws provided to attach the hood sides to the hood top. Use screws provided to attach the hood sides to the unit. See Fig. 17. Remove the shipping tape holding the economizer barometric relief damper in place (economizer only). -
Page 15: Step 11 - Make Electrical Connections
not factory connected. Installer must connect these leads accord- ing to required operation of the convenience outlet. If an always- energized convenience outlet operation is desired, connect the source leads to the line side of the unit-mounted disconnect. (Check with local codes to ensure this method is acceptable in your area.) If a de-energize via unit disconnect switch operation of the convenience outlet is desired, connect the source leads to the load side of the unit disconnect. -
Page 16: All Units
Two types of convenience outlets are offered on 50HCQA mod- Units Without Disconnect Option els: non-powered and unit-powered. Both types provide a 125-volt GFCI (ground-fault circuit interrupter) duplex receptacle rated at (3 Phase 15A behind a hinged waterproof access cover, located on the end Indoor Motor) panel of the unit. -
Page 17: Factory Option Thru-Base Connections
GFCI RECEPTACLE COVER - WHILE-IN-USE NOT INCLUDED WEATHERPROOF GASKET BASEPLATE FOR GFCI RECEPTACLE Fig. 25 — Weatherproof Cover Installation Non-Powered Convenience Outlet UNIT CONNECT PRIMARY TRANSFORMER This type requires the field installation of a general-purpose 125v VOLTAGE CONNECTIONS TERMINALS 15A circuit powered from a source elsewhere in the building. Ob- L1: RED + YEL H1 + H3 208, 230... -
Page 18: Units Without Thru-Base Connections (Electrical Connections)
HIGH VOLTAGE line voltage or excessive phase imbalance constitutes abuse and CONDUIT may cause damage to electrical components. Such operation CONNECTOR would invalidate any applicable Carrier warranty. max voltage deviation from average voltage % Voltage = 100 x Imbalance average voltage Fig. -
Page 19: Field Control Wiring
This device can be a thermostat (field-supplied) or a Premier- RACEWAY Link™ controller (available as factory-installed option or as field- installed accessory, for use on a Carrier Comfort Network ® or as a stand-alone control) or the RTU Open Controller for Building Management Systems using non-CCN protocols (RTU Open is available as a factory-installed option only). - Page 20 Reversing valve control Compressor control The DFB has two outputs for unit reversing valve control. Opera- The DFB receives inputs indicating Stage 1 Cooling, Stage 2 tion of the reversing valves is based on internal logic; this applica- Cooling and Stage 1 Heating from the space thermostat or unit tion does not use an “O”...
-
Page 21: Electric Heaters
Table 4 — DIP Switch Positions 30 minutes 60 minutes 90 minutes 120 minutes Fan Delay (factory default) Auxiliary (Electric) Heat Control DISCONNECT MOUNTING The 50HCQ unit can be equipped with one or two auxiliary elec- LOCATION tric heaters, to provide a second stage of heating. -
Page 22: Control And Power Wiring Diagrams
Single Point Boxes and Supplementary Fuses Low Voltage Control Connections When the unit MOCP device value exceeds 60-A, unit-mounted Run the low-voltage control leads from the heater module(s) — supplementary fuses are required for each heater circuit. These VIO and BRN (two of each if two modules are installed; identify fuses are included in accessory single point boxes, with power dis- for Module #1) —... - Page 25 Fig. 43 — Electro-Mechanical Power Wiring: 208/230-1-60...
- Page 26 Fig. 44 — Electro-Mechanical Power Wiring: 208/230-3-60...
- Page 27 Fig. 45 — Electro-Mechanical Power Wiring: 460-3-60...
- Page 28 Fig. 46 — Electro-Mechanical Power Wiring: 575-3-60...
-
Page 32: Economi$Er X (Factory Option)
Electrical ® Economi$er X (Factory Option) • Rated Voltage — 20 to 30 vac RMS, 50/60 Hz The EconoMi$er X system is an expandable economizer control system, which includes a W7220 economizer module (controller) • Transformer — 100 va maximum system input with an LCD and keypad (see Fig. - Page 33 Relative Humidity Table 6 — Economizer Module - Right Hand Terminal 5% to 95% RH non-condensing Blocks ECONOMIZER MODULE WIRING DETAILS LABEL TYPE DESCRIPTION Use Fig. 51 and Tables 5 and 6 to locate the wiring terminals for Top Right Terminal Blocks the Economizer module.
-
Page 34: Interface Overview
To use the keypad when working with menus: Table 7 — HH57AC081 Sensor Wiring Terminations • Press the ▲ (Up arrow) button to move to the previous menu. TERMINAL TYPE DESCRIPTION • Press the ▼ (Down arrow) button to move to the next NUMBER LABEL menu. -
Page 35: Setup And Configuration
the cooling coil. This unit application has the control sensor locat- The setup process uses a hierarchical menu structure that is easy to ed after the cooling coil, in the fan section, where it is designated use. Press the ▲ and ▼ arrow buttons to move forward and back- as (Cooling) Supply Air Temperature or SAT sensor. - Page 36 Table 9 — W7220 Menu Structure* (cont) PARAMETER PARAMETER EXPANDED PARAMETER NAME MENU PARAMETER DEFAULT RANGE AND Notes VALUE INCREMENT † ACT POS 0 to 100% Displays actual position of actuator Displays number of times actuator has cycled. ACT COUNT 1 to 65,535 1 cycle equals 180 degrees of actuator movement in any direction.
- Page 37 Table 9 — W7220 Menu Structure* (cont) PARAMETER PARAMETER EXPANDED PARAMETER NAME MENU PARAMETER DEFAULT RANGE AND Notes VALUE INCREMENT † DCV MINIMUM DAMPER POSITION 2 to 10 vdc or 100 Displays only if a CO sensor is connected. Used for Va to 9990 cfm (ventilation min cfm) set point.
- Page 38 Table 9 — W7220 Menu Structure* (cont) PARAMETER PARAMETER EXPANDED PARAMETER NAME MENU PARAMETER DEFAULT RANGE AND Notes VALUE INCREMENT † NONE Used for alarm for when the DA air temperature is too low. Set 35°F to 65°F DA LO ALM 45°F (7°C) lower range of alarm, below this temperature the alarm will show (2°C to 18°C);...
- Page 39 Table 9 — W7220 Menu Structure* (cont) PARAMETER PARAMETER EXPANDED PARAMETER NAME MENU PARAMETER DEFAULT RANGE AND Notes VALUE INCREMENT † ACTUATOR ERROR Actuator has failed or become disconnected - check for stall, ACT ERROR over voltage, under voltage and actuator count. Replace actuator if damper is movable and supply voltage is between 21.6 V and 26.4 V.
- Page 40 Table 11 — Dry Bulb Operation Without DCV (CO Sensor) — 1 Speed Fan DEMAND OUTSIDE AIR CONTROLLED GOOD TO Y1-I Y2-I FAN SPEED Y1-O Y2-O OCCUPIED UNOCCUPIED VENTILATION (DCV) ECONOMIZE High 0-v/Off 0-v/Off MIN POS Closed High 24-v/On 0-v/Off MIN POS Closed High...
-
Page 41: Enthalpy Settings
Table 14 — Enthalpy Operation With DCV (CO Sensor) — 1 Speed Fan DEMAND OUTSIDE AIR CONTROLLED GOOD TO Y1-I Y2-I Y1-O Y2-O OCCUPIED UNOCCUPIED SPEED VENTILATION (DCV) ECONOMIZE High 0-v/Off 0-v/Off Closed VENTMIN High 24-v/On 0-v/Off Closed VENTMIN High 24-v/On 24-v/On Closed... -
Page 42: Checkout
ECONOMIZING DUAL ENTHALPY AVAILABLE HIGH LIMIT NOT AVAILABLE SINGLE ENTHALPY P2 (T,RH) (T,RH) TEMPERATURE Fig. 55 — Single Enthalpy Curve Boundaries Table 15 — Single Enthalpy and Dual Enthalpy High Limit Curves POINT P1 POINT P2 ENTHALPY TEMP. DRY TEMP. ENTHALPY HUMIDITY HUMIDITY... -
Page 43: Smoke Detectors
Clearing Alarms Screw the sensor and detector plate into its operating position using screws from Step 1. See Fig. 57, Step 3. Once the alarm has been identified and the cause has been re- moved (e.g. replaced faulty sensor) the alarm can be cleared from Connect the flexible tube on the sampling inlet to the sam- the display. -
Page 44: Rtu Open Control System
RTU Open Control System Step 13 — Install Accessories For details on operating units equipped with the factory-installed Available accessories include: RTU Open controller, refer to the “Factory-Installed RTU Open • Roof curb Multi-Protocol Controller Control, Start-Up, Operation and Trou- •... -
Page 45: Step 14 - Check Belt Tension
Step 14 — Check Belt Tension BLOWER PULLEY Measure the belt span length as shown in Fig. 59. Calculate the re- quired deflection by multiplying the belt span length by . For V-BELT example, if the belt span length is 32 inches: 32 x -in. - Page 46 Check Valve C Open Check Valve D Closed © 2019 Carrier Corporation Manufacturer reserves the right to discontinue, or change at any time, specifications or designs without notice and without incurring obligations. Catalog No. 04-53500242-01 Printed in U.S.A. Form 50HCQ-4-6-02SI...
- Page 47 Start-Up Checklist for 50HCQA04-06 Single Package Rooftop Heat Pump (Remove and use for job file) NOTE: To avoid injury to personnel and damage to equipment or property when completing the procedures listed in this start-up checklist, use good judgment, follow safe practices, and adhere to the safety considerations/information as outlined in preced- ing sections of this Installation Instruction document.
- Page 48 9. Open humidistat input compressor and outdoor fan stop; LSV and DSV solenoids de-energized (Y/N) _____ 10. Restore set-points for thermostat and humidistat (Y/N) _____ © 2019 Carrier Corporation Manufacturer reserves the right to discontinue, or change at any time, specifications or designs without notice and without incurring obligations.
Need help?
Do you have a question about the WeatherMaster 50HCQ 06 Series and is the answer not in the manual?
Questions and answers