
Related Manuals for Tractus3D T1250


Summary of Contents for Tractus3D T1250
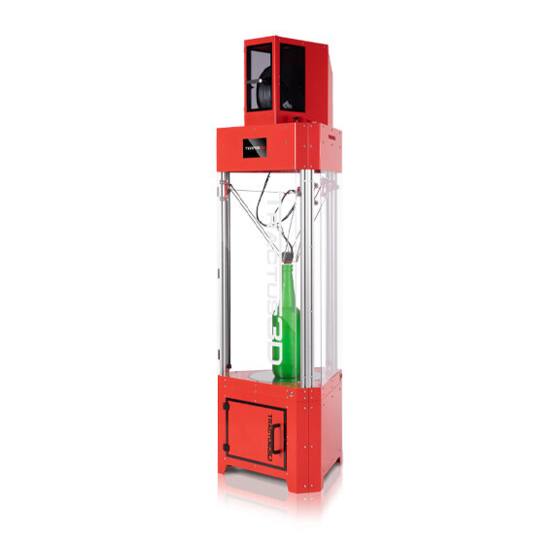
- Page 1 A PROUD DUTCH COMPANY HEART SOUL & DUTCH PERFECTION Inside every 3D Printer DESK series Installation and user manual Original manual v3.0...
-
Page 2: Table Of Contents
Table of Contents Disclaimer Preface Safety and compliance 1.1 Safety Notices 1.2 Hazards Introduction 2.1 Main components 2.2 Specifications T1250 2.3 Specifications T850 2.4 Specifications T650 Unboxing Setup for first use 4.1 Set up network 4.2 Update the firmware 4.3 Calibrating the print bed 4.4 Installing slicing software 4.5 Uploading files to 3D printer Operation 5.1 Web interface Materials... - Page 3 7.4 Preparing your print bed 7.5 Remove support material or brim Maintenance 8.1 Maintenance schedule 8.2 Change the print head 8.3 Change the bed plate 8.4 Dimensional accuracy calibration 8.5 Material usage and storage 8.6 Clean the 3D printer 8.7 Check all arms 8.8 Clean the print head and nozzle 8.9 Clean the Bowden tube 8.10 Clean the slide wheels 8.11 Check for play on the slides...
-
Page 4: Disclaimer
Tractus3D Printer. The contents of this document is provided by Tractus3D and without warranties of any kind, either expressed or implied in relation to the propriety, reliability or accuracy or otherwise of these contents. -
Page 5: Preface
Preface This is the installation and user manual for your Tractus3D printer. This manual contains chapters about the installation and use of the 3D printer. The manual contains important information and instructions on safety, installation and use. Please read all information and follow the instructions and guidelines in this manual carefully. -
Page 6: Safety And Compliance
When in operation, never reach inside of the 3Dprinter. Control the 3Dprinter with the touchscreen, positioned on the front or with the power switch at the front. Let the Tractus3D printer cool down for at least 5 minutes before reaching inside. - Page 7 Health and safety Our printers are compatible with all brands of 3D print filament, but we do recommend the use of Tractus3D materials for the best results. The properties of these materials are fully matched with our printer settings. These materials can be printed safely if the recommended temperatures and settings are used.
-
Page 8: Introduction
Introduction About the possibilities of your new Tractus3D printer 2.1 Main components Print head(s) ƒ Heated build plate ƒ Spool holder ƒ Touchscreen ƒ Extruder ƒ Bowden tubes ƒ Polycarbonate panels ƒ Power socket with cord or adapter ƒ Ethernet port ƒ... - Page 9 Physical dimensions Dimensions 640 mm x 555 mm x 1540 mm Net weight 30 kg Shipping weight 50 kg Shipping box dimensions 760 mm x 685 mm x 1400 mm Build plate Build plate material Heated glass build plate with PEI sheet Build plate temperature 10 - 120 °C Build plate levelling...
-
Page 10: Specifications T850
2.3 Specifications T850 Machine properties Printing technology Fused filament fabrication (FFF) - Fused deposition modeling (FDM) Build width 280 mm diameter (11”) Build height 400 mm (15.7”) Speed 300 mm/s XYZ resolution 10, 10, 10 micron Layer resolution 0.3 mm nozzle: 150 - 10 micron 0.4 mm nozzle: 300 - 10 micron 0.6 mm nozzle: 450 - 10 micron 0.8 mm nozzle: 600 - 10 micron... -
Page 11: Specifications T650
Ambient conditions Operating ambient temperature 15 - 35 °C, 10 - 90% RH non-condensing Materials Supported materials PLA, PRO1, PET-G, ABS, ASA, Facilan C8, TPU/TPE, Nylon, PC, Fillers like woodfill Filament diameter 1.75 mm Software Supplied software Simplify3D with 1 license (usage on 2 computers) Supported OS MacOS, Windows and Linux File types... - Page 12 Shipping box dimensions 430 mm x 495 mm x 905 mm Build plate Build plate material Heated glass build plate with PEI sheet Build plate temperature 10 - 120 °C Build plate levelling Automatic bed levelling Build plate heat up time <...
-
Page 13: Unboxing
Unboxing Unpack your Tractus3D printer carefully and set up the hardware according to the instructions on the quick start manual supplied with the 3D printer. Make sure when you install the printer on the location, you will use the swivel feet to adjust the 3D printer to be level as much as possible in all directions. - Page 14 Change to Static IP address To set a static IP address please use the following instructions in the Web Interface of the printer. To access the web interface, open a web browser (prefer Chrome) and surf to the IP address which you found on the console tab of the LCD screen.
- Page 15 Search in this file for the line: M552 P0.0.0.0 Change this line to: M552 Pxxx.xxx.xxx.xxx (Where xxx.xxx.xxx.xxx is your IP address, for example: M552 P192.168.1.10) Next search for the line: M553 P255.255.255.0 This is your subnet mask. If you have to change it, do this accordingly your details of the subnet mask in the same way as you changed the IP address Next search for the line: M554 P0.0.0.0...
-
Page 16: Update The Firmware
Make sure you did the setup procedure for the web interface described in chapter 4.1 Set Up Network. In the web interface go to Settings and tab General. Click on the blue button Upload File(s) and select the firmware you’ve received from Tractus3D. The interface will give you a notification that you uploaded a new firmware. -
Page 17: Calibrating The Print Bed
Click YES to update your firmware. Check the Firmware Version number to see if the update is loaded successfully. 4.3 Calibrating the print bed When you install the 3D printer for the first time or you have moved your printer to another location please always calibrate the print bed. -
Page 18: Installing Slicing Software
Default we supply Simplify3D with our 3D printers as slicing software. As we do recommend this software it’s not the only one that you can use for the 3D printer. Tractus3D is a reseller of Simplify3D and does give basic support for this and their printers but most of the support will be found online at the Simplify3D website. - Page 19 When you login on the Simplify3D website click on Download Software and choose your operating system. See the Windows Installation Instructions on the website how to open the installer. Select your installation language and click OK. Select Next > read the Simplify3D software End User License Agreement and Accept the agreement to continue. Choose I accept the agreement and click Next >...
- Page 20 Importing Tractus3D settings in Simplify3D Now it’s time to setup your printer in Simplify3D by the latest settings delivered by Tractus3D. When you requested your license you also received a mail from Tractus3D with a .FFF file. (settings file for Simplify3D).
- Page 21 Select the .FFF file you received from Tractus3D and click Open You will get a message which name the software gave the imported settings file. Next go at the left side of the screen to Processes and click the Add button.
- Page 22 Click on Import at the Models section to import a or OBJ file which you want to print. For more information how to get the best results with Simplify3D we recommend reading the support page on their website. https://www.simplify3d.com/support/...
- Page 23 Updating firmware settings in Simplify3D Next to configuring the profiles, the firmware file also has to be imported. The file is send out together with the printer profile. Follow the steps below to update the firmware settings in Simplify3D In Simplify3D go to Tools > Firmware configuration In this window choose Import and navigate to the location where you placed the firmware file.
-
Page 24: Uploading Files To 3D Printer
4.5 Uploading files to 3D printer When you have created a file with your slicer software and you stored the G-Code file on your computer it’s only a matter of uploading this to the 3D printer to get started. To upload the file please open the web interface. Go to G-Code Files and click the Upload G-Code File(s) button. -
Page 25: Operation
Operation After installation, it’s time to start printing with your 3D printer. This chapter provides information about the web interface, LCD touchscreen, cleaning the bed, starting a print, removing the print and support material. 5.1 Web interface With our web interface you can control the 3D printer remotely. In this chapter we will explain the main web interface buttons and actions takes or NOT to be taken while printing. - Page 26 Control your printhead when the printer is idle with these buttons. Home All will bring the printer to its starting position. Auto Delta Calibration is used for calibration of the machine (see chapter 4.3 Calibrating the bed) NOTE: Please make sure you don’t use these buttons while the printer is printing an object! Here you can find pre-defined shortcuts or make your own shortcuts (macro’s).
- Page 27 Print Status This part of the interface will be only working when a print is running. When the print is running and you want to pause the print job click on Pause Print. When you want to cancel the print first Pause the job and press Cancel to stop the job. Press Resume if you want to continue the print.
- Page 28 Here you can override the settings of your print file. Control your Tool Fan (Material Fan) more or less than setup in the slicing software. Control the speed of the printer Control the extrusion multiplier of the printer G-Code Files Here you can upload your files or start a print.
- Page 29 Extra file options Right mouse click (windows users) on the file will give you more options. The Simulate File option will start a print (simulated) directly without visible motion on the 3D printer. With this option you can calculate a really accurate time of printing and usage of the material. When the simulation is finished you will get a message on the web interface: File Demo_Material_Part_PETG.gcode will print in 0h 38m plus heating time With the more option list, you can also rename, delete a file or download the file to the computer.
-
Page 30: Materials
If you have troubles with the machine, we will always advise to go back to Tractus3D supported PLA with a clean (prefer new) nozzle. -
Page 31: Print Recommendations
For all materials that are supported, you have to use a clean glass plate with adhesion products like 3DLac or glue sticks. The overview below shows the recommended settings per supported (Tractus3D preferred) material. Bed:... -
Page 32: Tips For Experimental Materials
When you are going to use experimental materials always remember to watch the print process as much as possible to change settings while printing. Tractus3D printers can be adjusted while printing, such as temperature adjustments, fan speed adjustments, speed adjustments and many more options. -
Page 33: Operating The 3D Printer
Operating the 3D printer 7.1 Load material You need to load the material into the 3Dprinter, before you can start printing. It is recommended to use the spools of PLA that comes with your 3Dprinter. Take the filament out of the box and place it on the printer like the picture below. - Page 34 Push the black button on top of the printer to release the feeder motor and gently push the filament wire through the feeder unit. You can only load filament with the commands if the nozzle is on temperature above 170 degrees. This to prevent any cold extrusion damage.
-
Page 35: Unload Material
Click on the button Load Filament on the LCD screen or on your web interface. Manually extrude a little bit to spool the filament completely through the nozzle. Click on the Extrude button and select 50mm and 5mm/s. Please don’t use more than 5mm/s for manual extrusion! 7.2 Unload material Heat up the nozzle temperature to the printing temperature of the material which is inside your 3D printer at this moment. -
Page 36: Removing The Filament With A Blob
Push the black button on top of the machine to unload the filament by gently pulling the filament wire. Manually: Push the extruder a bit and pull back the filament wire. When you feel any obstruction or friction please stop pulling and push the filament back a little. There is a chance you have a blob on your filament. - Page 37 Push down the edge of the fitting together with pulling the tube out of the feeder. You will see the filament getting out of the feeder with the blob. Get a cutter to cut off the blob of the filament. Now push back the tube inside the fitting place the blue clip back on the fitting and try to remove the filament again by pushing the black button on top of the printer and pulling on the filament.
-
Page 38: Preparing Your Print Bed
7.4 Preparing your print bed If you’re using the PEI bed which is default on the desktop series or you have a basic glass plate, we recommend you clean the plate with a spatula if printing remains are there. After this, clean the plate with some Isopropanol (PEI sheet) and a towel. For a glass plate, hand warm water is sufficient. - Page 39 Removing a print from the bed Once your 3D print is finished it must be removed from the build plate. Always let the print bed cool down to room temperature before removing the print. Otherwise you can damage the bed! There are several methods to remove the printed object from the bed on room temperature.
- Page 40 Gently tap the model with your hand/fist and see if the print will pop loose. ƒ Still stuck? Try some handwarm water around the model and leave it for a few minutes. When you print a product with a brim, be aware of the danger of cutting yourself when removing the print from the build plate.
-
Page 41: Remove Support Material Or Brim
7.5 Remove support material or brim Prints which are using (breakaway) support will require post-processing to remove the support structures. You can manually break the support structures from the model you printed. It will require sometimes a tool like pliers or tweezers to break away the support material. It is advised to wear protective gloves when the support structure contains sharp corners or half broken parts. -
Page 42: Maintenance
Maintenance 8.1 Maintenance schedule To keep your 3D printer in optimal condition we recommend the following maintenance schedule assuming you print 1.500 hours a year. Every print again Check if the print head fan is running after heating up ƒ Clean the print head and nozzle ƒ... -
Page 43: Change The Print Head
8.2 Change the print head The print head can be changed quick on a DESK series 3D printer. Unload the filament Make sure you unloaded the filament if possible. (See chapter of unloading filament for help) If this is really stuck, continue to next step and cut the remains of filament. - Page 44 Cutting stuck filament Sometimes the filament is really stuck inside the print head. In this case you want to change the print head but the filament is holding you for a quick swap. Disconnect the main cable When the bowden tube is disconnected, unscrew the silver connector of the print head from the main cable...
- Page 45 Disconnect the arms from the print head Now gently disconnect the magnetic arms with some small force from the print head. Installing new print head Put the new print head on the magnets. With a T1250 watch carefully where the arms need to be attached to the balls on the print head.
-
Page 46: Change The Bed Plate
8.3 Change the bed plate When you switch from the PEI sheet bed to a glass bed plate or an Aluminium bed plate, or the other way around, please make sure you calibrate the machine after installing the new plate. Be careful not to cut yourself on this sharp part. Gently push back a clip of the bed and with a flat screwdriver lift the bed plate. -
Page 47: Dimensional Accuracy Calibration
Some materials will contract more than others. In the folder Tractus3D on the machine (if not deleted) you will find a file called: DimensionCalibration.gcode Use this file only for PLA on the machine, in combination with a 0.4 nozzle. If you want to calibrate for other materials use the STL file and slice the file to generate a g-code (don’t rotate the file on the bed in your slicing... - Page 48 Take a calliper and measure the length of the X and Y part and thickness (Z) of the print and write down the numbers which in this example we call them PrintX, PrintY and PrintZ The next steps can be a bit theoretical but when you take the time to master this you can hit a high accuracy. In the console of your machine (LCD or web interface) type the following command: M579 (press enter or click send)
-
Page 49: Material Usage And Storage
Or find and change this line in your config.g file which you can access through the Web interface > Settings > System Editor Change the M579 X0.997 Y1.009 line to M579 X0.9988 Y1.0057 8.5 Material usage and storage When you have multiple opened spools of filament, you must store them properly. It may affect its quality and usability, if the filament is not correctly stored. -
Page 50: Clean The 3D Printer
8.6 Clean the 3D printer For the best print results, it is important to keep the 3D printer clean while using it. It is advised to not use the printer in a room where it can easily be covered with dust and to remove small pieces of material that might be in the printer. -
Page 51: Clean The Print Head And Nozzle
8.8 Clean the print head and nozzle While printing some materials can get stuck to the outside of the nozzle and will degrade. This won’t damage your printer, but it can generate fumes and can drip off in your print. It is recommended to keep the nozzle clean in order to achieve the best print results. -
Page 52: Clean The Bowden Tube
8.9 Clean the Bowden tube Particles in the Bowden tubes can impede smooth movement of the filament. Clean the Bowden tubes at least once a month, or after experiencing an issue with filament grinding. To clean the Bowden tubes, they must first be removed from the printer. - Page 53 Press the black ring (pneufit) on the feeder/extruder motor and pull out the tube. Cut off a small piece of sponge or ball up a piece of tissue. Insert this into the feeder end of the Bowden tube and push it all the way through the tube with a length of the filament.
-
Page 54: Clean The Slide Wheels
8.10 Clean the slide wheels The wheels of the machine are made of POM and will wear in a little after a while. Also, the wheels will catch some dust which remains there. This is possible to be seen in the print result. For an optimal print result clean the wheels by following these steps: Lower the print head by moving the printer to the maintenance location. -
Page 55: Check For Play On The Slides
8.11 Check for play on the slides When the printer is still in its Maintenance position you can check for play on the slides. Take the slide between your fingers like the picture and try carefully to shake/turn your hand. If you feel any play in the slide, please adjust the concentric nut found on the single wheel side of the slide. Don’t overtighten this, you should still be able to turn the wheel with a finger without too much force applied. -
Page 56: Check Tension And Wear Of Belts
8.12 Check tension and wear of belts Maintaining correct tension on the belts is important to ensure good print quality. The belts transfer the movements of the motors to the slides. If the belts are too loose, print head movement may not be accurate, which can cause print inaccuracies. -
Page 57: Check If Print Head Fan Is Running After Heating Up
Repeat this for all three belts Make sure all belts are feeling the same in tension 8.13 Check if print head fan is running after heating up The small fan on the print head cools the print head during a print. This helps to prevent the heat from the nozzle traveling too far upwards. - Page 58 After filament is unloaded let the print head cool down. Never turn off the printer with a print head above 50 ƒ degrees Celsius! Lower the print head by moving the printer to the maintenance location. ƒ Press Macro > Maintenance ƒ...
- Page 59 Now you can clean or replace the gear from the extruder unit. The gear is locked with a set screw. If you ƒ replace this gear, make sure the set screw of the new gear is locked with loctite or a similar product and the setscrew is not sticking out of the gear unit.
-
Page 60: Troubleshooting
Troubleshooting A few printer-specific issues may occur when using your 3D printer. You can troubleshoot those yourself using the following information. 9.1 Unclog a print head Hot Pull Insert the filament (cleaning filament or PLA) into the heated (200 degrees Celsius) print head until you feel some resistance. -
Page 61: Print Quality Issues
Use the right temperature and settings as known for the filament you use ƒ Modify the shape of your model ƒ Use a brim ƒ Choose another material that is less sensitive to warping ƒ For detailed support, please contact us: https://tractus3d.com/support/service/... - Page 62 Phone +31(0)85 130 72 70 Email support@tractus3d.com Website www.tractus3d.com Address Bernseweg 14 5324 JW Ammerzoden The Netherlands...
Need help?
Do you have a question about the T1250 and is the answer not in the manual?
Questions and answers