Table of Contents
Troubleshooting

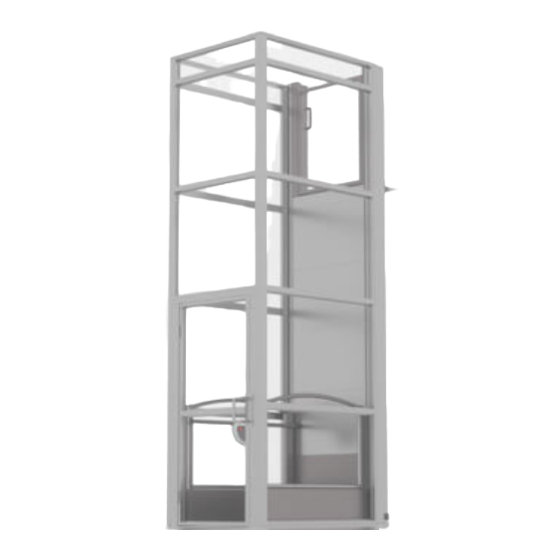
Related Manuals for Ascension 16D


Summary of Contents for Ascension 16D
- Page 1 ASCENSION CLARITY WHEELCHAIR LIFT 16C/D/E/S MODEL SERIES PRODUCT MANUAL Same-Side, Same-Side, Straight-Through, Straight-Through, Shaftway Enclosed Enclosed Shaftway For patent information, see ascension-lift.com/patents...
- Page 2 Copyright © 2021 Ascension, a Division of AGM, Tucson, Arizona http://ascension-lift.com This document, or parts thereof, may not be reproduced in any form, by any method, for any purpose, without written permission from Ascension.
- Page 3 ASCENSION CLARITY WHEELCHAIR LIFT 16C/D/E/S MODEL SERIES PRODUCT MANUAL Same-Side, Same-Side, Straight-Through, Straight-Through, Shaftway Enclosed Enclosed Shaftway For patent information, see ascension-lift.com/patents...
-
Page 4: Table Of Contents
TABLE OF CONTENTS SECTION 1 GENERAL ....................7 Product information ..................7 Definitions ....................... 8 Important safety information ................9 SECTION 2 OPERATION .................... 10 Description of operation ................10 ... - Page 5 Lower terminal switch ..................24 Upper terminal switch and creep switch ............25 5.10 Door lock switches ..................26 5.11 Traveling cable ....................27 5.12 Platform operating station ................28 ...
- Page 6 SECTION 7 INSPECTIONS ..................49 System specifications ..................49 Test platform safeties ..................49...
-
Page 7: General
CLARITY 16C/D/E/S Product Manual SECTION 1 SECTION 1 General Product information Operational ratings OCCUPANCY: 1 person RATED LOAD: 750 pounds (340kg) AVERAGE SPEED: 20 feet per minute (0.1 m/s) DUTY CYCLE: 15 minutes of operation per hour repetitive use (10 cycles for 168” lifting height) 22 minutes maximum single runtime (15 cycles for 168”... -
Page 8: Definitions
CLARITY 16C/D/E/S Product Manual SECTION 1 Definitions Emergency stop switch The red pushbutton provided at the platform operating station. Pushing this button immediately stops the lift until it is manually reset. Fascia The smooth surface extending from the upper landing sill to the level of the lower landing. -
Page 9: Important Safety Information
CLARITY 16C/D/E/S Product Manual SECTION 1 Figure 1: Parts identification Important safety information When using the lift, the following basic safety precautions and practices must be observed: 1. Read and understand all of the information contained in this manual. 2. Do not overload the platform. The lifting capacity is 750 lbs. -
Page 10: Operation
CLARITY 16C/D/E/S Product Manual SECTION 2 SECTION 2 Operation Description of operation Vertical motion of the platform is controlled by the three (3) operating switches located in the platform and at the landings. While any switch is in use, the other switches are disabled. -
Page 11: Standard Operation
CLARITY 16C/D/E/S Product Manual SECTION 2 Standard operation The main power disconnect for the lift must be in the “on” position for the lift to operate, even on battery power. Both landing doors must be closed and locked for the platform to operate. -
Page 12: Manual Lowering
Manual lowering The manual lowering pull handle can be used to lower the platform when power is unavailable. It is operated from upper landing (16E, 16S) or lower landing (16C, 16D). 1. 16E, 16S: a. Locate pull handle at the upper landing, near the base of the upper landing door (See Figure 3, 16E/16S). -
Page 13: Manually Unlocking Doors
The service override controls are an up and down button on a hand-held pendant to be connected to the lift only when needed. The service override controls are only intended for use by Ascension dealers and authorized service companies. -
Page 14: Basic Maintenance And Troubleshooting
CLARITY 16C/D/E/S Product Manual SECTION 3 SECTION 3 Basic maintenance and troubleshooting Routine maintenance The owning facility is responsible for the proper maintenance of the lift. The following checks must be performed every six (6) months: 1. Verify the operation of the lift per Section 2. -
Page 15: Advanced Troubleshooting
CLARITY 16C/D/E/S Product Manual SECTION 4 SECTION 4 Advanced troubleshooting Advanced troubleshooting Troubleshooting in this section is to be performed by a licensed service technician. See Section 3.2 for basic troubleshooting before contacting a licensed service technician. Problem Possible Cause... -
Page 16: Mechanical Disassembly And Repair
CLARITY 16C/D/E/S Product Manual SECTION 5 SECTION 5 Mechanical disassembly and repair Safety procedures The repairs in this section are to be performed by a skilled technician who has experience working on electromechanical systems and is well versed in standard industrial safety practices and procedures. -
Page 17: Removing The Fascia Panels
CLARITY 16C/D/E/S Product Manual SECTION 5 Removing the fascia panels Most of the functional components inside the machinery cabinet can be accessed by removing the bottom fascia panel while the platform rests at the lower landing. CRUSHING AND SHEARING HAZARDS EXIST WHILE... -
Page 18: Removing The Upper Covers (16E, 16S)
CLARITY 16C/D/E/S Product Manual SECTION 5 Removing the upper covers (16E, 16S) The upper covers form the insides of the side posts at the upper landing and support the upper door and strike. Removal of these covers grants access to the upper terminal switch, creep switch, and upper door interlock switch. -
Page 19: Mechanically Blocking The Platform
Most repairs on the Clarity lift can be accomplished with the platform resting at the lower landing. Ascension recommends against working under the raised platform unless it is necessary to do so. Any time work will be performed under the platform, it must first be blocked. -
Page 20: Hydraulic Drive System
CLARITY 16C/D/E/S Product Manual SECTION 5 Hydraulic drive system 5.5.1 Description The hydraulic system includes the hydraulic power unit, two (2) lifting cylinders, a shutoff valve, and the tubing connecting the components. The hydraulic power unit includes an integrated motor, pump, reservoir, and manifold with two solenoid valves: ... - Page 21 CLARITY 16C/D/E/S Product Manual SECTION 5 5.5.3 Measure and adjust relief pressure The hydraulic system is equipped with a pressure gauge that should read between 150- 450 psi during normal operation. The relief pressure is factory set at 600 psi, which should be the correct setting for most applications.
-
Page 22: Platform Safeties
CLARITY 16C/D/E/S Product Manual SECTION 5 Platform safeties The platform is equipped with mechanical devices designed to prevent it from falling in the event of failure of the lifting chains. These devices are called the platform safeties, and are located on both sides of the platform where it engages the guide rails. -
Page 23: Slack Chain Switches
CLARITY 16C/D/E/S Product Manual SECTION 5 Slack chain switches The two (2) slack chain switches are cable-pull type switches with a manual reset. The switches are mounted on each side of the machinery cabinet base. Each contains electrical contacts that are closed as long as there is tension in the platform suspension chains, allowing for normal operation of the lift. -
Page 24: Lower Terminal Switch
CLARITY 16C/D/E/S Product Manual SECTION 5 Lower terminal switch The lower terminal switch is a rotary lever limit switch mounted at the bottom of the machinery cabinet base on the right side. Upon arrival at the lower landing, the normally closed (NC) contacts open to stop the platform, and the normally open (NO) contacts close to apply power to unlock the lower landing door. -
Page 25: Upper Terminal Switch And Creep Switch
CLARITY 16C/D/E/S Product Manual SECTION 5 Upper terminal switch and creep switch The upper terminal switch is a rotary lever limit switch mounted at the top of the right guide rail (as viewed from the lower landing). It contains two sets of contacts: a... -
Page 26: Door Lock Switches
CLARITY 16C/D/E/S Product Manual SECTION 5 5.10 Door lock switches 5.10.1 Description The door at each landing is equipped with a safety interlock switch that mechanically latches the door whenever the platform leaves the landing and electrically monitors whether the door is open, shut and unlocked, or locked shut. -
Page 27: Traveling Cable
CLARITY 16C/D/E/S Product Manual SECTION 5 5.11 Traveling cable The traveling cable connects the electrical devices on the platform to the control equipment inside the machine cabinet. As the platform moves, the traveling cable flexes and follows it. Typical cable routing is shown in Figure 8 (upper fastening position depends on total travel height). -
Page 28: Platform Operating Station
CLARITY 16C/D/E/S Product Manual SECTION 5 5.12 Platform operating station The platform operating station contains an operating switch, emergency stop, and control lighting. It may optionally contain a hands-free phone and/or keyed operation. The front plate is attached at the back with four (4) fasteners (10-24 binding barrels). - Page 29 CLARITY 16C/D/E/S Product Manual SECTION 5 5.13.2 Runway enclosure windows The windows in the runway enclosure are inserted into the surrounding window frame members and cannot be removed without first removing the top horizontal window frame member. The horizontal members are interlocked with the vertical enclosure corner posts and can only be removed vertically (not horizontally).
- Page 30 CLARITY 16C/D/E/S Product Manual SECTION 5 5.13.3 Platform windows Each window in the platform side assembly is pressed into a slot in the top stainless steel rail, slid into channels in the side frame, and fixed by attachment of the stainless rail to the side frame.
-
Page 31: Disassembling And Detaching The Platform
CLARITY 16C/D/E/S Product Manual SECTION 5 5.14 Disassembling and detaching the platform The platform consists of three main subassemblies. The platform base is a steel weldment comprising the floor and lower sections of the sides. It connects to the platform brackets at the back and bears all of the structural loads imposed during operation. - Page 32 OFF. 5.14.3 Detach the platform base This step is necessary only when performing certain major repairs. Call Ascension at 1- 800-459-0400 for service recommendations. 1. Manually lower the platform until it is resting firmly on the ground.
-
Page 33: Runway Enclosure (16E, 16D)
CLARITY 16C/D/E/S Product Manual SECTION 5 5.15 Runway enclosure (16E, 16D) The runway enclosure is comprised of the lower landing door and window panels that surround and enclose the lift for its full length of travel. It serves to prevent unintended access during operation. - Page 34 CLARITY 16C/D/E/S Product Manual SECTION 5 Components of the runway enclosure are fastened from the inside. It may help to operate the platform in order to gain access to these fasteners. To disassemble: 1. Remove the upper enclosure cover over each enclosure side to be disassembled by removing the two (2) screws fastening it to the vertical corner posts.
-
Page 35: Electrical Testing And Adjustment
CLARITY 16C/D/E/S Product Manual SECTION 6 SECTION 6 Electrical testing and adjustment Access to the lift controller The lift controller is located at the bottom of the machine cabinet. It is accessed by removing the bottom fascia panel (Section 5.2) and the cover to the electrical box. -
Page 36: Controller Diagnostic Lights
CLARITY 16C/D/E/S Product Manual SECTION 6 Controller diagnostic lights The circuit board controlling the lift is equipped with LED lights for diagnostic purposes. The following diagram shows the location of each diagnostic light: Figure 16: Controller diagnostic lights Each input light illuminates when the contacts of the associated switch are closed. - Page 37 CLARITY 16C/D/E/S Product Manual SECTION 6 6.2.1 Input, output and controller status lights IO/status light Illuminated means… Controller status OK Power is connected and controller is initialized. Flashes when a fault is detected, locking out all other functions Controller status until reset.
- Page 38 CLARITY 16C/D/E/S Product Manual SECTION 6 6.2.2 Safety series Lights in the “safety series” indicated in the upper left corner show the state of the safety switches. All of these switches must be closed to enable UP or DOWN operation of the platform.
-
Page 39: Removing The Controller Subpanel
CLARITY 16C/D/E/S Product Manual SECTION 6 Removing the controller subpanel The controller subpanel is the sheet metal component that the controller and other components are mounted to within the electrical box. To remove, unfasten the four (4) screws, one at each corner. For complete removal, disconnect the externally connected wires at either end. -
Page 40: Testing The Power Supply
CLARITY 16C/D/E/S Product Manual SECTION 6 Testing the power supply The 27VDC power supply is located behind the controller circuit board inside the electrical box. Its terminals are visible below the circuit board, just above the enclosure grounding screw. See Figure 15 on page 35. -
Page 41: Testing The Controller Fuse
To fit properly, the two (2) ring terminals on the right stud must be installed back to back. 7. Replacement fuses may be purchased from Ascension (P/N 193387) or a Littelfuse distributor. The manufacturer part number is 0298080.ZXEH. -
Page 42: Testing The Ssr (Motor Relay)
CLARITY 16C/D/E/S Product Manual SECTION 6 6.10 Testing the SSR (motor relay) The SSR (solid-state relay) is used to switch power to the motor. The SSR is mounted on a heat sink located inside the electrical box to the left of the circuit board. -
Page 43: Adjusting Alarm Volume
CLARITY 16C/D/E/S Product Manual SECTION 6 8. Determine whether the SSR is functional: a. If the test bulbs illuminate when the 9V battery is connected and turn off when the 9V battery is disconnected, the SSR is working properly. b. If the test bulbs are always illuminated, even when the 9V battery is disconnected, the SSR must be replaced. -
Page 44: Adjusting The Illumination
CLARITY 16C/D/E/S Product Manual SECTION 6 6.13 Adjusting the illumination The Clarity is provided with standard platform and controls illumination. The brightness and mode of operation may be adjusted using the trimpot and DIP switches on the controller circuit board (for identification see Figure 15 on page 35). -
Page 45: Adjusting/Testing The Optional Power Door Operators
CLARITY 16C/D/E/S Product Manual SECTION 6 6.14 Adjusting/testing the optional power door operators Open Sesame (model 233) operator operation (open angle, hold open time, etc.) can be adjusted by following the instructions provided in the Open Sesame instruction booklet which can be obtained from the manufacturer’s website. Condensed instructions are on the inside of the operator cover. -
Page 46: Electrical Diagram
CLARITY 16C/D/E/S Product Manual SECTION 6 6.15 Electrical diagram (Color electrical diagram provided in document box). 117020 Rev C... - Page 47 CLARITY 16C/D/E/S Product Manual SECTION 6 117020 Rev C...
- Page 48 CLARITY 16C/D/E/S Product Manual SECTION 6 117020 Rev C...
- Page 49 CLARITY 16C/D/E/S Product Manual SECTION 7 SECTION 7 Inspections 7.1 System specifications 2:1 chain hydraulic, two parallel cylinders Drive system Two lifting chains per cylinder 400 psi Typ. working pressure 3000 psi Min. component rated pressure Rod diameter (2x) 1.25 inches, solid Cylinder barrel diameter (2x) 2.38 inches...
- Page 50 CLARITY 16C/D/E/S Product Manual SECTION 7 2. Load platform as needed for testing. 3. With the lower door open, use the override controls to raise the platform as shown. RISK OF CRUSHING UNDER PLATFORM. NEVER GO UNDER WARNING THE PLATFORM UNLESS IT IS SUITABLY BLOCKED.
- Page 51 CLARITY 16C/D/E/S Product Manual SECTION 7 7. Retrieve wooden planks from under platform using a broom or other reaching tool. 8. Use service override controls to raise platform, automatically disengaging the platform safeties. 9. Use service override controls to lower platform to lower landing.
- Page 52 16C/D/E/S PRODUCT MANUAL Printed in the U.S.A. 117020 Rev C...
Need help?
Do you have a question about the 16D and is the answer not in the manual?
Questions and answers