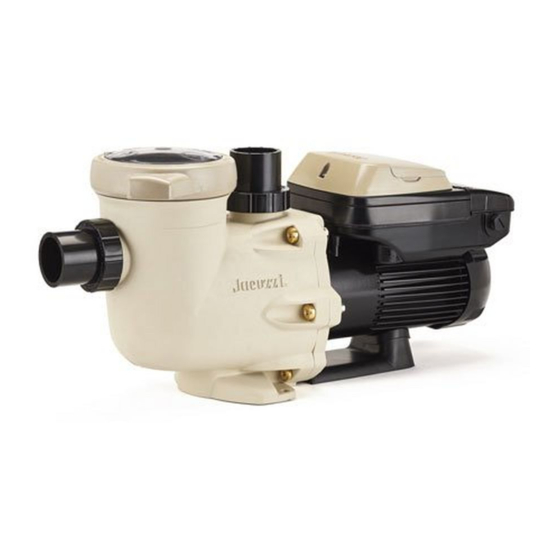
Summarization of Contents
Important Safety Instructions
Child Safety and Supervision
Do not permit children to use or climb on the product. Closely supervise children at all times.
Pump Intended Use and Location
Pump intended for permanently installed pools; do not use with storable pools. Ensure adequate ventilation.
Component Lifespan and Inspection
Components have a finite life and should be inspected frequently and replaced every ten years.
Electrical Shock Hazards
All wiring must conform to codes. Use GFCI protection and ensure proper grounding and bonding.
Suction Entrapment Hazards
Damaged or missing suction outlet covers can cause severe injury or death due to entrapment.
Entrapment Hazard Reduction
Install multiple suction outlets, ensure proper spacing, and follow APSP/CPSC guidelines.
Hazardous Pressure Warnings
Circulation systems operate under hazardous pressure. Stand clear during start-up and follow safety instructions.
Separation Hazard Warnings
Ensure proper assembly and secure strainer cover. Do not operate if components are damaged or missing.
Fire and Burn Hazard Precautions
Motors operate at high temperatures. Isolate from flammable structures to prevent fires and burns.
Installation Instruction Importance
Failure to install according to defined instructions may result in severe personal injury or death.
General Information and Product Dimensions
Product Dimensions
Provides physical dimensions of the JVS185S and JVS270S pumps for installation purposes.
Energy Efficiency Overview
Benefits of Low-Speed Operation
Discusses benefits of low-speed operation such as energy savings, improved filtration, and quieter operation.
Installation and Wiring
Pump Location Guidelines
Guidelines for selecting an appropriate location for the pump, considering proximity to the pool and drainage.
Pump Mounting Instructions
Instructions for securely mounting the pump on a level, rigid base to meet local and national codes.
Pipe Sizing and Flow Rate Chart
Provides recommended system flow rates based on pipe size and required straight pipe length.
Plumbing Connections and Fittings
Details on using PTFE tape for connections, avoiding pipe dope, and using fewest possible fittings.
Electrical Requirements and Safety
General electrical requirements and warnings, including conformance to NEC and grounding.
Electrical Specifications and Circuit
Information on connecting the pump to a 15 amp branch circuit and providing a disconnecting means.
Voltage Considerations
Guidelines on acceptable voltage ranges to prevent overheating and ensure component longevity.
Grounding and Bonding Procedures
Procedures for permanently grounding the pump and bonding it to the pool structure for electrical safety.
General Wiring Instructions
Instructions for permanent connection to a circuit, using circuit breaker as master On-Off switch.
Remote Control and Operation
Describes operation via built-in timers, third-party controls, or Hayward pool controls.
Digital Control Interface Orientation
Instructions on how to rotate the digital control interface to one of four desired positions.
Interface Wall Mounting Procedure
Step-by-step guide for wall mounting the digital control interface using an optional mounting kit.
Installation Procedure
Input Power Wiring Diagram
Diagram and notes for connecting the input power supply to the pump's terminal block.
Wiring Diagrams
Hayward Automation Control Wiring
Wiring details for connecting the pump to Hayward pool controllers like OmniLogic or ProLogic.
External Relay Speed Control Wiring
Wiring for third-party controls to select pump speeds via relay contacts.
Wall Mounted Digital Control Interface Wiring
Wiring instructions for connecting the wall-mounted digital control interface to the motor drive.
Remote Stop Switch Wiring
Wiring diagram for connecting an optional remote stop switch to the pump's low voltage terminals.
Startup & Operation
Prior to Start-Up
Checks and precautions to perform before initial pump startup, including pressure testing.
Starting and Priming the Pump
Procedure for filling the strainer housing and starting the pump to achieve priming.
User Interface Button Functions
Overview of the buttons and their functions on the pump's digital user interface.
Menu Navigation Structure
Outlines the structure of the pump's configuration, timer, preset speed, and diagnostics menus.
Initial Pump Startup Configuration
Steps for initial configuration of the variable speed drive after plumbing and wiring.
Configuration Menu Settings
Step-by-step guide for configuring settings like language, time, speeds, and passwords.
Timer Menu Programming
Instructions for programming daily timers to control pump speed and operation times.
Preset Speed Setup
Guide for setting up and naming up to four preset pump speeds.
Diagnostic Menu Functions
Accessing and viewing firmware versions, serial numbers, and event logs for troubleshooting.
Stop/Resume Pump Control
How to use the Stop/Resume button to pause and restart pump operation.
Quick Clean Operation Mode
Information on the Quick Clean mode for vacuuming the pool.
Remote Stop Activation
Note on how the pump responds when the remote stop switch is activated.
Maintenance
Routine Maintenance Tasks
Includes cleaning strainer basket, keeping motor clean, and inspecting shaft seals.
Storage / Winterization
Storing the Pump for Winter
Steps for safely draining and storing the pump to prevent damage from freezing.
Shaft Seal Change Instructions
Removing the Motor Assembly
Procedure for removing the motor assembly from the pump/strainer housing.
Removing the Impeller
Steps to remove the impeller and impeller screw from the motor shaft.
Removing the Ceramic Seat
Instructions for removing the seal plate and the ceramic seat from the motor.
Seal Installation
Guide for cleaning, lubricating, and installing the new shaft seal components.
Replacing Impeller and Diffuser
Procedure for installing the impeller, impeller ring, and diffuser.
Reassembling Motor Assembly
Instructions for reassembling the motor assembly with the diffuser into the pump housing.
Replacement Parts
Parts Diagram
Exploded view diagram illustrating all pump components with reference numbers.
Parts Listing
Detailed list of all replacement parts with part numbers, descriptions, and quantities.
Troubleshooting
General Problems and Solutions
Troubleshooting common issues like motor not starting, shutting off, humming, or pump not priming.
System Error Codes and Messages
Explanation of system error codes and their corresponding troubleshooting steps.
Warranty Information
Warranty Registration Details
Instructions for recording installation date, pressure, and pump model for warranty purposes.
Product Registration
Retaining Warranty Certificate
Advice to retain the warranty certificate in a safe and convenient location for records.
FCC Compliance Statement
FCC Compliance Requirements
Details on device compliance with FCC rules for radio frequency energy and potential interference.


Need help?
Do you have a question about the JVS270S and is the answer not in the manual?
Questions and answers