Table of Contents
Advertisement
Quick Links
Manuel du propriétaire
Owner's Manual
ELEMENT
ELEMENT
™
™
P P H H A A R R M M A A C C I I E E P P O O R R T T E E T T R R I I P P L L E E / / T T R R I I P P L L E E D D O O O O R R C C A A B B I I N N E E T T
*
18
10
23
2
17
21
5
6
13
15
14
20
12
9
11
19
7
22
3
10
1
18
4
16
8
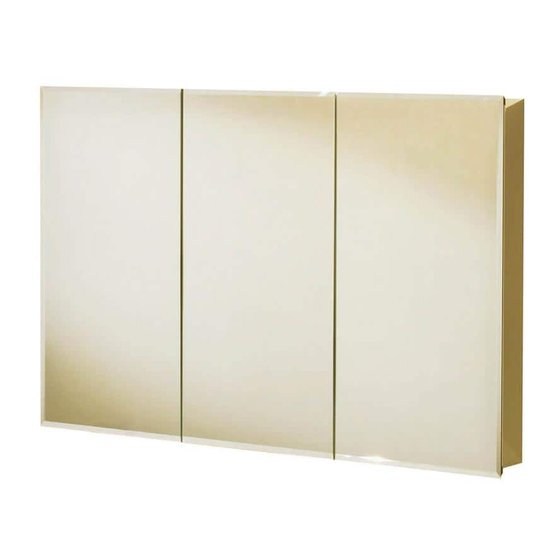
Illustration du cabinet TV3031, #126531 installé en surface
Picture of the TV3031, #126531 cabinet surface mounted
Veuillez lire les instructions avant de commencer
*Lors d'une installation avec un luminaire, veuillez vous référez au guide d'inst alla-
tion fourni avec le luminaire en guise de complément.
Please read instructions before proceeding
*When installing a light fixture with your cabinet, please refer to your light fixture
installation guide to complete the installation.
Advertisement
Table of Contents

Related Manuals for MAAX TV4831


Summary of Contents for MAAX TV4831
- Page 1 P P H H A A R R M M A A C C I I E E P P O O R R T T E E T T R R I I P P L L E E / / T T R R I I P P L L E E D D O O O O R R C C A A B B I I N N E E T T Illustration du cabinet TV3031, #126531 installé en surface...
- Page 2 ILLUSTRATION DES PIÈCES ILLUSTRATION OF COMPONENTS Drawings not to scale Dessins non à l’échelle SAC DE QUINCAILLERIE (10081400) HARDWARE BAG (10081400) SAC DE QUINCAILLERIE (10081374) HARDWARE BAG (10081374) OU/OR SAC DE QUINCAILLERIE (10081410 blanc / 10081403 gris) HARDWARE BAG (10081410 white / 10081403 gray) SAC DE QUINCAILLERIE (10081375 blanc / 10019009 gris) HARDWARE BAG (10081375 white / 10019009 grey) Des changements peuvent être apportés aux produits sans préavis.
-
Page 3: Avant De Débuter
Ruban de mousse adhésive (4 par paquet) Mirror tape pads (4 per pack) Tablette (Modèles TV3031 et TV3631) Glass shelves (Models TV3031 and TV3631) Glass shelves (TV4831 model ends only) Tablette (Extrémitées du modèle TV4831 seulement) Tablette (Centre du modèle TV4831 seulement) -
Page 4: Products Description
PRODUCT NAME OVERALL DIMENSIONS (W X H X D) WALL OPENING (W X H X D) 126531 TV3031 30” X 31” X5” 28 3/8” X 29 3/8” X 3 7/8” 762mm X 787,4mm X 127mm 720,7mm X 746,1mm X 98,4mm... -
Page 5: Guide D'installation
Guide d’installation Installation Instruction ÉTAPE 1 Installation encastrée STEP 1 - Recess mount installation Deux montants de bois dans le mur sont Arrange the wall opening with wall studs on nécessaires, un de chaque côté du boîtier (23). both sides of the cabinet (23). Déterminez l’emplacement du cabinet et préparez Prepare wall opening to the required dimensions l’ouverture dans le mur aux dimensions requises... -
Page 6: Step 2 - Surface Mount Installation
ÉTAPE 2 Installation en surface STEP 2 - Surface mount installation Déterminez l’emplacement du cabinet. Nivelez et Position the cabinet at the desired emplacement. marquez le dessous du boîtier (23). La distance Level and make a mark underneath the cabinet entre le plus haut point de la robinetterie et le (23). - Page 7 ÉTAPE 3 STEP 3 - Side mirrors installation - Installation des miroirs latéraux Seulement dans le cas d’un installation du Only in a surface mounting installation. cabinet en surface. Fixez deux supports de miroir (4) de chaque Fix two side mirrors brackets (4) on each côté...
- Page 8 ÉTAPE 4 - Installation des charnières STEP 4 - Hinges installation **IMPORTANT** Manipulez les portes avec **IMPORTANT** Handle doors with care. soin. Enlevez délicatement les mousses protec- Carefully remove the foam end caps from the trice aux extrémités des portes (5,6,7).
-
Page 9: Étape 5 - Installation Des Portes
ÉTAPE 5 - Installation des portes STEP 5 - Doors installation **IMPORTANT** À l’aide illustrations **IMPORTANT** Before starting doors ci-dessous, déterminez type plaque installation, refer to the ilustrations below to montage fournie avec votre pharmacie determine which type mounting plate avant débuter l’installation... - Page 10 ÉTAPE 6 - Ajustement des portes STEP 6 - Doors adjustment Important! Ne pas desserrer une de ces vis Important! Ensure the door is being held sans retenir la porte. Fermez lentement la prior to loosening any of the screws men porte pour l’ajuster.
- Page 11 ÉTAPE 7 - Installation des tablettes STEP 7 - Shelves installation Insérez les vis (15) sur les butoirs des sup- Install screw (15) into shelf stop (14) only one ports à t ablette (14). Serrez environ un tour full turn. **ATTENTION** Screw must not complet.
- Page 12 NETTOYAGE CLEANING Les nettoyeurs ménagers liquides doux Mild liquid household cleaners will keep sont suffisants pour garder la surface pro- the metal surface bright and clean. Rinse pre et brillante. Rincez à fond et asséchez well and dry with a clean cloth. avec un chiffon propre.
-
Page 13: Limited Warranty - United States
LIMITED WARRANTY — CANADA MAAX Bath Inc. offers express limited warranty on each of its products. This warranty extends only to the original owner/end-user for personal household use. For commercial uses, additional limitations apply. For accessing product Limited warranty please visit: www.maax.com/ca-warranty... - Page 16 Technical Services / Service technique / Servicio técnico T. 1 877 GET-MAAX (1 877 438-6229) F. 1 888 361-2045 10049035_2021-04-26...
Need help?
Do you have a question about the TV4831 and is the answer not in the manual?
Questions and answers