
Related Manuals for BIO UV HOME2


Summary of Contents for BIO UV HOME2
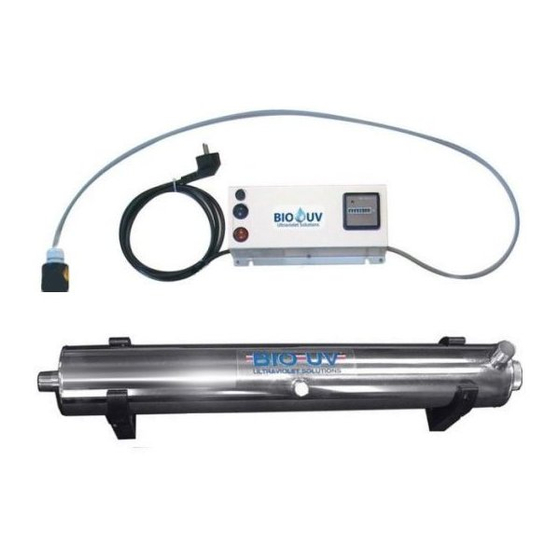
- Page 1 STERILIZERS in the HOME range INSTALLATION AND MAINTENANCE MANUAL HOME anglais Copyright BIO-UV Page 1...
- Page 2 UVPS Filiale de BIO-UV COMPLIANCE CERTIFICATE CERTIFICATE OF CONFORMITY BIO-UV, and this subsidiary, Hereby declares that the following products: HOME range comply to the following standards: NF EN 60598-1 + A11 (2001) CEM : EN55015 (Ed.00)+ A1(Ed.01) Number and year of EC stamp: CG-03-006 du 29/01/2003 LS-03-51003/NL du 20/02/03 Benoît GILLMANN...
-
Page 3: Table Of Contents
We thank you for choosing a sterilizer from the HOME range. Our equipment has been designed to give you reliable and safe operation for many years to come. The sterilizers in the DBP range have been designed for speed and ease of installation. Their design also makes them easy to maintain. -
Page 4: Technical Characteristics
A. TECHNICAL CHARACTERISTICS MAX FLOW RATE at 40 mJ/cm² 2,2 m3/h* 3,2 m3/h* REACTEUR Material Stainless steel Stainless steel 304L 304L Diameter 90 mm 90 mm Lenght 446 mm 717 mm Connection type Standard connection 3/4'' 3/4'' Finition Mirror polishing Mirror polishing Maximal Pressure 6bars... -
Page 5: Warnings And Safety
B. WARNINGS AND SAFETY BIO-UV sterilizers are ready to install, no work is required inside the reactor. READ ALL THE INSTRUCTIONS IN THIS MANUAL BEFORE SWITCHING ON THE BIO-UV APPLIANCE. INSTALLATION RECOMMANDATIONS The reactor must be installed in a technical room, protected from light and rain. The reactor must be installed in a dry zone. -
Page 6: Installation Type
C. INSTALLATION TYPE Flow Filter 60 Filter 10 In the presence of water softener, install the HOME lower down it. D. STARTING UP Check that the electrical connection is compliant. Check that the top of the equipment is correctly positioned. Having checked the fitting of the BIO-UV sterilizer, Carry out an INJECTION: Place a disinfectant product (for example chlorine pellets or active oxygen) -
Page 7: Electrical Diagrams
E. ELECTRICAL DIAGRAMS HOME 2 HOME 3 REPERE REFERENCE DESIGNATION QUANTITE ELE000839 Support of fuse 1 bis ELE001837 Fuse 5x20 1A ELE000770 ON/OFF SWITXH BAL000024 Ballast 33 W ELE002652 UV lampe indicator light BAL000025 Ballast 55W ELE000026 Hour counter HOME anglais Copyright BIO-UV Page 7... -
Page 8: Blow Up View, Designation
F. BLOW UP VIEW, DESIGNATION REPERE REFERENCE DESIGNATION QUANTITE VIS004279 Protection ELE002603 Socket USI004134 PIE000659 Flat washer LPE000003 UV lamp 33W HO (HOME2) 5 bis LPE000004 UV lamp 55W HO (HOME3) JTS000100 O Ringd25 QUA000016 Quartz Sleeve d25 ACC00410 Drain Plug JTS000230 O Ring HOME anglais... -
Page 9: Clearance Dimensions
G. CLEARANCE DIMENSIONS HOME 2 446 mm 717 mm HOME 3 130 mm 130 mm H. CHANGING UV LAMPS, QUARTZ TUBE AND O-RING SWITCH OFF the reactor, CUT the POWER source and EMPTY IT. Remove the cover (33). Take hold of the 4-pin connector (28) and gently withdraw the lamp upwards. - Page 10 Insert a thumb or finger in the sleeve and gently withdraw it until the O-ring comes free from its housing. Take hold of the quartz sleeve and extract it fully MAKING SURE that you keep it correctly aligned with the axis. Clean the quartz sleeve using acid or spirit vinegar or change it if necessary.
-
Page 11: Assembly Of The Uv Pro3 Monitor And Sensor Option
I. ASSEMBLY OF THE UV PRO3 MONITOR AND SENSOR OPTION This PRO3 monitor will indicate the drop in intensity of lamps during their lifespan and can also provide warning of fouling of the quartz duct or the UV-C radiation measurement cell. 1. - Page 12 WARRANTIES Units in the BIO-UV range are guaranteed subject to the following conditions: - 5 years for the stainless steel reactor (materials and welding) except in the event of use in a highly corrosive environment (brackish or very salty, e.g.: seawater) - 2 years for all other components, excepting the UV lamp (consumable)
Need help?
Do you have a question about the HOME2 and is the answer not in the manual?
Questions and answers