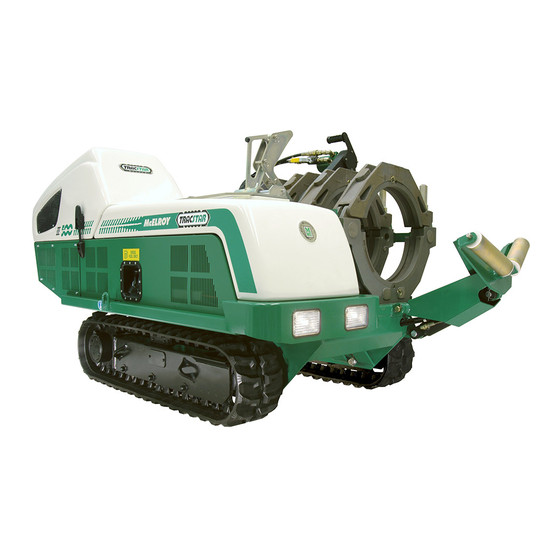

Related Manuals for McElroy 1648


Summarization of Contents
Hydraulic Manifold Block
Carriage Control Valve
Explains the function of the carriage control valve for directional movement of the carriage.
Pressure Gauge
Describes the location and function of the pressure gauge on the manifold.
Selector Valve
Details the selector valve's role in choosing pressure reducing valves for different functions.
Facing Pressure Adjustment
Explains the top valve for adjusting facing pressure, typically 3-7 Bar.
Heating Pressure Adjustment
Describes the middle valve for heating pressure, typically 0 Bar or adjusted for drag.
Fusion Pressure Adjustment
Notes the bottom valve is for adjusting fusion pressure, which must be determined.
Check Hydraulic Pressure
Heating Pressure Setting
Setting the pressure reducing valve for heating mode, considering drag pressure.
Fusion Pressure Setting
Setting fusion pressure, referencing the Fusion Pressure Calculator.
Determine Drag Pressure
Procedure to determine drag pressure by moving carriage and adjusting heating valve.
Calculate and Set Fusion Pressure
Combining calculated fusion pressure with drag pressure for the bottom valve.
Adjust Heating Pressure for Drag
Setting heating pressure to maintain pipe end contact during heating.
Fusion Pressure Calculator
Interfacial Pressure (IFP) Definitions
Defines Interfacial Pressure (IFP) and its relation to gauge pressure.
Using the Fusion Pressure Calculator
Step-by-step guide on how to operate the Fusion Pressure Calculator.
Determining Fusion Pressure Formula
Provides definitions and the formula for calculating fusion pressure.
Fusion Pressure Tables & TEPA
Total Effective Piston Area (TEPA) Data
Table listing TEPA values for different fusion machine models and cylinder types.
Facing The Pipe Procedure
Prepare and Position Facer
Steps for pivoting, securing, and positioning the facer.
Execute Facing Cut
Moving the carriage to perform the facing cut.
Adjust Facing Pressure
Adjusting facing pressure if the facer stalls during cutting.
Facing Heavy Wall Pipe Considerations
Advice on increasing pressure for heavy wall pipes.
Facing with High Drag Pressure
Procedure for facing when drag pressure exceeds 20 Bar.
Remove Facer After Cutting
Steps to bottom out carriage and remove the facer.
Remove Facer and Clean Pipe Ends
Store Facer
Pivoting the facer to its storage position.
Clean Faced Pipe Ends
Removing chips and cleaning faced pipe ends carefully.
Align Pipe Ends
Moving carriage to butt pipe ends and check alignment.
Alignment Safety Warning
Safety warning against using fingers to check alignment due to pressure and slippage risk.
Correct Pipe Misalignment
Adjusting the inner high side jaw to correct pipe misalignment.
Alignment Adjustment Principle
Principle of tightening the higher side jaw to correct alignment.
Secure Aligned Pipe
Tightening outside clamps to secure properly aligned pipe against slippage.
Reinstall Facer for Recut
Reinstalling facer if adjustments were made, to repeat facing.
Final Facer Removal
Bottoming out carriage and removing facer.
Check for Slippage
Bringing pipe ends together under fusion pressure to check for slippage.
Misalignment Tolerance
Notice regarding maximum 10% wall thickness misalignment for full joint strength.
Check Heater Temperature
Heater Temperature Caution
Caution regarding incorrect heating temperatures causing poor joints.
Recommended Heater Temperatures
Specifies minimum, optimum, and maximum heater surface temperatures for butt fusion.
Dial Thermometer Use
Guidance on using the dial thermometer as a reference for internal temperature.
Inserting the Heater
Heater Safety: Hazardous Environments
Critical safety warning about heater use in hazardous environments due to explosion risk.
Heater Handling in Hazardous Areas
Procedure for handling heaters in hazardous environments, including temperature management.
Clean Heater Surfaces
Instruction to use a clean non-synthetic cloth for cleaning heater adapter surfaces.
Inspect Heater Plates
Checking heater plates for damage, buildup, or imperfections that affect fusion quality.
Verify Heater Temperature
Verifying heater temperature using the dial thermometer.
Insert Heater Between Pipe Ends
The action of inserting the heater into position between the pipe ends.
Heating The Pipe
Initial Heater Contact and Melt Start
Moving carriage for initial heater contact and monitoring for melt indication.
Pressure Stabilization During Heating
Shifting to center position for pressure stabilization, adjusting for drag if needed.
Heating Phase Completion
Returning carriage to neutral, pipe ends heating at zero pressure or drag compensation.
Fusing The Pipe
Fusing Sequence Caution
Caution regarding sequence, melt pattern, and cooling time affecting joint quality.
Determine Melt Bead Size
Using the melt bead size chart to determine proper size after melt pattern is established.
Prepare for Heater Removal
Shifting carriage to neutral position before heater removal.
Engage Fusion Pressure
Shifting selector valve to fusion position to apply pressure.
Remove Heater
Moving carriage to remove the heater, using the stripper bar to help release it.
Inspect Fused Ends and Apply Fusion Pressure
Inspecting ends for flatness, smoothness, and applying fusion pressure if acceptable.
Observe Dwell/Transfer Times
Notice to be careful not to exceed approximate dwell/transfer times during fusion.
Unacceptable Concave Melt Appearance
Cause of Concave Melt
Identifies heating under pressure as the cause of concave melt appearance.
Action for Concave Melt
Notice that concave melt is unacceptable and requires stopping and restarting the process.
Cooling The Fusion Joint
Cool to Touch Method
Method of cooling the joint until it is cool to the touch.
Cooling to Touch Safety Caution
Safety caution for the cool-to-touch method, advising against finger contact.
Cooling Time Guidelines
Table providing cooling times based on wall thickness at 23°C.
Pyrometer Temperature Verification
Using a pyrometer to verify weld bead temperature against pipe/fitting temperature.
Cooling Time Factors
Note that heavier wall pipes require longer cooling times.
Post-Fusion Cooling Period
Requirement for an additional 30 minutes cooling outside the machine before handling.
Raise and Move Joined Pipe
Use Pipe Lifts
Instruction to use pipe lifts to raise the joined pipe.
Prepare for Next Joint
Pulling pipe through and preparing for the next fusion, including inspection.
Joint Inspection and Redo
Inspecting the joint and referring to troubleshooting guides if redo is necessary.
Butt Fusion Joint Troubleshooting Guide
Inspect the Fusion Joint
Guidance on inspecting the fusion joint for proper bead formation.
Golden Rule: Cut and Redo
The primary rule for troubleshooting: if uncertain, redo the joint.
Double Bead Proportions and Shape
Details on correct double bead width, height, and v-groove depth.
Fitting Side Bead Appearance
Notes on acceptable irregular appearance of fitting side beads when fusing to molded fittings.
Internal Bead Requirement
Clarification that internal bead rollover is not required.
Troubleshooting Guidelines and Requirements
Emphasizes guidelines and lists specific requirements for joint quality.
Troubleshooting Attributing Factors
One Bead Larger Than Other
Identifies misalignment, clamp slip, or worn equipment as causes for uneven bead size.
Bead Not Rolled Over
Attributes bead not rolling over to shallow v-groove, insufficient heating/joining force, or deep v-groove issues.
Squarish Outer Bead Edge
Links squarish outer bead edge to pressure during heating.
Excessive Double Bead Width
Attributes excessive bead width to overheating or excessive joining force.
Flat Top Bead
Links flat top bead to excessive joining force or overheating.
Beads Too Small
Attributes small beads to insufficient heating or joining force.
Beads Too Large
Links large beads to excessive heating time.
Rough Melt Bead Surface
Identifies hydrocarbon contamination as the cause of rough melt bead surfaces.
Deep Double V-Groove
Attributes deep v-groove to excessive joining force, insufficient heating, or pressure during heating.
Non-Uniform Bead Size
Links non-uniform bead size to misalignment, defective heating, worn equipment, or incomplete facing.
Third Bead Appearance
Attributes a third bead to excessive joining force.
Need help?
Do you have a question about the 1648 and is the answer not in the manual?
Questions and answers