
Related Manuals for McElroy Pit Bull 28


Summary of Contents for McElroy Pit Bull 28
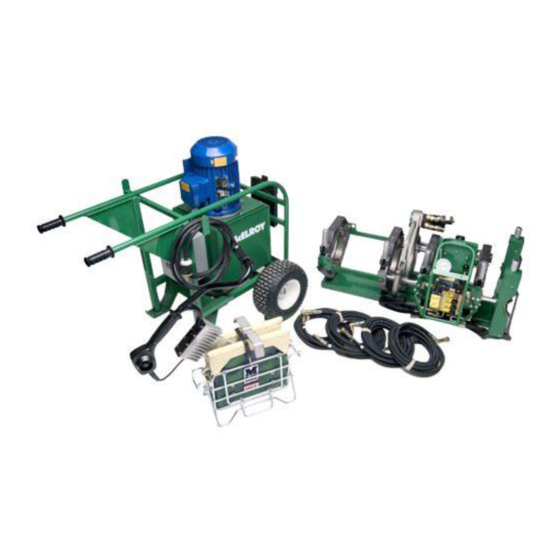
- Page 1 Operator’s Manual Pit Bull ® FUSION MACHINES Original Language: English Manual: T5034102 Revision: H 01/19...
- Page 2 Cancer and Reproductive Harm - www.P65warnings.ca.gov This product and other products could be protected by patents or have patents pending. All the latest patent information is available at patent.mcelroy.com...
- Page 3 The Pit Bull 28 model fuses 2" IPS (63mm) minimum to 8" DIPS (225mm) maximum pipe. The Pit Bull 250 model fuses 2" IPS (63mm) minimum to 250mm maximum pipe.
- Page 4 McElroy or has become damaged McElroy reserves the right to make any changes in or due to misuse, negligence or casualty, or has not been improvements on its products without incurring any operated or maintained according to McElroy’s printed...
-
Page 5: Table Of Contents
Electrical Box........2-6 COPYRIGHT © 2019, 2017, 2015, 2014, 2013, 2012, 2008 McELROY MANUFACTURING, INC. Tulsa, Oklahoma All rights reserved All product names or trademarks are property of their respective owners. - Page 6 Remove 3-Jaw Assembly From the Carriage ....4-1 Remove Facer From Pit Bull 28 and 250 ..... . . 4-2 Remove Facer From Pit Bull 412 and 618 .
- Page 7 Table of Contents Special Operations - Saddle Fusion Procedure Saddle Fusion Procedure for Pit Bull 28CU ..... 5-1 Install Heater Adapters ........5-1 Assure Saddle Will Fit .
-
Page 8: Safety Alerts
Follow all applicable federal, state, local, and industry specific regulations. McElroy Manufacturing, Inc. cannot anticipate every possible circumstance that might involve a potential hazard. The warnings in this manual and on the machine are therefore not all inclusive. -
Page 9: General Safety
Fusion Equipment Safety General Safety Safety is important. Report anything unusual that you notice during set up or operation. LISTEN for thumps, bumps, rattles, squeals, air leaks, or unusual sounds. SMELL odors like burning insulation, hot metal, burning rubber, hot oil, or natural gas. FEEL any changes in the way the equipment operates. -
Page 10: Electric Motors Are Not Explosion Proof
Fusion Equipment Safety Electric Motors are Not Explosion Proof Electric motors are not explosion proof. Operation of these components in an explosive atmosphere without necessary safety precautions will result in ¡PELIGRO! serious injury or death. When operating in an explosive atmosphere, keep pump motor and chassis in a safe area by using hydraulic extension hoses. -
Page 11: Units With Hydraulics
Fusion Equipment Safety Units With Hydraulics It is important to remember that a sudden hydraulic oil leak can cause serious injury, or even be fatal if the pressure is high enough. Escaping fluid under pressure can penetrate the skin causing serious injury. Keep hands and body away from pinholes which eject fluid under pressure. -
Page 12: Crush Points
Fusion Equipment Safety Crush Points Hydraulically operated equipment operates under high pressure and generates extremely high forces. Anything inadvertently caught in the machine will be crushed. Keep fingers, feet, arms, legs, and head out of the machine while operated. Always ensure machine power is off before entering the machine for any reason. -
Page 13: Overview
Overview Theory of Heat Fusion The principle of heat fusion is to heat two pipe surfaces to a designated temperature, and then fuse them together by application of force. This develops pressure which causes flow of the melted materials, which causes mixing and thus fusion. When the thermoplastic material is heated, the molecular structure is transformed into an amorphous condition. -
Page 14: Carriage Assembly
Overview Carriage Assembly The carriage assembly consists of two fixed jaws and two hydraulically operated movable jaws. TX01542-5-6-98 Hydraulic Fluid Reservoir The reservoir is incorporated in the hydraulic power unit. The fluid level should remain visible between the top and bottom of the sight gauge in the side of the reservoir. -
Page 15: Motor And Pump
Overview Motor and Pump The pump is powered by a TEFC motor mounted inside the reservoir. The pump is pressure compensated with an external pressure adjustment. TX02266-1-20-12 Relief Valve The overall system pressure is set with the relief valve mounted on top of the reservoir. -
Page 16: Hydraulic Cylinders
Overview Hydraulic Cylinders HIGH FORCE hydraulic carriage cylinders are painted green. High force cylinders are used when higher interfacial pressures are required, when handling heavy wall pipe, or when large drag factors need to be overcome. MEDIUM FORCE cylinders are painted orange and have approximately half the total effective piston area as High Force cylinders. -
Page 17: Facer
Overview Facer The facer is a McElroy rotating planer-block design. The block rotates on a ball bearing and is chain driven by a hydraulic motor. When fusing 4” and 6” diameter pipe on the 412 or 618 move the facer blades to the inboard position. -
Page 18: Insulated Heater Stand
Overview Insulated Heater Stand The heater should always be stored in the insulated heater stand or blanket for protection of the operator and to minimize heat loss and risk of mechanical damage. TX00363-9-15-94 Electrical Box The start and stop push buttons are located on the front of the electrical box. -
Page 19: Operation
Operation Read Before Operating Before operating this machine, please read this manual thoroughly, and keep a copy with the machine for future reference. Return manual to the protective storage box when not in use. This manual is to be considered part of your machine. TX00401-9-15-94 Setup There are four hydraulic hoses that connect the facer and the... -
Page 20: Connecting Machine To Power
Operation Connecting Machine to Power All electrical equipment and power sources must be located in a non-explosive atmosphere. Failure to do so will result in ¡PELIGRO! serious injury or death. Plug machine’s electrical cord into a proper power source. The reverse phase relay ensures correct rotation of the pump motor so damage to the hydraulic system does not occur. -
Page 21: Prepare Heater
Operation Prepare Heater Heater is not explosion proof. Operation of heater in an explosive atmosphere without necessary safety precautions will result in serious ¡PELIGRO! injury or death. If operating in an explosive atmosphere, heater should be brought up to temperature in a safe environment, then unplugged before entering the explosive atmosphere for fusion. -
Page 22: Outrigger
Operation Outrigger Machines with pivoting facers are equipped with an outrigger. The outrigger is an arm that is retractable and adds support to the carriage assembly when opening the jaws and pivoting the facer away from the carriage. To extend or retract the outrigger, press the locking button near the base of the outrigger and push or pull the arm until the button snaps to the locked position. -
Page 23: Positioning Pipe In Machine
Operation Positioning Pipe In Machine Swing the facer into place. With the carriage control valve lever, move the carriage toward the fixed jaws, while watching the gap at each end of the facer rest buttons. When the pipe is in contact with the facer, this gap indicates the amount of material that will be trimmed from the pipe end. -
Page 24: After Facing
Operation After Facing Turn facer motor off. Move carriage all the way to the right. Center the facer in between the pipe ends to avoid dragging facer stops on the pipe ends. Swing facer to the out position. Clean shavings out of pipe ends and from between the jaws. Do not touch faced pipe ends. -
Page 25: Set Fusion Pressure
Operation Set Fusion Pressure With the selector valve in the down position, the fusion pressure can be set. The theoretical fusion pressure can be calculated using the enclosed fusion pressure calculator. Always add drag pressure to the theoretical fusion pressure. Gauge (Fusion) Pressure = Theoretical Fusion Pressure + Drag Pressure TX03024-10-19-10... -
Page 26: Position Carriage For Heater Insertion
Operation Position Carriage for Heater Insertion Move carriage to the right to open a gap large enough to insert the heater. TX00374-9-15-94 Check Heater Temperature NOTICE: Incorrect heating temperature can result in questionable fusion joints. Check heater plates periodically with a pyrometer and make necessary adjustments. -
Page 27: Heat Pipe
Operation Heat Pipe Shift the selector valve (A) to the center position, and set the heating pressure (if required). If heating pressure is not required, set the pressure reducing valve (B) at its lowest setting, or the drag pressure, whichever is higher. Shift the selector valve (A) to the fusion position and move the carriage control valve (C) to the left to bring pipe ends in contact with the heater. -
Page 28: Opening Movable Jaws
Operation Opening Movable Jaws After the joint has cooled for the pipe manufacturer’s recommended time, shift the carriage control valve to the neutral position. Loosen all clamp knobs, and open the movable jaws. Move the carriage to the right so that the facer is clear of and the right of the fixed jaws of the carriage. -
Page 29: Special Operation - In Ditch
Special Operations - In Ditch Remove 3-Jaw Assembly from the Carriage Remove braces from inner fixed jaw. Remove the four bolts holding the carriage assembly to the skid with the wrench provided. Attach lifting strap as shown and lift the carriage assembly. TX02329-10-25-04 4 - 1... -
Page 30: Remove Facer From Pit Bull 28 And 250
Special Operations - In Ditch Remove Facer From Pit Bull 28 and 250 Loosen facer locking bolts. Lift facer out of the carriage and set on cardboard or wood blocks off of ground. Remove rear guide rod bracket. Attach rear guide rod bracket in the position shown. -
Page 31: Remove Facer From Pit Bull 412 And 618
Special Operations - In Ditch Remove Facer From Pit Bull 412 and 618 Remove rear guide rod bracket. Support the facer with a person or sling so it does not fall once the facer locking bolts are removed. Remove facer locking bolts. Lift facer out of the carriage and set on cardboard or wood blocks off of ground. -
Page 32: Manual Facer Operation
Special Operations - In Ditch Manual Facer Operation Lift as shown. Lock onto back guide rod, then latch on front guide rod. TX01887-11-15-00 4 - 4... -
Page 33: Removing Top Jaws
Special Operations - In Ditch Removing Top Jaws If the carriage is going to be hand carried, or if the carriage needs to be hoisted and slid underneath the pipe, the top jaws need to be removed. Loosen all clamp knobs. Take out the detent pins securing the top jaws and remove the jaws. -
Page 34: Clamp Carriage Assembly To Pipe
Special Operations - In Ditch Clamp Carriage Assembly to Pipe Position carriage assembly on side of the pipe. Lift pipe and slide carriage assembly under pipe. Rotate carriage assembly around to a normal upright position. Attach the top jaws and loosely clamp around pipe. TX00879-2-19-96 4 - 6... -
Page 35: Attach Hydraulic Hoses
Special Operations - In Ditch Attach Hydraulic Hoses There are four hydraulic hoses that connect the facer and the carriage to the hydraulic power unit. The unit must be off to connect or disconnect the hoses. Connect the 3/8" quick disconnects on the hydraulic power unit to the facer and the 1/4"... -
Page 36: Special Operations - Saddle Fusion Procedure
Special Operations - Saddle Fusion Procedure Saddle Fusion Procedure for Pit Bull 28CU The combination unit fuses branch saddles up to 8" DIPS outlet and up to a 9-5/8" diameter base on any size main. IMPORTANT: Optional chain extension kit are available for larger main sizes. -
Page 37: Install Clamping Inserts
Special Operations Saddle Fusion Procedure Install Clamping Inserts Select and install appropriate clamping inserts in the movable jaw(s). TX00457-9-16-94 Attach Carriage Assembly to Main Place the machine on the main. Place a line bolster on main opposite the carriage assembly if required. -
Page 38: Clean Surfaces
Special Operations - Saddle Fusion Procedure Clean Surfaces Clean the pipe in the area the fitting will come in contact. Clean the base of the fitting. Use a 50 or 60 grit utility cloth, scraping tool, or other procedure specified by the pipe manufacturer, fitting manufacturer, or applicable standard. -
Page 39: Prepare Heater
Special Operations - Saddle Fusion Procedure Prepare Heater NOTICE: Incorrect heating temperature can result in questionable fusion joints. Check heater plates periodically with a pyrometer and make necessary adjustments. Refer to the "Maintenance" section of this manual for instructions on how to adjust heater temperature. Check heater surface temperature with a pyrometer. -
Page 40: Remove Heater
Special Operations - Saddle Fusion Procedure Remove Heater Shift the carriage control valve to neutral and move the selector valve to the top position. Open the carriage just enough to remove the heater. Remove the heater. Quickly check for a complete and even melt pattern on the pipe and fitting. -
Page 41: Special Operations - Lifting
Special Operations Lifting Lifting Safety Follow all applicable federal, state, local, and industry specific regulations when lifting. Safety warnings: Do not exceed rated load or lift loads greater than the rated load of the lifting device. Do not operate a damaged or malfunctioning lifting device. Do not lift persons. -
Page 42: Maintenance
Maintenance Preventative Maintenance To insure optimum performance, the machine must be kept clean and well maintained. With reasonable care, this machine will give years of service. Therefore, it is important that a regular schedule of preventive maintenance be kept. Store machine inside, out of the weather, whenever possible. TX00428-8-10-95 Washing the Machine Cover plugs and electrical control boxes before washing. -
Page 43: Check Gauge
Maintenance Check Gauges Gauges should be checked daily. The gauge should read zero when the unit is not running. Damaged gauges should be replaced. TX02291-3-8-04 Clean Jaws and Inserts To prevent slippage and insure proper alignment, the jaws and inserts must be clean. Clean the jaws and inserts of any dirt or residual material using a stiff-bristled brush. -
Page 44: Fasteners Must Be Tight
Maintenance Fasteners Must Be Tight Check all nuts, bolts, and snap rings to make certain they are secure and in place. TX00437-9-13-94 Facer The facer should be lubricated annually. TX00438-9-15-94 Facer Blades Blades bolt directly to the blade holder and should be inspected for damage and sharpness. -
Page 45: Bleeding Air From Hydraulic System
Maintenance Bleeding Air From Hydraulic System 28, 250, 500 The two carriage cylinders have air bleed screws and must be bled if the system ever runs low on oil or leaks air on inlet side of pump. Air in the system is indicated when carriage movement becomes jerky and erratic. -
Page 46: Adjusting Heater Temperature
If this occurs, disconnect power and have the heater repaired by an McElroy Authorized Service Center. The heater has a red indicator light on the handle at the bottom of the temperature scale. -
Page 47: Maintenance Checklist
Maintenance Checklist Fusion Machine Checklist Item to Check Satisfactory Needs Repair Repair Comments Machine is clean All pins and snap rings are in place All nuts and bolts are tight All identification placards and handles are in place All clamp knobs are lubricated and turn freely Cords and plugs are in good condition All hardware is on the basic machine Oil Reservoir is filled to correct level... -
Page 48: Determining Fusion Pressure
Determining Fusion Pressure Variable Definitions O.D. = Outside Diameter of Pipe (inch) = Wall Thickness of Pipe (inch) = 3.14 = Standard Dimensional Ratio of Pipe (unitless) = Interfacial Pressure of Pipe (PSI) TEPA = Total Effective Piston Area of Carriage Cylinders (inch²) Formulas O.D. -
Page 49: Determining Fusion Pressure - Sidewall
Determining Fusion Pressure - Sidewall Variable Definitions O.D. = Outside Diameter of Base (not branch) = Wall Thickness BASE = 3.1416 ∏ = Standard Dimensional Ratio O.D. = Manufacturer’s Recommended Interfacial Pressure TEPA = Total Effective Piston Area Formulas O.D. t = ------------ ROUND BASE AREA = (O.D. - Page 50 Hydraulic Fluids Hydraulic Fluids The use of proper hydraulic fluid is mandatory to achieve maximum performance and machine life. Use a clean, high quality, anti-wear hydraulic fluid with a viscosity index (VI) of 135 minimum. It should have a maximum viscosity of 500 cSt (2000 SSU) at startup (ambient temperature) and a minimum viscosity of 13 cSt (65 SSU) at the maximum fluid temperature (generally 80°F above ambient).
-
Page 51: Specifications
Specifications Pit Bull HPU Specifications Pump flow rate: 6.1 gpm (23.1 lpm) @ 60 Hz 5.0 gpm (18.9 lpm) @ 50 Hz Design Pressure: 1500 psi (103 bar) Weight: 390 lbs (177 kg) Filtration: 10 micron absolute Reservoir capacity: 10 gallons (37 liters) Hydraulic fluid: see Hydraulic Fluid Section 41”... - Page 52 Hydraulic Fluids Pit Bull Carriage Specifications Heater/ with Bag 257* 21/42 1750 (19.9) (9.5/19) (117) 255* 21/42 (19.9) (9.5/19) (116) 425* 24/44 (28.1) (10.9/19.9) (193) (686) (737) 595* 34/58 (270) (42.6) (15.4/26) (1092) (838) (737) (38.1) (991) (711) (737) CD01850-01-10-19 Carriage weights include detachable facer For 412 and 618 carriages with Hydraulic Clamping, add 40 lbs.
-
Page 53: Generator Sizing Form
Specifications Generator Sizing Form Complete this form and provide a copy to your generator supplier. This information will enable your generator supplier to correctly size a generator for your application. Motor: 5 Horsepower Motor Code Letter: _________ (from motor nameplate should be J or K) Motor Voltage: ________ See HPU nameplate for voltage Motor Phases: 1 or 3 Phase Motor Frequency: __________ (50 or 60 Hz) - Page 55 About this manual . . . McElroy Manufacturing continually strives to give customers the best quality products available. This manual is printed with materials made for durable applications and harsh environments. This manual is waterproof, tear resistant, grease resistant, abrasion resistant and the bonding quality of the printing ensures a readable, durable product.
Need help?
Do you have a question about the Pit Bull 28 and is the answer not in the manual?
Questions and answers