Table of Contents
Advertisement
Quick Links
Advertisement
Table of Contents

Related Manuals for Liquid Controls POD2


Summary of Contents for Liquid Controls POD2
-
Page 2: Table Of Contents
Table of Contents Resources in this Guide ....................3 Publication Updates ......................3 Safety Procedures ......................4 General Information ......................6 Specifications ........................9 Dimensions ........................10 Regulatory Compliance Tag Markings ................11 Bill of Materials ........................ 13 Installation ........................15 POD Extension Kit Installation .................. -
Page 3: Resources In This Guide
This manual provides warnings and procedures that are intended to inform the owner and/or operator of the hazards present when using the Liquid Controls Meter on LP gas and other products. The reading of these warnings and the avoidance of such hazards is strictly in the hands of the owner-operators of the equipment. -
Page 4: Safety Procedures
Pulse Output Device Safety Procedures BE PREPARED · Before using this product, read and understand the instructions. · All work must be performed by qualified personnel trained in the proper application, installation, and maintenance of equipment and/or systems in accordance with all applicable codes and ordinances. ·... - Page 5 Pulse Output Device OBSERVE NATIONAL & LOCAL CODES Power, input, and output (I/O) wiring must be in accordance with the area classification for which it is used (Class I, Div 2). For North America, installations must be per the U. S. National Electrical Code, NFPA 70, or the Canadian Electrical Code in order to maintain Class I, Division 2 ratings.
-
Page 6: General Information
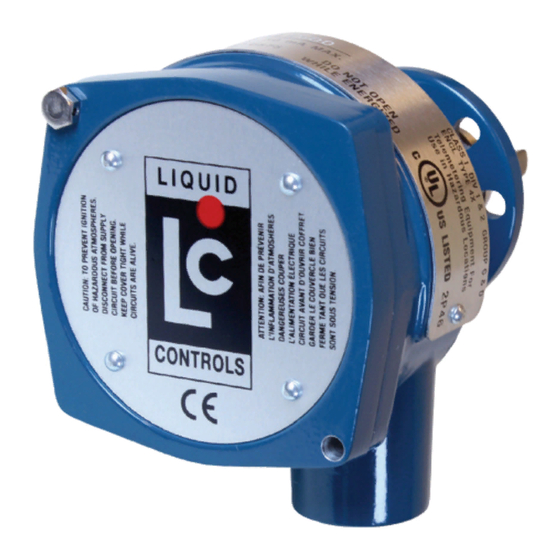
The packing list is inside the red information packet along with the Installation and Operation Manuals. The POD mounts directly to the front cover of any Liquid Controls meter in place of the packing gland. The motion of the meter’s blocking rotor is magnetically coupled through a stainless steel wall to the electronics compartment of the POD. - Page 7 Pulse Output Device · POD2 – Fork Drive with PTFE O-Ring, 100 PPR Quad Pulser, 9 to 30VDC · POD3 – Blade Drive with Buna-N O-Ring, 100 PPR Quad Pulser, 9 to 30VDC · POD4 – Blade Drive with PTFE O-Ring, 100 PPR Quad Pulser, 9 to 30VDC ·...
- Page 8 When initially calibrating a specific meter model, the K-Factor (Pulses/Unit) values given below are for reference only and are not to be used as a final K-Factor. NOTE: ll Liquid Controls meter models listed below assume use of the 400ppr pulser with a 1:1 Packing Gland/Face Gear ratio when calculating the Pulses/Unit.
-
Page 9: Specifications
Pulse Output Device Specifications · Voltage 9 to 30 VDC · POD5 has a 5 VDC minimum but is not IECEx approved · Current Supply 50 mA maximum · Output Signal 100 pulses per channel per revolution, unscaled (see the Output Resolution Signal Resolutions table in General Information... -
Page 10: Dimensions
Pulse Output Device · Operating -40 to 176 °F (-40 to 80 °C) Temperature Range · Humidity Range 0-100%, non-condensing · Shock 50 G for 10 ms · Vibration 1 G at 10-150 Hz Electromagnetic POD with PC Board 84120 Compatibility ·... -
Page 11: Regulatory Compliance Tag Markings
Pulse Output Device Regulatory Compliance Tag Markings Explosive Atmospheres · This equipment has been found to comply with the European Directive for Equipment For Potentially Explosive Atmospheres 2014/34/EU (ATEX), and Certification Scheme for Explosive Atmospheres of INTERNATIONAL ELECTROTECHNICAL COMMISSION (IECEx). Evaluation was made in 2018 by DNV GL to the ATEX Directive with a certificate number Presafe 18 ATEX 12438X and in 2011 to IECEx scheme with a certificate number IECEx DNV 11.0012X, where X represents the following Special Conditions for Safe Use: 1) Only Ex d certified cable glands and thread adapters are to be used;... - Page 12 Class I, Division 1 & 2, Groups C & D environments as classified by the US and/or Canadian Electrical Code. 2P46 UL listing control number issued to Liquid Controls. DNV 12.0091 X Explosive atmosphere certification for Brazil (INMETRO).
-
Page 13: Bill Of Materials
Pulse Output Device Bill of Materials https://www.lcmeter.com/resources/technical/manuals Get the latest PDF manual: Mobile/online version of this manual: https://www.lcmeter.com/manuals... - Page 14 Pulse Output Device https://www.lcmeter.com/resources/technical/manuals Get the latest PDF manual: Mobile/online version of this manual: https://www.lcmeter.com/manuals...
-
Page 15: Installation
Pulse Output Device Installation POD Installation New Installations When ordered with the flowmeter, the POD comes factory installed on the meter and ready for wiring. Wiring instructions begins on page 10. RELIEVING INTERNAL PRESSURE All internal pressure must be relieved to zero pressure before disassembly or inspection of the strainer, vapor eliminator, any valves in the system, the packing gland, and the front or rear covers. - Page 16 Pulse Output Device Retrofit Installations Follow these procedures to remove the existing hardware: 1. Relieve the pressure from the process piping to the meter. 2. Drain the meter by opening the meter’s drain plugs. NOTE 1: Meters with only two packing gland mounting screws are limited to four orientations.
- Page 17 Pulse Output Device Installing the POD POD Extension Kits If a POD Extension Kit is necessary, it must be installed prior to installation of the POD. See POD Extension Kit Installation Follow these steps to install the POD onto a flowmeter: 1.
-
Page 18: Pod Extension Kit Installation
The POD Extension is used to extend the connection away from the meter. There are four POD Extension models available: · 49754 POD1 or POD5 – Fork Drive with Buna-N O- Ring · 49756 POD2 – Fork Drive with Teflon O-Ring ·... -
Page 19: Pod Wiring
Pulse Output Device Follow these steps to install the POD Extension: 1. Verify that the proper POD Extension Model was obtained by comparing the driver tang on the POD Extension to the driver tang on the packing gland that was removed in Step 5 of the Retrofit Installations section of the Installation topic... - Page 20 Pulse Output Device must be engaged five (5) full threads into the female hub on the POD to meet explosion proof requirements. When installing in a Division 2 location, use either rigid conduit, flexible conduit, or no conduit. When no conduit is used, the instrument cable must be brought into the POD conduit hub using a cable gland to seal the wiring to maintain the Enclosure NEMA 4X rating.
- Page 21 Pulse Output Device Before inserting wires into the terminal block, strip ¼" of insulation off each wire. Turn each terminal screw counterclockwise a few turns to make sure that the wiring slot is fully open to accept wire. Insert the stripped end of the wire and tighten the terminal block screw. Plug the terminal block back into the board if it was removed.
-
Page 22: Pod Wiring Schematics
Pulse Output Device 7. Reassemble the unit. SIGNAL OUTPUT The diagram below shows the voltage output for a clockwise rotation of the Pulse Output Device (POD) with Channel A leading Channel B. For reverse flow applications (counterclockwise) Channel B leads Channel A. NOTE: Quadrature channel voltage output is 90°... - Page 23 Pulse Output Device Power Source Requirement An isolation source and overcurrent protective device rated 5A max must be installed in the power circuit. If a 5A-max isolation source and overcurrent protective device is not available, a Class 2 power source must be used. Dual Channel Quadrature Applications LECTROCOUNT®...
Need help?
Do you have a question about the POD2 and is the answer not in the manual?
Questions and answers