Table of Contents

Related Manuals for Thomson Power Systems TSC 900


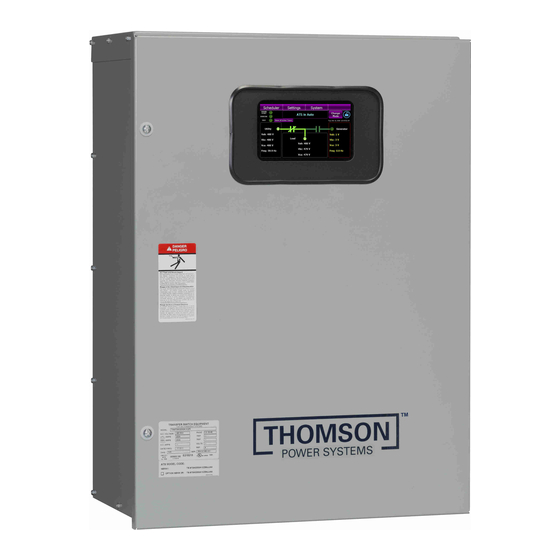
Summary of Contents for Thomson Power Systems TSC 900
- Page 1 PM163 Rev 0 20/02/05 TS 970 AUTOMATIC TRANSFER SWITCH WITH TSC 900 CONTROLLER INSTALLATION, OPERATING & SERVICE MANUAL 4916 - 275th Street, Langley, BC, Canada V4W 0A3 · Telephone (604) 888-0110 Email: info@thomsonps.com · www.thomsonps.com...
-
Page 3: Table Of Contents
TS 970 Transfer Switch TABLE OF CONTENTS PRODUCT REVISION HISTORY EQUIPMENT STORAGE 2.1. ENVIRONMENTAL CONDITIONS NOTES TO INSTALLER 3.1. INSTALLATION CODES/PERMITS 3.2. APPLICATION 3.3. INSTALLATION LOCATION 3.4. POWER CABLING 3.5. CONTROL WIRING 3.6. GENERATOR SET AUTOMATIC OPERATION 3.7. LOAD TYPES 3.8. - Page 4 14. REPLACEMENT PARTS 15. PRODUCT RETURN POLICY 16. NOTES 17. PERFORMANCE TEST FORM APPENDIX A – TYPICAL TS 970 ATS COMMISSIONING PROCEDURE APPENDIX B – TS 970 SYSTEM VOLTAGE CHANGE PROCEDURE APPENDIX C –SEISMIC CERTIFICATE PM163 REV 0 20/02/05 Thomson Power Systems...
-
Page 5: Product Revision History
Operating & Service Manual Version Rev 0 19/05/15 Original release. Contact Thomson Power Systems, to obtain applicable instruction manuals or if in doubt about any matter relating to installation, operation or maintenance. Soft copy of the most current version is available at www.thomsonps.com. -
Page 6: Notes To Installer
National Electrical Code (NEC). The TS 970 is a power contactor transfer switch, as with all power contactor type transfer switches there must be upstream circuit breakers on the Utility side and the Generator side. -
Page 7: Power Cabling
30 percent of the switch rating. 3.8. UPSTREAM OVER CURRENT PROTECTION TS 970 transfer switch models do not contain any integral over current protection and require upstream over current protection devices for both Utility and Generator sources. PM163 REV 0 20/02/05... -
Page 8: Withstand/Interrupting Current Ratings
A blank label is included to record the applicable settings if the configuration is changed from the factory default settings. To change the transfer switch voltage, refer to TS 970 System Voltage Change Procedure Appendix B. Contact Thomson Power Systems for further information as may be required. -
Page 9: Dielectric Testing
3.13. SEISMIC ANCHORING Model TS 970 Automatic Transfer Switches in "standard" enclosures are seismic certified under AC156 building code for non-structural components. Standard enclosures are all transfer switch enclosures Thomson Power Systems offers in NEMA 1, NEMA 2, NEMA12 and NEMA 3R for the above listed product. - Page 10 TS 970 Transfer Switch PM163 REV 0 20/02/05 Thomson Power Systems...
- Page 11 TS 970 Transfer Switch Anchoring Notes: 1. Anchoring must be designed according to IBC 2012 or latest version. 2. The anchoring details shown are recommended according to the seismic certification; design Engineer may use alternate anchors within the scope of IBC.
-
Page 12: General Description
System load is then automatically re-transferred back to the utility supply following restoration of the utility power source to within normal operating limits. The standard TS 970 series Automatic Transfer Switch is rated for 100% system load and requires upstream over current protection. 4.1. -
Page 13: Power Contactor Ats
TS 970 Transfer Switch 4.2. POWER CONTACTOR ATS TS 970 Series product line consist of two types of power contactor based on amperage size and optional features supplied with the ATS. 100 – 400A Power Contactor (Typical) 600 – 1200A Power Contactor (Typical) 100A –... -
Page 14: Product Model Code
4.3. PRODUCT MODEL CODE The type of TS 970 series transfer switch supplied is identified by way of a 21digit product code which appears on the equipment rating plate, or model, on the door of the transfer switch, and the transfer switch drawings. The model code structure and definitions are as follows:... -
Page 15: Typical Commissioning Procedures
NOTE: The Typical Automatic Transfer Switch Commissioning Procedures Model Series TS 970, Appendix A, is provided for general information only pertaining to typical site installations and applications. Contact Thomson Power Systems for further information as may be required. AUTOMATIC SEQUENCE OF OPERATION 5.1. -
Page 16: Test Modes
TS 970 Transfer Switch NOTE: A neutral delay timer circuit if enabled will delay the transfer sequence in the neutral position until the neutral delay time period expires. An engine cooldown timer circuit will be initiated once the load is transferred from the generator supply. -
Page 17: Recommended Maintenance
TS 970 Transfer Switch To maintain electrical integrity, ensure that: • All electrical connections, especially power connections, are clean and adequately tightened. Corroded or loose power connections will cause destructive heating and may cause premature tripping. • All insulating devices are in place and in good condition. - Page 18 TS 970 Transfer Switch 6.3. POWER CONTACTOR REPLACEMENT (100-400A) DANGER Do not open equipment until ALL power sources are disconnected Appropriate Personal Protective Equipment (PPE) must be worn before handling heavy objects. Failure to do so may cause personal injury or death.
- Page 19 TS 970 Transfer Switch 3. Disconnect harness connections on the power contactor (1) and limit switches (2 and 3) shown in the figure below. Use a cross screw driver. STEP 3 4. Remove the bolts located at the base of the power contactor using a 7/16” wrench.
- Page 20 TS 970 Transfer Switch 5. Loosen lug nut fasteners (9 in total) by using a 5/16” wrench. Disconnect all wire terminals. NOTE: Remember to note all wire locations for proper re-installation STEP 5 6. Replace the power contactor then repeat steps 1 through 5 backwards to re-assemble the new contactor.
- Page 21 TS 970 Transfer Switch 6.4. POWER CONTACTOR REPLACEMENT (600-1200A) DANGER Do not open equipment until ALL power sources are disconnected Appropriate Personal Protective Equipment (PPE) must be worn before handling heavy objects. Failure to do so may cause personal injury or death.
- Page 22 TS 970 Transfer Switch 2. Remove all bolts, washers and nuts holding the base of the power contactor using a 3/8” wench tool. STEP 2 3. Disconnect all control wiring by loosening all wire terminals of the power contactor. Use a cross screw driver.
- Page 23 TS 970 Transfer Switch 4. Remove all bolts holding the busbars to the power contactor as shown in figure below. Use a 3/8” wrench. STEP 4 5. Using a flat screw driver, de-attach all sticky pads from the power contactor to release it from the harness.
- Page 24 TS 970 Transfer Switch 6. Withdraw the contactor to its disconnected position away from the busbars. 7. Align the extension rails (shown below) of a scissor lift into the power contactor compartment. 8. Carefully pull the contactor onto the extension rails until it is completely withdrawn into the rails.
-
Page 25: Ats Manual Operating Instructions
TS 970 Transfer Switch ATS MANUAL OPERATING INSTRUCTIONS DANGER Arc Flash and Shock Hazard. Will cause severe injury or death. Do not open equipment until ALL power sources are disconnected. This equipment must be operated only by qualified electrical personnel utilizing safe work practices and appropriate Personal Protective Equipment (PPE). - Page 26 TS 970 Transfer Switch Once both Utility and Generator supplies are de-energized the following procedure can be used to operate the Transfer Switch Manually. 7.1.1. MANUAL CLOSING TO UTILITY POSITION (SIDE A) 1. With all power de-energized, open ATS enclosure door and locate manual operation handles (Shaft wrench &...
- Page 27 TS 970 Transfer Switch 7.1.2. MANUAL CLOSING TO GENERATOR POSITION (SIDE B) 1. With all power de-energized, open ATS enclosure door and locate manual operation handles (Shaft wrench & Screwdriver) 2. Un-plug the ATS control isolation plug (PL-15) to prevent automatic operation (refer to SECTION 8 for photo showing location of PL-15).
-
Page 28: 600A - 1200A Power Contactor Ats Manual Operation
TS 970 Transfer Switch 600A – 1200A POWER CONTACTOR ATS MANUAL OPERATION 7.2. Operating handle and select screw driver are supplied loose with the transfer switch for manual operation. Once both Utility and Generator supplies are de-energized the following procedure can be used to operate the Transfer Switch Manually. - Page 29 TS 970 Transfer Switch 4. Close Utility (Side A) Main Contacts by inserting the operating handle onto the Power Contactor Operating Shaft and move in the direction shown below until the Utility Main Contacts latch closed as shown by the Utility “ON” indicator.
- Page 30 TS 970 Transfer Switch 4. Close Generator (Side B) Main Contacts by using both operating handle and screwdriver simultaneously as described below: Insert the screwdriver into the SELECT B hole and while pushing and holding the screwdriver in, insert the operating handle onto the Power Contactor Operating Shaft and move in the direction shown below until the Gen Main contacts latch closed as shown by the Generator Position Indicator flag “ON”.
-
Page 31: Isometric View - 3 / 4 Pole, 100A - 400A Ats (Typical)
TS 970 Transfer Switch ISOMETRIC VIEW - 3 / 4 POLE, 100A - 400A ATS (TYPICAL) PM163 REV 0 20/02/05 Thomson Power Systems... -
Page 32: Isometric View - 3 / 4 Pole, 600A - 1200A Ats (Typical)
TS 970 Transfer Switch ISOMETRIC VIEW - 3 / 4 POLE, 600A - 1200A ATS (TYPICAL) PM163 REV 0 20/02/05 Thomson Power Systems... -
Page 33: Cable Terminal Information
TS 97xA-1000 #4-600MCM TS 97xA-1200 #4-600MCM 1. Optional terminal ratings are available in some models – Consult Thomson Power Systems. 2. For other model types not shown, contact Thomson Power Systems for further information. PM163 REV 0 20/02/05 Thomson Power Systems... -
Page 34: Short Circuit Withstand And Closing Ratings (Any Breaker)
1200A 50,000 100,000 1. For other model types not shown, contact Thomson Power Systems for further information. Note : Refer PM167 supplement document for short-circuit withstand / closing and short time ratings specific circuit breaker manufacturer and type listing. PM163 REV 0 20/02/05... -
Page 35: Ground Fault Site Test Requirements
TS 970 Transfer Switch 12. GROUND FAULT SITE TEST REQUIREMENTS Per NEC and UL1008, a ground fault protected system shall be performance tested when first installed on site. A written record of this shall be made and be available to the authority having jurisdiction. A form is provided at the back of this manual for this purpose –... -
Page 36: Troubleshooting
TS 970 Transfer Switch 13. TROUBLESHOOTING DANGER Arc Flash and Shock Hazard. Will cause severe injury or death. Do not open equipment until ALL power sources are disconnected This equipment must be installed and serviced only by qualified electrical personnel utilizing safe work practices and appropriate Personal Protective Equipment (PPE). - Page 37 TS 970 Transfer Switch PROBABLE CAUSES MALFUNCTIONS CORRECTIVE ACTIONS Utility Return Time delay period in TSC 900 Verify TSC 900 time delay setting has not yet expired. A Load Test mode has been activated Check TSC 900 GHC Home Page status indicators...
- Page 38 TS 970 Transfer Switch If defective, return to Thomson Power systems using RMA process Verify Generator & Utility auxiliary contacts are Faulty Power Contactor unit auxiliary operating correctly contact Transfer Mode selector is not in “Auto” Turn Transfer Mode selector to “Auto” position...
- Page 39 Defective TSC 900 controller • Verify TSC 900 SCU has SD Memory Card fully inserted into socket. If defective Return to Thomson Power systems using RMA process Verify Generator & Utility auxiliary contacts are Faulty Power Contactor unit auxiliary operating correctly...
- Page 40 Verify TSC 900 GHC has SD Memory Card fully system information inserted into socket. Defective GHC Display If defective Return to Thomson Power Systems using RMA process TSC 900 SCU Control board is not The GHC needs maintained 5Vdc power from the TSC powered from 120VAC Utility supply, 900 SCU Control board at all times.
-
Page 41: Power Contactor Unit Drawing
TS 970 Transfer Switch NOTE There are no user serviceable components located on the TSC 900 printed circuit board. If the TSC 900 controller (i.e. SCU or GHC) are deemed to be defective, they must be returned to the Thomson Power Systems Factory for repair or replacement. - Page 42 TS 970 Transfer Switch PM163 REV 0 20/02/05 Thomson Power Systems...
- Page 43 TS 970 Transfer Switch 600A – 1200A POWER CONTACTOR (TYPICAL) 13.2.2. PM163 REV 0 20/02/05 Thomson Power Systems...
-
Page 44: Replacement Parts
Service Dept. for installation Replacement procedures. 120VAC 10A Auxiliary Plug-in, 001278 Must ensure coil voltage is correct 11 pin Square Relay 100VA Control Transformer 002159 For other parts not listed, please contact Thomson Power Systems. PM163 REV 0 20/02/05 Thomson Power Systems... -
Page 45: Product Return Policy
Returns only: Email sales@thomsonps.com Warranty replacement/Warranty Repair: Email support@thomsonps.com Upon receipt of your request, Thomson Power Systems will confirm with a copy of our Order Acknowledgement via fax advising the RMA number which should be used to tag the defective controller prior to shipment. -
Page 46: Notes
TS 970 Transfer Switch 16. NOTES PM163 REV 0 20/02/05 Thomson Power Systems... -
Page 47: Performance Test Form
TS 970 Transfer Switch 17. PERFORMANCE TEST FORM This form should be retained by those in charge of the building electrical installation in order to be available to the authority having jurisdiction. Date Personnel Tests performed Comments Interconnection evaluation Grounding point evaluation... - Page 49 APPENDIX “A” THOMSON POWER SYSTEMS © TYPICAL TS 970 ATS COMMISSIONING PROCEDURES NOTE The following commissioning procedures are provided for general information only pertaining typical site installation applications. Contact Thomson Power Systems further information as may be required. A) Pre-Energization Checks 1.
- Page 50 1. Confirm Utility, Generator and loads can be energized in a safe manner. 2. Energize utility supply and wait approximately 2 minutes for the TSC 900 Display to successfully perform an initial boot-up process. A Thomson Power Systems Logo will be displayed during the booting process.
- Page 51 APPENDIX “A” THOMSON POWER SYSTEMS © TYPICAL TS 970 ATS COMMISSIONING PROCEDURES 6. Verify the status of the following indicator lights on the TSC 900 Display Home page: - Utility Source Green light is On - Load on Utility Green light is On 7.
- Page 52 APPENDIX “A” THOMSON POWER SYSTEMS © TYPICAL TS 970 ATS COMMISSIONING PROCEDURES 12. To stop the generator and transfer load back to the utility supply, press the Change Mode control button on the TSC 900 DISPLAY home page and select Return to Auto mode. The load will re- transfer back to the utility power as per Automatic Sequence.
-
Page 53: Appendix B - Ts 970 System Voltage Change Procedure
APPENDIX “B” THOMSON POWER SYSTEMS © TS 970 SYSTEM VOLTAGE CHANGE PROCEDURE The system voltage change procedure is a 2 step process • ATS Potential Transformer Tap Change • TSC 900 Software Programming Details of each step are as follows:... - Page 54 APPENDIX “B” THOMSON POWER SYSTEMS © TS 970 SYSTEM VOLTAGE CHANGE PROCEDURE Carefully remove the potential transformer high voltage side covers by prying up on the edge of the cover with a ¼” Flat Head Blade screwdriver and lifting off.
- Page 55 APPENDIX “B” THOMSON POWER SYSTEMS © TS 970 SYSTEM VOLTAGE CHANGE PROCEDURE CAUTION: Brace PT terminal block with your hand when loosening or tightening ANY screws. Remove the screw and red ring terminal connected to the incorrect (existing) PT voltage terminal. Install the screw and red ring terminal to the new selected PT Tap Terminal based on required voltage and tighten while supporting the terminal block.
- Page 56 APPENDIX “B” THOMSON POWER SYSTEMS © TS 970 SYSTEM VOLTAGE CHANGE PROCEDURE 2) TSC 900 Software Programming To change system voltage on the TSC 900 controller, the transfer switch must be energized to provide control power to the controller to allow software programming. If safe to do so, energize Transfer Switch on either Utilty or Generator sources and follow the programming procedure shown below.
- Page 57 APPENDIX “B” THOMSON POWER SYSTEMS © TS 970 SYSTEM VOLTAGE CHANGE PROCEDURE Once successfully logged in, From the TSC 900 DISPLAY Home Page, Navigate to the Settings Page below and select System Voltage as shown below. On the System Voltage Row, select the underlined System Voltage value and from the drop down list which appears, select the desired voltage for the application as shown below.
-
Page 59: Appendix C -Seismic Certificate
APPENDIX “C” THOMSON POWER SYSTEMS © SEISMIC CERTIFICATE 4916 - 275th Street, Langley, BC, Canada V4W 0A3 · Telephone (604) 888-0110 Email: info@thomsonps.com · www.thomsonps.com... - Page 61 For Preventative Maintenance or Extended Warranty information contact our Service Department at 604-888-0110 or email support@thomsonps.com PM163 REV 0 20/02/05 Thomson Power Systems and Regal are trademarks of Regal Beloit Corporation or one of its affiliated companies. ©2020 Regal Beloit Corporation, All Rights Reserved.
Need help?
Do you have a question about the TSC 900 and is the answer not in the manual?
Questions and answers