Table of Contents
Advertisement
Quick Links
HAZARD OF ELECTRICAL SHOCK, EXPLOSION, OR ARC FLASH
Read and understand this quick start guide before installing and operating the transfer switch
The installer is responsible for compliance with National Electrical Code (NEC) or Canadian Electrical Code (CEC) requirements with respect
to installation of this equipment.
Many components of this equipment operate at line voltage. DO NOT TOUCH. Use only electrically isolated tools.
Install and close all covers before applying power to this equipment.
Do not open covers to equipment until ALL power sources are disconnected.
This equipment must be installed and serviced only by qualified electrical personnel utilizing safe work practices and appropriate Personal
Protective Equipment (PPE).
Failure to do so may cause personal injury or death
Introduction ........................................................................................................................... 2
Check Equipment Delivery ................................................................................................... 2
Check Line Voltage/Amperage ............................................................................................. 2
Installation Requirements..................................................................................................... 2
Service Entrance Rated ATS (US Market Only) .................................................................. 3
Typical Interior Component Layout Drawing ...................................................................... 4
Power Conductor Installation ............................................................................................... 5
Power Conductor Insulation Resistance Testing ............................................................... 5
I.
Engine Start Wiring Connections ........................................................................................ 6
Remote Input Wiring Connections ....................................................................................... 7
Programmable Output Contacts .......................................................................................... 7
TSC 7320 Factory Default Programming ............................................................................. 8
Transfer Switch Operation .................................................................................................... 9
Equipment Energization Procedure ................................................................................... 13
TS 870 System Voltage Change Procedure ...................................................................... 15
Part ID 013191
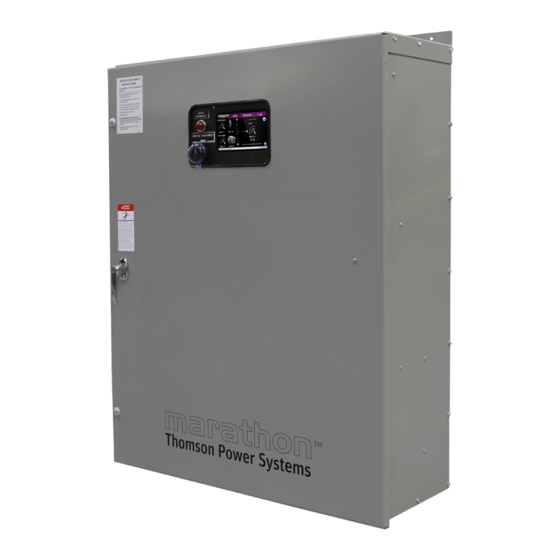
QUICK START GUIDE
TS 870 ATS
100A - 800A (OPEN TRANSITION)
TSC 7320 Controller Firmware Version
DANGER
R0
PAGE
Advertisement
Table of Contents

Related Manuals for Thomson Power Systems TS 870 ATS


Summary of Contents for Thomson Power Systems TS 870 ATS
-
Page 1: Table Of Contents
QUICK START GUIDE TS 870 ATS 100A – 800A (OPEN TRANSITION) TSC 7320 Controller Firmware Version DANGER HAZARD OF ELECTRICAL SHOCK, EXPLOSION, OR ARC FLASH Read and understand this quick start guide before installing and operating the transfer switch ... -
Page 2: Introduction
NOTE: Rev 0 of this Quick Start Guide applies to TSC 7320 with firmware revision R0. This quick start guide contains all the information you typically need to install and set up a Thomson Power Systems TS 870 Transfer Switch. -
Page 3: Service Entrance Rated Ats (Us Market Only)
Table #1 Withstand Current Ratings Standard ratings only are shown. Consult Thomson Power Systems for versions with higher withstand current ratings. For other model types not shown, contact Thomson Power Systems for further information. Withstand rating specified is for 250A, 3P. For 250A, the 4P rating are 65KA@240V, 35KA@480V and 22KA@600V E. -
Page 4: Typical Interior Component Layout Drawing
TS 870 with TSC 7320 Quick Start Guide F. Typical Interior Component Layout Drawing 3 Pole Model, 100A—200A Shown PM 173 Rev 0 23/02/10 Thomson Power Systems... -
Page 5: Power Conductor Installation
Following power cable installation, and isolating the TSC 7320 controller, all power cables shall be appropriately insulation resistance tested to ensure no cross-phase connections or conduction to ground. Once insulation resistance testing is complete, re-insert PL12 & PL15 isolation plugs, and close all the fuses on the Potential Transformer plate. PM 173 Rev 0 23/02/10 Thomson Power Systems... -
Page 6: Engine Start Wiring Connections
WARNING: Do not apply a resistive load greater than 8A @ 250VAC across the engine start terminals #30 & #31 as this will cause damage to the TSC 7320 controller. Change PM 173 Rev 0 23/02/10 Thomson Power Systems... -
Page 7: Remote Input Wiring Connections
WARNING: Do not apply any voltage across the output contacts as this will cause damage to the TSC 7320 controller. Connect a load in series with applicable voltage/current as specified. PM 173 Rev 0 23/02/10 Thomson Power Systems... -
Page 8: Tsc 7320 Factory Default Programming
The TSC 7320 is factory programmed with default settings as shown as per the following table. NOTE: This table is applicable for firmware version R0. Refer to the TSC 7320 O&M Manual for programming instructions to change any default setting. PM 173 Rev 0 23/02/10 Thomson Power Systems... -
Page 9: Transfer Switch Operation
Use the up and down buttons to change the value, and the center checkmark button to confirm that value Find and change all settings as desired To exit the editor mode, hold the center checkmark button for 5 seconds while not editing any settings. PM 173 Rev 0 23/02/10 Thomson Power Systems... - Page 10 Status – Engine – Generator – Mains – Alarms – Event Log – Communications – Schedule – PLC Instruments – About More information can be found by using the up and down buttons for a given display page (voltage and transfer switch state, etc.). PM 173 Rev 0 23/02/10 Thomson Power Systems...
- Page 11 This in turn will cause a repeating engine start/stop event every 3-4 minutes. To prevent engine start/stop cycling condition upon loss of control power, the local engine control panel should be selected for the OFF operating mode. PM 173 Rev 0 23/02/10 Thomson Power Systems...
- Page 12 LEDs will light up, this is expected. 2. The alarms can be cleared by pushing and holding the alarm button for 5 seconds. The controller will reset all alarms and function as intended again. PM 173 Rev 0 23/02/10 Thomson Power Systems...
-
Page 13: Equipment Energization Procedure
This equipment must be serviced only by qualified electrical personnel utilizing safe work practices and appropriate Personal Protective Equipment (PPE). Many components of this equipment operate at line voltage. DO NOT TOUCH. Use only electrically isolated tools. Failure to do so may cause personal injury or death. PM 173 Rev 0 23/02/10 Thomson Power Systems... - Page 14 Energize utility supply and wait approximately 20 seconds for the TSC 7320 controller to successfully perform an initial “boot-up” process. The Thomson Power Systems Logo will be displayed during the booting process. NOTE: under normal operation, TSC 7320 controller will not re-boot due to use of an external control power reservoir circuit. The Low Power Buffer (LPB) maintains DC control power during Utility power failures, allowing the controller to start the gen and transfer to it without rebooting.
-
Page 15: Ts 870 System Voltage Change Procedure
Carefully remove the potential transformer high voltage side covers by prying up on the edge of the cover with a ¼” Flat Head Blade screwdriver and lifting off. NOTE: You can also use your finger to pry up on the edge of the PT cover. PM 173 Rev 0 23/02/10 Thomson Power Systems... - Page 16 Replace the PT cover. PT covers should 'snap' in place, confirm they are installed correctly by gently "twisting" the PT cover. DO NOT use excessive force. Repeat the steps 1 to 8 for all Potential Transformers. PM 173 Rev 0 23/02/10 Thomson Power Systems...
- Page 17 Choosing voltage configuration: There are 5 separate inputs that dictate the different configurations, and they are listed in the table below. Select one of the options below based on the ATS requirements. PM 173 Rev 0 23/02/10 Thomson Power Systems...
- Page 18 Complete: The voltage change procedure is now complete. If the voltage settings need to be adjusted from their default values, please refer to Section M(a) of this document for further details on entering the restricted area of the settings, and how to change values. PM 173 Rev 0 23/02/10 Thomson Power Systems...
- Page 19 For Preventative Maintenance or Extended Warranty information contact our Service Department at 604-888-0110 or email support@thomsonps.com PM173 REV0 23/02/10 Thomson Power Systems and Regal are trademarks of Regal Beloit Corporation or one of its affiliated companies. ©2018 Regal Beloit Corporation, All Rights Reserved.
Need help?
Do you have a question about the TS 870 ATS and is the answer not in the manual?
Questions and answers