Table of Contents
Advertisement
Preface
About This Guide
This guide describes the monitor's features, setup, and operation. lnformation in this document is subject to change without notice.
The sections are as follows:
Safety
Instructions: lists safety information.
Setup: describes the initial setup process.
Using the
Monitor: gives an overview of how to use the monitor.
Drivers: provides driver installation instructions for Windows.
Technical Support
:provides tips and solutions for common problems.
Product
Information: lists the technical specifications of the monitor.
Warranty
Statement: Warranty Statement used in Australia and New Zealand.
National Conventions
The following subsections describe notational conventions used in this document.
Notes, Cautions, and Warnings
Throughout this guide, blocks of text may be accompanied by an icon and printed in bold type or in italic type. These blocks are notes, cautions, and warnings, and they are used as
follows:
NOTE: A NOTE indicates important information that helps you make better use of your computer system.
CAUTION: A CAUTION indicates either potential damage to hardware or loss of data and tells you how to avoid the problem.
WARNING: A WARNING indicates the potential for bodily harm and tells you how to avoid the problem.
Some warnings may appear in alternate formats and may be unaccompanied by an icon. In such cases, the specific presentation of the warning is mandated by regulatory authority
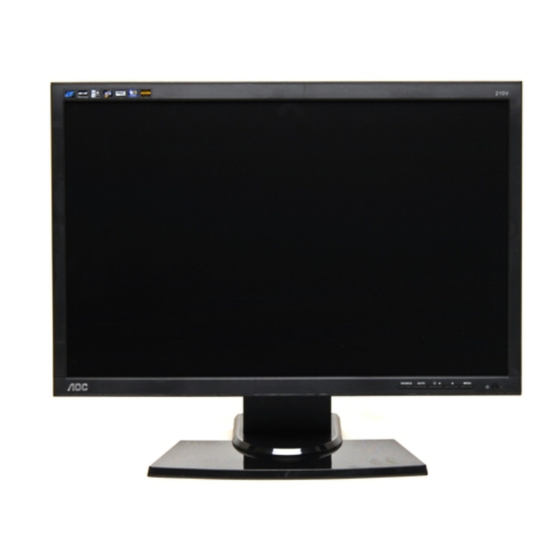
AOC 210V User Manual
Advertisement
Table of Contents

Related Manuals for AOC 210V


Summary of Contents for AOC 210V
- Page 1 AOC 210V User Manual Preface About This Guide This guide describes the monitor's features, setup, and operation. lnformation in this document is subject to change without notice. The sections are as follows: Safety Instructions: lists safety information. Setup: describes the initial setup process.
-
Page 2: Safety Instructions
Safety Instructions FCC Notice FCC Class B Radio Frequency Interference Statement WARNING: (FOR FCC CERTIFIED MODELS) NOTE: This equipment has been tested and found to comply with the limits for a Class B digital device, pursuant to Part 15 of the FCC Rules. These limits are designed to provide reasonable protection against harmful interference in a residential installation. - Page 3 This symbol on the product or on its packaging indicates that this product must not be disposed of with your other household waste. Instead, it is your responsibility to dispose of your waste equipment by handing it over to a designated collection point for the recycling of waste electrical and electronic equipment. The separate collection and recycling of your waste equipment at the time of disposal will help to conserve natural resources and ensure that it is recycled in a manner that protects human health and the environment.
- Page 4 The monitor is equipped with a three-pronged grounded plug, a plug with a third (grounding) pin. This plug will fit only into a grounded power outlet as a safety feature. If your outlet does not accommodate the three-wire plug, have an electrician install the correct outlet, or use an adapter to ground the appliance safely. Do not defeat the safety purpose of the grounded plug.
- Page 5 Setup Setup the stand and base Please setup or remove the base following below steps. Adjusting Viewing Angle For optimal viewing it is recommended to look at the full face of the monitor, then adjust the monitor's angle to your own preference. Hold the stand so you do not topple the monitor when you change the monitor's angle.
- Page 6 Attaching the Cables Cable Connections On Back of Monitor and Computer 1.Power 2.DVI 3.Analog Turn off your computer before performing the procedure below. Connect the power cable to the AC port on the back of the monitor. Connect one end of the 15-pin D-Sub cable to the back of the monitor and connect the other end to the computer's D-Sub port. (Optional - Requires a video card with DVI port) - Connect one end of the 24-pin DVI cable to the back of the monitor and connect the other end to the computer's DVI port Turn on your monitor and computer.
- Page 7 Attaching Wall Mounting Arm Preparing to Install An Optional Wall Mounting Arm This monitor can be attached to a wall mounting arm you purchase separately. Disconnect power before this procedure. Follow these steps: Remove the base. Follow the manufacturer's instructions to assemble the wall mounting arm. Place the wall mounting arm onto the back of the monitor.
-
Page 8: Using The Monitor
Using the Monitor Setting the Optimal Resolution The recommended resolution for this monitor is 1680 by 1050. To setup the monitor to this resolution, follow the steps below. Click START. Click SETTINGS. Click CONTROL PANEL. Double click DISPLAY. Click SETTINGS. Set the resolution SLIDE-BAR to 1680 by 1050. - Page 9 1.Souce 2. Auto Config 3. Eco Mode/ down 4. Up 5. Menu / Enter 6. Power Button & Indicator OSD Settings Press the MENU-button to activate the OSD window. Press+ or - to navigate through the functions. Once the desired function is highlighted, press the MENU-button to activate it. If the function selected has a sub-menu, press or again to navigate through the sub-menu functions.
- Page 10 Function Control Illustration Luminance Adjust Range Description Brightness 0-100 Backlight Adjustment Contrast 0-100 Contrast from Digital-register. Standard Standard Mode Text Text Mode Eco mode Internet Internet Mode Game Game Mode Movie Movie Mode Sports Sports Mode Gamma1 Adjust to Gamma1 Gamma Gamma2 Adjust to Gamma 2...
- Page 11 Color Temp. Warm Recall Warm Color Temperature from EEPROM. Normal Recall Normal Color Temperature from EEPROM. Cool Recall Cool Color Temperature from EEPROM. sRGB Recall SRGB Color Temperature from EEPROM. User-B Blue Gain from Digital-register User-G Green Gain Digital-register. User-R Red Gain from Digital-register User User-Y...
- Page 12 LED Indicators Status LED Color Full Power Mode Green Active-off Mode Orange...
- Page 13 Driver Windows ME &2000 Click START. Click SETTINGS. Select CONTROL PANEL. From the CONTROL PANEL, double click the DISPLAY icon. From the Display Properties Window, select the SETTINGS tab. Click ADVANCED. Click MONITOR. Click PROPERTIES. Click DRIVER. 10. Click UPDATE DRIVER. 11.
- Page 14 Windows Vista Select Start->Control panel, then double click Hardware and Sound and enter Display Properties. Click Personalization. Click Display Settings. Click Advanced Settings. Click Monitor. Click Properties. Click Driver. Select Update Driver then click Update Driver Software-Generic PnP Monitor. Click Browse my computer for driver software. Select Let me pick from a list of device drivers on my computer.
-
Page 15: Technical Support
Check with your computer manufacturer. Also check the monitor's video cable and make sure none of the No Plug & Play pins are bent. Make sure the AOC Monitor Drivers are installed (AOC Monitor Drivers are available at : http://www.aoc.com) Adjust the Contrast and Brightness Controls. Picture Is Fuzzy & Has Ghosting Shadowing Make sure you are not using an extension cable or switch box. -
Page 16: Product Information
Product Information Model number 210V Driving system TFT Color LCD Size 558mm ( 22") Pixel pitch 0.282mm(H) x0.282 mm(V) LCD Panel Video R, G, B Analog lnterface & Digital Interface Separate Sync. H/V TTL Display Color 16.7 million Colors Dot Clock... -
Page 17: Epa Energy Star
EPA ENERGY STAR® ENERGY STAR® is a U.S. registered mark. As an ENERGY STAR® Partner, AOC International (Europe) GmbH has determined that this product meets the ENERGY STAR® guidelines for energy efficiency. Preset Display Modes HORIZONTAL VERTICAL STAND RESOLUTION FREQUENCY(kHZ) -
Page 18: Pin Assignments
Pin Assignments Pin Number 15-Pin Side of the Signal Cable Video-Red Video-Green Video-Blue N.C. Ground GND-R GND-G GND-B Detect Cable N.C. DDC-Serial data H-sync V-sync DDC-Serial clock... -
Page 19: Plug And Play
Pin No. Signal Name Pin No. Signal Name Pin No. Signal Name TMDS Data 2- TMDS Data 1- TMDS Data 0- TMDS Data 2+ TMDS Data 1+ TMDS Data 0+ TMDS Data 2/4 Shield TMDS Data 1/3 Shield TMDS Data 0/5 Shield TMDS Data 4- TMDS Data 3- TMDS Data 5-...
Need help?
Do you have a question about the 210V and is the answer not in the manual?
Questions and answers