Table of Contents
Advertisement
Advertisement
Table of Contents

Related Manuals for DANE-ELEC SO SPEAKY PVR


Summary of Contents for DANE-ELEC SO SPEAKY PVR
-
Page 1: User Manual
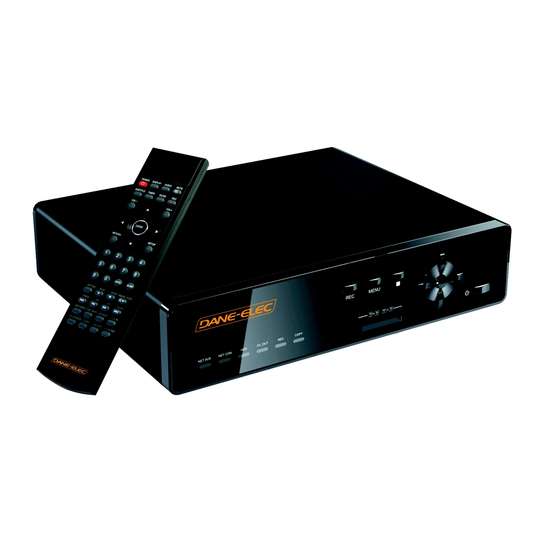
Multimedia Hard Disk Player & Recorder User Manual PC/MAC... -
Page 2: Table Of Contents
Back view • Remote controller 3. BasiC oPeraTion • Initiation Setup • Power connection • Connect and disconnect the So Speaky PVR • Connection of TV audio output • Composite output mode • Component YPbPr output connection • HDMI output mode •... -
Page 3: Brief Introduction
• feature/performance The So Speaky PVR is a new kind of family recording product. Via our So Speaky PVR, individuals can record favorite program randomly and store it in the device, avoiding the inconvenience brought by change tape frequently. The So Speaky PVR can provide long recording and good watching. - Page 4 audio: stereo(L/R) Input video: composite(AV) Card CF, SD, MMC, XD, MS, SDHC, MS PRO, MS DUO, MS, PRO DUO Format: MP3, WMA, WAV, ACC, OGG(no DRM)AC3 Audio Speed: MP3 32kbps - 320kbps WMA: 32kbps - 192kbps Video decode: MPEG 1/2/4, Xvid Video Format: IFO, VOB, DAT, AVI, MPG, MPEG, TS Subtitle...
-
Page 5: Product Details
(Red, Yellow, White) ( Red, Blue, Green ) Note: Up to the model and specification of the So Speaky PVR, some of the below accessories may not appeared in your packing, please take note. Or can consult your supplier. www.danedigital.com... -
Page 6: Front View
• front view MENU STOP DIRECTION KEY CARD READER ENTER POWER Button definition: Button button definition instruction REC button Press shortly to enter record mode. choose the Rec time MENU Menu button Press shortly to return the first menu Stop button Press shortly to stop current operation Left button Press shortly to move cursor left... -
Page 7: Back View
• Back view AUDIO INPUT COMPONENT VIDEO OUTPUT OPTICAL USB HOST AUDIO OUTPUT POWER INPUT VIDEO INPUT HDMI output COMPOSITE VIDEO OUTPUT Port definition: Port Port definition Instruction USB port via this USB port for PC communication USB connection Outside USB port Can read outside USB storage via USB port Can output audio and video when connected to video Video output... - Page 8 function Power Turn on and off in the stand by mode Video Switch output mode Mute Turn on or shut audio output Start recording in REC mode and repeat pressing to select recording time Browser Enter the browser menu Timer Enter the Time menu to edit, add, delete recording schedule copy Enter the copy mode...
-
Page 9: Basic Operation
Next Press to go to next file Fast forward Press to fast forward from current play and again to select the speed Fast rewind Press to fast rewind from current play and again to select the speed Subtitle Switch the subtitle if the file supported Display Press to display time, title, information of chapter when play video and photo. -
Page 10: Connect And Disconnect The So Speaky Pvr
The first time it is used as a peripheral storage device, a driver must be installed if the computer’s storage system is an older one. For the first use, turn the So Speaky PVR on, and connect it to the computer via the USB cable. The installation process will begin on the computer. - Page 11 - Select your external hard disk and confirm that you would like it to be stopped - Disconnect the USB cable that connects the So Speaky PVR to the computer. note: Before disconnecting any cables from your so speaky PVr, turn it off.
-
Page 12: Connection Of Tv Audio Output
Composite output mode Plug the yellow connector into the AV output of So Speaky PVR and AV input of TV, and plug the red and white connector into the audio input of TV or HIFI. Turn on the TV and select AV mode. Turn on the So Speaky PVR and TV displays the interface of initiation. -
Page 13: Connection Of Recording
TV receiver and make sure the output of set-top box or satellite TV receiver works well. Turn on TV and select AV mode. Turn on the So Speaky PVR and select video in after enter the men. -
Page 14: Connection And Setup Of Network
OPTICAL HDMI Connect one end of the RJ45 cable to the So Speaky PVR like the PC does and connect the video output. Press “setup” key or select “setup” menu in the initiation interface. Select “Network” option in the setup window and press “OK”... - Page 15 2. Select “sharing” in the property option and select “share this folder on the network” and click “Apply” for confirming to exist. 3. Open” Control panel- Management tool-Computer management-Local users and groups” and click “Users” option. Right click Guest and select “Properties”. www.danedigital.com...
- Page 16 4. Select ‘users can not change your password’ and ‘password never expires’. keep the other checkboxes unchecked. 5. Open” Control panel- Network connection”, and select “Local Area connection” and right click to select “Properties”. www.danedigital.com...
-
Page 17: Operation Of Sharing File Under Windows Vista
6. In the Pop-up window, select ‘Internet protocol (TCP/IP)’ 7. Set up the relevant IP address, subnet mask and gateway, can also choose to automatically design. 8. Completion of Windows XP network sharing. 9. Finally, please close the Windows Network Connection Firewall •... - Page 18 3. Open User account and select” open a new account” and name it “Guest” 4. Select the folder need to share and right click the mouse, then select the “sharing” option. www.danedigital.com...
- Page 19 5. Open the shared folder and add guest account to the list 6. Give the right to all the users after adding the Guest into the list. www.danedigital.com...
- Page 20 7. Select “sharing”, and then the folder is shared. 8. Finish sharing www.danedigital.com...
-
Page 21: Usage Of Starting Od Record And Play
• usage of starting record & play usage of one key recording function After correct connection of the AV-in signal, power on the set-top box (or satellite television receiver), TV and our recorder, switch the signal of TV to AV-in signal, following menu appears: If individuals only want to watch TV, do not power on the recorder and keep the input signal of TV with the set-top box signal Select “Video-in”... - Page 22 Select “Edit” from menu and select “Add a New Schedule”, then press “OK” button to enter. In “Recording schedule set up” menu, find the rest available recording time according to different recording quality level. Press the navigation buttons to set up the recording time, length, quality level, place to save the recorded files and repeat recording time.
-
Page 23: Playback Function
All the recorded files are recorded in a file folder named “My recordings”. Enter the “Browser” in the main menu and select the “HDD”, you will find this folder and recorded videos were saved in this folder named according to system time. It is available to preview the recorded files and press “ENTER”... -
Page 24: Connect To Pc
While using the So Speaky PVR HDD recorder & player with PC, power supply is also needed. 2) Connect to PC with USB cable Connect the So Speaky PVR HDD Recorder & player to PC with USB cable then you can copy and transfer data. -
Page 25: Operation Of Product Usage
4. oPeraTion of ProduCT usaGe Power on the So Speaky PVR HDD Recorder & Player, the system shows guide menu after a few seconds. There will be five function options, or individuals can enter this guide menu by press “Guide” button on the remote control. -
Page 26: Browser
• Browser Select “Browser” in the guide menu or press “Browser” button on the remote control, then individuals can browse movie, photo and music files stored in HDD, card, network and USB by pressing the “Up” and “Down” navigation buttons to choose the source devices and press “OK” button to confirm and play the files in the selected device. -
Page 27: Network
return Select to return the first menu Please refer to following procedure to rename file: 1.Select Rename 2.The edit window appears after press ”Enter” key rename 3. Use the navigation arrows to select letters and numbers. CAPS to toggle between uppercase and lowercase letters. -
Page 28: Time Rec
• Timer rec Timer Rec allows individuals to create, edit and delete recording schedules and view all schedule status and history. Select Timer Record from the Guide menu, there are four options: Edit, Delete, Status and History. Please press button select. Creating a New Schedule 1. -
Page 29: File Copy
• file Copy The File Copy allows individuals to copy files between USB, CARD, HDD, NET. Select “File Copy” from the Guide menu or select “COPY” on the remote control .It is very easy to copy files between various devices. Can only write on FAT or FAT 32 partition and Network (shared folder). -
Page 30: Setting Menu
• setup menu The default language setting on your So Speaky PVR is English. To change the language please follow the instructions below: - Turn on your So Speaky PVR - Go to Setup Menu - Select the desired language - Confirm by pressing “Enter”... -
Page 31: Changing Photos Settings
Select” Setup” option or directly press “Setup” button on the remote controller to enter the setup menu. It is possible to configure Photo, Audio, Video, Rec, Network and System. Select any option by pressing on the remote controller, and press enTer to confirm or press “Return”... -
Page 32: Changing Hdmi Settings
• Changing hdMi settings Connect the HDMI cable before usage, adjust TV mode to HDMI, then video appears on TV screen. Please refer to “changing audio settings” and “changing video settings” if you want to change HDMI settings. Changing Record Settings Recording quality setting: HQ, SP, LP, EP, SLP. -
Page 33: Hd Format
• hd format Note: format will delete all data, please make a copy at first Select by navigation, please press “enter” to next step or “ cancel” to exit when highlight confirms. Operate procedures. First, FAT32 and NTFS partition: please dispatch FAT32 and NTFS capacity according to instruction information, press “ok”... -
Page 34: Others
The illustration may be a little different from the real product. • how to know the firmware’s version of the so speaky PVr? On the menu select "Video in" in press ENTER, press "Stop" and the "Pause". www.danedigital.com...
Need help?
Do you have a question about the SO SPEAKY PVR and is the answer not in the manual?
Questions and answers