Table of Contents
Advertisement
Owner's Manual
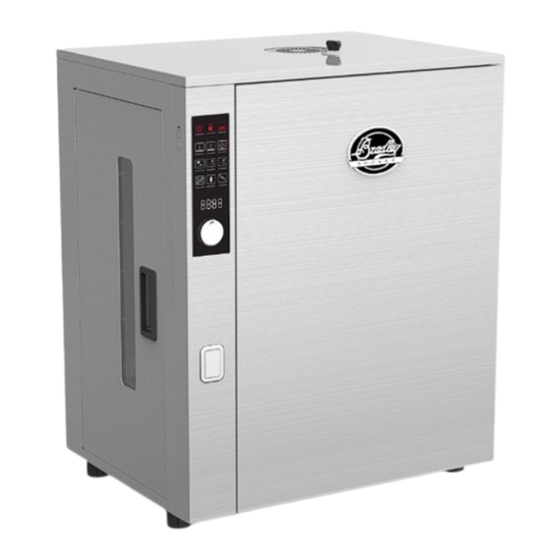
Bradley 5 Rack Capacity Digital Smoker Professional Series
120v – MODEL BS1019
220-240v – MODEL BS1019CE
Bradley Technologies Canada Inc.
1-866-508-7514
info@bradleysmoker.com
www.bradleysmoker.com
Printed in China/ Imprimé en Chine/ Impreso en China/ Gedruckt in China
July 2019/ Juillet 2019/ Julio de 2019/ Juli 2019
1 |
P a g e
Advertisement
Table of Contents

Related Manuals for Bradley BS1019CE


Summary of Contents for Bradley BS1019CE
- Page 1 Owner’s Manual Bradley 5 Rack Capacity Digital Smoker Professional Series 120v – MODEL BS1019 220-240v – MODEL BS1019CE Bradley Technologies Canada Inc. 1-866-508-7514 info@bradleysmoker.com www.bradleysmoker.com Printed in China/ Imprimé en Chine/ Impreso en China/ Gedruckt in China July 2019/ Juillet 2019/ Julio de 2019/ Juli 2019...
- Page 2 (with addition of ice) food with consistently superior results using minimal effort. The Bradley Smoker is unique in that it produces smoke which is four times cleaner than traditional burn-box chips*or wood pellets. Because it automatically extinguishes the spent bisquette, it prevents the formation of high temperature gases and acids.
-
Page 3: Table Of Contents
Table of contents Safety ……………………………………………………….. Page 4-5 General maintenance ………………………………. Page 6 External components ……………………………….. Page 7 Internal components ……………………………….. Page 8-9 Assembly instructions ………………………………. Page 10 How to season for the first time ………………. Page 11 ... -
Page 4: Safety
• Do not use appliance for any other purpose other than intended use. • Do not use any other type of wood other than Bradley Flavor Bisquettes®. • Lift and move smoker with care to prevent strains and back injuries. - Page 5 USE OUTDOORS ONLY Carbon Monoxide Hazard Warning • The use or combustion of Bradley Flavored Bisquettes in this product could expose user to chemicals such as carbon monoxide. Unventilated use will increase risk of serious health issues, up to and including death •...
-
Page 6: General Maintenance
Important Safety Precautions • Use precautions during user maintenance • The Bradley Smoker must be maintained and cleaned after each use. • Unplug the Long Power Cord from wall outlet prior to commencement of any maintenance or cleaning. • Do not immerse smoker in water. -
Page 7: External Components
External components 1. Smoker cabinet 2. Front door 3. Bisquette dispenser (side) door 4. Chimney vent damper 5. Feet 6. Display panel 7. Rotary knob 8. Door open push button 9. On/OFF switch 10. Power receptacle 11. Sensor replacement cover 12. -
Page 8: Internal Components
Cabinet Internal components 1. Door seal 2. Grill rack (4 included) 3. Shelving for grill rack 4. Heating element 5. Drip tray 6. Smoke diffuser 7. Water bowl 8. Renderings bowl 9. Lifting hook 10. Removable heating element cover 11. Wire harness removable cover 12. - Page 9 Cabinet Internal components continued 1. Meat probe 1 2. Meat probe 2 3. Smoke diffuser 4. Bisquette dispenser fastening screw. 5. Internal temperature sensor 6. Meat probe wire connector 7. Condensation bowl with rack P a g e...
-
Page 10: Assembly Instructions
Assembly Instructions How to assemble 5 Rack Bradley BS1019 (CE-EU) Professional Series smoker Remove smoker from box. Take all packaged parts out of smoker. Remove all protective packaging materials from parts. Set the smoker on firm base; stand or on table. -
Page 11: How To Season For The First Time
Setting up the smoker for the first time for seasoning Seasoning the Bradley Smoker® is an ongoing process, the more you use it, the better tasting your foods will be. Seasoning is mainly to remove the impartial smells from your smoker. The smell of your new Bradley Smoker®... -
Page 12: Operating Guidelines
Operating guidelines Getting started After seasoning, empty and refill the Water Bowl with water. Place your food onto the cooking racks and load them into the smoker. Set the damper at the desired opening. Do not close the damper all the way when the smoke is running. Turn ON the Smoker by pressing the power switch. -
Page 13: Optimum Use
When cooking or smoking foods that are heavy with grease and fat, please place a pie plate or bowl directly under the food to catch as much of the rendering as possible. This will help to keep your Bradley Smoker clean and will extend the life of your smoker. - Page 14 Display Function Guidelines POWER ON / OFF CHILD LOCK CABINET HEATING TEMPERATURE ADJUSTMENT COOK TIME ADJUSTMENT SMOKE TIME ADJUSTMENT BISQUETTE ADVANCE MEATPROBE 1 MEATPROBE 2 CUSTOM RECIPE TEMPERATURE F / C 4 - DIGIT DISPLAY *Note: When icons are greyed out that means they are deactivated ROTARY SELECTION AND DIAL KNOB 14 | P a g e...
-
Page 15: Display Functions
Display functions explained ROTARY DIAL / SELECTION Select the function on the screen you want to adjust Turning rotary dial clockwise will increase the settings on the 4 – digit display Turning rotary dial counter clockwise will decrease the settings on the 4 – digit display By pressing rotary dial the settings selection will be entered POWER ON / OFF When power is turned on, the sound will beep once and power indication light will turn red and... - Page 16 COOK TIME ADJUSTMENT By pressing this indicator, the indication light will flash blue and the 4-digit display will show flashing start time as 00:00. Rotate the rotary dial until the 4-digit display shows the desired target time. Press the rotary dial to confirm the setting. Count down time will begin. *Note: Adjustment will be cancelled if no confirmation is set within 5 seconds.
- Page 17 BISQUETTE ADVANCEMENT To manually advance the bisquette, press the indicator, the indication light will flash blue and the turntable will rotate ½ turn. Withdrawing the new and discarding the burnt bisquette happens at the same time. Digital display shows “FEEd” during bisquette advancement. After the bisquette has been advanced digital display will show “dONE”...
- Page 18 CUSTOM RECIPE *Note: Your Custom Recipe Menu sequences must be created in the Bradley Custom Recipe Menu App and downloaded to USB flash drive. *Note: do not power off the smoker during the update. After the update is completed the smoker will restart automatically.
-
Page 19: Firmware Update
FIRMWARE UPDATE Go to https://www.bradleysmoker.com/product/2019-digital-5-rack-smoker/ (scroll to firmware tab) and download the latest firmware update and save it on USB flash drive. Please follow these steps: 1. Press and hold recipe indicator for 3 seconds, buzzer will sound. 2. Insert the USB flash drive containing downloaded .bin file. 3. -
Page 20: Before You Call
Please don’t hesitate to contact our Customer Support if you have any questions or in the unlikely event that your Bradley Smoker needs service. We are ready to assist you. Please retain your invoice papers for warranty validation if service is needed. -
Page 21: Troubleshooting
TROUBLESHOOTING ERROR CODES To better help with trouble shooting, your smoker has a built in messaging system displaying the probable cause of error codes. Error codes Error meaning Principal and Remedy When cabinet temperature increase is less than 8 degrees during a 5 minute period and inner temperature is less than 80% from the set point value, the error code will be displayed with an HEAT ELEMENT FAILURE... - Page 22 When the smoker detects the sensor failure or loses the connection, the error code will be displayed with BISQUETTE BURNER an audible alarm. Press the rotary dial to cancel the TEMPERATURE SENSOR alarm. Check the sensor and its connections. FAILURE To replace the sensor see page 24 When the smoker detects a probe failure or loses the connection during the process, the error code...
-
Page 23: Quick Repairs
QUICK REPAIRS Only an authorized technician may work on electrical repairs on this appliance. Bradley Technologies Canada Inc. accepts no responsibility for any malfunction or damage which is caused by unsuitable electrical repairs. Main heating element replacement This error occurs when one or both of the elements are not supplying heat to the cabinet. - Page 24 QUICK REPAIRS Only an authorized technician may work on electrical repairs on this appliance. Bradley Technologies Canada Inc. accepts no responsibility for any malfunction or damage which is caused by unsuitable electrical repairs. Bisquette burner and burner sensor removal This error occurs when one or both of the elements are not supplying heat to the bisquette burner.
- Page 25 QUICK REPAIRS Only an authorized technician may work on electrical repairs on this appliance. Bradley Technologies Canada Inc. accepts no responsibility for any malfunction or damage which is caused by unsuitable electrical repairs. Cabinet sensor and temperature high limit switch removal When the smoker detects the sensor failure or loses the connection, the error code will be displayed with audible alarm.
- Page 26 QUICK REPAIRS Only an authorized technician may work on electrical repairs on this appliance. Bradley Technologies Canada Inc. accepts no responsibility for any malfunction or damage which is caused by unsuitable electrical repairs. Control display panel removal When a faulty display needs to be changed, please follow these steps: 1.
- Page 27 Continued from page 26 Press down the door button and gently apply downward motion to entire vertical metal panel till it releases. See the illustration to the left See the citquit board illustration above right 10. Gently disconnect all the cable sockets one by one and set them aside. A.
-
Page 28: Specifications
ELECTRICAL SPECIFICATIONS Rated Voltage 120 / 220-240V AC (country specific by factory default) Rated Frequency 50 / 60 Hz Rated Power 1000W Main heating element 2 x 400W Bisquette burner 2 x 100W CAPACITIES Internal volume Total racks 5 rack capacity ( 4 included ) Cooking area 5 x 0.13m²... -
Page 29: Warranty
Warranty is limited to repair or replacement of parts determined by Bradley Technologies Inc. Bradley Technologies Inc. at its discretion will provide a replacement part for any component found by Bradley Technologies Inc. to be defective and shall not be responsible for any reassembly.
Need help?
Do you have a question about the BS1019CE and is the answer not in the manual?
Questions and answers