Table of Contents
Advertisement
Congratulations on the purchase of your new SpaceLift
Products 5200 Series attic lift system. Expect to receive
many years of reliable service moving household items
between the floors of your home.
BEST-IN-CL SS FE TURES INCLUDE:
Low-profile design, no vertical restriction
Automated lift with 200-pound load limit
Platforms have up to 24 cubic feet capacity
Factory assembled for ease of installation
Wall-mounted control unit with key lock
Load management system
Two-year factory warranty
5200 SERIES SPECIFIC TIONS
Lift Weight Capacity: 200 lbs
Lift Speed: 3 inches per second
Max Vertical Travel: to 15 feet
Joist/Ceiling Depth: 7 to 14 inches
Platform Leveling: Variable adjustment
Power Requirement: 110 VAC – 120 VAC
Tethers: Stainless steel cable
Remote Control: Momentary up/down buttons
Dimensions (inches}:
Rough Framed Opening: 22.5 x 60 (+/- 1/8)
Internal Platform Area:
Ceiling Drywall Cutout: 22.5 x 46
Landing Space Area:
Unit Weight:
Model Number:
Serial Number:
Installation Date:
Installer:
Place of Purchase:
Date of Purchase:
Page 1
SpaceLift 5200 Series ttic Lift Manual (10/14)
Model 5200 Series ttic Lifts
Installation and Operation Manual
Model 5222
Model 5228
22 W x 59.5 L x 7 H
28 W x 59.5 L x 7 H
28.5 x 60 (+/- 1/8)
18 x 41
24 x 41
28.5 x 46
24.5 x 48
30.5 x 48
75 lbs
88 lbs
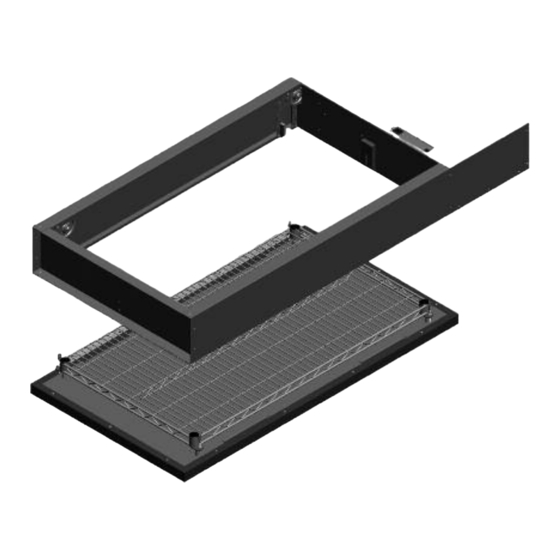
SpaceLift 5200 Series, operational perspective
SpaceLift 5200 Series, view stowed in attic floor
Protected by U.S. Patent No. 8,292,031.
Advertisement
Table of Contents

Related Manuals for SpaceLift 5228


Summarization of Contents
Installation Instructions
Before You Begin
Steps to take before starting the installation process.
Section 1: Location Selection
Location and Orientation Requirements
Guidelines for lift orientation, finished floor, electrical outlet, load support, power, landing area, travel, ceiling height, overhead space, and remote control unit.
Section 2: Prepare the Opening
Step 1: Prepare a Framed Opening in the Ceiling
Details on rough opening size, required dimensions, and ceiling drywall cutout.
Step 2: Install Mounting Strips
Instructions for cutting and installing wood mount strips and side strips.
Section 3: Install the Lift System
Section 4: Mount the Remote Control Unit
Instructions for mounting the remote control unit and connecting cables.
Section 5: Install the Ceiling Cover
Install Ceiling Cover
Procedures for attaching springs, standoffs, and landing pads for the ceiling cover.
Section 6: Set the Travel Limit
Set Bottom Limit
Detailed procedure to set the bottom travel limit of the lift system.
Reset to Maximum Vertical Travel
Method to reset the bottom limit to maximum vertical travel.
Operating Instructions
First Read: Normal Sequence of Operation
Overview of the standard operating sequence for the lift.
While Traveling Up or Down
Explains behavior and indicators during upward or downward travel.
Limited Warranty
Extent of Limited Warranty
Defines what the limited warranty covers and what it excludes.
Limitations of Warranty
Outlines limitations and disclaimers regarding warranties.
Limitations of Liability
Specifies limitations on the company's liability for damages.
Local Law
Explains how local laws may affect warranty rights.
Need help?
Do you have a question about the 5228 and is the answer not in the manual?
Questions and answers