
Related Manuals for Allen-Bradley PanelView Plus


Summarization of Contents
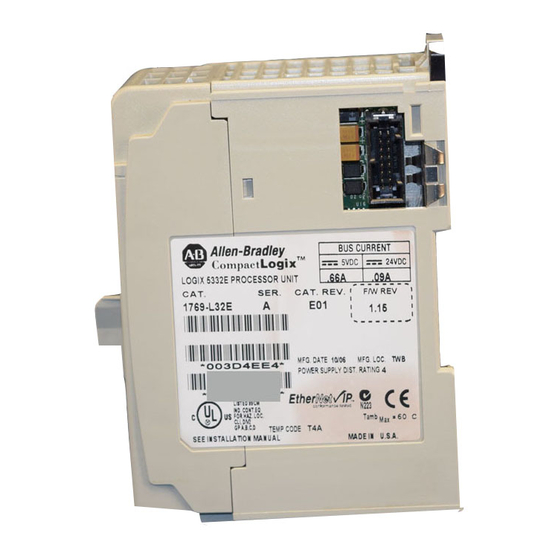
Prepare the CompactLogix Hardware
Before You Begin
Determine network and hardware requirements for the CompactLogix system.
What You Need
Lists required hardware and cables for setting up the CompactLogix system.
Connect the Battery to the Controller
Steps to connect the controller's battery and record installation date.
Record the Ethernet Address (MAC)
Instructions to find and record the controller's MAC address for network setup.
Set the ControlNet Node Address
How to set the node address for ControlNet controllers using DIP switches.
Assemble the System
Guide on assembling the controller, power supply, and I/O modules on DIN rail.
Make Network Connections
Instructions for connecting Ethernet, ControlNet, or serial network cables.
Wire Power
Steps for connecting power supply wires to the CompactLogix system.
Prepare the Computer
Before You Begin
Verify software requirements and install ControlNet card if needed.
What You Need
Lists required software and hardware for computer setup.
Terminology
Defines Ethernet addresses like MAC and IP addresses for network communication.
Make Network Connections
Steps for connecting the computer via Ethernet, ControlNet, or serial.
Install RSLogix Programming Software
Detailed guide on installing RSLogix 5000 programming software and its components.
Configure a Serial Driver
Steps to configure a serial driver in RSLinx for controller communication.
Set the IP Address for the Computer
Guide to configuring the computer's IP address for network connectivity.
Configure the EtherNet/IP Driver in RSLinx Software
Steps to set up the EtherNet/IP driver within RSLinx software.
Load Firmware
Instructions for loading firmware onto the controller using ControlFlash software.
Install Additional Software
Information on installing supplementary software like FactoryTalkView and RSNetWorx.
Prepare the Distributed POINT I/O Hardware
Before You Begin
Determine network adapter and mounting base for POINT I/O modules.
What You Need
Lists POINT I/O adapter, bases, module, and power supply.
Mount and Connect the Network Adapter
How to mount and connect Ethernet, ControlNet, or DeviceNet adapters.
Mount the POINT I/O Modules
Guide to mounting POINT I/O modules onto wiring bases and DIN rail.
Mount and Wire the POINT I/O Power Supply
Steps to mount and wire the POINT I/O power supply unit.
Wire the Adapter and I/O Modules to the Power Supply
Connecting power supply to POINT I/O adapter and modules.
Prepare the PowerFlex 70 Drive
Before You Begin
Determine network and adapter for PowerFlex 70 drive.
What You Need
Lists PowerFlex 70 drive and communication adapter.
Mount the PowerFlex 70 Drive
Instructions for mounting the PowerFlex 70 drive.
Wire Power
Steps for connecting power to the PowerFlex 70 drive.
Configure the Communication Adapter
Guide to setting up Ethernet, ControlNet, or DeviceNet adapters.
Connect Communication Adapter to the PowerFlex 70 Drive
How to connect the communication adapter to the PowerFlex 70 drive.
Prepare the PowerFlex 40 Drive
Before You Begin
Determine network and adapter for PowerFlex 40 drive.
What You Need
Lists PowerFlex 40 drive, adapter, and cover.
Mount the PowerFlex 40 Drive
Instructions for mounting the PowerFlex 40 drive.
Wire Power
Steps for connecting power to the PowerFlex 40 drive.
Configure the Communication Adapter
Guide to setting up Ethernet, ControlNet, or DeviceNet adapters.
Connect the Communication Adapter to the PowerFlex 40 Drive
How to connect the communication adapter to the PowerFlex 40 drive.
Prepare the PanelView Plus Terminal
Before You Begin
Determine network connection type (EtherNet/IP, ControlNet, serial).
What You Need
Lists PanelView Plus terminal, interface module, power supply, cables.
Install the ControlNet Interface Module
Steps to install the ControlNet communication module on the terminal.
Mount the PanelView Plus Terminal
Instructions for mounting the PanelView Plus terminal.
Wire the PanelView Plus Terminal to the Power Supply
Connecting power supply to the PanelView Plus terminal.
Make Network Connections
Connecting the PanelView Plus to Ethernet, ControlNet, or serial network.
Assign an IP Address
Guide to assigning an IP address to the PanelView Plus terminal.
Configure the EtherNet/IP Network
Before You Begin
Prepare computer, install hardware, verify power.
What You Need
Lists NIC, BOOTP/DHCP, MAC/IP addresses.
Terminology
Defines Ethernet addresses like MAC and IP addresses for network communication.
Assign IP Addresses to Devices
Using BOOTP/DHCP server to assign IP addresses to network devices.
Browse the EtherNet/IP Network in RSLinx
Using RSLinx RSWho to view EtherNet/IP devices on the network.
Configure the ControlNet Driver
Before You Begin
Prepare computer, install hardware, connect network.
What You Need
Lists RSNetWorx for ControlNet and ControlNet card.
Configure the ControlNet Driver in RSLinx
Steps to configure the ControlNet driver in RSLinx software.
Configure the DeviceNet Network
Before You Begin
Prepare computer, install hardware, connect network.
What You Need
Lists DeviceNet power supply, tap, and RSNetWorx.
Apply Power to the DeviceNet Network
Connecting power to the DeviceNet network using the 1606-XLDNET8 power supply.
Set the 1769-SDN Module’s Node Address
Using RSNetWorx Node Commissioning to set the SDN module's node address.
Create a DeviceNet Configuration File
Creating a DeviceNet configuration file in RSNetWorx for network setup.
Create a Project Using RSLogix 5000 Programming Software
Before You Begin
Configure network and prepare hardware.
What You Need
Lists CompactLogix I/O module and other modules.
Create a Project
Steps to create a new project in RSLogix 5000 software.
Configure the Controller
Setting up controller properties like IP address or node address.
Add Local I/O Modules
Adding local 1769 Compact I/O modules to the RSLogix project.
Add Ladder Logic to Test the Local 1769 Compact I/O Modules
Writing ladder logic to test local I/O modules with push buttons and indicators.
Set the Communication Path and Download to the Controller
Establishing communication path and downloading the project to the controller.
Add the 1769-SDN to the Project
Adding the 1769-SDN module to the RSLogix project for DeviceNet.
Add Distributed I/O Modules to the Project
Before You Begin
Prepare POINT I/O hardware and create RSLogix project.
What You Need
Lists POINT I/O module, required software for networks.
Add Distributed I/O Modules
Adding distributed POINT I/O modules to the RSLogix project.
Edit the DeviceNet Adapter Parameters
Configuring DeviceNet adapter parameters using RSNetWorx software.
Configure the DeviceNet Subnet
Setting up the DeviceNet subnet configuration in RSNetWorx.
Create a DeviceNet Scanlist
Creating a DeviceNet scanlist to define device communication on the network.
Add Ladder Logic
Adding ladder logic to control distributed I/O modules.
Create DeviceNet Tags and Add Ladder Logic
Generating DeviceNet tags and adding ladder logic for I/O control.
Download the Project
Downloading the RSLogix project to the controller.
Set the POINT I/O Chassis Size
Configuring the chassis size for POINT I/O modules in RSLogix.
Schedule the ControlNet Network
Scheduling the ControlNet network using RSNetWorx software.
Test the Distributed I/O Light
Verifying the operation of distributed I/O modules by testing indicator lights.
Create a PowerFlex 70 Application
Before You Begin
Prepare drive/adapter, create RSLogix project.
What You Need
Lists required software for network types.
Add the Drive to Your RSLogix 5000 Project and Connect to the Drive
Adding the PowerFlex 70 drive to the RSLogix project and connecting to it.
Edit the Drive Parameters
Modifying PowerFlex 70 drive parameters for network control.
Create a DeviceNet Scanlist
Creating a DeviceNet scanlist for the PowerFlex 70 drive.
Create DeviceNet Tags
Generating DeviceNet tags for the PowerFlex 70 drive.
Download the Project
Downloading the RSLogix project containing the PowerFlex 70 application.
Schedule the ControlNet Network
Scheduling the ControlNet network for PowerFlex 70 drive communication.
Test the PowerFlex 70 Tags
Verifying PowerFlex 70 drive functionality by testing tags in RSLogix.
Create a PowerFlex 40 Application
Before You Begin
Prepare drive/adapter, create RSLogix project.
What You Need
Lists required software for network types.
Add the Drive to Your RSLogix 5000 Project
Adding the PowerFlex 40 drive to the RSLogix project.
Create a DeviceNet Scanlist
Creating a DeviceNet scanlist for the PowerFlex 40 drive.
Create DeviceNet Tags
Generating DeviceNet tags for the PowerFlex 40 drive.
Download the Project
Downloading the RSLogix project containing the PowerFlex 40 application.
Schedule the ControlNet Network
Scheduling the ControlNet network for PowerFlex 40 drive communication.
Edit PowerFlex 40 Parameter Values
Modifying PowerFlex 40 drive parameters using the drive keypad.
Test the PowerFlex 40 Tags
Verifying PowerFlex 40 drive functionality by testing tags in RSLogix.
Create a PanelView Plus Application
Before You Begin
Prepare PanelView Plus, create RSLogix project.
What You Need
Lists FactoryTalkView Machine Edition software.
Create a New Application
Steps to create a new application in FactoryTalkView Studio.
Create an RSLinx Enterprise Configuration in FactoryTalkView ME
Setting up RSLinx Enterprise communication configuration within FactoryTalkView ME.
Create Device Shortcuts to the Controller
Establishing device shortcuts for controller communication in PanelView Plus.
Create the OB16_Light Indicator
Creating a multistate indicator object for the OB16 light in PanelView Plus.
Create a Push Button
Creating a maintained push button object for controlling the indicator.
Test the Indicator and Push Button
Testing the functionality of the push button and indicator on the PanelView Plus.
Add a Goto Configuration Mode Button
Adding a button to navigate to configuration mode on the PanelView Plus.
Assign Keys
Assigning function keys to display buttons on PanelView Plus terminals without touchscreens.
Assign an Initial Screen
Configuring the startup screen for the PanelView Plus application.
Transfer to PanelView Plus Firmware
Creating a runtime application and transferring it to the PanelView Plus.
Test the Application on the PanelView Plus Application
Running and testing the PanelView Plus application to verify functionality.
Need help?
Do you have a question about the PanelView Plus and is the answer not in the manual?
Questions and answers