
Related Manuals for Amico SR Series


Summary of Contents for Amico SR Series
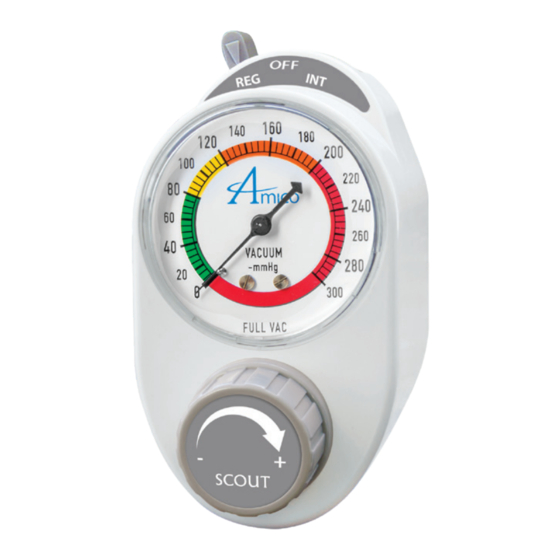
- Page 1 Operating and Maintenance Manual Scout and Sentinel Vacuum Regulators w w w . a m i c o . c o m...
-
Page 2: Table Of Contents
Contents Models User Responsibility Receiving Inspection Operating Instructions Procedures Prior to Use Instructions for Setting the Intermittent Timing Cleaning Instructions - Scout Cleaning Instructions - Sentinel 10-12 Recommended Maintenance Battery Replacement - Sentinel 13-14 Test & Calibration/Reset Guide - Sentinel 15-16 Troubleshooting Guide 17-18... -
Page 3: Models
Models SCOUT SERIES: Model Number SRX-XXXX-XX(X)-C Display Vacuum Regulator Type Color Coding Patient Connection Inlet Connection **Color Coding = Continuous/Intermittent U = USA 2 = 1/8" FNPT F2 = 1/8" FNPT R = Red A = Analog C2 = Continuous 2 Mode... -
Page 4: User Responsibility
CAUTION: Indicates a potentially hazardous situation which, if not avoided, may result in minor or moderate injury. CAUTION: Used without the safety alert symbol ( ) indicates a potentially hazardous situation, which, if not avoided, may result in property damage. CONSULT ACCOMPANYING DOCUMENTS Amico Patient Care Corporation... -
Page 5: Receiving Inspection
Receiving Inspection Remove the Amico Patient Care Corporation Vacuum Regulator from the packaging and inspect it for damage. If there is any damage, DO NOT USE and contact your provider. INTENDED USE WARNING: DO NOT use this Vacuum Regulator for anything other than its intended use. -
Page 6: Operating Instructions
Turn the Selector Switch to the OFF position to turn the Vacuum Regulator off when not in use. WARNING: ALWAYS make sure to connect the Vacuum Regulator to the Vacuum Source only. Connection to a Pressure Source could injure the patient or operator and damage the equipment. Amico Patient Care Corporation... -
Page 7: Procedures Prior To Use
Kink the vacuum tubing. Timing cycles are approximately 16 seconds ON and 8 seconds OFF. NOTE: The intermittent mode starts in the OFF phase. d. Decrease the vacuum level to zero and move the Selector Switch to the OFF position. www.amico.com... -
Page 8: Instructions For Setting The Intermittent Timing
Doing so could damage the Vacuum Regulator. NOTE: Amico Patient Care Corporation recommends that the user complete the Procedures Prior to Use (pages 5-6) to ensure that the Vacuum Regulator is operating correctly. Amico Patient Care Corporation... -
Page 9: Cleaning Instructions - Scout
Cleaning Instructions - Scout NOTE: Amico Patient Care Corporation highly recommends replacing the Disposable Body to ensure it is completely free of contamination. CAUTION: Ethylene Oxide is not recommended as a sterilant. Sterilization using an ethylene mixture may cause small surface cracks to some of the plastic parts that may not be readily apparent to the user. - Page 10 Control Knob Screw 4, 9 Disposable Body 5, 7, 8, 10 Disposable Back Screws 5, 7, 8 Port Gasket 6, 7, 8 Back Housing 5, 8 Disposable Body Back Screws 5, 7, 8 Housing Screws 1, 12 Amico Patient Care Corporation...
- Page 11 10. Install the Regulating Module by turning it counterclockwise into the corresponding threads on the Disposable Body. 11. Install a new Vacuum Gauge Filter. Carefully install the Vacuum Gauge into the Assembly. 12. Install the Front Housing and tighten all 4 Housing Screws. www.amico.com...
-
Page 12: Cleaning Instructions - Sentinel
Cleaning Instructions - Sentinel NOTE: Amico Patient Care Corporation highly recommends replacing the Disposable Body to ensure it is completely clean. NOTE: If the Amber BATT LED does not come on right away when TEST button is pressed, change the batteries. - Page 13 4, 9 Control Knob Screw 4, 9 Disposable Body 5, 7, 8, 10 Disposable Back Screws 5, 7, 8 Port Gasket 6, 7, 8 Back Housing 5, 8 Disposable Body Back Screws 5, 7, 8 Housing Screws 1, 12 www.amico.com...
-
Page 14: Recommended Maintenance
For Sentinel only: press the TEST button to test for contamination and battery power (follow the Procedures Prior to Use - Sentinel on page 6). Amico Patient Care Corporation... -
Page 15: Battery Replacement - Sentinel
CHECK or BATT LED guides (see Figure 8). Gently push the Sensor Assembly forward to insert the CHECK and BATT LED guides into the corresponding slots on the Front Housing (see Figure 8). Install the Front Housing on the Assembly and tighten all 6 Housing Screws. www.amico.com... - Page 16 Press Down on Sensor Assembly Gently Push Sensor Assembly Forward NOTE: Amico Patient Care Corporation highly recommends cleaning or replacing the Disposable Body to avoid calibrating a contaminated Vacuum Regulator. Follow instructions on pages 8-9 of this manual. Amico Patient Care Corporation...
-
Page 17: Test & Calibration/Reset Guide - Sentinel
Insert the tip of the Calibration/Reset/Test Tool into the TEST hole and press for less than 1 second. Check the LEDs on the front of the Vacuum Regulator. The Amber BATT LED should light up for approximately 0.5 seconds, indicating that the battery is OK and that the unit is not contaminated. www.amico.com... -
Page 18: Test & Calibration/Reset Guide - Sentinel
Amber BATT LED should come on first indicating that the batteries are good. Figure 10: Block Bottom Port with Finger NOTE: If no LEDs turn on after 10 seconds, change the batteries and begin the Calibration/Reset steps again. Amico Patient Care Corporation... -
Page 19: Troubleshooting Guide
(Figure 12 on page 16) Occlude Bottom Port. If FULL FULL mode is not showing Bottom Port or Bottom Port is open or vacuum is still low, check the full vacuum Vacuum Supply vacuum supply is low hospital's vacuum level. www.amico.com... -
Page 20: Troubleshooting Guide
Ensure that the Duckbill Valve is Ensure that the Green properly installed. If damaged, Plug is properly installed. please contact your supplier for If damaged, please a replacement contact your supplier for a replacement Green Plug Duckbill Valve Amico Patient Care Corporation... -
Page 21: Vacuum Regulator Assembly Drawing - Scout
C3, CH SRX-CI-DBKIT Intermittent Mode Disposable Body Assembly SRX-PRT-GKT Port Gasket Disposable Seal SRX-C23BKC-KIT Continuous 2/3 Mode Back Housing Assembly C2, C3, CH SRX-CIBKC-KIT Intermittent Mode Back Housing Assembly SRX-DSP-SCRBK Disposable Body Back Screw SRX-BHSSCR-6191 Housing Screw 6-19 x 1" www.amico.com... -
Page 22: Vacuum Regulator Assembly Drawing - Sentinel
Port Gasket Disposable Seal SSX-C23BK-KIT Continuous 2/3 Mode Back Housing Assembly C2, C3, CH SSX-CIBK-KIT Intermittent Mode Back Housing Assembly SRX-DSP-SCRBK Disposable Body Back Screw SRX-BHSSCR-6191 Housing Screw 6-19 x 1" SSX-CDR-MODULE Sensor Assembly with Batteries SRD-BAT Batteries Amico Patient Care Corporation... -
Page 23: Warranty Policy - Vacuum Regulators
Within this period, Amico Patient Care Corporation will repair or replace any part which is proven to be defective at the Company’s costs. All shipping and replacement costs will be borne by the Customer after the first twenty four (24) months after receipt of the Product. - Page 24 Amico Patient Care Corporation | www.amico.com 122 East Beaver Creek Road Richmond Hill, Ontario L4B 1G6 Canada Toll Free Tel: 1.877.462.6426 Tel: 905.764.0800 Fax: 905.764.0862 Email: info@amico.com SOT-IM-VAC-REG 05.23.2017...
Need help?
Do you have a question about the SR Series and is the answer not in the manual?
Questions and answers