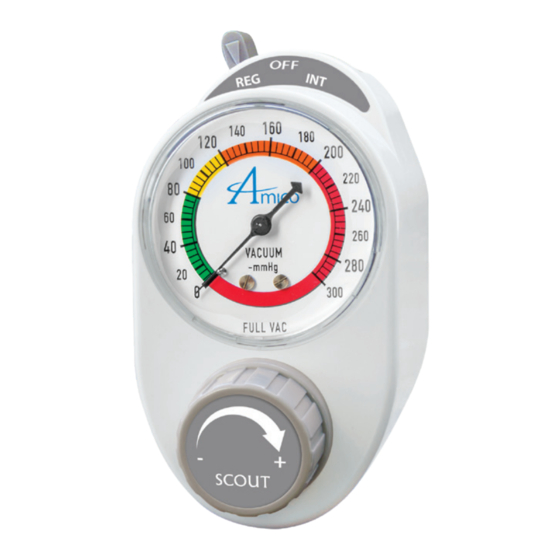
Summary of Contents for Amico SCOUT Series
- Page 1 Operating and Maintenance Manual Scout and Sentinel Vacuum Regulators w w w . a m i c o . c o m...
- Page 2 OX = Oxequip Z = Baby Blue BM = British Male GM = German Male (DIN) FM = French Male DO = DISS Outlet *** If no color is specified, grey is the standard for Sentinel Vacuum Regulators Amico Patient Care Corporation...
-
Page 3: User Responsibility
) indicates a potentially hazardous situation, which, if not avoided, may result in property damage. CONSULT ACCOMPANYING DOCUMENTS Receiving Inspection Remove the Vacuum Regulator from the packaging and inspect it for damage. If there is any damage, DO NOT USE and contact your provider. www.amico.com... -
Page 4: Specifications
Tesla MRI system. As per ASTM F2052, the largest deflection measurement across all devices tested yield allowable maximum spatial gradients of 8.93 T/m (893 gauss/cm) for 1.5 T systems, and 4.46 T/m (446 gauss/cm) for 3.0 T systems. Amico Patient Care Corporation... -
Page 5: Intended Use
• The device must be securely attached to a wall Gas Outlet. • To ensure MR compatibility, only adapters and fittings tested and designated by Amico Patient Care for the configurations listed as MR conditional should be used. Any substitution or change must be evaluated in accordance with your hospital policy. - Page 6 CAUTION: DO NOT operate the Vacuum Regulator when the Collection Canister is full. This may cause loss of vacuum and damage to the Vacuum Regulator. This will void the warranty. Amico Patient Care Corporation...
- Page 7 On the back of the Vacuum Regulator, press the TEST button using a small screwdriver or allen key and hold for 1 second. The Amber BATT LED will light up. This indicates that the batteries are not dead. If the Red CHECK LED doesn’t turn on, this means that the unit is not contaminated. www.amico.com...
-
Page 8: Cleaning Instructions - Scout
Cleaning Instructions - Scout NOTE: Amico Patient Care Corporation highly recommends replacing the Disposable Body to ensure it is completely free of contamination. CAUTION: Ethylene Oxide is not recommended as a sterilant. Sterilization using an ethylene mixture may cause small surface cracks to some of the plastic parts that may not be readily apparent to the user. - Page 9 11. Install the Regulating Module (#3) by turning it counterclockwise into the corresponding threads on the Scout Disposable Body Assembly (#6.1). 12. Carefully install the Vacuum Gauge (#2) into the Assembly. 13. Install the Scout Front Housing (#1) and tighten all 4 Housing Screws (#8). www.amico.com...
-
Page 10: Cleaning Instructions - Sentinel
Cleaning Instructions - Sentinel NOTE: Amico Patient Care Corporation highly recommends replacing the Disposable Body to ensure it is completely clean. NOTE: If the Amber BATT LED does not come on right away when TEST button is pressed, change the batteries. - Page 11 12. Carefully install the Vacuum Gauge (#2) into the Assembly. 13. Install the Sentinel Front Housing (#1) and tighten all 6 Housing Screws (#8). 14. Calibrate the Sensor Module (#10) following the steps in the “Calibrate/Reset Guide - Sentinel“ (page 15). www.amico.com...
-
Page 12: Recommended Maintenance
ON needle valve counterclockwise (see Figure 2). CAUTION: Do not continue to turn the needles once resistance is felt. Doing so could damage the Vacuum Regulator. Figure 2: Adjusting Intermittent Timing 12 Amico Patient Care Corporation... -
Page 13: Battery Replacement - Sentinel
Make sure top of the Sensor Module is seated with the LED guides of the Front Housing. Install the Front Housing on the Assembly and tighten all 6 Housing Screws. Calibrate the Sensor (follow the “Calibrate/Reset Guide - Sentinel“ (page 15). Figure 4: Sensor Module Installation Insert Sensor Module Guide Guide Guide Posts www.amico.com... - Page 14 Check the LEDs on the front of the Vacuum Regulator. The Amber BATT LED will turn on for approximately 1 second, indicating that the battery is OK. If the BATT LED does not turn on for a short period of time, batteries should be replaced. 14 Amico Patient Care Corporation...
- Page 15 Reinstall the Battery Holder and make sure the Battery Holder is locked in and not loose. Place the Digital Gauge back into the Front Disposable Body. Install the Front Housing back onto the Vacuum Regulator and tighten all Housing Screws. Battery Orientation Symbols www.amico.com...
-
Page 16: Troubleshooting Guide
(Figure 9) Occlude Bottom Port. If FULL FULL/REG mode is not Bottom Port or Bottom Port is open or vacuum is still low, check the showing vacuum Vacuum Supply vacuum supply is low hospital's vacuum level. 16 Amico Patient Care Corporation... - Page 17 Figure 9: Port Cover Locations Ensure that the Duckbill Valve is Ensure that the Green properly installed. If damaged, Plug is properly installed. please contact your supplier for If damaged, please a replacement contact your supplier for a replacement Green Plug Duckbill Valve www.amico.com...
- Page 18 18 Amico Patient Care Corporation...
- Page 19 www.amico.com...
- Page 20 20 Amico Patient Care Corporation...
- Page 21 www.amico.com...
-
Page 22: Warranty Policy - Vacuum Regulators
Within this period, Amico Patient Care Corporation will repair or replace any part which is proven to be defective at the Company’s costs. All shipping and installation costs will be borne by the Customer after the first twenty four (24) months after receipt of the Product. - Page 23 Notes www.amico.com...
- Page 24 Amico Patient Care Corporation | 122 East Beaver Creek Road, Richmond Hill, ON, L4B 1G6 Canada Toll Free Tel: 1.877.462.6426 | Toll Free Fax: 1.866.440.4986 | Tel: 905.764.0800 | Fax: 905.764.0862 Email: info@amico.com | www.amico.com SOT-IM-VAC-REG 02.07.2020...


Need help?
Do you have a question about the SCOUT Series and is the answer not in the manual?
Questions and answers