Table of Contents
Advertisement
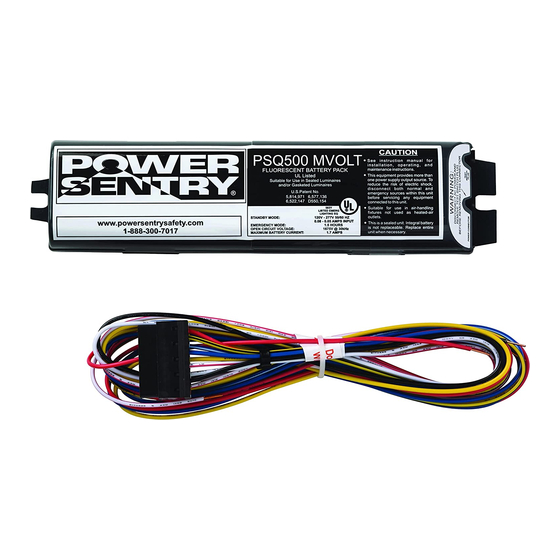
PS 300 MVOLT, PSQ500 MVOLT, PS600 MVOLT, PS1400 MVOLT
READ AND FOLLOW THESE INSTRUCTIONS BEFORE INSTALLATION TO INSURE PROPER AND SAFE
FIELD INSTALLABLE FLUORESCENT BATTERY PACK IS UNIVERSALLY COMPATIBLE WITH THE BALLASTS
AND LAMP(S) AS SHOWN IN LAMP COMPATIBILITY TABLE (PAGE 5)
READ AND FOLLOW ALL
SAFETY INSTRUCTIONS
WARNING
Dual Power Supply - Risk of Shock Hazard Even
if AC Power is OFF
Disconnect polarized Test Switch / Pilot Light
connector before servicing fixture
DO NOT remove the wire harness connector
when AC Power is ON
DO NOT mount near a gas or electric heater
Battery Pack Output Voltage is 1600VDC
CAUTION
Before wiring to power supply, turn off
Electricity at fuse panel or circuit
breaker
All servicing shall be performed by
qualified personnel
DO NOT attempt to service the battery.
It is not field replaceable
DO NOT use in hazardous locations
DO NOT use this product outdoors
DO NOT use this product in air handler
heated outlets
DO NOT use accessory equipment not
recommended by the manufacture
DO NOT use this equipment for other
than its intended use
INSTALLATION INSTRUCTIONS
EMERGENCY FLUORESCENT BATTERY PACK
Universal Voltage 120 to 277VAC Input
SAVE THESE INSTRUCTIONS
QD MODELS
OPERATION
IMPORTANT SAFEGUARDS
Consult your local building code for approved
wiring or installation
The emergency battery pack must be connected
to an un-switched AC power source of 120 to 277
Vac
This product is for use with indoor fixtures sealed
or unsealed
Equipment should be mounted in a location and
at heights where it will not be readily be subject to
tampering by unauthorized personnel
Make sure that the branch circuits are derived
from a common phase for both normal lighting
ballast and Battery Pack prior to installation
The Battery Pack can be switched or un-switched
(night) circuit. When used with a switched fixture,
it is important that the power to the Battery Pack
must be provided by an un-switched circuit.
Damage to the battery will occur if the Test
Switch / Pilot Light connection is made for a
prolonged period of time without AC power being
provided.
Battery packs are not field serviceable
Allow Battery Packs to charge 24 hrs before initial
and full discharge testing
Do not locate the Test Switch / Pilot Light or route
cable within 1" of fixture lamps
Emergency lighting system should be tested per
all of the required tests and as often as local
codes require or at least quarterly to insure all
components are operational.
CONTAINS NICKEL-CADMIUM
RECHARGEABLE BATTERY.
MUST BE RECYCLED OR DISPOSED
OF PROPERLY.
Page 1
Advertisement
Table of Contents

Related Manuals for Power Sentry PS600 MVOLT


Summarization of Contents
Installation Steps and Inspection
Install Battery Pack
Procedure for installing the battery pack into the fixture.
Install Test Switch / Pilot Light (TS/PL)
Procedure for installing the Test Switch/Pilot Light.
Post-Installation Procedures
Installation Inspection
Checks to perform before normal operation to ensure correct installation.
Normal Operation
Explanation of how the unit functions during normal power supply.
Periodic Maintenance
Recommended maintenance schedule for the emergency lighting system.
Troubleshooting Guide
Troubleshooting Common Issues
Lists common problems and their potential causes and solutions.
Lamp Configuration and Compatibility
Lamp Selector Table (PS1400 Only)
Table detailing lamp types, wattage, and selector switch positions.
Lamp Selector Switch Location
Illustrates the location and operation of the lamp selector switch.
Lamp Compatibility Table
Compatibility matrix for various lamp types across different battery pack models.
Wiring Diagrams
One Lamp Rapid Start Ballast
Wiring diagram for a single-lamp rapid start ballast.
Two Lamp Rapid Start Ballast
Wiring diagram for a two-lamp rapid start ballast.
Three Lamp Rapid Start Ballast
Wiring diagram for a three-lamp rapid start ballast.
Four Lamp Rapid Start Ballast
Wiring diagram for a four-lamp rapid start ballast.
One Four-Pin Compact Lamp Rapid Start Ballast (PS1400)
Wiring for PS1400 with one 4-pin compact rapid start lamp.
Two Four-Pin Compact Lamp Rapid Start Ballast (PS1400)
Wiring for PS1400 with two 4-pin compact rapid start lamps.
One Lamp Instant Start Ballast
Wiring diagram for a single-lamp instant start ballast.
Two Lamp Instant Start Ballast
Wiring diagram for a two-lamp instant start ballast.
Three Lamp Instant Start Ballast
Wiring diagram for a three-lamp instant start ballast.
Four Lamp Instant Start Ballast
Wiring diagram for a four-lamp instant start ballast.
One Lamp Circline Ballast
Wiring diagram for a single-lamp circline ballast.
Two Lamp Circline Ballast
Wiring diagram for a two-lamp circline ballast.
One Lamp Without AC Ballast
Wiring diagram for a single lamp without an AC ballast.
Two Lamp Without AC Ballast
Wiring diagram for two lamps without an AC ballast.
Need help?
Do you have a question about the PS600 MVOLT and is the answer not in the manual?
Questions and answers