Table of Contents
Advertisement
OPERATOR HANDBOOK
READ BEFORE INSTALLING OR OPERATING THIS EQUIPMENT
Xylem Dewatering Solutions UK
Ltd
Quenington
Cirencester
Gloucestershire
GL7 5BX,
England
Xylem Dewatering Solutions
One Floodgate Road
Bridgeport
New Jersey 08014
U.S.A.
Heidra Pumps
HS80
HS100
HS100NC
HS100-SG
HS103
HS150
HS150NC
HS150-SG
HS150V
HS150V-SG
HS150HH
HS200
HS200-SG
HS250
HS300
Tel:
*44 (0)1285 750271
Fax:
*44 (0)1285 750352
E-mail:
sales@godwinpumps.co.uk
Website:
www.godwinpumps.co.uk
Tel:
856 467 3636
Fax:
856 467 4841
E-mail:
sales@godwinpumps.com
Website:
www.godwinpumps.com
Pump Serial Number
Book No
95-0014-0000/A
Issue
6
Date
September 2012
Advertisement
Table of Contents

Related Manuals for Godwin HS100


Summary of Contents for Godwin HS100
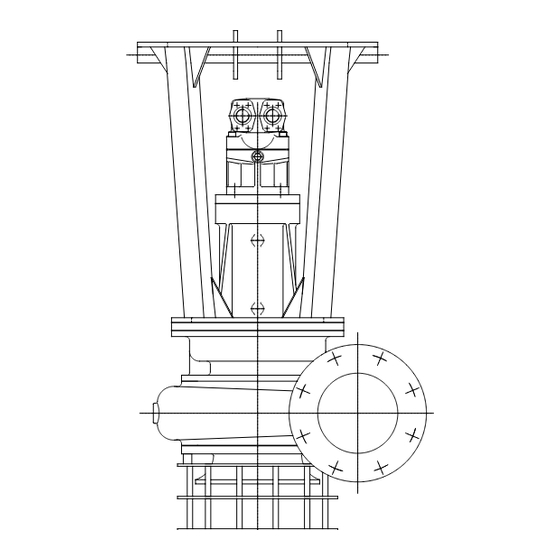
- Page 1 OPERATOR HANDBOOK Heidra Pumps HS80 HS100 HS100NC HS100-SG HS103 HS150 HS150NC HS150-SG HS150V HS150V-SG HS150HH HS200 HS200-SG HS250 HS300 READ BEFORE INSTALLING OR OPERATING THIS EQUIPMENT Xylem Dewatering Solutions UK Pump Serial Number Tel: *44 (0)1285 750271 Quenington Fax: *44 (0)1285 750352...
-
Page 2: Table Of Contents
WARRANTY ........................ 25 FAULT FINDING ......................25 10 TECHNICAL DATA ..................... 26 10.1 HS80, HS100, HS100-SG, HS103, HS150, HS150V & HS150V-SG Pumps ............. 26 10.2 HS150HH, HS200, HS200-SG, HS250 & HS300 Pumps ................... 27 10.3 HS100NC & HS150NC Pumps ........................... 28 10.4... -
Page 3: Introduction
The purpose of this Installation, Operating and Maintenance Handbook is to provide the owner or user of the equipment with sufficient information to carry out those tasks on the Heidra hydraulically driven range of vertical suction Submersible Pumps. Pump models covered: - HS80 HS103 HS150V-SG HS250... -
Page 4: Safety Precautions
OPERATOR Book No.: 95-0014-0000/A HANDBOOK Issue: SAFETY PRECAUTIONS WARNING. ALL ITEMS IN THIS SECTION, IF NOT STRICTLY OBSERVED, COULD RESULT IN SEVERE PERSONAL INJURY OR LOSS OF LIFE. Only use lifting equipment of suitable capacity for the size and weight of the equipment being lifted. The pump units are designed for lifting by wire rope in use or slings around the workshop. -
Page 5: Installation
OPERATOR Book No.: 95-0014-0000/A HANDBOOK Issue: INSTALLATION General Notes Xylem Dewatering Solutions may refute warranty liability if the installation does not meet the requirements of the pump. Consult Xylem Dewatering Solutions should any doubt exist over the suitability of an installation. Only suitably qualified personnel (both mechanical and electrical) should carry out the installation. -
Page 6: Front Seal Removal
5.2.2 Front seal removal The bearings (and mechanical seal for HS80 units) of HS80, HS100, HS150, HS100-SG, HS150V, HS150V-SG, HS100NC and HS150NC pumps are designed to be lubricated and cooled by the hydraulic motor system oil. The oil is bled from the motor by removing the seal from the front cover. -
Page 7: Hoses
Issue: Hoses Maximum recommended hose lengths are: - Pump Flow Rate Hose length GPM(Imperial)/ litres per min Metres/feet HS80 2.6 / 12 35 / 115 2.4 / 11 45 / 148 2.2 / 10 50 / 164 2.0 / 9.2 65 / 213 The lengths are for ½”nominal bore hose with SAE 10 oil at 15°C. -
Page 8: Maintenance
Remove the key (36). Figure 5 Typical HS80 pump Release the screws (72) holding the rear wear plate (5) to the bearing bracket assembly. Remove the wear plate to expose the mechanical seal housing (8). -
Page 9: Reassembly
OPERATOR Book No.: 95-0014-0000/A HANDBOOK Issue: 7.1.2 Reassembly New seals and O-rings must be fitted when reassembling. It is also prudent to fit a new impeller retaining screw. Heat both bearings (39 & 40) with a temperature controlled bearing heater until they are a consistent 110°C. Do not overheat or allow the bearings to remain at this temperature for longer than their fitting time. -
Page 10: Hs100, Hs100-Sg, Hs103, Hs150, Hs150-Sg, Hs150V & Hs150V-Sg Pumps
OPERATOR Book No.: 95-0014-0000/A HANDBOOK Issue: HS100, HS100-SG, HS103, HS150, HS150-SG, HS150V & HS150V- SG pumps NOTE! The HS100NC & HS150NC pumps differ only in volute, impeller and associated parts. Therefore these dismantling and reassembly instructions can be followed in principle, but refer to section 7.5 for detail differences. Note that dismantling and reassembly procedures refer to the item numbers in the illustrations and are correct for a directly corresponding build. - Page 11 OPERATOR Book No.: 95-0014-0000/A HANDBOOK Issue: 11. Release the nuts (65) holding the hydraulic motor (76) to the bearing cover (11) and remove the motor. 12. HS100 only. Undo the screws (60) and remove the bearing cover (11) from the bearing bracket.
-
Page 12: Reassembly
OPERATOR Book No.: 95-0014-0000/A HANDBOOK Issue: 7.2.2 Reassembly New seals and O-rings must be fitted when reassembling. It is also prudent to fit a new impeller retaining nut. Heat both bearings (47 & 48) with a temperature controlled bearing heater until they are a consistent 110°C. Do not overheat or allow the bearings to remain at this temperature for longer than their fitting time. -
Page 13: Hs150Hh, Hs200-Sg, Hs200 & Hs250 Pumps
OPERATOR Book No.: 95-0014-0000/A HANDBOOK Issue: HS150HH, HS200-SG, HS200 & HS250 pumps Note that dismantling and reassembly procedures refer to the item numbers in the illustration and are correct for a directly corresponding build. However because of the number of possible build configurations some interpretation of the diagram will be necessary for other pump variants. -
Page 14: Reassembly
OPERATOR Book No.: 95-0014-0000/A HANDBOOK Issue: 11. Release the nuts (69) from bolts (54) and remove the lifting bracket (11) and adaptor (8) from the bearing bracket assembly. 12. Release the screws (57) holding the hydraulic motor (84) to the bearing cover (77) and remove the motor. 13. - Page 15 OPERATOR Book No.: 95-0014-0000/A HANDBOOK Issue: Once up to temperature, slide the roller bearing (89) inner race up hard against the shaft shoulder, fit the bearing spacer (78) and slide the angular contact ball bearings (2 off 90) up hard onto the other shaft shoulder. Hold them in position for a minimum of 30 seconds.
-
Page 16: Hs300 Pumps
OPERATOR Book No.: 95-0014-0000/A HANDBOOK Issue: HS300 pumps Note that dismantling and reassembly procedures refer to the item numbers in the illustration and are correct for a directly corresponding build. Figure 13 HS300 cross section 7.4.1 Dismantling The HS300 arrangement differs from the rest of the range because of the extra weight and bulk of the unit. It has an external lifting bracket. - Page 17 OPERATOR Book No.: 95-0014-0000/A HANDBOOK Issue: Using suitable lifting gear rotate the whole unit 90° until it is resting with the shaft horizontally and the pump mounting foot towards the ground. Remove the 4 off nuts, bolts and washers (81, 74 & 62) holding the strainer to the frame. Support the strainer (10) and remove the 8 off nuts, bolts and washers (81, 74 &...
-
Page 18: Reassembly
OPERATOR Book No.: 95-0014-0000/A HANDBOOK Issue: 7.4.2 Reassembly New seals, O-rings and impeller retaining screw must be fitted when reassembling. Heat the roller bearing inner race (part of 24) and both angular contact ball bearings (2 off 25) with a temperature controlled bearing heater until they are a consistent 110°C. -
Page 19: Hs100Nc & Hs150Nc Pumps
OPERATOR Book No.: 95-0014-0000/A HANDBOOK Issue: 26. Fit 4 off studs (67) every other hole in the pump body. Fit 4 off studs (68) in the remaining holes. Pass the front cover assembly over the studs and secure with 4 off nut and spring washers (74 & 81) on the shorter studs. 27. - Page 20 OPERATOR Book No.: 95-0014-0000/A HANDBOOK Issue: Impeller Impeller sleeve Adjustment screw Impeller screw Washer Figure 17 Typical HS100NC & HS150NC cross sectional view To break the friction fit between the impeller sleeve and the shaft, the adjustment screw is turned anticlockwise (it is left hand threaded -Figure 18 ) using the 65mm long Allen key (Figure 15).
-
Page 21: Reassembly
OPERATOR Book No.: 95-0014-0000/A HANDBOOK Issue: 7.5.2 Reassembly 7.5.2.1 GUIDE PIN FITTING The HS100NC and HS150NC are fitted with a ’chopper’ insert ring. It is critical to efficient operation of the pump that the guide pin used is fitted correctly. Place impeller on flat surface –... -
Page 22: Handbook Issue
OPERATOR Book No.: 95-0014-0000/A HANDBOOK Issue: Align the guide pin lip with the centre boss of the impeller (Figure 24). Figure 24 Aligning the guide pin lip with the centre boss of the impeller Hold the lip tip firmly against the centre of the impeller boss and tighten the cap screw with Allen wrench until it is held in place (Figure 25). -
Page 23: Impeller Fitting
OPERATOR Book No.: 95-0014-0000/A HANDBOOK Issue: 7.5.2.2 IMPELLER FITTING The impeller is fitted to the tapered shaft by means of a tapered sleeve with an adjusting screw locked onto the shaft with a screw and washer (Figure 27). Impeller Impeller sleeve and adjustment screw Impeller screw... -
Page 24: Adjusting Impeller Front Clearance
OPERATOR Book No.: 95-0014-0000/A HANDBOOK Issue: 7.5.2.3 ADJUSTING IMPELLER FRONT CLEARANCE Unscrew and remove the impeller cap screw and flat washer. Using the Hexagon head (Allen bit) 12mm x 65mm long with extension bars (Figure 30 if needed) turn the adjustment screw clockwise by hand until the impeller firmly makes contact with the wear plate (insert ring). -
Page 25: Warranty
OPERATOR Book No.: 95-0014-0000/A HANDBOOK Issue: WARRANTY Unless special arrangements have been agreed and signed by both parties Xylem Dewatering Solutions will apply the following policy over defects found after delivery. We will make good, by repair or the supply of a replacement, defects which, under proper use, appear in the goods within a period of twelve calendar months after the goods have been delivered and arise solely from faulty design (other than a design made, furnished or specified by you for which we have disclaimed responsibility in writing), materials or... -
Page 26: Technical Data
OPERATOR Book No.: 95-0014-0000/A HANDBOOK Issue: TECHNICAL DATA 10.1 HS80, HS100, HS100-SG, HS103, HS150, HS150V & HS150V-SG Pumps HS150V PUMP HS80 HS100 HS100-SG HS103 HS150 HS150V-SG ACW looking at Rotation impeller from See Note 1 ACW looking at impeller from suction end... -
Page 27: Hs150Hh, Hs200, Hs200-Sg, Hs250 & Hs300 Pumps
310 (4495) (psi) Flow & Return connection size Twin 1 1/2”BSPT (supplied with quick 1 1/4”BSPT female female release couplings on HS80, HS100 & HS150) Bearing leakage connection size 3/4” BSPT ½” BSPT female (supplied with quick female release couplings on HS80, HS100 &... -
Page 28: Hs100Nc & Hs150Nc Pumps
OPERATOR Book No.: 95-0014-0000/A HANDBOOK Issue: 10.3 HS100NC & HS150NC Pumps PUMP HS100NC HS150NC Rotation ACW looking at impeller from suction end Max pump speed 2200 Max head m (ft) 40 (131) 52 (170) /hr (Imp. Max flow 225 (825) 370 (1356) gpm) Nominal solids... -
Page 29: Fastener Torques
OPERATOR Book No.: 95-0014-0000/A HANDBOOK Issue: 10.4 Fastener Torques The following tables give the recommended tightening torques for general purpose metric and UNC fasteners. They are to be used only when the joint is metal to metal (i.e. no joints or gaskets) and no special figures (e.g. for impeller retaining bolts) have been quoted. - Page 30 OPERATOR Book No.: 95-0014-0000/A HANDBOOK Issue: NOTES Page 30 of 30...
Need help?
Do you have a question about the HS100 and is the answer not in the manual?
Questions and answers