Sign In
Upload
Download
Add to my manuals
Delete from my manuals
Share
URL of this page:
HTML Link:
Bookmark this page
Add
Manual will be automatically added to "My Manuals"
Print this page
×
Bookmark added
×
Added to my manuals
Manuals
Brands
Q Acoustics Manuals
Racks & Stands
Q60WB
Installation instructions manual
Q Acoustics Q60WB Installation Instructions Manual
3060s & 7060s subwoofer wall bracket / 3000i series speaker stand pair
Hide thumbs
1
2
3
4
5
6
7
8
9
10
11
12
13
14
page
of
14
Go
/
14
Bookmarks
Advertisement
Quick Links
Download this manual
3 0 6 0 S & 7 0 6 0 S
S U B W O O F E R W A L L B R A C K E T
I N S T A L L A T I O N I N S T R U C T I O N S
Q 6 0 W B
Designed and engineered in the United Kingdom.
1
Previous
Page
Next
Page
1
2
3
4
5
Advertisement
Need help?
Do you have a question about the Q60WB and is the answer not in the manual?
Ask a question
Questions and answers
Related Manuals for Q Acoustics Q60WB
Racks & Stands Q Acoustics Q-AV Table Stand Installation Instructions
(2 pages)
Racks & Stands Q Acoustics Q FS75 Owner's Manual
(28 pages)
Racks & Stands Q Acoustics 3000i Manual
Speaker stand pair suitable for 3010i and 3020i speakers (4 pages)
Racks & Stands Q Acoustics Concept 300 Owner's Manual
(28 pages)
Racks & Stands Q Acoustics 4663KFSIBK Manual
3000i speaker stand pair suitable for 301 0i and 3020i speakers (4 pages)
Racks & Stands Q Acoustics 3000FSi Installation Instructions Manual
3060s & 7060s subwoofer wall bracket / 3000i series speaker stand pair (14 pages)
Summarization of Contents
Introduction
Items Included
Lists the components provided with the wall bracket, excluding wall fixings.
Tools Required
Lists the tools necessary for the installation of the wall bracket.
Installation Steps
Step 1: Attach Damping Pad
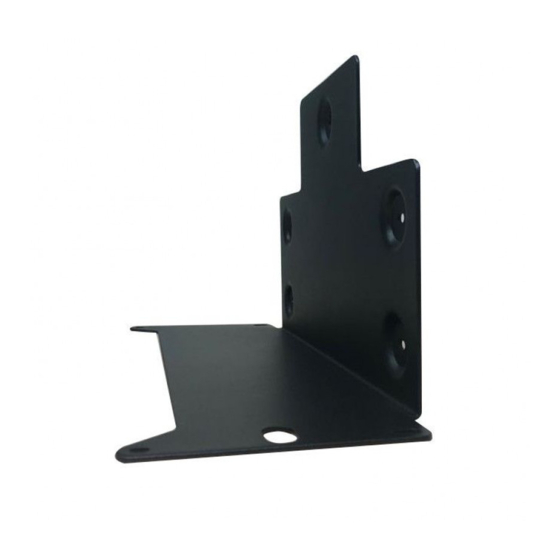
Stick the vibration damping pad to the wall bracket in the shown position.
Step 2: Position and Level Bracket
Position the sub bracket and mark screw holes ensuring it is perfectly horizontal.
Step 3: Secure Bracket to Wall
Screw the bracket to the wall, ensuring wall and fixing method support the total load.
Step 4: Place Subwoofer on Bracket
Place the sub on the bracket by lining up front feet and holding the back against the pad.
Step 5: Loosely Install Front Screws
Loosely screw in the front 2 screws but do not tighten fully.
Step 6: Loosely Install Rear Screws
Align the rear screws and screw them in loosely.
Step 7: Tighten All Screws
Tighten all 4 screws evenly until the sub is sitting flat on the base of the bracket.
Step 8: Refer to Full Manual
Refer to the subwoofer full manual to complete the installation of your system.
Print
Rename the bookmark
Delete bookmark?
Delete from my manuals?
Login
Sign In
OR
Sign in with Facebook
Sign in with Google
Upload manual
Upload from disk
Upload from URL
Need help?
Do you have a question about the Q60WB and is the answer not in the manual?
Questions and answers