Table of Contents
Advertisement
Quick Links
Advertisement
Table of Contents
Troubleshooting

Related Manuals for jenway 7310

Summarization of Contents
SECTION 1 - Introduction
1.1 Instrument description
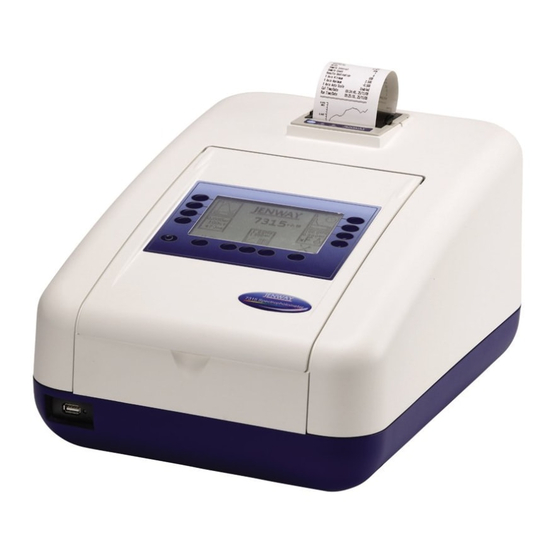
Details on the Jenway 7310 and 7315 spectrophotometers and their applications.
1.2 Instrument specification
Technical specifications for the Jenway 7310 and 7315 spectrophotometers, including ranges and performance.
SECTION 2 - Installation
2.1 Unpacking
Steps for carefully unpacking the spectrophotometer and verifying included items.
2.2 Installation
Guidance on placing and connecting the spectrophotometer for initial operation.
2.3 Display
Explanation of the spectrophotometer's dot matrix display and its interface elements.
2.4 Controls
Description of the keypad layout and soft key functions for instrument navigation.
2.5 Rear Panel
Identification and function of connectors and switches on the rear of the instrument.
2.6 Front Panel
Identification of components located on the front panel of the spectrophotometer.
SECTION 3 - Theory and Practice of Spectroscopy Measurements
3.1 Theory of Spectroscopy Measurement
Explanation of the Beer-Lambert law and transmittance principles in spectroscopy.
3.2 Spectroscopy Measurement
Description of the main components of a spectrophotometer and their functions.
3.3 Good Practice Guidelines
Recommendations for optimal performance, sample handling, and measurement procedures.
SECTION 4 – Instrument Setup
4.1 Navigating and Screen Setup
How to navigate the spectrophotometer menus and understand the home screen interface.
4.2 Time and Date
Instructions for setting the instrument's current time and date for logging and printing.
4.3 Instrument Settings Menu
Accessing and configuring various instrument settings like security, lock options, and display.
4.4 Security and Setting Passwords
Setting up security codes, locking instrument parameters, and managing method access.
4.4.1 Setting Security Codes
Enables setting a security code to lock instrument settings and measurement modes.
4.4.2 Settings lock
Locks instrument and measurement mode settings to prevent unauthorized changes.
4.4.3 Method Lock
Disables method selection, opening, deletion, and saving when active.
4.5 Mode Selection
Restricting access to measurement modes and configuring their display status.
4.6 Diagnostics
Performing basic instrument checks, including lamp status and wavelength calibration.
4.7 GLP Settings
Setting up user ID for Good Laboratory Practice compliance and result tracking.
4.8 Screen Contrast
Adjusting the brightness and contrast of the spectrophotometer's display.
4.9 Lamp Save
Configuring the automatic lamp turn-off feature to conserve energy and extend lamp life.
SECTION 5 - Photometrics
5.1 Mode Specific Parameters
Overview of minimal and expanded operating menus for photometric measurements.
5.2 Method Set Up
Setting up photometric measurements by adjusting wavelength and display format.
5.3 Calibration
Procedure for calibrating the instrument to zero absorbance or 100% transmittance.
5.4 Sample Measurement
Steps for measuring a sample after performing calibration in photometric mode.
SECTION 6 – Concentration
6.1 Mode Specific Parameters
Overview of minimal and expanded operating menus for concentration measurements.
6.2 Method Setup
Configuration for concentration measurements: wavelength, units, resolution, standards, factors, and curve fitting.
6.2.1 Selecting a Wavelength
Adjusting the measurement wavelength in the expanded or settings menu.
6.2.2 Settings
Setting wavelength, units, resolution, standard, or factor parameters for concentration.
6.2.2.1 Selecting Concentration Units
Choosing the appropriate unit for concentration display from a list of options.
6.2.2.2 Changing the Resolution
Selecting the display resolution for concentration values (1, 0.1, 0.01, 0.001).
6.2.2.3 Using a Standard
Entering standard values for calibration when the factor is unknown.
6.2.2.4 Using a Factor
Entering a known factor for concentration calculations.
6.2.3 Standard Curve
Viewing, creating, adjusting, and displaying statistics for the standard curve.
6.2.3.1 Creating a New Standard Curve
Steps to create a new standard curve, including entering concentrations and performing measurements.
6.3 Calibration
Calibrating for concentration measurements using standards or factors after zero calibration.
6.3.1 Calibrating to a Standard
Procedure to calibrate using a standard solution after zero calibration.
6.3.2 Calibrating to a Factor
Procedure to calibrate using a factor after zero calibration.
6.4 Sample Measurement
Measuring unknown samples and calculating concentration based on calibration.
6.4.1 Measuring a Sample After Calibrating to a Standard
Measuring a sample after calibration using a standard.
6.4.2 Measuring a Sample After Calibrating to a Factor
Measuring a sample after calibration using a factor.
SECTION 7 – Spectrum
7.1 Mode Specific Parameters
Overview of minimal and expanded operating menus for spectrum scanning.
7.2 Method Setup
Configuring spectrum scan parameters: y-axis, wavelengths, scan interval, and data analysis settings.
7.2.1 Scan Settings
Setting the graph y-axis, operating mode, start/end wavelengths, and scan interval.
7.2.1.1 Selecting Absorbance or % Transmittance
Switching the operating mode between absorbance and % transmittance.
7.2.1.2 Setting Start and End Wavelengths
Defining the wavelength range for the spectrum scan.
7.2.1.3 Setting the Scan Interval
Setting the interval between measured wavelengths in the spectrum scan.
7.2.1.4 Y-Axis Scaling
Adjusting the scale of the spectrum graph's y-axis manually or automatically.
7.3 Calibration
Performing a baseline scan across the selected wavelength range for spectrum analysis.
7.4 Sample Measurement
Scanning the sample after baseline correction to obtain spectral data.
7.5 Data Analysis
Analyzing spectral data, including peaks, valleys, and spectral points.
7.5.1 Peaks and Valleys Threshold
Setting the threshold value for detecting peaks and valleys in spectral data.
7.5.2 Peaks and Valleys Table
Displaying detected peaks and valleys above the selected threshold in tabular form.
7.5.3 Spectral Points Analysis
Selecting specific points from the spectrum for detailed analysis.
SECTION 8 – Quantitation
8.1 Mode Specific Parameters
Overview of minimal and expanded operating menus for quantitation.
8.2 Method Setup
Configuring quantitation methods: wavelength, standards, units, resolution, and curve fitting.
8.2.1 Selecting a Wavelength
Setting the wavelength for quantitation measurements.
8.2.2 Quantitation Table
Viewing and setting quantitation standards, units, resolution, and operating mode.
8.2.2.1 Selecting Number of Standards
Choosing the number of standards (2 to 6) for creating a standard curve.
8.2.2.2 Selecting Concentration Units
Choosing the appropriate unit for concentration display from a list of options.
8.2.2.3 Changing the Resolution
Selecting the display resolution for concentration values (1, 0.1, 0.01, 0.001).
8.2.2.4 Selecting Absorbance or % Transmittance
Switching the operating mode between absorbance and % transmittance.
8.2.2.5 Adding Standards
Entering concentrations and photometric values for standards to create a curve.
8.2.3 Standard Curve
Viewing, creating, adjusting, and displaying statistics for the standard curve.
8.2.3.1 Creating a New Standard Curve
Steps to create a new standard curve, including entering concentrations and performing measurements.
8.3 Calibration
Performing zero calibration for quantitation measurements.
8.4 Sample Measurement
Measuring unknown samples and calculating concentration using a standard curve.
8.5 Data Analysis
Examining statistics of the standard curve and curve fit algorithm.
SECTION 9 – Kinetics
9.1 Mode Specific Parameters
Overview of minimal and expanded operating menus for kinetics measurements.
9.2 Method Setup
Configuring kinetics settings: wavelength, units, resolution, time, lag, and start-on-level.
9.2.1 Kinetics Settings
Setting wavelength, units, resolution, y-axis scaling, and time parameters for kinetics.
9.2.1.1 Y-Axis Scaling
Adjusting the scale of the kinetics graph's y-axis manually or automatically.
9.2.1.2 Setting Lag Time or Start on Level
Setting a delay before measurements or a minimum absorbance level to start.
9.2.1.3 Selecting Absorbance or % Transmittance
Switching the operating mode between absorbance and % transmittance.
9.2.1.4 Changing the Resolution
Selecting the display resolution for concentration values (1, 0.1, 0.01, 0.001).
9.2.1.5 Selecting Concentration Units
Choosing the appropriate unit for concentration display from a list of options.
9.2.1.6 Using a Standard
Entering standard values for calibration when the factor is unknown.
9.2.1.7 Using a Factor
Entering a known factor for concentration calculations.
9.2.1.8 Selecting a Wavelength
Setting the wavelength for kinetics measurements.
9.2.1.9 Setting the Kinetics Measurement Time
Defining the duration for the kinetics scan.
9.3 Calibration
Performing zero calibration before starting kinetics measurements.
9.4 Sample Measurement
Initiating and monitoring sample measurements for kinetics analysis.
9.5 Data Analysis
Analyzing kinetics experiment results, including rate of change and moving line analysis.
SECTION 10 – Saving, Printing and Autologging
10.1 Saving Methods
Saving measurement methods to internal memory or USB storage.
10.1.1 Saving Methods to Internal Memory
Procedures for saving methods to the instrument's internal memory.
10.1.2 Saving Methods to USB Memory Stick
Procedures for saving methods to a USB memory stick.
10.2 Opening Methods
Loading previously saved methods from internal memory or USB.
10.2.1 Opening Methods from Internal Memory
Steps to open methods stored in the instrument's internal memory.
10.2.2 Opening Methods from USB Memory Stick
Steps to open methods stored on a USB memory stick.
10.3 Deleting Methods
Removing saved methods from the instrument's memory.
10.4 Saving Results
Saving measurement results to a USB memory stick.
10.5 Opening Results
Accessing previously saved measurement results from a USB memory stick.
10.6 Deleting Results
Removing measurement results from the USB memory stick.
10.7 Printing
Printing measurement results and configuring print settings like destination and language.
10.7.1 Print Setup
Configuring print settings such as language, destination, and data selection.
10.7.1.1 Print Setup – Photometrics and Concentration
Print setup options for photometrics and concentration modes.
10.7.1.2 Print Setup - Spectrum
Print setup options for spectrum mode, including data intervals and analysis tables.
10.7.1.3 Print Setup – Quantitation
Print setup options for quantitation mode, including curve statistics.
10.7.1.4 Print Setup – Kinetics
Print setup options for kinetics mode, including statistics and data intervals.
10.7.2 Printing Results
Printing currently displayed results with selected print setup options.
10.8 Autologging
Setting up automated repeat measurements and destinations for results.
10.8.1 Setting the Number of Sample Repetitions
Configuring the number of repeat measurements and time interval between them.
10.8.2 Selecting Result's Destination
Choosing where to send autologged results: printer, USB memory stick, or PC.
10.9 Connecting to a PC
Instructions for connecting the instrument to a PC using the RS232 serial port.
SECTION 11 – Accessories and Spare Parts
11.1 Optional Accessories
List of available part codes and descriptions for optional accessories.
11.2 Connecting the Accessories
Guidelines for connecting passive and active accessories to the spectrophotometer.
11.2.1 Internal Printer
Instructions for installing the optional internal printer.
11.2.2 Passive Accessories
Instructions for fitting and removing passive accessories.
11.2.3 Active Accessories
Instructions for fitting and removing active accessories.
11.2.3.1 Automatic 8 cell turret
Installation and operation of the automatic 8 cell turret accessory.
11.2.3.2 Peltier
Installation and operation of the Peltier accessory for temperature control.
11.2.3.3 Sipper pump
Installation and operation of the Sipper pump accessory for automated sample delivery.
11.2.3.4 Combined sipper peltier pump
Installation and operation of the combined sipper and peltier accessory.
11.3 Using the Accessories
Detailed instructions for operating specific accessories like cell turrets, peltier, and sipper pumps.
11.3.1 Automatic 8 cell turret
Using the automatic 8 cell turret for sample measurements.
11.3.1.1 Automatic 8 cell turret - supporting creation of a standard curve in quantitation
Using the 8 cell turret to assist in creating standard curves for quantitation.
11.3.2 Peltier
Operating the Peltier accessory to set and control sample temperature.
11.3.3 Sipper pump
Operating the Sipper pump in manual or timed mode for sample aspiration.
11.3.3.1 Manual Sipper Pump Settings
Configuring the Sipper pump for manual operation and preferred pump direction.
11.3.3.2 Timed Sipper Pump Settings
Configuring the Sipper pump for timed operation, including sample uptake and air gap.
11.3.4 Combined sipper peltier pump
Operating the combined sipper peltier pump for temperature control and sample delivery.
11.4 Spares
List of common spare parts available for the spectrophotometer.
SECTION 12 – Maintenance and Service
12.1 Routine Maintenance
Basic cleaning and care instructions for the spectrophotometer.
12.2 Lamp Replacement
Steps for replacing the tungsten halogen or xenon lamp module.
12.2.1 Tungsten Halogen Lamp Replacement
Procedure for replacing the tungsten halogen lamp in the 7310 model.
12.2.2 Xenon Lamp Module Replacement
Procedure for replacing the xenon lamp module in the 7315 model (service engineer required).
12.3 Service
Contact information and procedures for obtaining technical service and repairs.
SECTION 13 – Troubleshooting
13.1 Error Codes
List of error codes, their symbols, descriptions, and potential causes and solutions.
13.2 Troubleshooting Guide
Table of common issues and their recommended solutions for spectrophotometer operation.
13.3 Technical Support
Contact details for obtaining technical assistance and application advice.
Need help?
Do you have a question about the 7310 and is the answer not in the manual?
Questions and answers