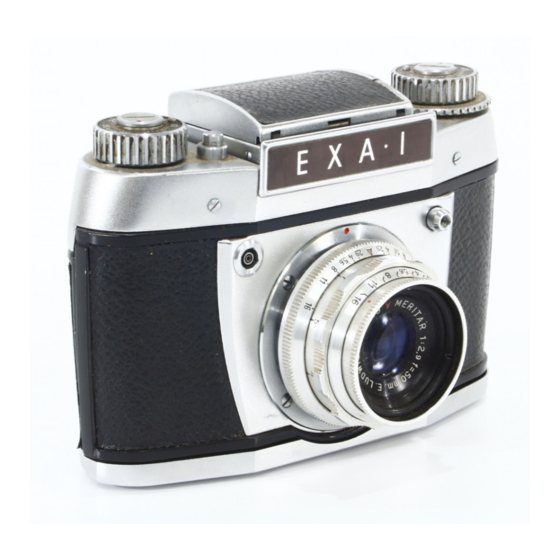

Related Manuals for Ihagee EXA II


Summarization of Contents
EXA Disassembly and Assembly
A. Disassembly of EXA camera
Steps for disassembling the main body of the EXA camera.
1. Remove the back 350.02
Steps to remove the back cover of the EXA camera.
2. Right side open.
Procedure for opening and disassembling the right side of the EXA camera.
3. Left side open.
Procedure for opening and disassembling the left side of the EXA camera.
4. Mechanism removal.
Steps for removing the internal mechanism from the EXA camera body.
EXA 1/63 Disassembly and Assembly
AA. Disassembly of EXA 1/63 camera.
Steps for disassembling the EXA 1/63 camera.
1. Remove the back 370.20.
Steps to remove the back cover of the EXA 1/63 camera.
2. Removal of top-plate 350.21 U1.
Procedure for removing the top plate of the EXA 1/63 camera.
3. Mechanism removal.
Steps for removing the internal mechanism from the EXA 1/63 camera.
B. EXA assembly.
Procedures for assembling the EXA camera.
1. Mechanism insertion.
Procedure for inserting the mechanism during EXA assembly.
2. Close left side.
Steps for reassembling the left side of the EXA camera.
EXA Assembly Adjustments
3. Close right side.
Steps for reassembling the right side of the EXA camera.
4. Check and adjust the distance between the lens mount and the film plane.
Procedure for checking and adjusting lens mount to film plane distance.
5. Check and adjust the mirror position.
Procedure for checking and adjusting the mirror position.
EXA I/63 Assembly and Fault Elimination
BB. Assembly of camera EXA I/63.
Procedures for assembling the EXA I/63 camera.
1. Mechanism insertion.
Procedure for inserting the mechanism during EXA I/63 assembly.
2. Top-plate 350.21 U 1 fitting.
Steps for fitting the top plate of the EXA I/63 camera.
3. Check and adjust the distance between the lens mount and the film plane.
Procedure for checking and adjusting lens mount to film plane distance.
4. Check and adjust the mirror position.
Procedure for checking and adjusting the mirror position.
C. Elimination of certain faults.
Guidance for troubleshooting and resolving common camera faults.
1. Shutter flap 350.04 U 5 falls back.
Troubleshooting guide for a shutter flap falling back issue.
Shutter Faults
1. Shutter flap 350.04 U 5 falls back.
Detailed steps for fixing a shutter flap falling back problem.
2. Shutter does not engage (Shutter flap 350.04 U 5 runs closed)
Troubleshooting guide for a shutter that does not engage.
Shutter Faults Continuation
2. Shutter does not engage (Shutter flap 350.04 U 5 runs closed)
Detailed steps for fixing a shutter engagement issue.
Fault Elimination - EXA
3. Mirror 300.21-53 replacement.
Procedure for replacing the mirror in the camera.
4. Frame-counter failure.
Troubleshooting guide for frame-counter malfunctions.
Fault Elimination - EXA and EXA I
4. Frame-counter failure.
Detailed steps for fixing frame-counter issues.
5. Synchronisation failure.
Troubleshooting guide for flash synchronisation failures.
Adjusting the flash synchronisation. EXA
Procedure for adjusting flash synchronisation on the EXA model.
Adjusting the flash synchronisation. EXA I/63
Procedure for adjusting flash synchronisation on the EXA I/63 model.
Synchronisation Adjustments
5. Synchronisation failure.
Detailed steps for synchronisation adjustments.
Adjusting the insulating-part I.
Procedure for adjusting the insulating part under the time-setting disc.
Adjusting the insulating-part II.
Procedure for adjusting the insulating part with flash contacts.
Synchronisation and Film Transport
5. Synchronisation failure.
Checking the X-contact for flash synchronisation.
Checking the X-contact.
Procedure for checking the X-contact for flash synchronisation.
6. Checking the film transport.
Procedure for checking the camera's film transport mechanism.
EXA Ia Disassembly and Assembly
A. Disassembly of camera
Steps for disassembling the EXA Ia camera.
1. Take off the back cover 370.20.
Steps to remove the back cover of the EXA Ia camera.
2. Remove the top-plate 750-001.00.
Procedure for removing the top plate of the EXA Ia camera.
EXA Ia Assembly
2. Remove the top-plate 750-001.00.
Detailed steps for removing the top plate assembly.
3. Mechanism removal.
Procedure for removing the internal mechanism from the EXA Ia camera.
B. Assembly of camera.
Procedures for assembling the EXA Ia camera.
1. Mechanism insertion.
Procedure for inserting the mechanism during EXA Ia assembly.
2. Fitting top-plate 750-001.00.
Steps for fitting the top plate during EXA Ia assembly.
3. Check and adjust the distance between the lens mount and the film plane.
Procedure for checking and adjusting lens mount to film plane distance.
4. Check and adjust the mirror.
Procedure for checking and adjusting the mirror position.
EXA Ia Fault Elimination
C. Elimination of certain faults.
Guidance for troubleshooting and resolving common camera faults.
1. Shutter flap 750-401.00 falls back.
Troubleshooting guide for a shutter flap falling back issue.
2. Shutter does not engage (Shutter flap 750-401.00 runs closed)
Troubleshooting guide for a shutter that does not engage.
3. Mirror 300.21-53 replacement.
Procedure for replacing the mirror.
4. Frame counter failure.
Troubleshooting guide for frame counter malfunctions.
5. Synchronisation failure.
Troubleshooting guide for flash synchronisation failures.
6. Checking the film transport.
Procedure for checking the camera's film transport mechanism.
EXA II Disassembly and Assembly
A. Disassembly of camera.
Steps for disassembling the EXA II camera.
1. Take off the back cover 370.10.
Steps to remove the back cover of the EXA II camera.
2. Remove the top-plate 750-001.00.
Procedure for removing the top plate of the EXA II camera.
3. Removal of mechanism 370.03.
Steps for removing the internal mechanism from the EXA II camera.
B. Assembly of camera.
Procedures for assembling the EXA II camera.
1. Insertion of mechanism 370.03.
Procedure for inserting the mechanism during EXA II assembly.
EXA II Assembly and Faults
2. Fitting the top-plate 370.01 U2.
Steps for fitting the top plate of the EXA II camera.
3. Check and adjust the distance between the lens mount and the film plane.
Procedure for checking and adjusting lens mount to film plane distance.
4. Check and adjust the mirror position.
Procedure for checking and adjusting the mirror position.
C. Elimination of certain faults.
Guidance for troubleshooting and resolving common camera faults.
1. Cocking fails or is blocked.
Troubleshooting guide for cocking failures or blockages.
EXA II Fault Elimination - Cocking and Curtains
1. Cocking fails or is blocked.
Detailed steps for fixing cocking failures or blockages.
2. Cocking segment 370.07 U5 is damaged.
Procedure for dealing with a damaged cocking segment.
EXA II Fault Elimination - Curtains
2. Cocking segment 370.07 U5 is damaged.
Detailed steps for repairing or replacing a damaged cocking segment.
EXA II Fault Elimination - Shutter and Mirror
3. Curtains unserviceable.
Procedure for dealing with unserviceable shutter curtains.
EXA II Fault Elimination - Shutter Times
3. Curtains unserviceable.
Detailed steps for replacing unserviceable shutter curtains.
EXA II Fault Elimination - Shutter Times
4. Shutter times checking and adjusting.
Procedure for checking and adjusting shutter timing.
EXA II Fault Elimination - Shutter Times
4. Shutter times checking and adjusting.
Detailed steps for adjusting shutter speeds.
EXA II Fault Elimination - Mirror and Transport
5. Mirror 370.01-33 replacement.
Procedure for replacing the mirror.
6. Transport fails.
Troubleshooting guide for film transport failures.
EXA IIa Disassembly and Assembly
A. Disassembly of camera.
Steps for disassembling the EXA IIa camera.
1. Take off the back cover 370.20.
Steps to remove the back cover of the EXA IIa camera.
2. Remove the top-plate 370.41 U1.
Procedure for removing the top plate of the EXA IIa camera.
3. Removal of mechanism 370.43.
Steps for removing the internal mechanism from the EXA IIa camera.
B. Assembly of camera.
Procedures for assembling the EXA IIa camera.
1. Insertion of mechanism 370.43.
Procedure for inserting the mechanism during EXA IIa assembly.
EXA IIa Assembly and Faults
2. Fitting the top-plate 370.41 U1.
Steps for fitting the top plate of the EXA IIa camera.
3. Check and adjust the distance between the lens mount and the film plane.
Procedure for checking and adjusting lens mount to film plane distance.
4. Check and adjust the mirror.
Procedure for checking and adjusting the mirror position.
C. Elimination of certain faults.
Guidance for troubleshooting and resolving common camera faults.
1. Cocking segment 370.07 U5 is damaged.
Procedure for dealing with a damaged cocking segment.
2. Curtains unserviceable.
Procedure for dealing with unserviceable shutter curtains.
3. Shutter times checking and adjusting.
Procedure for checking and adjusting shutter timing.
4. Mirror 370.01-33 replacement.
Procedure for replacing the mirror.
5. Transport fails.
Troubleshooting guide for film transport failures.
6. Frame-counter adjusting.
Procedure for adjusting the frame counter.
EXA IIb Disassembly and Assembly
A. Disassembly of camera.
Steps for disassembling the EXA IIb camera.
1. Take off the back cover 370.20.
Steps to remove the back cover of the EXA IIb camera.
2. Remove the top-plate 370.51 U1.
Procedure for removing the top plate of the EXA IIb camera.
3. Removal of mechanism 370.53.
Steps for removing the internal mechanism from the EXA IIb camera.
B. Assembly of camera.
Procedures for assembling the EXA IIb camera.
1. Insertion of mechanism 370.53.
Procedure for inserting the mechanism during EXA IIb assembly.
EXA IIb Assembly and Faults
2. Fitting the top-plate 370.51 U 1.
Steps for fitting the top plate of the EXA IIb camera.
3. Check and adjust the distance between the lens mount and the film plane.
Procedure for checking and adjusting lens mount to film plane distance.
4. Check and adjust the mirror position.
Procedure for checking and adjusting the mirror position.
C. Elimination of certain faults.
Guidance for troubleshooting and resolving common camera faults.
1. Cocking segment 370.57 U2 is damaged.
Procedure for dealing with a damaged cocking segment.
2. Curtains unserviceable.
Procedure for dealing with unserviceable shutter curtains.
EXA IIb Fault Elimination
2. Curtains unserviceable.
Detailed steps for replacing unserviceable shutter curtains.
3. Shutter times checking and adjusting.
Procedure for checking and adjusting shutter timing.
4. Mirror 370.51-2 replacement.
Procedure for replacing the mirror.
5. Transport fails.
Troubleshooting guide for film transport failures.
6. Frame-counter adjusting.
Procedure for adjusting the frame counter.
EXA 500 Disassembly and Assembly
A. Disassembly of camera.
Steps for disassembling the EXA 500 camera.
1. Take off the back cover 370.20.
Steps to remove the back cover of the EXA 500 camera.
2. Remove the top-plate 370.61 U1.
Procedure for removing the top plate of the EXA 500 camera.
3. Removal of mechanism 370.63.
Steps for removing the internal mechanism from the EXA 500 camera.
B. Assembly of camera.
Procedures for assembling the EXA 500 camera.
1. Insertion of mechanism 370.63.
Procedure for inserting the mechanism during EXA 500 assembly.
EXA 500 Assembly and Faults
2. Fitting the top-plate 370.61 U 1.
Steps for fitting the top plate of the EXA 500 camera.
3. Check and adjust the distance between the lens mount and the film plane.
Procedure for checking and adjusting lens mount to film plane distance.
4. Check and adjust the mirror position.
Procedure for checking and adjusting the mirror position.
C. Elimination of certain faults.
Guidance for troubleshooting and resolving common camera faults.
1. Cocking segment 370.57 U2 is damaged.
Procedure for dealing with a damaged cocking segment.
2. Curtains unserviceable.
Procedure for dealing with unserviceable shutter curtains.
EXA 500 Fault Elimination
2. Curtains unserviceable.
Detailed steps for replacing unserviceable shutter curtains.
3. Shutter times checking and adjusting.
Procedure for checking and adjusting shutter timing.
4. Mirror 370.51-2 replacement.
Procedure for replacing the mirror.
5. Transport fails.
Troubleshooting guide for film transport failures.
6. Frame-counter adjusting.
Procedure for adjusting the frame counter.
Need help?
Do you have a question about the EXA II and is the answer not in the manual?
Questions and answers