Table of Contents
Advertisement
Advertisement
Table of Contents

Related Manuals for Chef's Choice 667

Summary of Contents for Chef's Choice 667
- Page 1 Professional Electric Food Slicer Model 662/667...
-
Page 2: Important Safeguards
IMPORTANT SAFEGUARDS When using electrical appliances, basic safety precautions should always be followed, including the following: 1. Read all instructions carefully before using slicer, to maximize results and to avoid injury. 2. To protect against risk of electrical shock, do not immerse power unit in water or other liquid or operate in wet areas. - Page 3 MADE A GOOD CHOICE! Congratulations on your selection of the Chef’sChoice ® Professional Electric Food Slicer. As an owner of an Chef’sChoice slicer, you have an easy-to-use ® commercial quality product for slicing bread, meat, cheese, vegetables and fruits. Its performance will bring new joy to preparing freshly sliced foods directly in your kitchen.
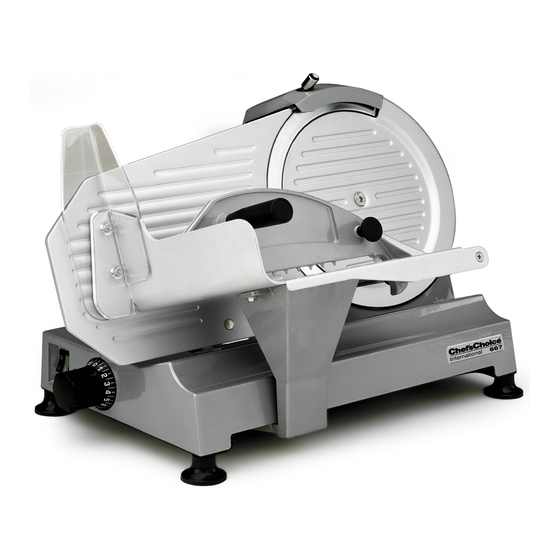
- Page 4 Introduction: The Chef’sChoice Professional Electic Food Slicer is equipped with a commercial quality fine-edge ® (non-serrated) blade for slicing a large variety of foods, including meat, cheese, bread, vegetables and fruit. Review Figure 1 and 2 to familiarize yourself with the Slicer and some of its key components. Figure 1.
- Page 5 4. Thickness control plate 5. Food carriage 6. Food pusher 6a. Food pusher handle 7. Blade sharpener, built-in (Model 667 only) 7a. Detachable blade sharpener (Model 662 only) 8. Thumb screws to fasten food carriage 9. Base 10. Feet, non-skid 11. Slice deflector 12.
-
Page 6: For Your Safety
For Your Safety • To minimize the possibility of accidentally powering the slicer, it is designed with a double switch system (2a and 2b) in Figures 1, 2 and 3. The left – on/off power switch (2a) must be pushed first. To start the blade, next push the spring-loaded safety switch (2b in Fig. 3 [The spring-loaded safety switch will return instantly to a “neutral”... - Page 7 Preparing to Slice Caution: Avoid personal contact with the blade edge. Serious injury can result. 1. Before using the slicer for the first time, we recommend that you clean it thoroughly (see page 9). 2. Place assembled slicer on a sturdy, clean and dry surface. Position slicer so food carriage (5) is to your right and thickness control knob (1) is in front of you on your life.
-
Page 8: Cleaning And Maintenance
5. Now with the firm grip on the food carriage and light pressure against the food pusher advance the food into contact with the rotating blade by slowly moving the carriage forward (Fig. 5). The food will be sliced and the slices will drop into a tray or plate placed on the slicer base on the opposite side of the blade. - Page 9 Removing the Food Carriage: Turn the thickness control knob clockwise past the “zero” position until it stops. Reach underneath the food carriage and unscrew the two knurled thumb screws (8). Put aside the thumb screws and plastic support pads (see Figure 6) in a safe place. Lift off the food carriage with the attached food pusher and wash them in a sink using a mild soap.
- Page 10 Cleaning Other Parts of the Slicer: The slice deflector (11), shown in Figure 2, can be removed with a screwdriver (put screws away for safekeeping) and cleaned in the sink or using a mild spray cleaner. The area behind the slice deflector can be cleaned with a bottle brush.
- Page 11 Professional Slicer as delivered includes for ® Model 662 a detachable sharpener (7a) and with the Model 667 the sharpener (7) is mounted “permanently” on a support post, above and slightly behind the blade (see Figure 13a). Each of these sharpeners have been designed so as to minimize (but not eliminate) the dangers that always exist when working near an exposed blade edge.
- Page 12 Using the Detachable Sharpener – Model 662 1. Always, first unplug the cord from the power outlet. 2. Clean the exposed portion of the slicer blade, as described in the section on cleaning, to remove grease. 3. Examine the detachable sharpener...
- Page 13 9. Place one hand on the thickness control knob and the other hand away from the blade. Then slowly turn the thickness control knob clockwise until the sharpening stone lightly contacts the rear facet of the rotating blade as shown in Figure 11. You will be able to hear when it first contacts the blade. It will be slightly noisy. Maintain the stone in steady but light contact with the blade edge for 30-40 seconds. Then promptly turn the thickness control knob counterclockwise to full open position in order to move the stone away from its contact with the blade.
- Page 14 17. You may wish to clean the blade as described in the previous “Cleaning the Blade (without removal of blade)” section before cutting food. 18. After many sharpenings, when the gap between the blade edge and the thickness control plate (in fully closed position) exceeds 6 mm, the blade must be replaced. Using the Built-In Sharpener – Model 667 1.
- Page 15 9. With the blade now fully sharpened, loosen the thumb screw knob, raise the sharpener, carefully rotate it 180° back to its original storage position, push it down fully and tighten the rear thumb screw for secure storage of the sharpener. 10. You may wish to clean the exposed areas of the blade as described in Cleaning the Blade (without removal of blade) before slicing any food with the newly sharpened blade.
- Page 16 Service No user-serviceable parts are inside. Refer servicing to qualified personnel. In the event service is needed, you may return your food slicer to EdgeCraft Corp., where the cost of repair or electrical or mechanical adjustment can be estimated before the repair is undertaken. Please include your return address and a brief description of the problem or damage to the slicer on a separate sheet inside the box.
Need help?
Do you have a question about the 667 and is the answer not in the manual?
Questions and answers