Table of Contents
Advertisement
SLV-SE740B/SE740D/SE740E/SE740G/SE740I/SE740N/
QQ
3 7 63 1515 0
SERVICE MANUAL
* The abbreviations of SE740, SE747, SE840 and SX740 contained in
this service manual are indicated when these models are common to
TE
L 13942296513
all their corresponding models as given below.
Abbreviated
SE740
model name
SE740B
All model
SE740D
names
SE740E
SLV-
SE740G
SE740I
SE740N
System
Channel coverage
SE740B/SE840B:
SECAM (L)
VHF F2 to F10
UHF F21 to F69
CATV B to Q
HYPER S21 to S41
PAL (B/G)
VHF E2 to E12
VHF italian channels A to H
UHF E21 to E69
CATV S01 to S05, S1 to S20
HYPER S21 to S41
SE740D/SE740E/SE747E/SE840D/SE840E/
SX740D/SX740E:
www
PAL (B/G)
VHF E2 to E12
VHF italian channels A to H
UHF E21 to E69
CATV S01 to S05, S1 to S20
.
HYPER S21 to S41
SE740G/SE840G:
PAL (I)
UHF B21 to B69
http://www.xiaoyu163.com
SE747E/SE840B/SE840D/SE840E/SE840G/
SE840N/SX740D/SX740E/SX740N
SE747
SE840
SE747E
SE840B
SE840D
SE840E
SE840G
SE840N
SE740I:
PAL (I)
VHF IA to IJ, SA10 to SA13
UHF B21 to B69
CATV S01 to S05, S1 to S20
HYPER S21 to S41
SE740N/SE840N/SX740N:
PAL (B/G, D/K)
VHF E2 to E12, R1 to R12
UHF E21 to E69, R21 to R69
CATV S1 to S41, S01 to S05
RF output signal
SE740D/SE740E/SE740G/SE740I/SE740N/
SE747E/SE840D/SE840E/SE840G/SE840N/
SX740D/SX740E/SX740N:
UHF channels 21 to 69
x
ao
u163
y
i
http://www.xiaoyu163.com
2 9
8
RMT-V406/V406A/V406B/V407A/V407B
SLV-SE740B/SE740D/SE740E/SE740I/SE740N/SE747E/
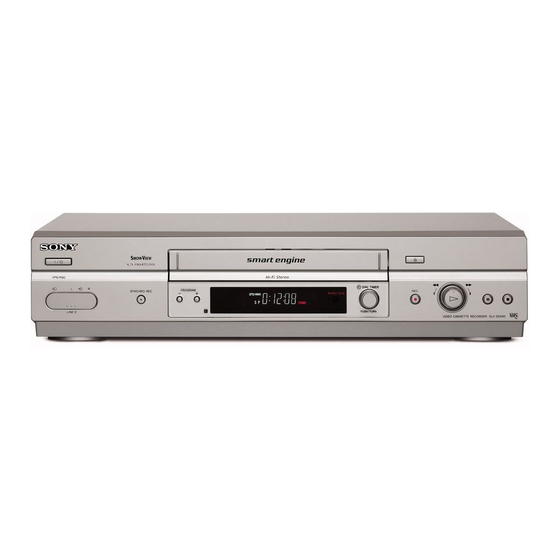
Photo: SLV-SE840B
RMT-V407B
Refer to the SERVICE MANUAL of VHS MECHANI-
Q Q
3
6 7
CAL ADJUSTMENT MANUAL VII for MECHANICAL
1 3
1 5
ADJUSTMENTS. (9-921-790-11)
SX740
SX740D
SX740E
SX740N
SPECIFICATIONS
VIDEO CASSETTE RECORDER
co
.
9 4
2 8
AEP Model
SE840B/SE840D/SE840E/SE840N/
SX740D/SX740E/SX740N
UK Model
SLV-SE740G/SE840G
TS-10 MECHANISM
0 5
8
2 9
9 4
2 8
Aerial out
75-ohm asymmetrical aerial socket
Tape speed
SE740D/SE740E/SE740G/SE740I/SE747E/
SE840D/SE840E/SE840G/SX740D/SX740E:
SP: PAL
23.39 mm/s (recording/playback)
NTSC 33.35 mm/s (playback only)
LP: PAL
11.70 mm/s (recording/playback)
NTSC 16.67 mm/s (playback only)
EP: NTSC 11.12 mm/s (playback only)
— Continued on next page —
m
9 9
9 9
Advertisement
Table of Contents

Related Manuals for Sony SLV-SE740G


Summarization of Contents
Specifications
System
Details channel coverage for different models including PAL, NTSC, and SECAM systems.
RF output signal
Specifies the RF output signal characteristics for various models.
Aerial out
Describes the connection type for the aerial input.
Tape speed
Lists tape speeds for recording and playback in SP, LP, and EP modes.
Safety Check-out
Safety-Related Component Warning!!
Warning about critical components identified with marks for safe operation.
Important Service Guide
General
General information and introductory sections for servicing the VCR.
Disassembly and Reassembly
Procedures for taking apart and reassembling the VCR.
P.C.BOARDS
Lists the Printed Circuit Boards found within the VCR unit.
Schematic Diagrams
Contains detailed circuit diagrams for various VCR sections.
Alignment and Adjustments
Procedures for calibrating and adjusting VCR mechanisms.
Repair Parts List
Comprehensive list of all replaceable parts for the VCR.
How to Eject the Cassette Tape
Mode Switch (Program Switch) Assembly Point
Instruction for correctly aligning the mode switch assembly.
1. GENERAL
Getting Started
Initial setup steps and basic operation overview for new users.
Index to parts and controls
Reference guide identifying front panel components and controls.
Step 1: Unpacking
Rear panel
Identification of connectors and ports on the VCR's rear panel.
Remote commander
Overview and function of the remote control unit.
Step 2: Setting up the remote commander
TV control buttons
Explanation of how to use the remote for TV functions.
Code numbers of controllable TVs
List of codes for operating other TV brands with the remote.
Step 3: Connecting the VCR
About the SMARTLINK features
Information on features enhancing VCR-TV interaction.
Additional connections
Details on connecting to stereo systems or tuners.
Step 4: Setting up the VCR with the Auto Set Up function
Downloading the TV tuner's preset data
Guide for loading TV channel data via SMARTLINK connection.
Selecting a language
Instructions for changing the on-screen display language.
Presetting channels
Changing/disabling programme positions
Manage channel order and disable unwanted channels.
Changing programme positions
Changing the station names
Instructions for renaming stored TV channels.
Setting the clock
Basic Operations
Fundamental VCR operations explained.
Playing a tape
Step-by-step guide for playing video tapes.
Playing a tape
Recording TV programmes
Instructions for recording television broadcasts.
Recording TV programmes
Recording what you are watching on the TV (TV Direct Rec)
How to record content directly from the TV using SMARTLINK.
Recording TV programmes using the Dial Timer
Using the Dial Timer function for automatic recordings.
Recording TV programmes using the Dial Timer
Recording TV programmes using the VIDEO Plus+ system
Simplified programming using PlusCode numbers.
Recording TV programmes using the VIDEO Plus+ system
Setting the timer manually
Step-by-step guide for setting manual timer recordings.
Setting the timer manually
Additional Operations
Advanced features and functions of the VCR.
Playing/searching at various speeds
Navigating tapes at different playback speeds.
Setting the recording duration time
Setting the VCR to stop recording automatically after a duration.
Setting the recording duration time
Synchronized Recording
Recording programs from external equipment automatically.
Checking/changing/cancelling timer settings
Managing programmed timer recordings.
Checking/changing/cancelling timer settings
Recording stereo and bilingual programmes
How to record stereo and bilingual audio tracks.
Searching using the index function
Using index signals to locate specific recordings.
Searching using the index function
Adjusting the picture
Fine-tuning picture quality, including tracking and sharpness.
Reducing the VCR's power consumption
Settings to lower power usage when the VCR is idle.
Changing menu options
Customizing VCR settings through menu options.
Changing menu options
Editing
Functions related to editing recorded content.
Connecting to a VCR or stereo system
How to hook up other audio/video devices.
Basic editing
Fundamental editing operations.
Audio dubbing
Recording new audio over existing tracks.
Additional Information
Troubleshooting
Guidance for resolving common VCR problems.
Quick Start Guide
Index
Alphabetical reference to topics covered in the manual.
2. DISASSEMBLY AND REASSEMBLY
2-1 CABINET AND PCB
Instructions for accessing the VCR's internal cabinet and circuit boards.
2-1 CABINET AND PCB
2-1-3 Ass'y-Panel Front
Procedure to remove the front panel assembly.
2-1-4 Ass'y Jack PCB
Procedure to remove the jack PCB assembly.
2-1 CABINET AND PCB
2-1-5 Ass'y MAIN-PCB, DECK
Procedure to remove the main PCB and deck assembly.
2-2 VCR DECK PARTS LOCATIONS
2-2-1 Top View
Diagram showing the top view of VCR deck components.
2-2 VCR DECK PARTS LOCATIONS
Fig. 2-7 Top Parts Location-2
Diagram identifying top-view components of the VCR deck.
2-2 VCR DECK PARTS LOCATIONS
2-2-2 Bottom View
Diagram showing the bottom view of VCR deck components.
2-3 VCR DECK
2-3-1 Holder FL Cassette Ass'y Removal
Procedure to remove the cassette holder assembly.
2-3-2 Lever FL Door Removal
Procedure to remove the front flap door.
2-3 VCR DECK
2-3-3 Slider FL Drive, Gear FL Cam Removal
Procedure to remove slider and gear components.
2-3-4 Lever FL Arm Ass'y Removal
Procedure to remove the FL arm assembly.
2-3 VCR DECK
2-3-5 Gear Worm Wheel Removal
Procedure to remove the gear worm wheel.
2-3-6 Cable Flat Removal
Procedure to remove ribbon cables.
2-3 VCR DECK
2-3-7 Motor Loading Ass'y Removal
Procedure to remove the motor loading assembly.
2-3-8 Bracket Gear, Gear Joint 2, 1 Removal
Procedure to remove gear and joint components.
2-3 VCR DECK
2-3-9 Gear Loading Drive, Slider Cam, Lever Load S, T Ass'y Removal
Procedure to remove loading drive and lever assemblies.
2-3-10 Gear Loading Drive, Slider Cam, Lever Load S, T Ass'y Assembly
Procedure to assemble loading drive and lever assemblies.
2-3 VCR DECK
2-3-11 Lever Pinch Drive, Lever Tension Drive Removal
Procedure to remove pinch and tension drive levers.
2-3-12 Lever Tension Ass'y, Band Brake Ass'y Removal
Procedure to remove tension and band brake assemblies.
2-3 VCR DECK
2-3-13 Lever Brake S, T Ass'y Removal
Procedure to remove brake lever assemblies.
2-3-14 Gear Idle Ass'y Removal
Procedure to remove the gear idle assembly.
2-3 VCR DECK
2-3-15 Disk S, T Reel Removal
Procedure to remove reel disk components.
2-3-16 Holder Clutch Ass'y Removal
Procedure to remove the clutch holder assembly.
2-3 VCR DECK
2-3-17 Lever Up Down Ass'y, Gear Center Ass'y Removal
Procedure to remove lever and gear assemblies.
2-3-18 Guide Cassette Door Removal
Procedure to remove the cassette door guide.
2-3 VCR DECK
2-3-19 Lever Unit Pinch Ass'y, Plate Joint, Spring Pinch Drive Removal
Procedure to remove pinch unit and related parts.
2-3-20 Lever #9 Guide Ass'y Removal
Procedure to remove the #9 guide lever assembly.
2-3 VCR DECK
2-3-21 FE Head Removal
Procedure to remove the FE head.
2-3-22 ACE Head Removal
Procedure to remove the ACE head.
2-3 VCR DECK
2-3-23 Slider S, T Ass'y Removal
Procedure to remove slider assemblies.
2-3-24 Plate Ground Deck, Cylinder Ass'y Removal
Procedure to remove deck plate and cylinder.
2-3 VCR DECK
2-3-25 Belt Pulley Removal
Procedure to remove the belt pulley.
2-3-26 Motor Capstan Ass'y Removal
Procedure to remove the motor capstan assembly.
2-3 VCR DECK
2-3-27 Post #8 Guide Ass'y Removal
Procedure to remove the #8 guide post assembly.
2-3-28 Level Head Cleaner Ass'y Removal
Procedure to remove the head cleaner assembly.
2-3-29 How to Eject the Cassette Tape
Method to eject a tape if the unit is not operating.
3. P.C.BOARDS
3-1 Main PCB
Details of the main printed circuit board.
3-2 Dial Timer PCB
Details of the dial timer printed circuit board.
3-3 Front A/V PCB
Details of the front audio/video printed circuit board.
3-1 MAIN PCB
COMPONENT SIDE
Component layout on the main PCB's front side.
3-1 MAIN PCB
CONDUCTOR SIDE
Component layout on the main PCB's back side.
3-2 DIAL TIMER PCB
COMPONENT SIDE
Component layout on the dial timer PCB's front side.
CONDUCTOR SIDE
Component layout on the dial timer PCB's back side.
3-3 FRONT A/V PCB
COMPONENT SIDE
Component layout on the front A/V PCB's front side.
CONDUCTOR SIDE
Component layout on the front A/V PCB's back side.
4. SCHEMATIC DIAGRAMS
Block Identification of Main PCB
Overview of functional blocks on the main PCB.
Block Identification of Main PCB
4-3 SYSTEM CONTROL/SERVO
Schematic for the system control and servo functions.
4-4 AUDIO/VIDEO
Schematic for audio and video signal processing.
4-5 Hi-Fi
Schematic for the Hi-Fi audio circuitry.
4-6 TM-BLOCK
Schematic for the TM-block functionality.
4-7 OSD/VPS/PDC
Schematic for On-Screen Display, VPS, and PDC functions.
4-8 SECAM (SE740B/SE840B)
Schematic specific to SECAM color system models.
4-9 A2/NICAM
Schematic for A2/NICAM stereo sound system.
4-10 Input-Output (2 Scart Jack)
Schematic for SCART input/output connections.
4-11 Function
Schematic detailing overall VCR functions.
5. ALIGNMENT AND ADJUSTMENTS
5-1 VCR ADJUSTMENT
Procedures for adjusting VCR operational points.
5-1-1 Location of adjustment button of remote control
Identifies buttons on the remote for VCR adjustments.
5-1 VCR ADJUSTMENT
5-1-2 Test point location for adjustment mode setting
Locates test points on the main PCB for adjustment.
5-1 VCR ADJUSTMENT
5-2 HEAD SWITCHING POINT ADJUSTMENT
Procedure to adjust the head switching point.
5-3 NVRAM OPTION SETTING
Setting VCR options stored in NVRAM.
5-4 VCR MECHANICAL ADJUSTMENT
5-4-1 Tape Transport System and Adjustment Locations
Identifies adjustment points for the tape transport system.
5-4-1 Tape Transport System and Adjustment Locations
ACE Head Assembly Adjustment
Adjustments for the ACE head assembly.
ACE Head Assembly Adjustment
ACE HEAD TILT ADJUSTMENT
Procedure to adjust the ACE head tilt.
AUDIO AZIMUTH ADJUSTMENT
Procedure to adjust audio azimuth.
ACE Head Assembly Adjustment
ACE HEAD POSITION (X-POINT) ADJUSTMENT
Procedure to adjust the ACE head position (X-Point).
ACE Head Assembly Adjustment
Linearity adjustment (Guide roller S, T adjustment)
Adjusting guide rollers for tape path linearity.
Linearity adjustment (Guide roller S, T adjustment)
Check Transitional Operation from RPS to Play
Verifying tape entry transition from RPS to Play mode.
Check Transitional Operation from RPS to Play
Envelope Check
Checking video envelope signals for proper playback.
Tape Wrinkle Check
Observing and adjusting for tape wrinkles.
5-4-3 Reel Torque
Adjusting reel torque for proper tape tension.
6. REPAIR PARTS LIST
6-1 Exploded Views
Visual breakdowns of VCR parts.
6-2 Electrical Parts List
Comprehensive list of electronic components.
6-1 Exploded Views
6-1-1 Instrument Assembly
Exploded view of the main VCR instrument assembly.
6-1 Exploded Views
6-1-2 Mechanical Parts (Top Side)
Exploded view of mechanical parts on the top side.
6-1 Exploded Views
6-1-3 Mechanical Parts (Bottom Side)
Exploded view of mechanical parts on the bottom side.
6-2 Electrical Parts List
MAIN
List of main electrical components.
Need help?
Do you have a question about the SLV-SE740G and is the answer not in the manual?
Questions and answers