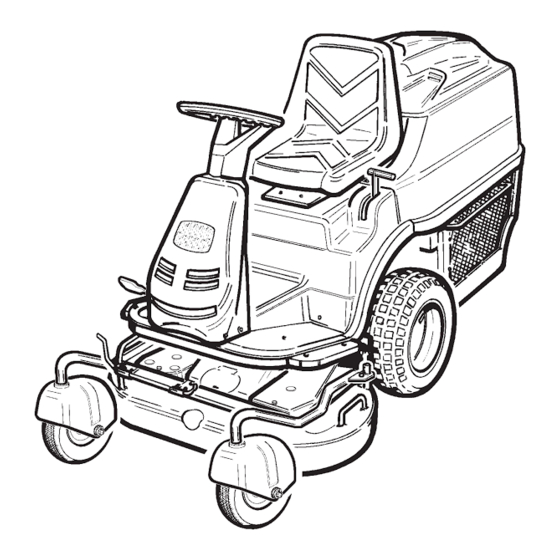
Summarization of Contents
Introduction and Safety Symbols
Explanation of Warning Symbols
Details the meaning of warning symbols for operations requiring special care.
Top Green Anchorage Points
Lifting with Mower Dish Inserted
Instructions for lifting the TOP GREEN with the lawn-mower dish attached.
Lifting Without Mower Dish
Instructions for lifting the TOP GREEN without the lawn-mower dish attached.
Cap.02 Mounting the Lawn-Mower Dish
Positioning Lawn-Mower Dish (4A)
Steps to position the lawn-mower dish under the TOP GREEN.
Lubricating Bush (5A)
Procedure for greasing the bush of the lawn-mower dish bracket.
Positioning Lawn-Mower Dish (6A)
Steps to position the lawn-mower dish.
Aligning Bush (7A) with Transmission Shaft (7B)
Procedure to align the bush with the transmission shaft.
Securing Dish with Pin (8A)
How to fix the dish to the TOP GREEN using the pin.
Cap.04 Mounting the Fairings
Mounting the Rear Fairing
Instructions for installing the rear fairing.
Mounting the Main Fairing
Instructions for installing the main fairing.
Mounting the Grille
Instructions for installing the front grille.
Cap.05 Disassembling the Belts
Removing Belt Guard (3B)
Procedure to remove the belt guard by loosening screws.
Removing Belts from Pulley (4B)
Steps to remove the belts from the drive pulley.
Removing Shock Absorber (5A)
Procedure to remove the shock absorber.
Cap.06 Assembling Belts (XPAX 765)
Removing Belt Stretcher Spring (10A)
Instructions to remove the spring of the belt stretcher.
Removing Belt XPAX 765
Steps for removing the XPAX 765 belt.
Cap.06 Replacing Belts (XPAX 1150)
Inserting Belts (13A) into Cardan Shaft (13B)
Procedure to insert belts into the cardan shaft and pulley grooves.
Positioning Belts (13A) on Driven Pulley (13C)
Steps to position belts on the driven pulley, noting the stretcher.
Fixing Pulley Support (13E)
How to fix the pulley support to the frame with screws.
Positioning Locking Spring (13G)
Procedure to position the locking spring of the belt stretcher.
Cap.07 Adjusting the Belt Stretcher
Setting 10mm Clearance
Ensuring a 10mm gap between belt stretcher and guard when lever is lifted.
Setting 48mm Spring Pack
Restoring 48mm spring pack value by adjusting nut when lever is lowered.
Cap.09 Adjusting Brake Stop Distance
Reducing Brake Stop Distance
Steps to shorten the mower's braking distance.
Lengthening Brake Stop Distance
Steps to increase the mower's braking distance.
Adjusting Brake Pedal '0' Point
Procedure to adjust the neutral position of the brake pedal.
Cap.01 Disassembling Belts
Loosening Adjusting Slide Screw (6A)
Instructions to loosen the fixing screw of the adjusting slide.
Unlocking Drive Pulleys
Steps to unlock the belt driving pulleys by loosening screws.
Removing Pulley (8A)
Procedure to remove the pulley using a lever.
Removing Driving Belt (9A)
Instructions for removing the driving belt.
Removing Pulley (10A)
Procedure to remove the pulley using a lever.
Cap.01 Belt Disassembly Continued
Removing Belt (17A)
Instructions to draw out the belt from the pulleys.
Removing Pulley Driving Pin (18A)
Procedure to remove the pulley driving pin using a soft tool.
Overturning Dish and Removing Pin (19A)
Steps to overturn the mower dish and remove the driving pin.
Removing Key (20A)
Instructions to remove the key from the pin seat.
Cap.02 Assembling Belts
Fixing Belt Support (25A)
Procedure to fix the belt support to the dish using screws.
Inserting Pulley Driving Pin (26A)
Instructions to insert the pulley driving pin into the support.
Fixing Support to Dish (27A)
How to overturn the dish and fix the support using screws.
Inserting and Locking Pulley (28C)
Procedure to insert the pulley and lock it with a screw.
Cap.02 Belt Assembly Continued
Fixing Support to Dish (34A)
Procedure to fix the support to the dish using screws.
Fixing Support to Dish (35A)
Procedure to fix the support to the dish, referencing other chapters.
Blade Positioning During Tensioning
Attention for blade positioning (90°) during belt tensioning.
Tensioning Belt (37A)
How to tension the belt and fix the adjusting slide.
Cap.03 Disassembling Blades
Blade Fixing Screw Direction
Attention to rotation direction of blade fixing screws.
Removing Blade Screw (43A) and Spring (43B)
Steps to loosen blade screw and remove cup spring.
Removing Blades (44A)
Instructions to remove the blades.
Removing Blades (45A)
Instructions to remove the blades.
Removing Blade Support (46A)
Procedure to remove blade support from shaft.
Removing Key (47A)
Instructions to remove the key.
Cap.04 Assembling Blades
Blade Fixing Screw Direction
Attention to rotation direction of blade fixing screws.
Positioning Cup Spring (53B) and Screw (53A)
Steps to position cup spring and fixing screw.
Fixing Blades to Support (54A)
Procedure to fix blades to support by locking screws.
Final Screw Tightening
Using a wooden object for final tightening of screws.
Ensuring Blade Orthogonality (90°)
Verification that blades are correctly positioned at 90°.
Cap.06 Variants - Versions
STANDARD Version Tightener Assembly
Sequence for assembling tighteners on mower dish in STANDARD version.
PROFESSIONAL Version Tightener Assembly
Sequence for assembling tighteners on mower dish in PROFESSIONAL version.
PROFESSIONAL Pulley Assembly
Ensuring bearing protrusion for pulley assembly in PROFESSIONAL version.
STANDARD Blade Pin Support Assembly
Assembly of blade pin support with dish in STANDARD version.
PROFESSIONAL Blade Pin Support Assembly
Assembly of blade pin support with dish in PROFESSIONAL version.
Cap.07 Maintenance
Sharpening Blades
Periodically sharpen blades, respecting cutting edge tilt.
Blade Replacement Condition
Note on replacing blades when thickness is less than 45mm.
Cap.10 Assembling Wheels (PROFESSIONAL)
Positioning Wheel (61A) on Pin (61B)
Procedure to position the wheel on the pin.
Locking Wheel with Seeger Ring (62A)
How to lock the wheel to the pin using a seeger-ring.
Locking Wheel Pin to Frame
Procedure to lock the wheel pin to the frame using a seeger-ring.
Positioning Protective Hood (64A)
How to position the protective hood in its seat.


Need help?
Do you have a question about the TG155 Special and is the answer not in the manual?
Questions and answers