Table of Contents
Advertisement
No.01
More Service Manuals at www.service-manual.net
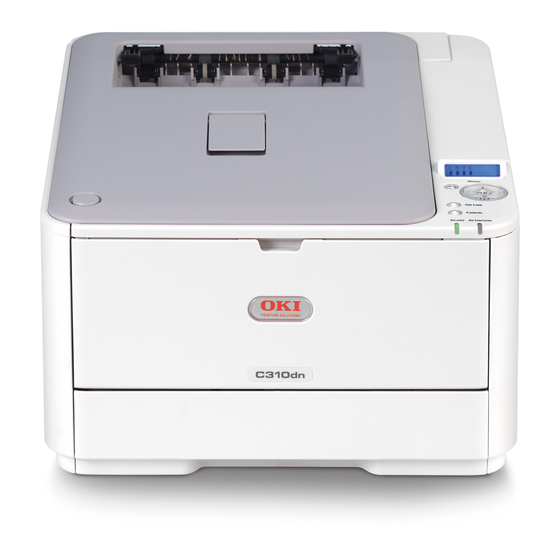
C310dn, C330dn, C510dn, C530dn
Maintenance Manual
Related drawings
Drawing No.
44346007TL
44346007TR
BOM
Rev
Date
Approval
Check
Date
2010-06-18
[Rev. 1]
C310dn, C330dn, C510dn, and C530dn Disassembly for Maintenance
C310dn, C330dn, C510dn, and C530dn RSPL
Use for
DCO No.
Contents
Design
Tsutomu Yamamoto
S Ogashiwa
Oki Data CONFIDENTIAL
Name
Certification Body
Design
Approval
Name
C310dn, C330dn, C510dn, C530dn
Maintenance Manual
Drawing No.
44346001TH
1
220
Advertisement
Chapters
Table of Contents
Troubleshooting

Summarization of Contents
1. CONFIGURATION
1.1 System configuration
Explains system configuration diagrams detailing printer components and their interconnections.
1.2 Printer configuration
Describes printer's internal parts: electrophotographic section, paper paths, controllers, operator panel, and power supplies.
1.3 Optional items
Lists and illustrates optional items like trays, additional memory, and SD cards for the printers.
1.4 Specifications
Details critical specifications: printing system, resolution, RAM, OS support, print languages, and interface.
1.5 Interface specifications
Covers USB and network interface specifications, including protocols, connectors, and signals.
2. DESCRIPTION OF OPERATION
2.1 Electrophotographic process mechanism
Explains the step-by-step electrophotographic printing process: charging, exposure, development, transfer, and fusing.
2.2 Printing process
Details simplex and duplex printing operations, covering paper paths and component interactions during printing.
3. INSTALLATION
3.1 Cautions, and do’s and don’ts
Provides essential warnings and precautions for safe and correct printer installation and handling.
3.2 Unpacking procedure
Outlines steps for safely unpacking the printer, emphasizing safe lifting practices due to its weight.
3.3 Printer installation instructions
Specifies required ambient temperature, humidity, and installation space for optimal printer placement.
3.4 List of components and accessories
Lists all included printer components and accessories, with a warning regarding safe lifting.
3.5 Assembly procedure
Details assembly steps for the printer main unit, including removing protective tapes and opening the top cover.
3.6 Printing of MenuMap
Explains how to print the MenuMap to verify correct printer operation and check settings.
3.7 Connection methods
Describes connecting the printer to a computer via USB and Ethernet, including cable and driver setup.
3.8 Checking of paper used by the user
Guides on checking user-provided paper and setting media weight/type for proper printing.
4. REPLACEMENT OF PARTS
4.1 Notes on replacement of parts
Provides critical safety notes and procedures for unplugging/reconnecting power and handling integrated circuits.
4.2 Part replacement procedure
Details procedures for replacing various printer parts and assemblies, starting with the belt unit.
4.3 Locations to lubricate
Shows specific locations requiring lubrication and the types of lubricants to use for maintenance tasks.
5. MAINTENANCE MENUS
5.1 System Maintenance menu (for maintenance personnel)
Explains access to the System Maintenance menu for advanced printer adjustments and configurations.
5.2 Maintenance Utility
Details the Maintenance Utility software and its options for adjusting printer settings and configurations.
5.3 User maintenance menu functions
Covers user-accessible maintenance menu functions like saving/restoring settings and power save options.
5.4 Setup after part replacement
Describes necessary adjustments after replacing parts like the CU/PU board, including EEPROM data copying.
5.5 Manual density adjustment operation
Provides instructions for performing manual density adjustment when print density issues arise.
5.6 Printer ADMIN MENU
Explains access and configuration of the Printer Admin Menu, including password and category settings.
6. PERIODIC MAINTENANCE
6.1 Cleaning
Advises on cleaning the printer's interior and exterior using specific tools and precautions to avoid damage.
6.2 LED lens array cleaning
Details cleaning the LED lens array and LED heads to resolve print quality issues like faded images or lines.
6.3 Pick-up roller cleaning
Explains cleaning pick-up rollers and separator rollers to prevent paper jams and ensure proper feed.
6.4 Pinter internal cleaning
Guides on cleaning specific internal parts, like the metal shaft near the fuser, to address toner adherence.
7. TROUBLESHOOTING
7.1 Before troubleshooting
Outlines preliminary checks and information gathering required before starting detailed troubleshooting steps.
7.2 Points to check before dealing with image troubles
Lists key points to verify regarding operating environment, consumables, and component installation for image quality.
7.3 Precautions for dealing with image troubles
Provides essential precautions for handling sensitive parts like OPC drums and hot fuser units during troubleshooting.
7.4 Preparation for troubleshooting
Explains how to use the operator panel LCD to identify trouble status and guide troubleshooting steps.
7.5 Troubleshooting procedure
Provides a systematic procedure for troubleshooting based on LCD messages and user flows for various errors.
7.6 Fuse check
Details how to check relevant fuses on control boards to diagnose electrical faults and failures.
8. CONNECTION DIAGRAMS
8.1 Resistance value checking
Provides resistance values for checking various motors like transport belt, ID, fuser, and feed motors.
8.2 Layout of parts
Illustrates component layouts on the Print Engine Controller PCB (PU PCB) for C530 and C330 models.
8.3 Firmware revision numbers
Lists ROM control numbers, firmware revisions, and checksums for different printer models.


Need help?
Do you have a question about the C510dn and is the answer not in the manual?
Questions and answers