Advertisement
Quick Links
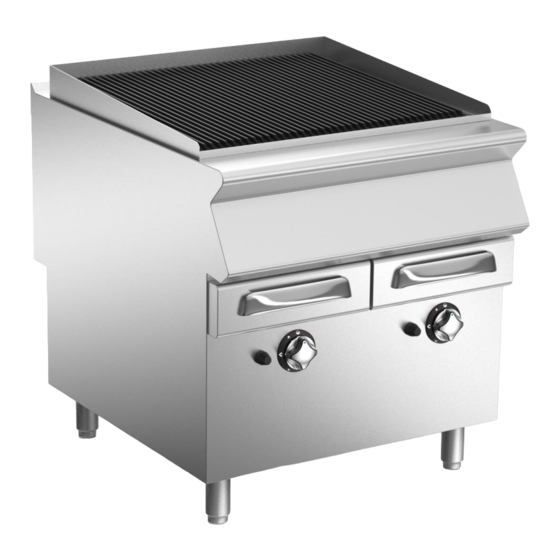
GRIGLIA
ISTRUZIONI PER L'INSTALLAZIONE, USO E MANUTENZIONE
Leggere subito le informazioni generali!
GRILLGERÄT
ANWEISUNGEN FÜR INSTALLATION, GEBRAUCH UND WARTUNG
Die Hinweise sollen sofortgelesen werden!
GRILL
INSTRUCTIONS FOR INSTALLATION, OPERATION AND MAINTENANCE
Read the general informations immediately!
GRILLOIR
INSTRUCIONS POUR INSTALLATION, EMPLOI ET ENTRETIEN
Lire tout de suite averissements!
PARILLA
INSTRUCCIONES PARA INSTAKKACION, USO Y MANTENINIENTO
¡En primer lugar leer las advertencias!
GRILLHÄLL
ISTRUCTIES VOOR INSTALLATIE, GEBRUIK EN ONDERHOUD
Lees de waarschuwingen onmiddellijk!
NP90
IT
DE – AT – IT – BE – LU –CH
GB – IE – MT
FR – BE – LU
ES
NL – BE
DOC.NO CR0584070
EDITION 001
Advertisement

Related Manuals for Mareno NG98G


Summary of Contents for Mareno NG98G
- Page 1 NP90 GRIGLIA ISTRUZIONI PER L’INSTALLAZIONE, USO E MANUTENZIONE Leggere subito le informazioni generali! DE – AT – IT – BE – LU –CH GRILLGERÄT ANWEISUNGEN FÜR INSTALLATION, GEBRAUCH UND WARTUNG Die Hinweise sollen sofortgelesen werden! GB – IE – MT GRILL INSTRUCTIONS FOR INSTALLATION, OPERATION AND MAINTENANCE Read the general informations immediately!
- Page 2 MISURE IN cm - DIMENSIONS IN cm - ABMESSUNGEN IN cm MISURE IN cm - DIMENSIONS IN cm - ABMESSUNGEN IN cm MESURES EN cm - MEDIDAS EN cm - MATEN IN cm MESURES EN cm - MEDIDAS EN cm - MATEN IN cm NG94G NG94G NG98G NG98G Legenda - Legende - Key - Légende - Leyenda - Legenda...
- Page 3 SCHEMA DI INSTALLAZIONE - INSTALLATION DIAGRAM - INSTALLATIONSPLAN - SCHÉMA D’INSTALLATION SCHEMA DI INSTALLAZIONE - INSTALLATION DIAGRAM - INSTALLATIONSPLAN - SCHÉMA D’INSTALLATION - ESQUEMA DE INSTALACION -INSTALLATIESCHEMA - IINSTALLATIONSRITNINGAR - ESQUEMA DE INSTALACION -INSTALLATIESCHEMA - IINSTALLATIONSRITNINGAR MISURE IN cm - DIMENSIONS IN cm - ABMESSUNGEN IN cm MISURE IN cm - DIMENSIONS IN cm - ABMESSUNGEN IN cm MESURES EN cm - MEDIDAS EN cm - MATEN IN cm MESURES EN cm - MEDIDAS EN cm - MATEN IN cm...
- Page 4 UNIONE APPARECCHIATURE-GERÄTEZUSAMMENSCHLUSS-COMBINING APPLIANCES-UNIÓN D’APPAREIL- UNIONE APPARECCHIATURE-GERÄTEZUSAMMENSCHLUSS-COMBINING APPLIANCES-UNIÓN D’APPAREIL- UNION DE VARIOS EQUIPOS-VERBINDING VAN APPARATEN UNION DE VARIOS EQUIPOS-VERBINDING VAN APPARATEN CR0585060 CR0585060 CR0582520 CR0582520 CR0584400 CR0584400 15203299 15203299 CR0585060 CR0585060 CR0685240 CR0685240...
- Page 5 FIGURE - ABB. - FIG. FIGURE - ABB. - FIG.
- Page 6 DATI TECNICI - TECHNICAL DATA - TECHNISCHE DATEN - CARACTERISTIQUES TECHNIQUES - DATOS TECNI- DATI TECNICI - TECHNICAL DATA - TECHNISCHE DATEN - CARACTERISTIQUES TECHNIQUES - DATOS TECNI- COS - TECHNISCHE GEGEVENS COS - TECHNISCHE GEGEVENS...
- Page 7 DATI TECNICI - TECHNICAL DATA - TECHNISCHE DATEN - CARACTERISTIQUES TECHNIQUES - DATOS TECNI- DATI TECNICI - TECHNICAL DATA - TECHNISCHE DATEN - CARACTERISTIQUES TECHNIQUES - DATOS TECNI- COS - TECHNISCHE GEGEVENS COS - TECHNISCHE GEGEVENS...
- Page 8 DATI TECNICI - TECHNICAL DATA - TECHNISCHE DATEN - CARACTERISTIQUES TECHNIQUES - DATOS TECNI- DATI TECNICI - TECHNICAL DATA - TECHNISCHE DATEN - CARACTERISTIQUES TECHNIQUES - DATOS TECNI- COS - TECHNISCHE GEGEVENS COS - TECHNISCHE GEGEVENS...
- Page 9 DATI TECNICI - TECHNICAL DATA - TECHNISCHE DATEN - CARACTERISTIQUES TECHNIQUES - DATOS TECNI- DATI TECNICI - TECHNICAL DATA - TECHNISCHE DATEN - CARACTERISTIQUES TECHNIQUES - DATOS TECNI- COS - TECHNISCHE GEGEVENS COS - TECHNISCHE GEGEVENS...
- Page 10 GENERAL INFORMATION ............................... 24 APPLIANCE SPECIFICATIONS ..........................24 GENERAL PRESCRIPTIONS ............................ 24 REMINDERS FOR THE INSTALLER ............................24 REMINDERS FOR THE USER ..............................24 REMINDERS FOR THE MAINTENANCE TECHNICIAN ......................24 REMINDERS FOR CLEANING ..............................24 DISPOSAL OF PACKING AND THE APPLIANCE ..................... 24 INSTRUCTIONS FOR INSTALLATION ............................
- Page 11 GENERAL INFORMATION REMINDERS FOR THE MAINTENANCE TECHNICIAN This chapter contains general information which all users of the • Read this manual carefully. It provides important information manual must be familiar with. Specifi c information for individual for safe installation, use and maintenance of the appliance. users of the manual is provided in subsequent chapters ( “...
- Page 12 Install the appliance in compliance with the prescriptions of 7.3 APPLIANCE TYPE “B11” EN1717 and the water pollution regulations in force in your • Fit the “B11” type appliance with a suitable fl ue, available from country. the appliance manufacturer. Follow the assembly instructions provided with the fl...
- Page 13 • Install a mechanical fi lter and a shut-off valve upstream of the INSTRUCTIONS FOR USE appliance in an easily accessible point. • Make sure the water circuit is free of ferrous particles before REMINDERS FOR THE USER connecting the fi lter and the appliance. The appliance manufacturer cannot be liable for any da- •...
- Page 14 • Hold the knob down for about 20 seconds before releasing it. INSTRUCTIONS FOR CLEANING If the pilot fl ame goes out, repeat the operation. REMINDERS FOR CLEANING Main burner ignition The appliance manufacturer cannot be liable for any da- mage due to failure to comply with the prescriptions given Turn the knob from position “...
-
Page 15: Troubleshooting
• Installation, conversion to a different type of gas and applian- • Defective gas tap or valve. ce maintenance must be carried out by qualifi ed technicians • Defective thermocouple or insuffi cient heating. authorized by the manufacturer, in compliance with current •... -
Page 16: Cleaning The Interior
• Re-assemble all parts. For assembly, proceed in reverse or- der. Replacing the elements. • Remove the grease collection drawer. • Remove the control panel. • Remove the splashguard and the grille. • Remove the box and the cover of the element terminals by unscrewing the self-tapping screws from the top of the ap- pliance.
Need help?
Do you have a question about the NG98G and is the answer not in the manual?
Questions and answers