Table of Contents
Advertisement
Quick Links
Advertisement
Table of Contents

Related Manuals for JVC Enverio GZ-E205


Summarization of Contents
Beginner’s Guide
Charging
Instructions for charging the camcorder battery.
Recording
Operating instructions for recording videos.
Playback
Operating instructions for playing back recorded content.
Shooting Tips
Techniques for capturing stable images and framing shots.
Basic Way to Hold a Camcorder
Proper grip technique for stable image capture.
Extending Your Hands to Shoot
High-angle shooting technique for capturing subjects behind crowds.
Squatting and Shooting at Eye Level
Technique for shooting small children from their eye level.
Panning
Method for shooting a wide angle of view by rotating the body.
Useful Shooting Techniques
Holiday Season/Christmas
Tips for recording Christmas celebrations and family moments.
Decorating the Tree and Preparing the Dinner
Recording scenes of tree decorating and meal preparation.
Recording the Christmas Party
Capturing moments during the Christmas party itself.
Finding the Presents
Recording children's excitement when finding Christmas presents.
Useful Shooting Techniques
Wedding
Tips for creating an awesome wedding video for the bride and groom.
Discussing and Planning Before the Event
Pre-event discussion with the couple for better shooting.
Finding out the route of entrance
Planning the bride and groom's entrance route for optimal filming.
Number of times and timing of clothes-changing
Capturing wardrobe changes and guest well wishes.
Finding the Right Angle to Capture Both Bride and Groom
Techniques for composing shots of the couple and guests.
Recording the Expressions and Comments of Guests
Capturing guest comments from eye level to chest level.
Useful Shooting Techniques
Advanced Operation with Two Camcorders
Using two camcorders for varied scenes and editing.
Travel
Tips for capturing good times during domestic or overseas trips.
Bringing the Necessary Equipment
Essential equipment considerations for trips.
Camcorder
Advice on selecting and preparing a camcorder for travel.
Battery Pack
Tips for preparing adequate battery packs for travel.
AC Adapter
Information on using the AC adapter overseas.
Power Plug Adapter
Importance of using the correct power plug adapter abroad.
Useful Shooting Techniques
Battery Charger
Bringing an additional battery charger for extended use.
Tripod
Importance of a tripod for stable images and travel.
Recording the Excitement Before Departure
Capturing pre-departure moments and airport scenes.
Using Pan at the Places of Interest
Panning technique for scenic or historical sites.
Showing Everyone Having a Good Time
Recording personal feelings and attraction experiences.
Useful Shooting Techniques
Amusement Park
Tips for capturing smiling faces and attraction moments.
Taking Videos or Still Images According to the Attraction
Choosing between video and still images for different scenarios.
Inducing Responses by Calling Out
Encouraging reactions for more dynamic video content.
Capturing the Best Moment in a Video as a Still Image
Using video playback to capture still images from scenes.
Useful Shooting Techniques
Advanced Operation with Backlight Compensation
Adjusting brightness for subjects in backlight.
Getting Started
Verifying the Accessories
Checking the included camcorder accessories and their functions.
Getting Started
Attaching the Core Filter
Instructions for connecting the core filter to the AV cable.
Getting Started
Charging the Battery Pack
Step-by-step guide to charging the camcorder battery pack.
Getting Started
Grip Adjustment
Adjusting the grip belt for secure handling.
Using as a Hand Strap
Adjusting the strap length for wrist use.
Inserting an SD Card
Guide to inserting an SD card into the camcorder.
Getting Started
Removing the Card
Procedure for safely removing an SD card.
Types of Usable SD Card
Information on compatible SD, SDHC, and SDXC card types.
When your computer cannot recognize the SDXC card
Troubleshooting steps for SDXC card recognition issues.
Getting Started
Using the Touch Screen
How to operate the camcorder using the touch screen interface.
Getting Started
Names of Buttons and Functions on the LCD Monitor
Identification of buttons and displays on the LCD for different modes.
Getting Started
Clock Setting
Initial setup and adjustment of the camcorder's date and time.
Getting Started
Resetting the Clock
Procedure to reset or adjust the camcorder's clock.
Getting Started
Changing the Display Language
How to change the on-screen display language.
Holding this Unit
Proper grip techniques to prevent camera shake.
Tripod Mounting
Instructions for mounting the camcorder on a tripod.
Getting Started
Using this Unit Overseas
Adapting the camcorder for use in different countries and regions.
Charging the Battery Pack Overseas
Information on power outlet compatibility and plug adapters abroad.
Getting Started
Setting the Clock to Local Time when Traveling
Adjusting the clock to local time for travel destinations.
Setting Daylight Saving Time
Activating or deactivating daylight saving time settings.
Getting Started
Optional Accessories
Details on optional accessories like battery packs and cables.
Recording
Taking Videos in Auto Mode
Recording videos using the Intelligent Auto mode for automatic settings.
Recording
Scenes of Intelligent Auto
Icons and descriptions of scenes detected by Intelligent Auto mode.
Recording
Using the Silent Mode
Operating the camcorder quietly in dark environments.
Recording
Zooming
Adjusting the angle of view using optical and digital zoom.
Capturing Still Images During Video Recording
Taking still images while recording video.
Taking Still Images in Auto Mode
Capturing still images using Intelligent Auto mode.
Recording
Indications During Still Image Recording
Explanation of icons and indicators during still image capture.
Scenes of Intelligent Auto
Scene detection icons and their meanings in Intelligent Auto mode.
Recording
Operation Buttons for Still Image Recording
Overview of buttons for still image capture.
Using the Silent Mode
Operating the camcorder silently for discreet recording.
Zooming
Adjusting the angle of view using the zoom lever.
Recording
Manual Recording
Adjusting settings like brightness and shutter speed manually.
Recording
Manual Recording Menu
Details on manual settings like Scene Select, Focus, and Brightness.
Recording
Shooting According to Scene (Subject)
Selecting scenes for optimal shooting conditions.
Recording
Adjusting Focus Manually
Manually adjusting focus when clarity is needed.
Setting Effect
Descriptions of NIGHTALIVE and SPOTLIGHT effects.
Recording
Adjusting Brightness
Adjusting the camcorder's brightness level.
Adjust the focus
Manual focus adjustment for distant or near subjects.
Recording
Setting White Balance
Adjusting color tone to match the light source.
Recording
Setting Backlight Compensation
Correcting images that appear too dark due to backlight.
Using MWB
Setting custom white balance using a white paper.
Recording
Taking Close-up Shots
Using the tele macro function for close-up shots.
Recording
Recording with Effects
Adding animation effects to video recordings.
Recording
Recording with Animation Effects
Applying animation effects detected by smiles or screen touch.
Recording
Capturing Subjects Clearly (TOUCH PRIORITY AE/AF)
Adjusting focus and brightness based on tapped positions.
Recording
Capturing Smiles Automatically (SMILE SHOT)
Automatically capturing still images when smiles are detected.
Recording
Recording while Displaying a Magnified View of a Selected Face (FACE SUB-WINDOW)
Recording with a magnified view of a face in a sub-window.
Recording
Registering Human Face Personal Authentication Information
Registering faces for automatic focus and brightness adjustment.
Recording
Setting SMILE%/NAME DISPLAY
Displaying names and smile levels when faces are detected.
Recording
Editing the Registered Face Information
Changing registered name, priority level, and face information.
Recording
Canceling (Deleting) Registered Face Information
Deleting registered face information from the unit.
Recording
Reducing Camera Shake
Using the image stabilizer to reduce camera shake.
Recording at Intervals (TIME-LAPSE RECORDING)
Recording scenes over long periods at set intervals.
Recording
Recording Automatically by Sensing Movements (AUTO REC)
Automatic recording based on subject movement and brightness changes.
Recording
Taking Group Shots (Self-timer)
Using self-timers for taking group photos.
Recording
Using the Face Detection Self-timer
Using face detection for group photos, including the photographer.
Recording
Recording Videos with Date and Time
Recording videos with date and time displayed.
Recording
Checking the Remaining Recording Time
Checking remaining time on memory and battery power.
Playback
Playing Back Videos
Selecting and playing recorded videos from an index screen.
Playback
During Video Playback
Overview of playback controls and indicators.
Adjusting the Volume of Videos
Using the zoom/volume lever to control playback volume.
Checking the Recording Date and Other Information
Displaying recording date and file duration during playback.
Playback
Checking the Content of Videos Quickly (Digest Playback)
Playing back short segments of recorded videos for quick review.
Playback
Playing a Video with Defective Management Information
Operations for playing videos with corrupted management data.
Playing Back Still Images
Selecting and playing recorded still images from an index screen.
Playback
Operation Buttons for Still Image Playback
Overview of controls for still image playback.
During Still Image Playback
Explanation of indicators and controls during still image playback.
Slideshow Playback
Playing back still images in a slideshow format.
Playback
Searching for a Specific Video/Still Image by Date
Finding files by filtering based on recording dates.
Playback
Connecting to and Viewing on TV
Connecting the camcorder to a TV for playback.
Unnatural Displays on TV
Troubleshooting common display issues when connected to TV.
Connecting via the HDMI Mini Connector
Steps for connecting to an HDTV via HDMI for HD playback.
Operating in Conjunction with TV via HDMI
Linking camcorder operations with HDMI-CEC enabled TVs.
Playback
Connecting via the AV Connector
Connecting the camcorder to a TV using the AV connector.
Playback
Playing Back Playlists
Playing back created playlists of favorite videos.
Playing Back a DVD or Blu-ray Disc Created on this Unit
Playing back discs created using the camcorder's backup function.
Digest Playback on a Blu-ray or DVD Player
Reviewing recorded videos from a disc via digest playback.
Editing
Deleting Unwanted Files
Removing unwanted videos and images to free up space.
Deleting the Currently Displayed File
Deleting the file currently shown on the screen.
Deleting Selected Files
Selecting and deleting multiple files at once.
Editing
Protecting Files
Preventing accidental deletion of important videos and images.
Protecting/Releasing Protection of the Currently Displayed File
Protecting or unprotecting the currently displayed file.
Editing
Protecting/Releasing Protection of Selected Files
Protecting or unprotecting multiple selected files.
Editing
Capturing a Still Image in the Video During Playback
Extracting still images from recorded video scenes.
Combining Videos Recorded by Seamless Recording (GZ-E245)
Merging videos recorded with seamless recording enabled.
Editing
Capturing a Required Part in the Video (TRIMMING)
Selecting and saving a specific portion of a video as a new file.
Editing
Capturing Videos for Uploading to YouTube
Capturing and trimming videos for YouTube upload.
Editing
Creating Playlists from the Recorded Videos
Creating playlists of favorite recorded videos.
Creating Playlists with Selected Files
Arranging and creating playlists by selecting files one by one.
Editing
Creating Playlists by Date
Creating playlists by arranging multiple files according to recording date.
Editing
Editing Playlists
Changing the content of an existing playlist.
Editing
Deleting Playlists
Removing created playlists from the unit.
Copying
Creating Discs with a DVD Writer
Copying recorded files to discs using an optional DVD writer.
Compatible DVD Writers
List of compatible DVD writers for the unit.
Creating Discs with a DVD Writer
Steps for preparing and using a DVD writer.
Copying to Discs
Methods for copying files to discs.
Other Operations
Additional operations related to DVD writers.
Copying
Preparing a DVD Writer (CU-VD3)
Steps to prepare the CU-VD3 DVD writer.
Preparing a DVD Writer (CU-VD50)
Steps to prepare the CU-VD50 DVD writer.
Copying
Creating a Disc
Instructions for creating discs with a DVD writer.
Copying All Files
Copying all videos or still images from the unit.
Copying
Copying Files by Date
Copying files sorted by their recording date.
Copying
Copying Files by Date
Sorting and copying files based on recording date.
Copying
Copying Selected Playlists
Arranging and copying created playlists to discs.
Copying
Copying Selected Files
Selecting and copying individual videos or still images.
Copying
Playing Back with a DVD Writer
Playing back DVDs created on the unit using a DVD writer.
Copying
Creating Discs with an External Blu-ray Drive
Creating discs using an optional BD writer.
Compatible BD Writers (External Blu-ray Drives)
List of compatible external Blu-ray drives.
Creating Discs with a BD Writer (External Blu-ray Drive)
Steps for creating discs with an external Blu-ray drive.
Preparing an External Blu-ray Drive
Instructions for preparing an external Blu-ray drive.
Copying
Creating a Disc
Creating discs using an external Blu-ray drive.
Copying All Files
Copying all videos or still images to a Blu-ray or DVD disc.
Copying
Copying All Files
Copying all or unsaved videos/images to discs.
Copying
Copying Files by Date
Copying files sorted by recording date to discs.
Copying
Copying Selected Playlists
Arranging and copying created playlists to discs.
Copying
Copying Selected Playlists
Arranging and copying playlists to discs.
Copying
Copying Selected Files
Selecting and copying individual files to discs.
Copying
Playing Back with an External Blu-ray Drive
Playing back Blu-ray discs created on the unit.
Copying
Creating a Disc Using a Connected Blu-ray Recorder
Creating discs by connecting to a Blu-ray recorder via USB.
Dubbing Files to a Disc by Connecting to a DVD Recorder
Dubbing videos to discs using a DVD recorder via AV cable.
Copying
Dubbing Files to a VHS Tape by Connecting to a VCR
Dubbing videos to VHS tapes using a VCR.
Copying Files with a USB External Hard Disk Drive
Copying files to a USB external hard disk drive.
Copying
Preparing a USB External Hard Disk Drive
Steps to prepare a USB external hard disk drive for connection.
Copying All Files
Copying all videos or still images to a USB external hard disk drive.
Copying
Playing Back Files in the USB External Hard Disk Drive
Playing back videos or still images from a USB external hard disk drive.
Copying
Deleting Folders in the USB External Hard Disk Drive
Deleting folders from a connected USB external hard disk drive.
Formatting the USB External Hard Disk Drive
Deleting all files on the external hard disk drive by formatting.
Copying
Importing Files from the USB External Hard Disk Drive
Copying files from USB HDD to built-in memory or SD card.
Copying
Copying Files to an SD Card (GZ-E245)
Copying videos and still images from built-in memory to an SD card.
Copying
Moving Files to an SD Card (GZ-E245)
Moving videos and still images from built-in memory to an SD card.
Copying
Copying to Windows PC
Copying files to a computer using provided software.
Verifying System Requirements (Guideline)
Checking PC requirements for software compatibility.
Copying
Installing the Provided Software (Built-in)
Installing camcorder software for PC connection and management.
Copying
Backing Up All Files
Creating a backup of all files to a computer's HDD.
Disconnecting this Unit from Computer
Safely disconnecting the camcorder from the computer.
Copying
Organizing Files
Organizing backed-up files using labels and user lists.
Copying
Recording Videos to Discs
Copying organized files to discs using PC software.
Copying
Backing Up Files Without Using Provided Software
Copying files to a computer without installing specific software.
Copying
List of Files and Folders
Structure of folders and files created on the camcorder's memory.
Copying
Copying to Mac Computer
Copying files from the camcorder to a Mac computer.
Menu Settings
Operating the Menu
Overview of the three types of menus available on the unit.
Operating the Shortcut Menu
Using the shortcut menu for quick access to functions.
Menu Settings
Operating the Main Menu
Configuring various settings through the main menu.
Operating the Common Menu
Accessing and configuring common settings regardless of mode.
Menu Settings
Recording Menu (Video)
Adjusting video settings like scene select, focus, brightness, and white balance.
Menu Settings
SEAMLESS RECORDING (GZ-E245)
Continuous recording across media without stopping.
ZOOM MIC
Adjusting the zoom microphone settings.
SCENE SELECT
Selecting scenes to suit shooting conditions.
FOCUS
Manually adjusting focus for subjects.
BRIGHTNESS ADJUST
Adjusting overall screen brightness.
WHITE BALANCE
Adjusting color tone to match the light source.
BACKLIGHT COMP.
Correcting dark subjects due to backlight.
TELE MACRO
Enabling close-up shots using telephoto zoom.
TOUCH PRIORITY AE/AF
Adjusting focus/brightness based on subject faces or areas.
LIGHT
Turning the camcorder's light on or off.
Menu Settings
GAIN UP
Making subjects brighter in dark places.
WIND CUT
Reducing wind noise during recording.
ANIMATION EFFECT
Adding animation effects to video recordings.
TIME-LAPSE RECORDING
Recording scenes over long periods at set intervals.
AUTO REC
Automatic recording based on subject movement.
Menu Settings
DATE/TIME RECORDING
Recording videos with date and time displayed.
FACE SUB-WINDOW
Magnifying and displaying registered faces in a sub-window.
SMILE SHOT
Automatically capturing stills upon smile detection.
SMILE%/NAME DISPLAY
Setting display items for detected faces.
FACE REGISTRATION
Registering faces for automatic tracking.
Menu Settings
VIDEO QUALITY
Setting the quality of video recording.
ZOOM
Setting the maximum zoom ratio for recording.
Menu Settings
SEAMLESS RECORDING (GZ-E245)
Continuous recording on SD card when built-in memory is full.
ZOOM MIC
Adjusting zoom microphone settings.
Menu Settings
Recording Menu (Still Image)
Adjusting settings like scene select, focus, brightness for still images.
Menu Settings
TELE MACRO
Enabling close-up shots using telephoto zoom.
TOUCH PRIORITY AE/AF
Adjusting focus/brightness based on subject faces or areas.
LIGHT
Turning the camcorder's light on or off.
SELF-TIMER
Using self-timers for group photos.
GAIN UP
Making subjects brighter in dark places.
AUTO REC
Automatic recording based on subject movement.
SHUTTER MODE
Adjusting continuous shooting settings.
SMILE SHOT
Automatically capturing stills upon smile detection.
SMILE%/NAME DISPLAY
Setting display items for detected faces.
FACE REGISTRATION
Registering faces for automatic tracking.
IMAGE SIZE
Setting the pixel size for still images.
Menu Settings
GAIN UP
Making subjects brighter in dark places.
WIND CUT
Reducing wind noise during recording.
ANIMATION EFFECT
Adding animation effects to video recordings.
TIME-LAPSE RECORDING
Recording scenes over long periods at set intervals.
AUTO REC
Automatic recording based on subject movement.
Menu Settings
SHUTTER MODE
Adjusting continuous shooting settings.
SMILE SHOT
Automatically capturing stills upon smile detection.
SMILE%/NAME DISPLAY
Setting display items for detected faces.
FACE REGISTRATION
Registering faces for automatic tracking.
Menu Settings
IMAGE SIZE
Setting the pixel size for still images.
Menu Settings
Playback Menu (Video)
Options for deleting or searching for specific videos.
Menu Settings
SEAMLESS REC CTRL (GZ-E245)
Combining videos recorded with seamless recording.
K2 TECHNOLOGY
Enhancing sound quality for recorded audio.
SEARCH DATE
Narrowing down the index screen by recording dates.
DISPLAY DATE/TIME
Setting whether to display date/time during playback.
DIGEST PLAYBACK
Playing back digests of recorded videos.
PLAYBACK PLAYLIST
Playing back created playlists.
EDIT PLAYLIST
Creating or editing playlists.
PROTECT/CANCEL
Protecting files from accidental deletion.
COPY (GZ-E245)
Copying files from built-in memory to SD card.
MOVE (GZ-E245)
Moving files from built-in memory to SD card.
TRIMMING
Selecting and saving a part of a video as a new file.
UPLOAD SETTINGS
Capturing and copying videos for YouTube upload.
PLAYBACK OTHER FILE
Playing videos with defective management information.
Menu Settings
K2 TECHNOLOGY
Reproducing sounds with higher fidelity.
Menu Settings
Playback Menu (Still Image)
Options for deleting or searching for specific still images.
Menu Settings
PROTECT/CANCEL
Protecting files from accidental deletion.
COPY (GZ-E245)
Copying files from built-in memory to SD card.
MOVE (GZ-E245)
Moving files from built-in memory to SD card.
Menu Settings
Common Menu
Configuring common settings like clock, language, and display.
Menu Settings
TOUCH SCREEN ADJUST
Adjusting the response position of touch screen buttons.
DISPLAY ON TV
Displaying icons and date/time on a TV screen.
VIDEO OUTPUT
Setting aspect ratio (16:9 or 4:3) for TV output.
HDMI OUTPUT
Setting video output definition via HDMI.
HDMI CONTROL
Linking operations with HDMI-CEC compliant TVs.
FACTORY PRESET
Resetting all settings to their default values.
UPDATE
Updating the unit's functions to the latest version.
FORMAT BUILT-IN MEM. (GZ-E245)
Deleting all files on the built-in memory.
FORMAT SD CARD
Deleting all files on the SD card.
ERASE ALL DATA (GZ-E245)
Erasing all data on the unit when disposing of it.
Menu Settings
CLOCK ADJUST
Resetting time or setting local time for overseas use.
DATE DISPLAY STYLE
Setting date order and time format.
LANGUAGE
Changing the on-screen display language.
MONITOR BRIGHTNESS
Adjusting the brightness of the LCD monitor.
Menu Settings
REC MEDIA FOR VIDEO (GZ-E245)
Selecting recording/playback media for videos.
REC MEDIA FOR IMAGE (GZ-E245)
Selecting recording/playback media for still images.
Menu Settings
OPERATION SOUND
Turning the operation sound on or off.
SILENT MODE
Operating the camcorder silently in dark places.
Menu Settings
AUTO POWER OFF
Preventing accidental power-off by setting auto power off.
QUICK RESTART
Enabling quick power-on when LCD monitor is opened within 5 minutes.
Menu Settings
DEMO MODE
Playing a demonstration of the unit's special features.
TOUCH SCREEN ADJUST
Adjusting the response position of touch screen buttons.
Menu Settings
DISPLAY ON TV
Displaying icons and date/time on a TV screen.
Menu Settings
VIDEO OUTPUT
Setting aspect ratio (16:9 or 4:3) for TV output.
HDMI OUTPUT
Setting video output definition via HDMI.
Menu Settings
HDMI CONTROL
Linking operations with HDMI-CEC compliant TVs.
FACTORY PRESET
Resetting all settings to their default values.
UPDATE
Updating the unit's functions to the latest version.
Menu Settings
FORMAT BUILT-IN MEM. (GZ-E245)
Deleting all files on the built-in memory.
FORMAT SD CARD
Deleting all files on the SD card.
Menu Settings
ERASE ALL DATA (GZ-E245)
Erasing all data on the unit when disposing of it.
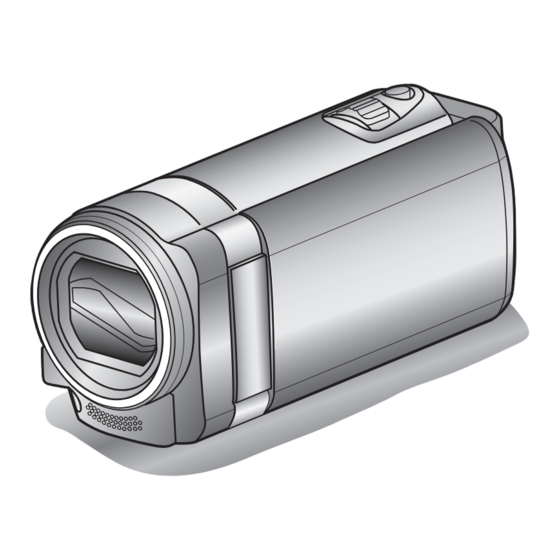
Names of Parts
LCD Monitor
Description and function of the LCD monitor.
Indications on the LCD monitor
Common Recording Indications
Explanation of common icons displayed during recording.
Video Recording
Icons and indicators specific to video recording mode.
Indications on the LCD monitor
Still Image Recording
Icons and indicators specific to still image recording.
Video Playback
Icons and indicators displayed during video playback.
Indications on the LCD monitor
Still Image Playback
Icons and indicators during still image playback.
When the unit is not working properly
Steps to take when the unit malfunctions.
Troubleshooting
Battery Pack
Solutions for power and charging issues with the battery pack.
Recording
Troubleshooting common recording problems like focus and zoom.
Troubleshooting
Editing/Copying
Resolving issues with file deletion, copying, and disc creation.
Computer
Troubleshooting issues related to PC connection and software use.
Troubleshooting
Screen/Image
Solutions for LCD visibility, color, and image quality issues.
Other Problems
Addressing touch screen, grainy image, and heating issues.
Troubleshooting
Error Message?
Explanations and solutions for various error messages.
Maintenance
Camcorder
Regular maintenance procedures for the camcorder body.
Lens/LCD Monitor
Cleaning and protecting the lens and LCD screen.
Specifications
Camera
Technical details of the camcorder's camera components and performance.
Specifications
Connectors
Specifications for HDMI, AV, and USB connectors.
Video
Technical details of video recording formats and quality.
Still Image
Specifications for still image recording format and size.
AC Adapter (AC-V10M)
Technical specifications of the AC adapter.
Battery Pack (BN-VG108E)
Technical specifications of the battery pack.
Need help?
Do you have a question about the Enverio GZ-E205 and is the answer not in the manual?
Questions and answers