JVC Everio GZ-MS215 Basic User's Manual
Hide thumbs
Also See for Everio GZ-MS215:
- Basic user's manual (72 pages) ,
- Basic user's manual (24 pages)
Table of Contents
Advertisement
Quick Links
CAMCORDER
GZ-MS230
GZ-MS215
Basic User Guide
Dear Customers
Thank you for purchasing this JVC product.
Before use, please read the Safety Precautions and Cautions on P.2 and P.21 to ensure safe
use of this product.
Some features explained in this manual only apply to the specific camera model identified.
This product comes with a "Basic User Guide (this manual)" and a "Detailed User Guide".
Detailed User Guide
.
Explains the ways of shooting in various situations and the
useful features.
■
Access the following website on your PC
http://manual.jvc.co.jp/index.html/
Advertisement
Table of Contents

Related Manuals for JVC Everio GZ-MS215


Summary of Contents for JVC Everio GZ-MS215
- Page 1 GZ-MS215 Basic User Guide Dear Customers Thank you for purchasing this JVC product. Before use, please read the Safety Precautions and Cautions on P.2 and P.21 to ensure safe use of this product. Some features explained in this manual only apply to the specific camera model identified.
-
Page 2: Safety Precautions
Do not disassemble and do not dispose of in fi re. could lead to fi re or electric shock. Contact your JVC dealer. Do not attempt to repair the When the equipment is installed in a cabinet or on malfunction yourself. - Page 3 YouTube LLC. in the European Union. • Other product and company names included in this instruction manual are trademarks and/or registered trademarks of their respective holders. For more information, refer to the Detailed User Guide http://manual.jvc.co.jp/index.html/...
-
Page 4: Table Of Contents
............14 ▶Learning About Advanced Operations Use the “Detailed User Guide” on your PC to find out more about the advanced operations. ■ Access the following address on your PC http://manual.jvc.co.jp/index.html/ Verifying the Accessories AC Adapter Battery Pack USB Cable... -
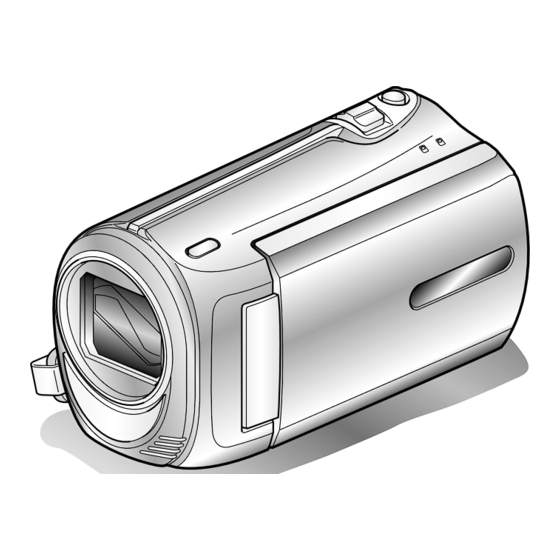
Page 5: Names Of Parts And Functions
W Grip Belt Release Lever Switches between video and still X Grip Belt ( P.7) image modes. Y Tripod Mounting Hole Z SD Card Slot ( P.7) a Battery Release Lever ( P.6) For more information, refer to the Detailed User Guide http://manual.jvc.co.jp/index.html/... -
Page 6: Getting Started
Goes out CAUTION Be sure to use JVC battery packs. ● If you use any other battery packs besides JVC battery packs, safety and performance cannot be guaranteed. ● Charging time: Approx. 1 h 50 m (using supplied battery pack) * If the battery pack is charged outside the room temperature range of 10°C to... -
Page 7: Grip Adjustment
When a commercially available SD card is inserted, recordings can still be made to the card without stopping when the remaining recording time on the built-in memory runs out. Close the LCD monitor. Open the cover. Insert an SD card. (Base) Label * Turn off the power of this unit before inserting or removing a card. For more information, refer to the Detailed User Guide http://manual.jvc.co.jp/index.html/... - Page 8 SD card (256 MB to 2 GB), SDHC card (4 GB to 32 GB) ● Using cards other than those specified above may result in recording failure or data loss. For more information, refer to the Detailed User Guide http://manual.jvc.co.jp/index.html/...
- Page 9 QUIT FORMAT SD CARD ④ Select “SD CARD” and touch FILE MEDIA SETTINGS FILE + MANAGEMENT NO BUILT-IN MEMORY QUIT ⑥ Select “YES” and touch QUIT ⑦ After formatting, touch For more information, refer to the Detailed User Guide http://manual.jvc.co.jp/index.html/...
-
Page 10: Clock Setting
Use the slider to adjust the year, month, day, hour and minute. ● Touch the operation buttons “ ” / “ ” to move the cursor. After setting the date and time, touch For more information, refer to the Detailed User Guide http://manual.jvc.co.jp/index.html/... - Page 11 LCD BACKLIGHT QUIT QUIT ● The subsequent setting operations are the same as steps 3 - 5 on the ④ Select the desired language and previous page. touch ⑤ Touch For more information, refer to the Detailed User Guide http://manual.jvc.co.jp/index.html/...
-
Page 12: Recording
■ Indications during video recording Video Quality Remaining Recording Time :Record-Standby Scene Counter :Recording in Progress Recording Media (GZ-MS215 : / ) Battery Indicator NOTE ● The estimated recording time of the supplied battery pack is approximately 50 minutes. ( P.18) For more information, refer to the Detailed User Guide http://manual.jvc.co.jp/index.html/... -
Page 13: Still Image Recording
Take a still image. Press fully Lights up during still image recording ■ Indications during still image recording Image Size Image Quality Remaining Number of Shots Shutter Speed Recording in Progress Recording Media Focus (GZ-MS215 : / ) Battery Indicator For more information, refer to the Detailed User Guide http://manual.jvc.co.jp/index.html/... -
Page 14: Playback
Advances to the next video Advances to the next still image Returns to the beginning of the scene Returns to the previous still image Forward search Reverse search Forward slow-motion Reverse slow-motion For more information, refer to the Detailed User Guide http://manual.jvc.co.jp/index.html/... -
Page 15: Playing Back On Tv
Images are projected Adjust the TV's screen accordingly. horizontally on the TV. NOTE ● Please contact the TV manufacturer on questions or problems with setting the TV to the correct mode. For more information, refer to the Detailed User Guide http://manual.jvc.co.jp/index.html/... -
Page 16: Copying
“ON”. Alternatively, set “ON-SCREEN DISPLAY” in the playback menu to “DISPLAY DATE ONLY”. Start recording. ● Start playback on this unit ( P.14) and press the record button on the recorder. ● After playback is complete, stop the recording. For more information, refer to the Detailed User Guide http://manual.jvc.co.jp/index.html/... -
Page 17: Further Information
Use of this software is authorized according to the terms of the software license. (for inquires regarding this unit) When contacting the nearest JVC office or agency in your country (refer to the JVC Worldwide Service Network at http://www.jvc-victor.co.jp/english/worldmap/index-e.html) about this software, please have the following information ready. -
Page 18: Recordable Time/Number Of Images
● When the battery life is reached, the recording time becomes shorter even if the battery pack is fully charged. (Replace the battery pack with a new one.) For more information, refer to the Detailed User Guide http://manual.jvc.co.jp/index.html/... -
Page 19: Troubleshooting
If the solutions indicated in the chart do not solve the problem, consult your nearest JVC dealer or JVC service center for instructions. Refer also to the FAQ of new products on JVC’s website. Refer also to the Q&A information of new products on JVC’s website (http://www.jvc.com). - Page 20 ● If a video recording is stopped with DATA RECORDED IS TOO the actual recording time displayed at “0:00:00:17” and below, the LITTLE UNABLE TO SAVE video cannot be saved. For more information, refer to the Detailed User Guide http://manual.jvc.co.jp/index.html/...
-
Page 21: Cautions
... push it strongly or apply any shocks..place the camcorder with LCD monitor on the bottom. • To prolong service life ... avoid rubbing it with coarse cloth. For more information, refer to the Detailed User Guide http://manual.jvc.co.jp/index.html/... - Page 22 ... swing it excessively when using the hand strap..swing the soft camcorder case excessively when the camcorder is inside it..place the camcorder in dusty or sandy areas, such as on a beach. For more information, refer to the Detailed User Guide http://manual.jvc.co.jp/index.html/...
-
Page 23: Specifications
* When using the AC adapter overseas, please prepare a commercially available converter plug for the country or region of visit. ● The specifications and appearance of this product are subject to changes for further improvement without prior notice. For more information, refer to the Detailed User Guide http://manual.jvc.co.jp/index.html/... - Page 24 Terms A AC adapter ........ 6, 23 M Menu Settings ........ 17 AV Connection ......15, 16 N Number of Images ......18 Battery Pack ......6, 23 R Recordable Time ......18 C Clock Adjust ........11 SD Card ........8, 18 Copy (Back Up) ......
Need help?
Do you have a question about the Everio GZ-MS215 and is the answer not in the manual?
Questions and answers