
Related Manuals for DigiTech STUDIO 400


Summary of Contents for DigiTech STUDIO 400
- Page 1 A Harman International Company S-DISC ™ ROCESSING Studio 400 4 IN-4 OUT Professional Studio Effects Processor Owner's Manual...
-
Page 2: Lithium Battery Warning
IMPORTANT! C A U T I O N FOR YOUR PROTECTION, PLEASE READ THE FOLLOWING: R I S K O F E L E C T R I C S H O C K WATER AND MOISTURE: Appliance should not be used near water (e.g. near a D O N O T O P E N bathtub, washbowl, kitchen sink, laundry tub, in a wet basement, or near a swimming pool, etc). -
Page 3: Declaration Of Conformity
President of Digitech 8760 S. Sandy Parkway Sandy, Utah 84070, USA Effective October 1, 1996 European Contact: Your Local DigiTech Sales and Service Office or International Sales Office 3 Overlook Drive #4 Amherst, New Hampshire 03031, USA Tel (603) 672-4244... -
Page 4: Table Of Contents
Studio 400 Specifications ........ -
Page 5: Introduction
1. The warranty registration card must be mailed within ten days after purchase date to validate the war- ranty. 2. DigiTech warrants this product, when used solely within the U.S., to be free from defects in materials and workmanship under normal use and service. -
Page 6: Section 1 - Setting Up
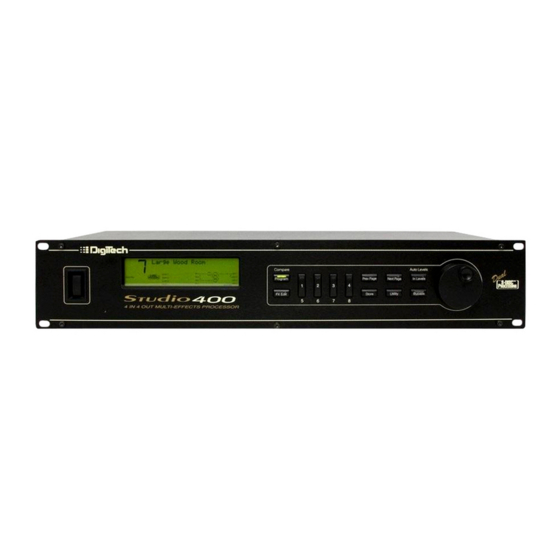
Figure 1-1 Front Panel 1) DISPLAY - The Studio 400's large custom display is where you get most of the information you need to move around the operating system. The display has several important sections that you need to under- stand when you use the Studio 400. - Page 7 Studio 400 Owner's Manual 1d) Information Line - This row of 24 characters (top line of the display) is the Information line. It gives more detailed information about specific functions and items, and contains things like Program names, Parameter names, and Utility or auxiliary information.
-
Page 8: Rear Panel Controls
4) MIDI IN - MIDI data is received at this port. When MIDI data is received, the MIDI indicator in the dis- play flashes on and off. 5) MIDI OUT / THRU - Merges MIDI data generated by the Studio 400 with MIDI data received at the input. Please see pg. 32 for more information. -
Page 9: Making Connections
(such as mixing console inputs). This method is called the "in- line" method because the Studio 400 is connected directly in the audio path of the source. When you use the in-line method, the master wet-to-dry effects mix is controlled from the Studio 400 operating system. - Page 10 Figure 1-6 on the following page, shows how to connect the Studio 400 for this application. Section 1 - Setting Up...
-
Page 11: A Word About Bypass
Program OFF, but the Dry Levels defined in that Program remain untouched. If the effects are all wet (no Dry Level), the Bypass function effectively Mutes the Studio 400. If the Dry Level is up, then the Studio 400 passes the original signals through without processing. A line through the modules in a Effect Configuration Matrix indicate that the module is Bypassed. -
Page 12: Section 2 - Basic Functions Of The Studio 400
GETTING AROUND THE OPERATING SYSTEM The menu structure of the Studio 400 has been specially designed to be easy to use. The display shows the information you need, but to make things even easier for you, illumination in the front panel buttons offers additional operating information. -
Page 13: Modifying Fx Module Parameters Example
CHANGED icons turn on indicating that the Program has been modified. • Press the <Program> button to return to Program Mode, or continue in Edit Mode by continuing to press the <FX EDIT> button. Section 2 - Basic Function of the Studio 400... -
Page 14: Input/Output Configurations
Low Frequency Oscillator (LFO) or MIDI Continuous Controller information. Every Program in the Studio 400 has a set of Modifiers. Up to 8 Modifier links can be assigned to control parameters. There are three types of Modifiers that can be linked to a parameter: MIDI CCs, LFOs, and Dynamic (signal level dependent). -
Page 15: Linking A Parameter To A Modifier
LFOs - When you use LFOs, Parameter values can be controlled automatically between a defined mini- mum and maximum setting at a rate set by the user. The Studio 400 has 2 user definable LFOs in each program that can be assigned to any Parameter. -
Page 16: Setting Up An Lfo Or Dynamic
• Press <3> and use the Data wheel to adjust HiThrs. The HiThrs control sets the point at which maxi- mum Parameter modification occurs. • Press <4> and use the Data wheel to select the source input you want the modifier to "listen" to, or follow. Section 2 - Basic Function of the Studio 400... -
Page 17: Comparing Programs
Compare function. To compare an edited Program with the original Stored version, do the following: • While the Studio 400 is in program mode, press the <PROGRAM> button once. The top line of the display reads: *COMPARING ORIGINAL PRG*. When this message is displayed, the stored Program is temporarily loaded and active. -
Page 18: Section 3 - Effects And Parameters
Likewise, the Module sizes available in the Studio 400 are Quarter (module type = 4th ), Half (module type = HLF ), and Whole (module type = FUL ). This simply means that FUL module type offers effects with more flexibility and power than the HLF mod- ules, and so on. -
Page 19: Reverbs
Studio 400 Owner's Manual DIGITAL AND ANALOG EFFECT LIST Within the Studio 400, lies a vast palette of Digital and Analog effects. All of which are Studio quality. The following is a list of the Effects available: Reverbs, Choruses, Flangers, Phasers, Rotary Speaker Simulator,Tremolo, Auto-Panner, Pitch Shifters, Detuners, Delays (Digital and Analog), Equalizers, Noise Gate, and Compressor. - Page 20 Studio 400 Owner's Manual Reverbs PARAM. DESCRIPTION FX: Lvl Controls the signal input level fed to the Module. Varies from OFF to 100%. Dry: Lvl Controls the level of the dry (uneffected) signal. Ranges from OFF to 100%. Balance Controls the left/right positioning of the dry signal in the stereo soundfield. Varies from -99 (all left) to 99 (all right).
- Page 21 Studio 400 Owner's Manual Reverbs (continued) PARAM. DESCRIPTION Blend The BLEND control cross-mixes reverberations from the left side into the right side and vice-versa. This can be used to increase the realism of the simulated room by adding reverberations from different parts of the room to each channel. Varies from 0% to 99%.
-
Page 22: Chorus And Flange
Studio 400 Owner's Manual CHORUS AND FLANGE Both choruses and flangers use a Low Frequency Oscillator (LFO) to produce their rich, swirling effects. When you change the speed and depth Parameters of modulation effects, you're actually controlling the frequency and amplitude of the LFO. These settings determine the rate and intensity of the modulation effect. - Page 23 Studio 400 Owner's Manual Flangers PARAM. DESCRIPTION FX: Lvl Controls the signal input level fed to the Module. Varies from OFF to 100%. Dry: Lvl Controls the level of the dry (uneffected) signal. Ranges from OFF to 100%. Balance Controls the left/right positioning of the dry signal in the stereo soundfield. Varies from -99 (all left) to 99 (all right).
- Page 24 Studio 400 Owner's Manual Choruses DESCRIPTION PARAM. FX: Lvl Controls the signal input level fed to the Module. Varies from OFF to 100%. Dry: Lvl Controls the level of the dry (uneffected) signal. Ranges from OFF to 100%. Balance Controls the left/right positioning of the dry signal in the stereo soundfield. Varies from -99 (all left) to 99 (all right).
-
Page 25: Phasers
Studio 400 Owner's Manual PHASERS Phasers create a copy of the original signal and modulate that new signal’s phase relationship to the origi- nal signal. When the two signals are reunited at the output, the modified signal, moving smoothly in and out of phase, causes continuous cancellations and reinforcements at different frequencies throughout the modulating cycle. -
Page 26: Tremolos, Auto Panners And Rotary Speaker Simluator
Studio 400 Owner's Manual ROTARY SPEAKER SIMULAOR / TREMOLO / AUTO PANNER The Rotary Speaker Simluator allows you to emulate the classic rotating speaker sound, without the chiro- practic problems that come with moving bulky speaker cabinets. Tremolos and Auto Panners are similar to one another because they use an LFO to modulate the level of the signal. -
Page 27: Detuners And Pitch Shifters
50%, the pitch is exactly one semitone (50 cents) up from the original. Pitch shifters allow you to create multiple voices from a single note input. In the Studio 400, the new pitch is determined by the setting of the SHFT Parameters, which can cover a pitch range of four octaves. - Page 28 Studio 400 Owner's Manual Pitch Shifters PARAM. DESCRIPTION FX: Lvl Controls the signal input level fed to the Module. Varies from OFF to 100%. Dry: Lvl Controls the level of the dry (uneffected) signal. Ranges from OFF to 100%. Controls the left/right posistioning of the dry signal in the stereo soundfield. Varies from Balance -99 (all left) to -99 (all right).
-
Page 29: Delays
"sampled" or recorded into memory, where it is held for the amount of time you specify with the delay time setting, after which the sample is replayed at the output. The Studio 400's delays have a feedback meter that is used to send a portion of the delayed signal back to the input to be re-recorded along with new source material. -
Page 30: Eqs
Studio 400 Owner's Manual EQUALIZERS The Studio 400 has a broad selection of equalizer Modules to cover virtually any need. Both mono and stereo modules are available. Remember that mono equalizers connected to stereo sources will always sum the stereo signal together for equalization (thus eliminating the stereo image). If you need to maintain the stereo image, use a stereo equalizer module. -
Page 31: Noise Gate And Compressor
Studio 400 Owner's Manual NOISE GATE / COMPRESSOR Noise gates are particularly useful for preventing mic rumble, wind noise, or hum from getting to tape in your recordings, or for gating drum kits to prevent mic bleed. Compression does exactly what its name implies; it compresses the dynamic range of the signal. It does this by turning signals down as they become louder. -
Page 32: Multi Effects
Studio 400 Owner's Manual MULTI EFFECTS MODULES The Studio 400, Multi Effect Modules allow the User to combine either Delay and Chorus or Delay and Flange within one Effect module block. This is ideal for situations where the User needs to add another effect to the Effect Configuration, but is running low on signal processing resources. -
Page 33: Section 4-In Levels And Utilities
The concept of Auto Leveling is simple: the Studio 400 listens to the signal for about 8 seconds, and sets the input levels accordingly. You also have the option of leveling the inputs manually if you want. -
Page 34: Utility
• To return to Program mode, press <PROGRAM>. MIDI CHANNEL This option sets the MIDI Channel that the Studio 400 will respond to MIDI program changes and CC mes- sages. MIDI Channel settings include: Off, 1, 2,...15, 16, and All. -
Page 35: System Exclusive Device Channel / Midi Merge
Note that the number under STUDIOUSER changes along with the MIDI number. • Press <3> and use the Data wheel to select the Studio 400 Program you want the selected MIDI Program change number to recall. As this number increases above Program 100, note that STU- DIOUSER changes to STUDIOFACT, indicating that the mapped number will recall the indicated Program number in the Factory bank. -
Page 36: Program Dump
This option allows you to dump all resident Programs in memory to an external recording device, like a patch librarian, computer, or sequencer for backup, storage, or organization. This option dumps all Programs simultaneously. It does not send any Studio 400 system information, such as SysEx Device channel or Program maps. -
Page 37: Program Autoload
• When you're finished, you can return to Program mode by pressing <PROGRAM>. FACTORY RESET Allows you to erase all User Program and Utility settings at once and restore the Studio 400 memory to its factory condition. WARNING! This procedure will destroy and reset ALL User Programs in the Studio 400's memory. Be sure you want to erase the memory, and start fresh before continuing with this procedure. -
Page 38: Harmony Tuning Reference
Studio 400 Owner's Manual HARMONY TUNING REFERENCE When using Harmony intelligent pitch shifting, the Reference note pitch is set at A=440. If you wish to change the reference note, you can access this function in the Utility menu. Reference can be set from A=427 to A= 453. -
Page 39: Section 5- Appendix
EFFECTS AND DEFAULTS LIST On the following page, is a list of effects available in the Studio 400. Both the module Type and the effect name appears on Page one of all FX Modules. Please note maximum delay times vary depending on the mod- ule Type being used. - Page 40 Studio 400 Owner's Manual Effect Name Defaults GEQ8 Mono Flat, LowPump, Sizzle, Smiley, InvrtPhase GEQ15 Mono Flat, LowPump, Sizzle, Smiley, InvrtPhase GEQ31 Mono Flat, LowPump, Sizzle, Smiley, InvrtPhase St GEQ8 Stereo Flat, LowPump, Sizzle, Smiley, PhasInvrtL St GEQ15 Stereo Flat, LowPump, Sizzle, Smiley, PhasInvrtL...
-
Page 41: Effect Configuration Chart
Studio 400 Owner's Manual EFFECT CONFIGURATION CHART Configuration 1 Configuration 2 Configuration 3 IN 1 OUT 1 IN 1 OUT 1 IN 1 OUT 1 IN 2 OUT 2 IN 2 OUT 2 IN 2 OUT 2 IN 3 OUT 3... -
Page 42: Factory Program List
Studio 400 Owner's Manual STUDIO 400 FACTORY PROGRAM LIST LASSIC EVERBS MBIENT ROGRAMS 1- 1:Rvb 2:GtRv 3:Dly 4:Cho ....Cfg-1 51- Detuned Doubler ..... Cfg-10 2- Perfect Hall . - Page 43 Studio 400 Owner's Manual 159) Dual Reverb FFECT LOCK ONFIGURATIONS 101) Cfg. 1 (H, H, H, H) 160) Stereo Reverb 102) Cfg. 2 (H, H, H, H) 161) St. Dual Reverb 103) Cfg. 3 (H, H, H, H) 162) Gated Reverb 104) Cfg.
-
Page 44: Studio 400 Specifications
Studio 400 Owner's Manual STUDIO 400 SPECIFICATIONS A/D Converter: 18 bit, 128 x oversampled delta-sigma stereo D/A Converter: 20 bit 64 x oversampled Sampling Frequency: 44.1 kHz DSP Section: Static-Dynamic Instruction Set computer(S-DISC ® ) Digital Signal Path Width: 24 bits (144.5 dB) Internal Data Path Width: 48 bits (289 dB) Dynamic Delay Memory: 64k x 24 bits (1.4 seconds) -
Page 45: Harmony Interval Charts
Studio 400 Owner’s Manual HARMONY INTERVAL CHARTS Interval Major Minor Harm.Minor Mel.Minor Dorian Mixolydian Lydian üOct ü7th ü6th üOct üOct üOct üOct ¨2nd ¨3rd ¨4th ¨5th ¨6th ¨7th ¨Oct Lydian Minor Whole Hlf-Whl Whl-Hlf Major Int. Int. Int. Int. Blues Int. -
Page 46: User Notes
Studio 400 Owner's Manual USER NOTES..Section 5 - Appendix... - Page 47 Studio 400 Owner’s Manual USER NOTES... Section 5 - Appendix...
- Page 48 FAX (801) 566-7005 International Distribution: 3 Overlook Dr Unit 4 Amherst, New Hampshire 03031 U.S.A. FAX (603) 672-4246 DigiTech™, Studio 400, and S-DISC™ are registered trademarks of DOD Electronics Corporation Copyright © 1995 DOD Electronics Corporation Printed In U.S.A. 11/95 Manufactured in the U.S.A.
Need help?
Do you have a question about the STUDIO 400 and is the answer not in the manual?
Questions and answers