
Related Manuals for Pentax 540FGZ - AF - Hot-shoe clip-on Flash


Summary of Contents for Pentax 540FGZ - AF - Hot-shoe clip-on Flash
- Page 1 AUTO ZOOM ELECTRONIC FLASH UNIT OPERATING MANUAL Please read this operating manual carefully first for proper use.
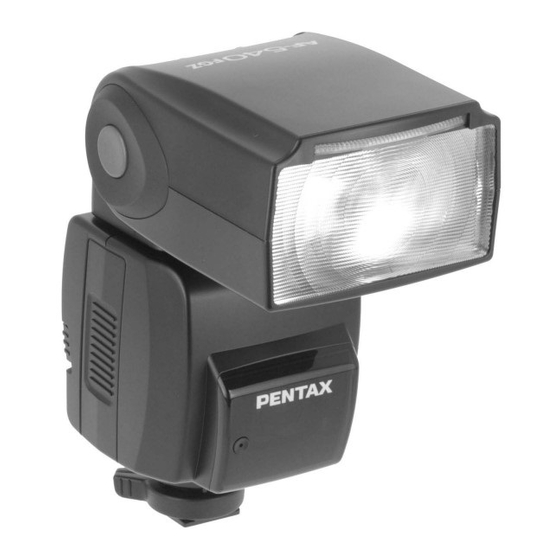
- Page 2 Thank you for purchasing the PENTAX Auto-flash AF540FGZ. In addition to easy daylight sync photography with TTL auto, the AF540FGZ also allows wireless TTL auto (P-TTL auto) photography and high-speed sync. It is a clip-on type flash which enables accurate focus adjustments even in dark locations with built-in AF-assist spotbeam.
-
Page 3: For The Safe Use Of Your Flash Unit
FOR THE SAFE USE OF YOUR FLASH UNIT Although we have carefully designed this flash unit for safe operation, please be sure to follow precautions given on page 2. WARNING This symbol indicates that violating this item could cause serious personal injuries. CAUTION This symbol indicates that violating this item could cause minor or medium personal injuries, or material losses. - Page 4 WARNING CAUTION The flash contains electronic circuits that Do not use the flash near anyone’s eyes, as it operate at high voltages. Do not attempt to may hurt them. Be particularly careful with the disassemble the flash unit yourself, as there is flash around infants.
-
Page 5: Precautions For Your Flash Unit
● When photographing black subjects or white subjects, use exposure compensation. ● Do not attach any accessories having either fewer or different (layout other than PENTAX standard) electrical contacts for the hot shoe or grip. Otherwise, some functions may not work properly. -
Page 6: Cautions Regarding Batteries
■Cautions Regarding Batteries ● This flash unit uses four AA alkaline, lithium, or nickel metal hydride batteries. Do not use any other type of battery. The flash unit may not be able to operate correctly or demonstrate sufficient performance, or the flash unit itself may generate heat, depending on the type of batteries used. -
Page 7: Table Of Contents
Mounting to Camera......... 14 Connecting the AF540FGZ with the Turning the Power On........15 Extension Cord ..........59 Supported Functions for PENTAX Charging the AF540FGZ with the Optional External Power Source....16 Cameras ............60 Switching the Charging Mode......16 Cameras that Support Each Flash Mode.. -
Page 8: Names Of Parts
Names of Parts Bounce angle adjustment Bounce lock release button LCD panel Battery chamber cover Flash mode button Shoe lock pin Select button Flash signal contacts Adjustment dial Shoe foot LCD panel illumination button/ Format button Locking lever Zoom button/ Channel button Test button/ Modeling button/ Ready lamp Setting switch Power switch... - Page 9 >...
- Page 10 5P Sync socket External power source socket " Socket cover Slave sensor Wide-angle panel Catchlight panel Flash head AF spotbeam emitter Auto flash sensor...
-
Page 11: Major Bundled Items
■Major bundled items Stand Case Operating manual (this manual) Certification Opening of the stand Slide the hot shoe bracket into the opening of the stand. ● You cannot attach the off-camera shoe adapter F to the bundled stand. ● When attaching the flash unit to the stand, do not tighten the locking lever too far. -
Page 12: Lcd Panel Indicator
■LCD Panel Indicator : A.Zoom ➝ M.Zoom xxmm = 20, 24, 28, 35, 50, 70, 85 (35 mm format) Zoom indicator 35, 45, 55, 70, 100, 135, 150 (645 format) 55, 60, 70, 90, 120, 180, 190 (67 format) 13, 16, 19, 24, 34, 48, 58 (DIGITAL format) Format indicator : 35mm ➝... - Page 13 > When in poorly lit locations and the LCD panel cannot Auto Check Display be seen, pressing the LCD panel illumination button If the correct flash output is obtained, the flash mode (LIGHT) will illuminate the panel for about 10 seconds. indicator and ( ) in the viewfinder will begin blinking.
-
Page 14: Inserting The Batteries
Inserting the Batteries Slide the battery chamber cover as shown in the Insert four AA batteries, making sure the plus/ figure to open. minus markings (+, -) match the diagram inside the battery chamber cover. -
Page 15: Using The Optional External Power Source
■Using the Optional External Power Types of Batteries This flash unit uses four AA batteries of the same type, Source as shown below. Use the optional TR Power Pack-3 (sold separately) as - Alkaline battery (LR6) an external power source. - Lithium battery (FR6) ●... -
Page 16: Mounting To Camera
Mounting to Camera Remove the hot shoe cover from the camera. Attach the flash unit to the camera. ● The following cameras have a shoe lock pin. When Turn the locking lever of the flash unit in the attaching the flash unit, turn the locking lever in direction opposite to that indicated by (FIX➝) the (FIX➝) direction and lock the flash unit to the (clockwise from the direction of the LCD... -
Page 17: Turning The Power On
Turning the Power On Sliding the power switch to the (ON) position will turn on the power. The ready lamp will light up when the flash is charged. Sliding it to the (OFF) position will turn off the power. If charging time takes more than 20 seconds, the batteries have been exhausted and should be replaced with new batteries. -
Page 18: Charging The Af540Fgz With The Optional External Power Source
■Charging the AF540FGZ with the ● When turning off the flash unit, make sure you turn the power switch of the external power Optional External Power Source source to OFF. Otherwise the external power Prepare the external power source TR Power source may be exhausted. -
Page 19: Auto Power Off Function
■Auto Power Off Function ■Quick Power On Function When the flash unit is left unused for about 3 minutes If the flash unit is mounted on autofocus cameras, with the power switch set to the (ON) position, it press the shutter release button half way to turn on the automatically switches off to save the power. -
Page 20: Select Button (S)/Adjustment Dial Functions
Select Button (S)/Adjustment Dial Functions 4 types of settings are available as shown on the following pages for the select button (S) and the adjustment dial. ■Procedure Turn the adjustment dial and adjust the blinking number. Press the select button (S) so that the number to adjust is blinking. - Page 21 After adjustment, press the select button (S) and stop the blinking. Adjust the other items below using the same procedure. ● When using multiple flash units set to P-TTL or TTL Auto and adjusting the amount of light at the same time, use the camera’s exposure compensation.
-
Page 22: Camera Format And Flash Coverage Angle
Camera Format and Flash Coverage Angle ■Format setting The AF540FGZ’s flash coverage angle can be adjusted to match the angle of view of the lens being used, Firstly, set the FORMAT to match the image size which enables effective distribution of the flash light. of the camera you are using. - Page 23 the focal length of the lens by pressing the shutter release button of the camera halfway down. The auto zoom function operates while the exposure metering timer is operating (while information is being displayed in the viewfinder). If you are setting the format manually, return the setting switch to the upper (white dot) position.
- Page 24 ● In the manual zoom mode, refer to the LCD panel and set it so the flash coverage angle matches the lens focal length or set a flash coverage angle that is shorter than the lens focal length. Zoom Positions for Each Format * With the wide-angle panel 35mm camera 645 camera...
- Page 25 35mm Camera 645 Camera 67 Camera Digital Camera...
- Page 26 ● In the (A.Zoom) mode, the flash coverage angle ● In the (A.Zoom) mode, if there is no lens focal will be adjusted automatically to suit the lens length information, the flash coverage angle will focal length when you press the shutter release be set automatically to 24mm with a 35mm button halfway, and the camera exposure camera.
-
Page 27: Using The Flash Modes
Using the Flash Modes TTL auto flash (TTL) The AF540FGZ has the following flash modes. Select the mode best suited for the subject. Based on the amount of light reflected off the film of the Before photographing, confirm the following. camera, the camera adjusts the flash output 1. -
Page 28: P-Ttl Auto Flash
■P-TTL Auto Flash Set the sync mode switch to leading curtain sync ), trailing curtain sync ( ), or contrast-control ( ), according to the Effective flash range subject. (Refer to page 32.) ● After turning the power (ON), the setting will be (P-TTL) and (A.Zoom). -
Page 29: Ttl Auto Flash
■TTL Auto Flash Procedure Refer to page 25 for the features and conditions of use Turn on the flash unit. of this flash mode. Press the flash mode button (MODE) until (TTL) is displayed on the LCD panel. Set the sync mode switch to leading curtain sync ), trailing curtain sync ( ), or contrast-control (... -
Page 30: Auto Flash
■Auto Flash Refer to page 25 for the features and conditions of use of this flash mode. - Page 31 Procedure Set the zoom position. (The setting method differs according to your camera and lens. Refer Turn on the power switch. to page 21.) ● Select (M.Zoom) regardless of the type of lens being used. Press the flash mode button (MODE) until (A) is displayed on the LCD panel.
-
Page 32: Manual Flash
■Manual Flash Procedure Refer to page 25 for the features and conditions of use Turn on the power switch. of this flash mode. Press the flash mode button (MODE) to display (M) (1/xx) on the LCD panel. ● You can set the flash output from 1/1 to 1/64. See page 18. - Page 33 Confirm that the subject is within the effective flash range and the ready lamp is lit. Then take a picture. ● In the following cameras, if the correct flash output is obtained, the flash mode indicator and ( ) in the viewfinder will blink. 645, LX, MZ-M/ZX-M For details, refer to “Auto Check Display”...
-
Page 34: Using The Sync Mode
Using the Sync Mode Trailing Curtain Sync Mode The AF540FGZ has the following sync modes. Select the mode best suited for the subject. In this sync mode, the flash is discharged at the instant Before photographing, confirm the following. the second curtain begins its travel. This mode will 1. -
Page 35: Leading Curtain Sync Mode
■Leading Curtain Sync Mode ■Trailing Curtain Sync Mode Refer to page 32 for the features and conditions of use Refer to page 32 for the features and conditions of use of this sync mode. of this sync mode. Procedure Set the power switch to the (ON) position. Set the sync mode switch to leading curtain sync Confirm that the subject is within the effective flash range and the ready lamp is lit. -
Page 36: High-Speed Sync Mode
■High-Speed Sync Mode Procedure Refer to page 32 for the features and conditions of use Turn on the camera. Set the exposure mode to a of this sync mode. mode other than the Programmed AE. ● As can be seen in the table on page 84, as the Attach the flash unit to the camera’s hot shoe and shutter speed becomes faster, the guide number turn it on. - Page 37 Check the flash range by looking at the bar graph on the LCD panel. Confirm that the subject is within the effective flash range and the ready lamp is lit. Then take a picture. ● Please read the camera operating manual for camera operation.
-
Page 38: Contrast Control Sync Flash
■Contrast Control Sync Flash Procedure Refer to page 32 for the features and conditions of use Turn on the power switch. of this sync mode. ● Refer to “Connecting the AF540FGZ with the Set the sync mode switch to contrast-control Extension Cord”... - Page 39 With a single flash With contrast control sync flash ● If you are using a single flash unit, you can only perform leading curtain sync photography when the sync mode switch is set to contrast-control...
-
Page 40: Advanced Functions
Advanced Functions ■Wireless Mode Notes on Wireless Flash Control (P-TTL photography) With the AF540FGZ, you can take photographs with the flash unit separated from the camera wirelessly in When using the AF540FGZ in wireless mode, the P-TTL mode. following information is transferred between the flash Combine the flash unit with the built-in flash unit of the units attached to the camera and separated from the camera or another AF540FGZ attached to the camera. - Page 41 ● Control Flash and Main Flash The purpose of the control flash of the wireless mode is to send information to the other flash unit before taking a picture. The main flash discharges at the actual time a picture is taken in the same manner as traditionally done.
- Page 42 However, this requires the firmware to be updated to Version 1.10 or later. Download the firmware for the K10D from the following URL, and install it on your camera. http://www.pentax.jp/english/support/download_digital.html You may also contact your nearest PENTAX service center for firmware updates. (This will involve a fee.)
- Page 43 Firstly, set the wireless mode and channel of the Next, remove the flash unit from the camera and AF540FGZ, and register them on the camera. place it in the desired position. Turn the camera off and then attach the ● Press the flash mode button (MODE) to display AF540FGZ to the hot shoe of the camera.
- Page 44 When Attaching the AF540FGZ to the Camera for Control Flash Main flash Control flash only: not Set the power switch of the flash unit to used for main flash (WIRELESS). Press the wireless mode button (M/C/S) the (Preparation of Flash Unit Attached to Camera) number of times required to display CONTROL Firstly, set the wireless mode and channel of the on the LCD panel.
- Page 45 When you turn the camera on and press the Next, set the channel of the separated (wireless) shutter release button halfway down, the flash unit to the same channel as the flash unit channel of the flash unit is registered on the attached to the camera.
- Page 46 When Using Both an AF540FGZ Attached to the Camera and a Separated Flash Unit as Main Flashes Use both flash units as main flashes Set the power switch of the flash unit to (WIRELESS). (Preparation of Flash Unit Attached to Camera) Press the wireless mode button (M/C/S) the Firstly, set the wireless mode and channel of the number of times required to display MASTER...
- Page 47 Slide the setting switch back up to the (white Next, set the channel of the separated (wireless) dot). flash unit to the same channel as the flash unit When you turn the camera on and press the attached to the camera. shutter release button halfway down, the Place the other AF540FGZ in the desired channel of the flash unit is registered on the...
- Page 48 Wireless High-Speed Sync Photography (Using the AF540FGZ in Combination with a Built-in Flash Unit) Firstly, set the wireless mode and channel of the AF540FGZ, and register them on the camera. ● You cannot set the flash unit to SLAVE while the Turn the camera off and then attach the exposure metering timer is on (while information AF540FGZ to the hot shoe of the camera.
- Page 49 ● If the shutter speed is the same or slower than When you turn the camera on and press the shutter release button halfway down, the the X-sync speed of the camera, the flash will be channel is registered on the camera. set to P-TTL mode, and when it is faster than X- sync speed, the flash will be set to high-speed Next, remove the flash unit from the camera and...
- Page 50 Press the wireless mode button (M/C/S) the (Using the AF540FGZ in Combination with number of times required to select CONTROL another AF540FGZ) or MASTER. Firstly, set the wireless mode and channel of the CONTROL: For using the flash unit attached AF540FGZ attached to the camera, and register to the camera as the control flash.
- Page 51 Slide the setting switch back up to the (white Set the sync mode switch of the wireless flash dot). unit to leading curtain sync ( When you turn the camera on and press the Set the exposure mode of the camera to manual shutter release button halfway down, the exposure and the shutter speed faster than X- channel is registered on the camera.
-
Page 52: Slave
■Slave With the AF540FGZ, you can take photographs with the flash unit separated from the camera wirelessly in auto or manual mode. Combine the flash unit with the built-in flash unit of the camera or another flash unit attached to the camera. Before photographing, confirm the following. - Page 53 ● Do not use red-eye reduction with the camera’s Set the zoom position to suit the subject and place the flash unit at the desired location. flash. This will result in the AF540FGZ firing by ● When setting up a flash unit separately from the the pre-flash.
-
Page 54: Slave Mode Setting
■Slave Mode Setting Procedure To properly control the slave flash, it is necessary to set Slide the setting switch up. the slave mode settings. Press the LCD panel illumination button (LIGHT) for 2 seconds or more. SL1 will be displayed. Press the select button (S) to select SL 1 or SL 2. -
Page 55: Slow-Speed Sync Photography
■Slow-Speed Sync Photography When using a normal flash to photograph a subject in a night or evening setting, the background will appear very dark because a normal flash light cannot sufficiently light it. However, it is possible to balance both subject and background by using the flash to properly expose the foreground subject and a slow shutter speed to expose the low light background. -
Page 56: Bounce Flash
■Bounce Flash The bounce angle can be set to the following angles. Rightward: 0°, 30°, 60°, 90°, 120°, 150°, 180° With the AF540FGZ, you can tilt and swivel the flash head to aim at the ceiling or wall to bounce the flash Leftward: 0°, 30°, 60°, 90°, 135°... - Page 57 ● A click stop is provided for each bounce angle. Manual Flash Photography ● Hold the bounce lock release button and tilt the The amount of light during bounce flash photography is flash head downward when you set the bounce greatly affected by the condition of the reflective angle at -10 °...
-
Page 58: Af Spotbeam
■AF Spotbeam ● To change the composition, raise your finger off the shutter release button and press it halfway The AF540FGZ features a built-in red spotbeam down again to recompose the picture. projector to assist the autofocus system in dim light and ●... -
Page 59: Wide-Angle Panel And Catchlight Panel
■Wide-Angle Panel and Catchlight 2.Catchlight panel A catchlight is a reflection of light source in the eyes. Panel It usually appears as a white dot and makes the human The AF540FGZ has a built-in wide-angle panel and subject look more lively. Set the bounce flash angle to catchlight panel at the top of the flash head. -
Page 60: Modeling Flash/Test Flash
10 consecutive times. After the MZ-S: You can use the LCD illuminator button. (Refer tenth time, let the flash unit rest for at least 10 to "PENTAX Functions" in the camera's minutes. operating manual.) Test Flash Check that the flash is ready, then press the test button (TEST). -
Page 61: Connecting The Af540Fgz With The Extension Cord
■Connecting the AF540FGZ with the ● When setting up the flash unit separately from the camera, use the off-camera shoe adapter F Extension Cord when using a tripod, or the optional off-camera When using the AF540FGZ separately from the shoe clip CL-10 when setting up in another camera connected by an extension cord, use the location such as tabletop, chair, etc. -
Page 62: Supported Functions For Pentax Cameras
Supported Functions for PENTAX Cameras ■Cameras that Support Each Flash Mode Cameras that support each of the flash modes are listed below. Please note that functions related to each flash mode differ. Refer to "Functions Related to Each Flash Mode" (page 64 - 71). - Page 63 Super Program, LX Auto Flash (A) Aperture setting - Under the following conditions, autofocus cameras can also use (A). capable PENTAX - The camera exposure mode is set to manual exposure. single lens reflex - The camera exposure metering timer is off.
-
Page 64: Cameras That Support Each Sync Mode
Restrictions Sync Mode Camera Reference Page Leading curtain sync ( ) All PENTAX single lens reflex cameras provided with a hot shoe page 72 Trailing curtain sync ( Digital single lens reflex K20D, K200D, K100D Super, page 72... -
Page 65: Cameras That Support Wireless Mode
Restrictions Sync Mode Camera Reference Page High-speed sync ( Digital single lens reflex K20D, K200D, K100D Super, page 76 cameras K10D, K110D, K100D, *ist DL2, *ist DS2, *ist DL, *ist DS, *ist D Film cameras (35mm autofocus *ist, MZ-S, MZ-L/ZX-L/MZ-6 single lens reflex cameras) ■Cameras that Support Wireless Mode Function... -
Page 66: Cameras That Support Slow-Speed Sync Mode
■Cameras that Support Slow-Speed Sync Mode Function Camera Notes Slow-speed Digital single lens reflex K20D, K200D, K100D Super, Slow-speed sync is not possible sync cameras K10D, K110D, K100D, *ist DL2, in the following cameras except *ist DS2, *ist DL, *ist DS, *ist D with B (Bulb Exposure). - Page 67 1. Cameras that Support P-TTL Auto Flash Mode Type A (Digital single lens reflex cameras): K20D, K200D, K100D Super, K10D, K110D, K100D, *ist DL2, *ist DS2, *ist DL, *ist DS, *ist D Type B (Film cameras (35mm autofocus single lens reflex)): *ist, MZ-L/ZX-L/MZ-6, MZ-S (P-TTL) P-TTL auto (TTL) TTL auto...
- Page 68 2. Cameras that Support TTL Auto Flash Mode <Film cameras (35mm autofocus single lens reflex cameras)> Type A: MZ-60/ZX-60, MZ-5 /ZX-5 , MZ-30/ZX-30, MZ-7/ZX-7, Z-1/PZ-1, Z-5, Z-1P/PZ-1P, Z-5P, Z-20/PZ-20, Z-20P, Z-50P, Z-70P, SFX/SF1, SFX /SF1 Type B: MZ-3, MZ-5/ZX-5, MZ-10/ZX-10, MZ-50/ZX-50 Type C: Z-10/PZ-10 (P-TTL) P-TTL auto (TTL) TTL auto...
- Page 69 <Film cameras (medium format)> Type D: 672 Type E: 645 N2, 645 N Type F: 645 (P-TTL) P-TTL auto (TTL) TTL auto (A) auto flash (M) manual flash (SB) AF Flash Mode flash photography flash photography photography photography spotbeam Camera type (D), (E), (F) Leading curtain sync Trailing curtain sync...
- Page 70 <Film cameras (35mm manual focus single lens reflex cameras)> Type G: LX Type H: Super A/Super Program (P-TTL) P-TTL auto (TTL) TTL auto (A) auto flash (M) manual flash (SB) AF Flash Mode flash photography flash photography photography photography spotbeam Camera type (G), (H) (G), (H)
- Page 71 3. Cameras that Does not Support P-TTL and TTL Auto Flash Mode <Film cameras (35mm autofocus single lens reflex cameras)> Type A: SF7/SF10 (P-TTL) P-TTL auto (TTL) TTL auto (A) auto flash (M) manual flash (SB) AF Flash Mode flash photography flash photography photography photography...
- Page 72 <Film cameras (35mm manual focus single lens reflex camera, 67 camera)> Type B: MZ-M/ZX-M Type C: P30T, P30N/P3N, P30, P50/P5, A3Date, A3DateS, Program A/Program Plus Type D: ME, ME-Super, MG, ME-F/MEF, MV1/MV (P-TTL) P-TTL auto (TTL) TTL auto (A) auto flash (M) manual flash (SB) AF Flash Mode...
- Page 73 Type E: 35mm single reflex cameras other than those in Type A to D, 67 camera (P-TTL) P-TTL auto (TTL) TTL auto (A) auto flash (M) manual flash (SB) AF Flash Mode flash photography flash photography photography photography spotbeam Camera type Leading curtain sync Trailing curtain sync Slow-speed sync...
-
Page 74: Sync Mode Restrictions
■Sync Mode Restrictions Leading Curtain Sync Photography ( This sync mode can be used with all PENTAX single lens reflex cameras provided with a hot shoe. However, there are restrictions depending on camera type and settings. Camera Model Camera Settings... - Page 75 Camera Category Camera Model Shutter Speed Film cameras 645N2, 645N 1/45 sec. fixed (in Programmed AE and Aperture Priority AE) (medium format) 1/45 sec. or slower (in Shutter Priority AE and manual exposure) Film cameras MZ-S 1/90 sec. or slower (35mm autofocus Z-1/PZ-1, Z-5, Z-1P/PZ-1P, Z-5P 1/125 sec.
- Page 76 Contrast Control Sync Photography ( Flash units that support this sync mode are as follows. However, the flash modes, cameras, and camera shutter speeds that can be used differ depending on the flash unit. Set the shutter speed to the speed shown in the shutter speed column below. Flash Unit Flash Mode Camera Model...
- Page 77 Camera Category Camera Model Shutter Speed Film cameras (medium 645N2, 645N 1/45 sec. fixed (in Programmed AE and Aperture format) Priority AE) 1/45 sec. or slower (in Shutter Priority AE and manual exposure) Film cameras (35mm Z-1/PZ-1, Z-1P/PZ-1P, Z-5, Z-5P 1/60 sec.
- Page 78 High-Speed Sync Mode Photography ( Cameras that support this sync mode are as follows. Be sure to set your camera according to the following settings: - Shutter speed: faster than flash unit's X-sync speed - Exposure mode: Tv (Shutter Priority), Av (Aperture Priority), M (manual) Exposure modes other than the above are not compatible with this sync mode.
- Page 79 Slow-Speed Sync Photography Restrictions Be sure to set the camera as follows. - Shutter speed: slower than flash unit's X-sync speed - Exposure mode: manual exposure, Shutter Priority AE, (except 645, SFX /SF1 , SFX/SF1 and SF 7/SF10), B (Bulb Exposure) Exposure modes other than the above are not compatible with this photographic method.
- Page 80 Exposure Modes Not Supported by Camera Model Notes Slow-Speed Sync Photography MZ-S, MZ-5 /ZX-5 , MZ-3, P (Programmed AE) and Av (Aperture MZ-5/ZX-5, MZ-M/ZX-M, Priority) modes Z-50P, Program A/ Program Plus MZ-50/ZX-50 PICT and Av (Aperture Priority) modes , , , MZ-30/ZX-30 , Av (Aperture Priority) modes...
-
Page 81: Precautions When Photographing With A Slave Flash
■Precautions When Photographing with a Slave Flash ● Be sure to set the camera as follows: - Exposure mode: M (manual) or B (Bulb Exposure) * Exposure modes other than those above are not compatible with this photographic method. ● Set the slave mode of the flash unit to SL 2 (refer to page 52). -
Page 82: Flash Effective Range
Flash Effective Range ■Calculating the Flash Effective However, if the minimum distance obtained is 0.7m or less, the minimum distance will be 0.7m. Refer to page Range 82 for the guide number table. When setting the lens to manual f/stop, calculate the guide number at full flash with the use of flash's zoom position and ISO. - Page 83 Effective flash range indicator Display of Flash Effective Range The shooting distance parameters will be displayed on the LCD panel. Make sure that you are within the flash effective range before taking pictures. ● The effective flash range is displayed for the following camera and lens combinations.
-
Page 84: Guide Number (Gn)
■Guide Number (GN) ● Depending on the camera and lens you are using, the effective flash range may be displayed. (Refer to Guide numbers indicate flash light intensity. The larger page 81.) the number, the farther you can reach with your flash. From the guide number, you can easily obtain the proper aperture setting required for an optimum exposure. - Page 85 *With the wide-angle panel attached Camera format Zoom position Flash 35mm 85mm 70mm 50mm 35mm 28mm 24mm *20mm light 150mm 135mm 100mm 70mm 55mm 45mm *35mm intensity 190mm 180mm 120mm 90mm 70mm 60mm *55mm DIGITAL 58mm 48mm 34mm 24mm 19mm 16mm *13mm 27.5...
- Page 86 High-Speed Sync Guide Number *With the wide-angle panel attached Camera format Zoom position Shutter 35mm 85mm 70mm 50mm 35mm 28mm 24mm *20mm speed DIGITAL 58mm 48mm 34mm 24mm 19mm 16mm *13mm 24.2 22.4 20.1 17.5 15.7 14.3 18.8 17.4 15.6 13.6 12.2 11.1...
-
Page 87: P-Ttl And Ttl Auto Flash Effective Range
■P-TTL and TTL Auto Flash Effective Range Zoom position Camera format ISO 100 ISO 200 35mm 20mm 24mm 28mm 35mm 50mm 70mm 85mm 20mm 24mm 28mm 35mm 50mm 70mm 85mm 35mm 45mm 55mm 70mm 100mm 135mm 150mm 35mm 45mm 55mm 70mm 100mm 135mm 150mm 55mm 60mm... - Page 88 Zoom position Camera format ISO 400 35mm 20mm 24mm 28mm 35mm 50mm 70mm 85mm 35mm 45mm 55mm 70mm 100mm 135mm 150mm 55mm 60mm 70mm 90mm 120mm 180mm 190mm DIGITAL 13mm 16mm 19mm 24mm 34mm 48mm 58mm f/1.2 3.5 - 35.0 5.4 - 53.3 5.9 - 58.3 6.5 - 65.0 7.5 - 75.0 8.4 - 83.3 9.0 - 90.0 f/1.4 3.0 - 30.0 4.6 - 45.7 5.0 - 50.0 5.6 - 55.7 6.5 - 64.2 7.2 - 71.4 7.8 - 77.1 2.1 - 21.0 3.2 - 32.0 3.5 - 35.0 3.9 - 39.0 4.5 - 45.0 5.0 - 50.0 5.4 - 54.0...
-
Page 89: Optional Accessories
Optional Accessories A number of dedicated accessories are available for this flash unit. TR Power Pack-3 Hot Shoe Adapter F External power source which supplies power from six Adapter for connecting the camera and extension cord C-size batteries. F5P/F5P L. It also has a hot shoe on its top. Off-camera Shoe Clip CL-10 Extension Cord F5P/F5P L Setting clip for using the AF540FGZ as a wireless slave... -
Page 90: Specifications
Specifications Type Clip-on, TTL auto zoom flash unit with series control Guide No. Maximum 54 (ISO 100/m). In manual mode, seven-step adjustment from M1/1 to M1/64. The focal lengths in the table below are for 35 mm single lens reflex cameras. (when using 35mm format camera) *Wide-angle panel used (ISO 100) - Page 91 Focal Length (Zoom position) 85mm 70mm 50mm 35mm 28mm 24mm 20mm* (ISO 400) (M1/1) (=FULL) (M1/2) (M1/4) (M1/8) 27.5 24.5 22.5 14.5 (M1/16) 24.5 22.5 19.5 (M1/32) 13.5 (M1/64) 13.5 Flash duration (1/2 peak each) (M1/1) flash: Approx. 1/1200 sec. (TTL) Fastest duration time: Approx. 1/20000 sec. Recycling time/Total number Battery type Recycling time Total number of flashes...
- Page 92 Flash modes P-TTL auto, TTL auto, auto, manual. Flash output compensation In P-TTL mode, -3.0 to +1.0 levels (0.5 step increments) Wireless master, slave: (1/1 ➝ 2/3 ➝ 1/2 ➝1/3) Flash output setting Manual: (1/1 ➝ 1/2 ➝ 1/4 ➝ 1/8 ➝ 1/16 ➝ 1/32 ➝ 1/64) Flash sync mode Leading curtain sync, Trailing curtain sync, Contrast control sync, High-speed sync.
-
Page 93: Warranty Policy
If the equipment is not covered by warranty, regular charges of the manufacturer or of its representatives will apply. Shipping charges are to be borne by the owner. If your PENTAX was purchased outside of the country where you wish to have it serviced during the warranty period, regular handling and servicing fees may be charged by the manufacturer’s... - Page 94 Therefore, we recommend that you review the warranty card supplied with your product at the time of purchase, or contact the PENTAX distributor in your country for more information and to receive a copy of the warranty policy. For customers in the USA STATEMENT OF FCC COMPLIANCE This device complies with Part 15 of the FCC Rules.
- Page 95 Information on disposal for users 2. In other countries outside the EU 1. In the European Union If you wish to discard this product, please contact your local If your product is marked with this symbol, it means that used electrical/electronic authorities and ask for the correct method of disposal.
- Page 96 Julius-Vosseler-Strasse 104, 22527 Hamburg, GERMANY (European Headquarters) (HQ - http://www.pentaxeurope.com) (Germany - http://www.pentax.de) PENTAX U.K. Limited PENTAX House, Heron Drive, Langley, Slough, Berks SL3 8PN, U.K. (http://www.pentax.uk) PENTAX France S.A.S. 112 Quai de Bezons, B.P. 204, 95106 Argenteuil Cedex, FRANCE (http://www.pentax.fr) PENTAX Italia S.r.l.
Need help?
Do you have a question about the 540FGZ - AF - Hot-shoe clip-on Flash and is the answer not in the manual?
Questions and answers