Advertisement
Introduction
Dear customer,
Thanks to its technology, design and operation and the fact that it exceeds the strictest quality standars, a fully satisfactory use and long product life can be assured.
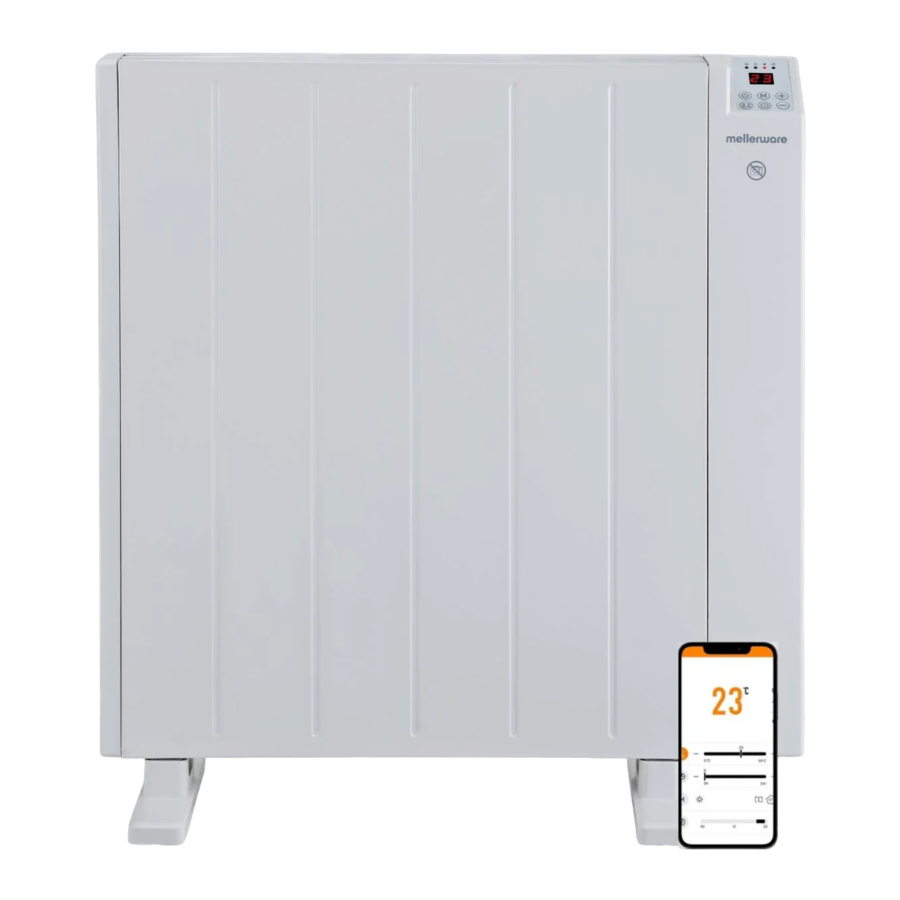
Description

- Air outlet
- Control panel
- Feet
- On/off switch
- Wall support
- Screws
CONTROL PANEL

- On/off indicator
- Wi-Fi indicator
- Comfort mode indicator
- ECO mode indicator
- Screen
- Mode button
- On/off button
- Button +
- Open window function / Wi-Fi
- Timer button
- Button –
If your appliance does not have the accessories described above, you can also purchase them separately by going to www.mellerware.com or by contacting our customer service team.
Installation
- Be sure to remove all packaging material from inside the appliance.
- The appliance requires suitable ventilation in order to work properly. Leave a space of more than 36 cm between walls or other obstacles and more than 20 cm from the floor (Fig.1).

- The plug must be easily accessible so it can be disconnected in an emergency.
- To achieve the highest efficiency from the appliance it should be situated in a place where the atmospheric temperature is between 12 and 32ºC.
- The appliance should work well with its wall support attached or with its base/feet attached.

ASSEMBLING THE WALL BRACKET
- The appliance has a wall bracket (E) on which it can be supported.
- Fix the wall bracket as you think appropriate, using plugs, screws, and adhesive...
- Taking into account the separation distances mentioned above, place the wall support in the required position and mark the drilling points on the wall. (Fig.1).
- Drill into the wall where marked and insert the rawlplugs. (Fig.2).

- Follow the instructions (Fig. 3, 4, 5).


- Make sure that the bracket is firmly fixed; it should be able to support twice the weight of the appliance.


FITTING THE BASE FEET
- The appliance has anti-slip base feet (C) that support the product.
- To assemble the base feet, place the appliance face down.
- Position the base feet on the body of the appliance.
- Position the base feet on the body of the appliance using the screws. (Provided with the appliance) (Fig.6).

- Stand the appliance up again so as to check that the base feet work properly.

Instructions for use
BEFORE USE
- Some parts of the appliance have been lightly greased. Consequently, the first time the appliance is used a light smoke may be detected. After a short time, this smoke will disappear.
- To eliminate the smell given off by the appliance when used for the first time, it is recommended to have it on at full power for 2 hours in a well-ventilated room.
USE
- Connect the appliance to the mains.
- Turn the appliance on, by using the on/off switch (D).
- Turn the appliance on, by using the on/off button (7).
- Note: during any programming, if the unit controls are not used for 1 min, the screen will flash three times
![]() and continue displaying target temperature. The device will go into child lock mode. Press + and - at the same time to unlock the control panel
and continue displaying target temperature. The device will go into child lock mode. Press + and - at the same time to unlock the control panel
SET CURRENT DAY / TIME: - The first thing to do is to configure the day and time you are in.
- Press the
![]() button for 3 seconds.
button for 3 seconds. - The display will show "d". Press +/- to select the day of the week (1-7):
- Monday (1)
- Tuesday (2)
- Wednesday (3)
- Thursday (4)
- Friday (5)
- Saturday (6)
- Sunday (7)
 and continue displaying
- Press
![]() to confirm the day of the week. Then, will appear on the screen.
to confirm the day of the week. Then, will appear on the screen. - Press
![]() +/- to select the hour. Press to confirm the time. Then,
+/- to select the hour. Press to confirm the time. Then, ![]() will appear on the screen.
will appear on the screen. - Press +/- to select the minutes.
- Press
![]() to confirm the minutes and finish the configuration.
to confirm the minutes and finish the configuration. - NOTE: If the appliance is unplugged, the clock and calendar will be reset to factory defaults.


HEATING MODE
- Press
![]() to select the desired heating mode. By pressing repeatedly, the device will change mode in this order:
to select the desired heating mode. By pressing repeatedly, the device will change mode in this order:
![]()
![]() Comfort mode: press +/- to set the temperature between 5- 35ºC.
Comfort mode: press +/- to set the temperature between 5- 35ºC.![]() ECO mode: press +/- to set the temperature between 1-31ºC.
ECO mode: press +/- to set the temperature between 1-31ºC.- P1 / P2 / P3: predefined weekly programs.
![]() Anti-freeze mode: the temperature cannot be adjusted and it is by default 7ºC.
Anti-freeze mode: the temperature cannot be adjusted and it is by default 7ºC.
 to select the desired


WEEKLY SETTING
- NOTE: before starting the weekly setting, the day and current time must be set.
P1: (Monday – Sunday):
- This program is default and cannot be modified.
![]()
00:00 am - 01:00 am, the appliance is in comfort mode. 01:00 am - 07:00 am, the device is in ECO mode. 07:00 am - 00:00 am, the device is in comfort mode.

P2: (Monday – Friday):
- This program is default and cannot be modified.
![]()
00:00 am - 01:00 am, the appliance is in comfort mode. 01:00 am - 05:00 am, the device is in ECO mode. 05:00 am - 09:00 am, the device is in comfort mode. 09:00 am - 19:00 pm, the device is in ECO mode. 19:00 pm - 00:00 am, the device is in comfort mode.

P2: (Saturday – Sunday):
- This program is default and cannot be modified.
![]()
00:00 am - 01:00 am, the appliance is in comfort mode. 01:00 am - 08:00 am, the device is in ECO mode. 08:00 am - 11:00 am, the device is in comfort mode. 11:00 am - 1:00 pm, the device is in ECO mode. 13:00 pm - 16:00 pm, the device is in comfort mode. 16:00 pm - 20:00 pm, the device is in ECO mode. 20:00 pm - 00:00 am, the device is in comfort mode.

P3: (Monday - Friday):
- This program CAN be modified.
![]()
00:00 am - 01:00 am, the appliance is in comfort mode. 01:00 am - 05:00 am, the device is in ECO mode. 05:00 am - 09:00 am, the device is in comfort mode. 09:00 am - 12:00 pm, the device is in ECO mode. 12:00 pm - 16:00 pm, the device is in comfort mode. 16:00 pm - 18:00 pm, the device is in ECO mode. 18:00 pm - 00:00 am, the device is in comfort mode.

P3: (Saturday - Sunday):
- This program CAN be modified.
![]()
00:00 am - 01:00 am, the appliance is in comfort mode. 01:00 am - 05:00 am, the device is in ECO mode. 05:00 am - 00:00 am, the device is in comfort mode.

MODIFICATION OF P3
- Display must show P3 to proceed on the modification.
- Press the
![]() button for 3 seconds.
button for 3 seconds. ![]() will appear on the screen. Press +/- to change the day of the week you want to modify (d1-d7).
will appear on the screen. Press +/- to change the day of the week you want to modify (d1-d7). - Press
![]() to confirm and the time will appear on the display. Press +/- to select the time you want to set.
to confirm and the time will appear on the display. Press +/- to select the time you want to set. - Press
![]() to select the heating mode you want for the selected time (comfort mode, ECO mode or anti-freeze mode (nothing appears)).
to select the heating mode you want for the selected time (comfort mode, ECO mode or anti-freeze mode (nothing appears)). - Repeat this operation until all hours and every day of the week are completed.
 button for 3 seconds.
TIMER FUNCTION:
- The operating time of the appliance can be controlled.
- Press
![]() once and the display will show "0H". Press +/- to select the hours (0-24h). Wait 3 seconds to confirm the operation.
once and the display will show "0H". Press +/- to select the hours (0-24h). Wait 3 seconds to confirm the operation. - The programmed time or time remaining will appear on the screen.

OPEN WINDOW FUNCTION:
- Press the open window function (9) and
![]() will appear on the screen.
will appear on the screen. - After a few seconds the appliance will return to show the temperature / timer that was previously.
- When the appliance is heating up, if the room temperature drops 2ºC in 2 minutes, this function will be activated and the appliance will stop heating.
- To deactivate window open mode, press the open window function button (9) and
![]() will appear on the screen.
will appear on the screen.


CONNECTION WITH APP:
- To connect your device, follow the instructions in the USE GUIDE that you will find on the product page at www.mellerware.com
ONCE YOU HAVE FINISHED USING THE APPLIANCE:
- Turn the appliance off using the on/off button (7).
- Turn the appliance off using the on/off switch (D).
- Unplug the appliance from the mains.
- Clean the appliance.
SAFETY THERMAL PROTECTOR:
- The appliance has a safety device, which protects the appliance from overheating.
- When the appliance switches itself on and off repeatedly, for reasons other than the thermostat control, check to ensure that there are no obstacles that impede correct air entry or expulsion.
- If the appliance turns itself off and does not switch itself on again, disconnect it from the mains supply, and wait for approximately 15 minutes before reconnecting.
- If the machine does not start again seek authorized technical assistance.
Cleaning
- Disconnect the appliance from the mains and allow it to cool before undertaking any cleaning task.
- Clean the equipment with a damp cloth with a few drops of washingup liquid and then dry.
- Do not use solvents, or products with an acid or base pH such as bleach, or abrasive products, for cleaning the appliance.
- Do not let water or any other liquid get into the air vents to avoid damage to the inner parts of the appliance.
- Never submerge the appliance in water or any other liquid or place it under running water.
Anomalies and repair
In the event of a fault, please contact our customer service team via web chat (Monday to Friday from 9:00h to 18:00h) or by sending an email to hi@mellerware.com
The following information details the features related to ecodesign.

Safety advice and warnings
- Read these instructions carefully before switching on the appliance and keep them for future reference. Failure to follow and observe these instructions could lead to an accident.
![]()
Some parts of this product can become very hot and caue burns. Particular attention has to be given where children and vulnerable people are present.- The appliance must not be placed below a power socket.
- Children of less than 3 years should be kept away unless continuously supervised.

- Children aged from 3 years and less than 8 years shall only switch on/off the appliance provided that it has been placed or installed in its intended normal operating position and they have been given supervision or instruction concerning use of the appliance in a safe way and understand the hazards involved.
- This appliance can be used by children aged from 8 years and above and persons with reduced physical, sensory or mental capabilities or lack of experience and knowledge if they have been given supervision or instruction concerning use of the appliance in a safe way and understand the hazards involved.
- Cleaning and user maintenance shall not be made by children unless they are supervised.
- Children aged from 3 years and less than 8 years shall not plug in, regulate and clean the appliance or perform user maintenance.
- This appliance is not a toy. Children should be supervised to ensure that they do not play with the appliance.
- Do not use the appliance near bathtubs, showers or swimming pools.
- If the connection to the mains has been damaged, it must be replaced, take the appliance to an authorized technical support service. Do not attempt to disassemble or repair the appliance by yourself in order to avoid a hazard.
- This appliance is for household use only, not professional, industrial use.
![]()
This symbol means that product can't be covered. ![]()
In order to prevent overheating do not cover the appliance.

![]()
This appliance is not equipped with a room temperature control device. Do not use this appliance in small rooms that are occupied by people who are unable to leave the room on their own, unless they are under constant surveillance.

- Ensure that the voltage indicated on the rating label matches the mains voltage before plugging in the appliance.
- Connect the appliance to a base with an earth socket withstanding a minimum of 16 amperes.
- The appliance's plug must fit into the mains socket properly. Do not alter the plug. Do not use plug adaptors.
- Use the appliance in a wellventilated area.
- The appliance must only be used with the stand provided.
- When the appliance is placed on its support, make sure that the surface on which it is placed is stable.
- Keep the appliance away from flammable material such as textiles, cardboard or paper, etc.
- Place the appliance a minimum distance of 50cm away from combustible materials, such as curtains, furniture...
- Ensure that neither the air access nor exit become either totally or partially covered by drapery, clothing, etc., as this increases the risk of fire.
- Do not use the appliance in association with a programmer, timer or other device that automatically switches it on.
- Do not use the appliance if the cable or plug is damaged.
- If any of the appliance casings breaks, immediately disconnect the appliance from the mains to prevent the possibility of an electric shock.
![]()
Do not use the appliance near water.- Do not use the appliance with damp hands or feet, or when barefooted.
- Do not force the power cord. Never use the power cord to lift up, carry or unplug the appliance.
- Do not wrap the power cord around the appliance.
- Do not allow the power cord to come into contact with the appliance's hot surfaces.
- Check the state of the power cord. Damaged or tangled cables increase the risk of electric shock.
- The appliance is not suitable for outdoor use.
- Supply cord should be regularly examined for signs of damage, and if the cord is damaged, the appliance must not be used.
- Do not touch the plug with wet hands.
- Do not use the appliance in the case of persons insensitive to heat (the appliance has heated surfaces).
- The temperature of the accessible surfaces may be high when the appliance is in use.
USE AND CAR
- Fully extend the appliance's power cable before each use.
- Do not use the appliance if the on/off switch does not work.
- Do not use the appliance if it is tipped up and do not turn it over.
- Disconnect the appliance from the mains when not in use and before undertaking any cleaning task.
- Store this appliance out of reach of children and/or persons with physical, sensory or reduced mental or lack of experience and knowledge.
- Do not store the appliance if it is still hot.
- Keep the appliance in a dry, dustfree place, out of direct sunlight.
- Never leave the appliance unattended while in use.
- Never leave the appliance connected and unattended if is not in use. This saves energy and prolongs the life of the appliance.
- Do not use the appliance to dry textiles of any kind.
Service
Any misuse or failure to follow the instructions for use renders the guarantee and the manufacturer's liability null and void.
Documents / Resources
References

Download manual
Here you can download full pdf version of manual, it may contain additional safety instructions, warranty information, FCC rules, etc.
Advertisement

Need help?
Do you have a question about the Comfy Wifi and is the answer not in the manual?
Questions and answers