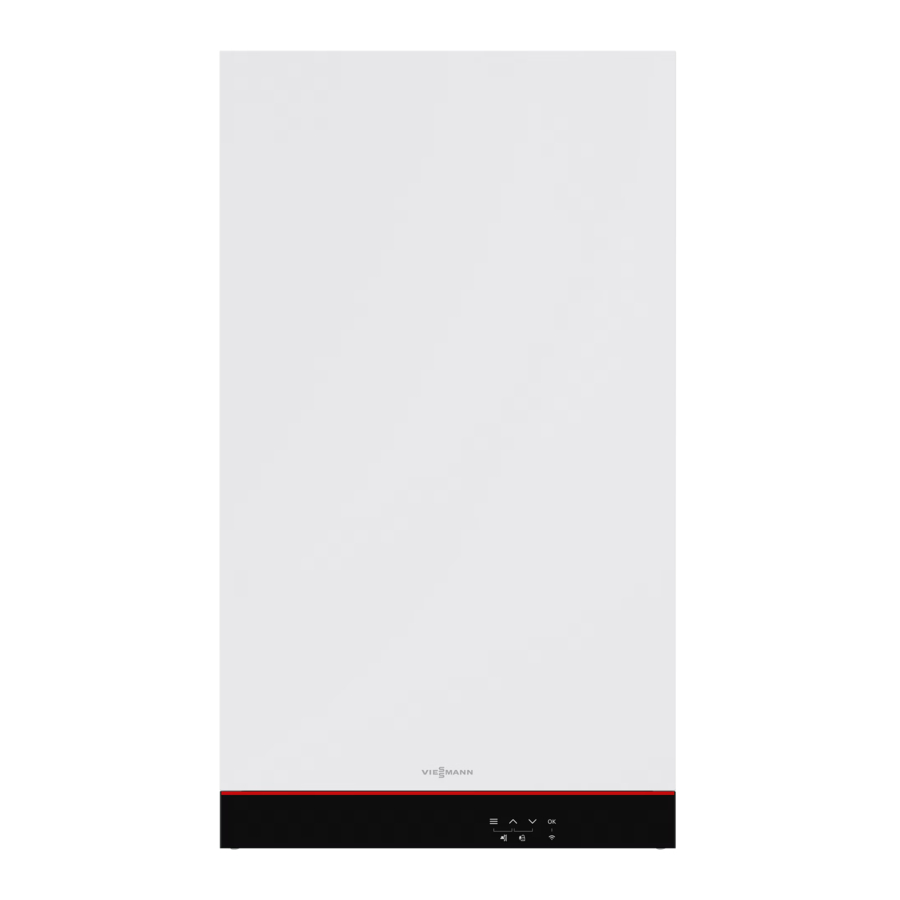
VIESSMANN VITODENS 050-W Manual
- Installation and service instructions manual (100 pages) ,
- Technical manual (60 pages) ,
- Operating instructions manual (37 pages)
Advertisement
Safety instructions
For your safety
 Please follow these safety instructions closely to prevent accidents and material losses.
Safety instructions explained

This symbol warns against the risk of injury.
Please note
This symbol warns against the risk of material losses and environmental pollution.
 Note
Note
Details identified by the word "Note" contain additional information.
Target group
These operating instructions are designed for heating system users. This appliance can also be operated by children aged 8 and older, as well as by individuals with reduced physical, sensory or mental faculties or those lacking in experience and knowledge, provided such individuals are supervised or have been instructed in the safe use of this appliance and any risks arising from it
Please note
Supervise children in the proximity of the appliance.
- Never permit children to play with the appliance.
- Cleaning and user maintenance must never be carried out by unsupervised children.
Safety instructions for working on the system
Connecting the appliance
- The appliance may be connected and commissioned only by authorised contractors.
- Only operate the appliance with suitable fuels.
- Observe the specified electrical connection requirements.
- Modifications to the existing installation may only be carried out by authorised specialists.
Incorrectly executed work on the heating system can lead to life threatening accidents.
- Work on gas installations may only be carried out by a registered gas fitter.
- Work on electrical equipment may only be carried out by a qualified electrician.
Working on the appliance
- All settings and work on the appliance must be performed as specified in these operating instructions. Further work on the appliance may be carried out only by authorised contractors.
- Do not open the appliance.
- Do not remove casings.
- Do not modify or remove attachments or fitted accessories.
- Do not open or tighten pipe connections.
Hot surfaces can cause burns.
- Do not open the appliance.
- Never touch the hot surfaces of uninsulated pipes, fittings or flue pipes.
Auxiliary components, spare and wearing parts
Please note
Components not tested with the heating system may damage the system or affect its function. Have all installation or replacement work carried out exclusively by your contractor.
Safety instructions for operating the system
Damage to the appliance
Damaged equipment poses a safety hazard. Check the appliance for external damage. Never start up a damaged appliance.
If you smell gas
Escaping gas can lead to explosions which may result in serious injury.
- No smoking! Prevent naked flames and sparks. Never switch lights or electrical appliances on or off.
- Close the gas shut-off valve.
- Open windows and doors.
- Evacuate any people from the danger zone.
- Notify your gas and power supply utility and your local heating contractor from outside the building.
- Have the power supply to the building shut off from a safe place (outside the building).
If you smell flue gas
Flue gas can lead to life threatening poisoning.
- Shut down the heating system.
- Ventilate the installation site.
- Close all doors in the living space.
If there is a fire
Fire presents a risk of burns and explosion.
- Shut down the heating system.
- Close the shut-off valves in the fuel supply lines.
- Use a tested fire extinguisher, class ABC.
If water escapes from the appliance
If water escapes from the appliance there is a risk of electric shock.
- Shut down the heating system at the external isolator (e.g. fuse box, domestic distribution board).
- Please notify your contractor.
If the heating system develops a fault
Fault messages indicate faults in the heating system. If faults are not rectified, they can have life threatening consequences. Do not acknowledge fault messages several times in quick succession. Notify contractor so the cause can be analysed and the fault rectified.
Installation room requirements
Sealed vents result in a lack of combustion air. This leads to incomplete combustion and the formation of life threatening carbon monoxide. Never cover or close existing vents. Do not make any subsequent modifications to the building characteristics that could affect safe operation (e.g. cable/pipework routing, cladding or partitions).
Easily flammable liquids and materials (e.g. naphtha/petrol, solvents, cleaning agents, paints or paper) can cause deflagration and fire. Never store or use such materials in the boiler room or in direct proximity to the heating system.
Please note
Incorrect ambient conditions can lead to heating system damage and can put safe operation at risk.
- Maintain the permissible ambient temperatures as detailed in these operating instructions.
- Prevent air contamination by halogenated hydrocarbons (e.g. as contained in paints, solvents or cleaning fluids) and excessive dust (e.g. through grinding/polishing work).
- Avoid continuously high humidity levels (e.g. through continuous drying of washing).
Extractors
The operation of appliances that extract air to the outside (cooker hoods, extractors, air conditioning units, etc.) can create negative pressure. If the boiler is operated at the same time, this can lead to a reverse flow of flue gas.
The simultaneous operation of the boiler and appliances that extract air to the outside can result in life threatening poisoning due to a reverse flow of flue gas. Take suitable steps to ensure an adequate supply of combustion air. If necessary, contact your contractor.
Liability
No liability is accepted for loss of profit, unattained savings, or other direct or indirect consequential losses resulting from use of the WiFi interface integrated into the system or the corresponding internet services. No liability is accepted for losses resulting from inappropriate use.
Liability is limited to typical damage arising if a fundamental contractual obligation is violated through slight negligence, the fulfilment of which is essential for proper execution of the contract.
The limitation of liability shall not apply if the damage was caused deliberately or through gross negligence, or if mandatory liability applies due to product liability legislation.
The Viessmann General Terms and Conditions apply, which are included in each current Viessmann pricelist. The relevant data protection regulations and terms of use apply to the use of Viessmann apps. Viessmann accepts no liability for push notifications and email services, which are provided by network operators. The terms and conditions of the respective network operators therefore apply.
Introductory information
Symbols
| Symbol | Meaning |
 | Reference to other document containing further information |
 | Step in a diagram: The numbers correspond to the order in which the steps are carried out. |
 | Warning of personal injury |
 | Warning of material losses and environmental pollution |
 | Live electrical area |
 | Pay particular attention. |
 | Component must audibly click into place. or Acoustic signal |
 | Fit new component. or In conjunction with a tool: Clean the surface. |
 | Dispose of component correctly. |
 | Dispose of component at a suitable collection point. Do not dispose of component in domestic waste. |
Terminology
To provide you with a better understanding of the functions of your control unit, some terminology is explained. This information can be found in chapter "Terminology".
Intended use
The appliance is intended solely for installation and operation in sealed unvented heating systems that comply with EN 12828, with due attention paid to CECS 215-2017 and the associated installation, service and operating instructions. It is only designed for heating up heating water that is of potable water quality.
Intended use presupposes that a fixed installation in conjunction with permissible, system-specific components has been carried out.
The appliance is intended exclusively for domestic or semi-domestic use; even users who have not had any instruction are able to operate the appliance safely.
Commercial or industrial usage for a purpose other than heating the building or DHW shall be deemed inappropriate.
Any usage beyond this must be approved by the manufacturer in each individual case.
Incorrect usage or operation of the appliance (e.g. the appliance being opened by the system user) is prohibited and will result in an exclusion of liability. Incorrect usage also occurs if the components in the heating system are modified from their intended use (e.g. if the flue gas and ventilation air paths are sealed).
Product information
The control unit is a boiler and heating circuit control unit for the following operating modes:
- Weather-compensated operation
- Constant operation
- Room temperature-dependent operation:
- Constant operation as option with room temperature controller
- OpenTherm controller
Your heating contractor will configure the operating mode during commissioning in accordance with your heating system.
These instructions describe all 3 operating modes. The setting options for room temperature-dependent operation with an OpenTherm controller via the system are limited:
![]() OpenTherm controller operating instructions
OpenTherm controller operating instructions
Weather-compensated operation
In weather-compensated operation, the flow temperature level is controlled according to the outside temperature. The lower the outside temperature, the higher the flow temperature. This means that more heat is provided for central heating on cold days than on warmer days. In weather-compensated operation, 1 heating circuit without mixer can be operated with the control unit.
Constant operation
In constant operation the heat generator provides heating water with a constant flow temperature regardless of the outside temperature. In constant operation, 1 heating circuit without mixer can be operated with the control unit.
Room temperature-dependent operation
In room temperature-dependent operation, the central heating is switched on or off subject to the room temperature. The flow temperature remains constant. In room temperature-dependent operation, 1 heating circuit without mixer can be operated with the control unit.
Constant operation as option with room temperature controller
In constant operation with room temperature controller, the control unit measures the room temperature and compares it with the selected required room temperature. If the temperatures are different, the room temperature is regulated to the required value.
Note
The heating water temperature must be set high enough in order to achieve the required room temperature.
![]() Operating instructions for room temperature controller
Operating instructions for room temperature controller
OpenTherm controller
In room temperature-dependent operation, the central heating is switched on or off subject to the room temperature. The flow temperature remains constant.
Operation
The control unit is integrated into the heat generator and controls all functions of your system. The control unit is operated via a black/white screen.
A communication module is integrated in the control unit. This allows the system to be remotely controlled via the internet using an app (except when operating via OpenTherm controller).
Commissioning
The commissioning and matching of the appliance to local conditions and building characteristics, as well as instructing the user in the operation of the system, must be carried out by your contractor.
As the operator of new combustion equipment, you may be obliged to notify the local flue gas inspector of the installation without delay [check local regulations]. Your local flue gas inspector (where applicable) will also provide you with information on additional activities concerning your combustion equipment (such as regular testing, cleaning).
Your system is preset
Your heating system is preset at the factory and is therefore ready for operation following commissioning by your contractor:
Central heating in weather-compensated mode
The rooms are heated to 20°C.
Central heating in constant operation
The set flow temperature is 60°C.
Central heating in room temperature-dependent operation
The rooms are heated in accordance with the settings on your room temperature controller or OpenTherm controller.
DHW heating
DHW is heated to 50°C.
Frost protection
- Your heat generator and DHW cylinder (if installed) are protected against frost.
The frost protection function is only possible when an outside temperature sensor is connected. Frost protection function is active at outside temperatures below 5°C. The burner is switched on and the boiler water temperature is held at 20°C.
Power failure
All settings are retained if there is a power failure.
Energy saving tips
Saving energy when using central heating
- Do not overheat your home. Every degree of room temperature reduction saves up to 6% on your heating bills. Weather-compensated operation and room temperature-dependent operation: Do not set your standard room temperature higher than 20°C.
- In room temperature-dependent operation, time programs for central heating can only be adjusted at the room temperature controller or OpenTherm controller.
![]() Operating instructions for the room temperature controller or OpenTherm controller
Operating instructions for the room temperature controller or OpenTherm controller
Saving energy on DHW heating
During regular periods of absence, heat the DHW to a lower temperature.
For additional energy saving functions, please contact your contractor.
Tips for greater comfort
More comfort in your home
- Set your individual preferred temperature.
- Only for weather-compensated operation: Adjust the heating curves so that your home is heated with your individual preferred temperature all year round.
- In room temperature-dependent operation, time programs for central heating can only be adjusted at the room temperature controller or OpenTherm controller.
![]() Operating instructions for the room temperature controller or OpenTherm controller.
Operating instructions for the room temperature controller or OpenTherm controller.
Operation
Operating principles
Touch buttons
You can adjust any setting on your system centrally at the control unit.
The control unit is equipped with touch buttons. To input settings and check information, tap the on-screen buttons.
Controller for room temperature-dependent operation
If a room temperature controller or OpenTherm controller is installed in one of your rooms, you can adjust some settings at your room temperature controller or OpenTherm controller.
![]() Operating instructions for the room temperature controller or OpenTherm controller
Operating instructions for the room temperature controller or OpenTherm controller
Status display with Lightguide
Depending on the heat generator, a white spot (Lightguide) is shown on the display.
Meaning of the display:
- Lightguide pulsates slowly: Display is in standby mode.
- Lightguide flashes quickly: There is a fault in the system.
Note
You can switch off the Lightguide.
Screen displays
Standby
After approx. 2 minutes, the display backlighting is switched off. You can deactivate standby mode.
Home screen
After switching on or activating the control unit the home screen is shown.
In the delivered condition,![]() heating circuit 1 is shown as the home screen.
heating circuit 1 is shown as the home screen.
Call up the home screen:
- Standby is active: Tap any button.
- From anywhere in the menu: Tap
![]() repeatedly until the home screen is shown.
repeatedly until the home screen is shown.

Default displays
On the home screen, you can call up the various default displays to see the status of the most important functions.
Default screen displays:
![]() In weather-compensated operation: Set room temperature
In weather-compensated operation: Set room temperature
In constant operation: Flow temperature
 DHW temperature
 System pressure
 "ON"/"OFF"
 Current fault message (if a fault is present)
To call up the default displays:
- Tap
![]() repeatedly until the home screen is shown.
repeatedly until the home screen is shown. - Tap
![]() repeatedly to switch between the default displays.
repeatedly to switch between the default displays.
Buttons and symbols

Fig. 1
- Function area
- Navigation are
Buttons and symbols in navigation area B
![]() Calls up the main menu.
Calls up the main menu.
Or
Takes you back to the home screen.
![]() Scrolls through the menu or adjusts values.
Scrolls through the menu or adjusts values.
"OK" You confirm the operation.
Buttons and symbols in function area A
Note
- What buttons and symbols are available depends on the operating mode: Weather-compensated operation, constant operation, room temperature-dependent operation.
- These symbols are not always displayed, but appear subject to the system version and the operating status.
Symbols
 Heating circuit
 DHW temperature
 System pressure
 DHW ECO function
 Service menu active
 Fault display active
 Burner status active
 WiFi connection
 Emissions test mode
 Reset the burner.
Overview of main menu
In the main menu, you can check and adjust all of the settings for the appliance's range of functions. Available menus:
![]() Information
Information![]() Heating curve
Heating curve
 Information
 Heating curve
![]() Display brightness
Display brightness![]() Display standby mode
Display standby mode![]() Internet access and information
Internet access and information![]() Low power radio access and information
Low power radio access and information![]() Lightguide
Lightguide
 Display brightness
 Display standby mode
 Internet access and information
 Low power radio access and information
 Lightguide
Calling up the main menu
Tap the following buttons:
![]() to call up the main menu.
to call up the main menu.![]() for the required menu
for the required menu-
"OK" to confirm
Operating programs for central heating and DHW heating
Note
The operating programs for central heating and DHW heating can be set separately or all together for the entire system.
| Operating program | Function |
| Central heating | |
Heating circuit  is active. is active. | The rooms of the selected heating circuit are heated in accordance with the specified room temperature or flow temperature: See chapter "Central heating". Note |
| Heating circuit 1 is not active. |
|
| DHW heating | |
DHW  is active. is active. | DHW is heated in accordance with the specified DHW temperature: See chapter "DHW heating". |
| DHW is not active. |
|
| System | |
| The entire system is switched on. |
In room temperature-dependent operation, a time program for central heating can only be set at the room temperature controller: See the operating instructions for the room temperature controller.
|
| The entire system is switched off. |
|
Central heating
Factory settings for the temperature levels
Weather-compensated operation
- Standard room temperature: 20°C
Constant operation and room temperature-dependent operation
- Standard flow temperature: 60°C
Constant operation and room temperature-dependent operation with room temperature controller
Only change the set values for the flow temperature if the heat supply for central heating is insufficient.
Room temperature-dependent operation with OpenTherm controller
In this operating mode, it is not possible to adjust temperatures via the control unit.
See the OpenTherm controller operating instructions.
Switching on the central heating
Tap the following buttons:
![]() repeatedly to switch between the default displays until
repeatedly to switch between the default displays until ![]() appears.
appears.![]() for 4 s until
for 4 s until ![]() appears.
appears.- "OK" to confirm.
![]() to exit the menu.
to exit the menu.
Turning off central heating
You do not want to heat your rooms but you want to have DHW available (summer mode).
Tap the following buttons:
![]() repeatedly to switch between the default displays until
repeatedly to switch between the default displays until ![]() appears.
appears.![]() for 4 s until appears.
for 4 s until appears.- "OK" to confirm.
![]() to exit the menu.
to exit the menu.
Note
- To prevent the circulation pump from seizing, it briefly starts every 24 hours.
- Boiler frost protection is enabled.
Adjusting the temperature for central heating
Adjust the temperature for central heating to suit your needs.
Note
With room temperature-dependent operation, you adjust the set room temperature on your room temperature controller.
Tap the following buttons:
-
![]() until
until ![]() appears.
appears.
-
![]() Select the set temperature
Select the set temperature - "OK" to confirm
![]() to exit the menu.
to exit the menu.
 Select the set temperature
Adjusting the heating curve

The heating curve can only be adjusted in weathercompensated operation.
By setting the heating curve, you influence the flow temperature provided by the heat generator.
So that your rooms are heated optimally at any outside temperature, you can adjust the heating curve slope and level.
Factory setting:
- Slope: 1
- Level: 3
![]()

Tap the following buttons:
![]() for 4 s to enter the main menu.
for 4 s to enter the main menu.![]()
![]() should be selected
should be selected- "OK" to confirm

 should be selected
![]()
![]() should be selected.
should be selected.- "OK" to confirm
![]() to set the value for the slope.
to set the value for the slope.- "OK" to confirm
-
![]() to set the value for the level.
to set the value for the level. - "OK" to confirm
![]() repeatedly to exit the menu.
repeatedly to exit the menu.

 should be selected.
Holiday at home
The "holiday at home" function is only available in combination with the ViCare thermostat (accessories). The function is switched on and off via the ViCare app.
While the function is switched on, the display shows "E3".
Holiday program
The "holiday program" function is only available in conjunction with the ViCare thermostat (accessories). The function is switched on and off via the ViCare app.
While the function is switched on, the display shows "E3".
DHW heating
Switching on DHW heating
You want to have DHW available.
Tap the following buttons:
![]() repeatedly to switch between the default displays until
repeatedly to switch between the default displays until ![]() appears.
appears.![]() for 4 s until
for 4 s until ![]() appears.
appears.- "OK" to confirm.
![]() to exit the menu.
to exit the menu.
Adjusting the temperature for DHW heating
Factory settings: 50°C
Adjust the DHW temperature to suit your needs.
Note
For reasons of good hygiene, you should not set the DHW temperature lower than 50°C.
Tap the following buttons:
![]() until
until ![]() appears.
appears.![]() Select the set temperature
Select the set temperature- "OK" to confirm
![]() to exit the menu.
to exit the menu.
Setting the Eco function for DHW heating
![]()
Note
This function is only possible in conjunction with an instantaneous water heater (combi boiler).
You can set the Eco function via default display ![]() .
.
Tap the following buttons:
![]() repeatedly to switch between the default displays until
repeatedly to switch between the default displays until ![]() appears.
appears.![]()
- "OK" to confirm

When ![]() is illuminated on the far left, you have successfully switched on the Eco function.
is illuminated on the far left, you have successfully switched on the Eco function.
Switching off DHW heating
You do not want to have DHW available. Tap the following buttons:
![]() repeatedly to switch between the default displays until
repeatedly to switch between the default displays until ![]() appears.
appears.![]() for 4 s until
for 4 s until ![]() appears.
appears.- "OK" to confirm
![]() to exit the menu.
to exit the menu.
Further settings
Adjusting the display brightness

Set the right brightness for your display. Tap the following buttons:
![]() for 4 s to enter the main menu.
for 4 s to enter the main menu.![]()
![]() should be selected
should be selected- "OK" to confirm
![]() to set the value "HI" corresponds to the max. value.
to set the value "HI" corresponds to the max. value.- "OK" to confirm
![]() repeatedly to exit the menu.
repeatedly to exit the menu.
Setting standby for the display

Activate or deactivate standby.
Tap the following buttons:
![]() for 4 s to enter the main menu.
for 4 s to enter the main menu.-
![]()
![]() should be selected
should be selected - "OK" to confirm
![]() should be selected.
should be selected.
![]() The display is always on.
The display is always on.
![]() The display enters standby mode after 2 min.
The display enters standby mode after 2 min.- "OK" to confirm
![]() repeatedly to exit the menu.
repeatedly to exit the menu.
 should be selected.
 The display is always on.
 The display enters standby mode after 2 min.
Switching the "Lightguide" on and off
Depending on the heat generator, a white spot (Lightguide) is shown on the display during operation. In the delivered condition, the Lightguide is switched on. You can switch off the Lightguide. Tap the following buttons:
![]() for 4 s to enter the main menu.
for 4 s to enter the main menu.-
![]()
![]() should be selected.
should be selected. - "OK" to confirm
![]() should be selected. Confirm your selection with "OK".
should be selected. Confirm your selection with "OK".
 should be selected. Confirm your selection with "OK".
![]() repeatedly to exit the menu.
repeatedly to exit the menu.
Meaning of the display:
- Lightguide pulsates slowly: Display is in standby mode.
- Lightguide flashes quickly: There is a fault in the system.
Note
Faults are shown by flashing lights even if the Lightguide is switched off.
Switching internet access on or off
You can control your system remotely via the internet using an app. To do this, establish an internet connection via WiFi (2.4 gigahertz): See the following chapter. The required credentials for internet access to the control unit via app can be found on the adjacent label:
Establishing a WiFi connection
You will need the ViCare app on your mobile device to establish an internet connection with the heat generator.
Tap the following buttons:
- "OK" for 4 s. The display will show a rotating bar until the WiFi symbol is illuminated on the far left.
- Start the ViCare app and follow the instructions in the app.
![]() flashes. The connection to the local network is being established.
flashes. The connection to the local network is being established.
![]() is dimly illuminated. The connection to the local network has been established.
is dimly illuminated. The connection to the local network has been established.
![]() is brightly illuminated. The connection to the server has been established.
is brightly illuminated. The connection to the server has been established.
Fault while establishing the connection
"E10" Connection to the home network cannot be established.
Note
If "E10" appears on the display, check the connection to the router and whether the network password is correct.
"E12" Connection to the server cannot be established.
Note
If "E12" appears on the display, re-establish the connection at a later time.
Note
The fault code is displayed in parts; first "E1" and then "0".
Switching on WiFi 

Tap the following buttons:
![]() for 4 s to enter the main menu.
for 4 s to enter the main menu.
![]() should be selected.
should be selected.- "OK" to confirm
-
![]() Switch WiFi on with
Switch WiFi on with ![]() or off with
or off with ![]() .
. - "OK" to confirm
![]() repeatedly to exit the menu.
repeatedly to exit the menu.
 should be selected.
 or off with
  .
.Switching the wireless connection for the remote control on or off
With weather-compensated operation, you can connect your remote control to the control unit for wireless data transfer via low power radio or other subscribers.

Fig. 4
Tap the following buttons:
![]() for 4 s to enter the main menu.
for 4 s to enter the main menu.
![]() should be selected.
should be selected.- "OK" to confirm
![]() Switch low power radio on with
Switch low power radio on with ![]() or off with
or off with ![]() .
.- "OK" to confirm
![]() repeatedly to exit the menu.
repeatedly to exit the menu.
 should be selected.
 Switch low power radio on with
 Note
Menu point P.8 is hidden if a low power radio component is already connected to the appliance.
Checks
Checking operating data
![]()
Depending on the system equipment level and the settings made, you can check current system data, e.g. temperatures.

Tap the following buttons
![]() for 4 s to enter the main menu.
for 4 s to enter the main menu.![]() should be selected.
should be selected.- "OK" to confirm
![]()
- "OK" to confirm
![]() repeatedly to exit the menu.
repeatedly to exit the menu.
 should be selected.
Checking licences for the integrated communication module
Switch on the WiFi to call up online legal information, such as open source licences:
On the home screen, press OK for approx. 4 s.
Calling up the license information for third party components
Requirement: Access point must be switched on.
Tap the following buttons:
- Call up the WiFi settings on your mobile device.
- Connect your mobile device to the WiFi "Viessmann-<xxxx>". A password prompt will be displayed.
- Enter the WPA2 network key as the password for the "Viessmann-<xxxx>" WiFi.
Note
The WPA2 network key can be found on the label: See chapter "Switching internet access on or off".
- With your connected mobile device, open http:// 192.168.0.1 in your internet browser.
- Follow the link "Third party Components Licences".
Third party software
- Overview
This product contains third party software, including open source software. You are authorised to use this third party software subject to compliance with the relevant licensing terms as provided in this document. A list of used third party software components and of license texts can be accessed by connecting your boiler, like it is mentioned in the manual. - Acknowledgements
Linux® is the registered trademark of Linus Torvalds in the U.S. and other countries. This product includes software developed by the OpenSSL Project for use in the OpenSSL Toolkit (http://www.openssl.org/). This product includes cryptographic software written by Eric Young (eay@cryptsoft.com) and software written by Tim Hudson ( tjh@cryptsoft.com ). - Disclaimer
The open source software contained in this product is distributed WITHOUT ANY WARRANTY; without even the implied warranty of MERCHANTABILITY or FITNESS FOR A PARTICULAR PURPOSE. The single licences may contain more details on a limitation of warranty or liability. - How to obtain the source code
The software included in this product may contain copyrighted software that is covered under a licence requiring us to provide the source code of that software, such as the GPL or LGPL. To obtain the complete corresponding source code for such copyrighted software, please get in touch with us via the contact information provided in section 5 below indicating the build number you will find in the licensing information section, which can be accessed as outlined in this document. This offer is not limited in time and is valid to anyone in receipt of this information. - Contact information
Viessmann Climate Solutions SE
D-35108 Allendorf
Germany
Fax +49 64 52 70-27 80
Phone +49 64 52 70-0
open-source-software-support@viessmann.com
www.viessmann.de
Checking WiFi information
![]()
You can check the current status of your WiFi connection, such as the signal strength.
Tap the following buttons:
![]() for 4 s to enter the main menu.
for 4 s to enter the main menu.![]() should be selected.
should be selected.- "OK" to confirm
![]() should be selected.
should be selected.- "OK" to confirm
One of the following statuses is displayed:
![]()
![]() repeatedly to exit the menu.
repeatedly to exit the menu.
 should be selected.
 should be selected.
Checking low power radio information
![]()
Tap the following buttons:
![]() for 4 s to enter the main menu.
for 4 s to enter the main menu.![]() should be selected.
should be selected.- "OK" to confirm
![]() should be selected.
should be selected.- "OK" to confirm
One of the following statuses is displayed:
![]()
![]() repeatedly to exit the menu.
repeatedly to exit the menu.
 should be selected.
 should be selected.
Checking fault messages
![]()
If your heating system has a fault, ![]() and the fault code will be displayed.
and the fault code will be displayed.
If faults are not rectified, they can have life threatening consequences. Do not acknowledge fault messages several times in quick succession. Please notify your contractor if a fault occurs. Your contractor will be able to analyse the cause and rectify the fault.
If a fault is active and is shown on the display, you can confirm with OK and return to the home screen. To call up this fault later, follow the steps below.
Note
- If you have connected a message facility to alert you to fault messages (e.g. a buzzer), this is deactivated when the fault message is acknowledged.
- If troubleshooting cannot be carried out until a later date, the fault message will be displayed again the following day at 07:00. The message facility is switched on again.
Tap the following buttons:
![]() for 4 s to enter the main menu.
for 4 s to enter the main menu.![]() should be selected.
should be selected.- "OK" to confirm
![]() to select fault message
to select fault message ![]() to
to ![]() .
.- "OK" to confirm
![]() to call up further details about the fault code.
to call up further details about the fault code.
 should be selected.
 to
to  .
.Note
Up to 5 fault messages can be displayed.
![]() repeatedly to exit the menu.
repeatedly to exit the menu.
If ![]() flashes and
flashes and ![]() appears on the display, the burner is locked out. To reset the burner, see the next chapter on resetting the burner.
appears on the display, the burner is locked out. To reset the burner, see the next chapter on resetting the burner.
Burner fault
The display shows  and
and ![]() flashes.
flashes.
A fault has caused the burner to lock out. You can reset it.
Note
The burner fault display can be closed for the time being by pressing ![]() for 4 s. You can open the fault later by pressing
for 4 s. You can open the fault later by pressing  simultaneously.
Tap the following buttons:
![]() to see the fault number.
to see the fault number.- Make a note of the fault number. This enables the contractor to be better prepared and may save you unnecessary travelling costs.
- Press
![]() and
and![]() for approx. 4 s.
for approx. 4 s.
 for approx. 4 s.
A rotating bar will appear on the display. This indicates that the resetting process has been started. If the fault no longer exists, the home screen will appear.
Notify your heating contractor if the fault recurs.
Emissions test mode
Starting emissions test mode
![]()
Emissions test mode for testing flue gas must only be activated by your flue gas inspector during the annual inspection.
If possible, have the emissions test carried out during the heating season.
![]() and
and  – hold for 4 s.
A rotating bar is shown on the display. The process has been started. A check runs in the background to determine whether there is sufficient heat transfer.
As soon as emissions test mode is active, the heat generator flow temperature appears on the display.
Note
If "- - -" flashes on the display 3 times and then the home screen is shown, emissions test mode is not possible due to a low flow rate or low heat draw-off.
Stopping emissions test mode
Note
Emissions test mode ends automatically after 30 minutes.
Press ![]() to manually end emissions test mode.
to manually end emissions test mode.
Switching on and off
Switching the system off
With frost protection monitoring
If you do not wish to use your heat generator for several days you can switch it off.
Set the operating mode to OFF.
Frost protection monitoring is active for the heat generator and the DHW cylinder.
Note
For frost protection for the entire heating system, see the operating instructions for the room temperature controller.
Without frost protection monitoring
Shut down your heating system completely if it will not be needed for long periods of time (several months). We recommend you contact your local heating contractor if you are planning to take your heating system out of use for long periods. Your heating contractor can then take suitable steps such as frost protection for the system or heating surface preservation as required.
- Close the gas shut-off valve and safeguard against unauthorised reopening.
- Turn off the ON/OFF switch.
The power to the system is now at zero volt.
Note that the system is no longer protected against frost.
Switching on the system
Ask your contractor about the following:
- Required system pressure
- Position of ventilation apertures in the installation room, if applicable
- Open the gas shut-off valve.
- Check whether the power supply to your system is switched on, e.g. at a separate MCB/fuse or mains isolator.
Note
The power supply to the system was switched on by your heating contractor during commissioning. If possible, do not interrupt the power supply, even when the system is in standby mode.
- Turn on the ON/OFF switch.
- After a short while, the home screen is shown on the display.
- The Lightguide is illuminated constantly.
Your system and, if installed, remote control units are ready for operation.
- Check the system pressure:
![]() until the pressure gauge symbol
until the pressure gauge symbol ![]() lights up.
lights up.- If the pressure shown is below 1.0 bar: Please top up with water or notify your heating contractor.
What to do if...
Rooms are too hot
| Cause | Remedy |
| Control unit or room temperature controller is not set correctly. | Check and correct the room temperature or flow temperature.
|
" " is shown on the display. " is shown on the display. | Notify your heating contractor of the fault code. |
| The "holiday at home" function is switched on via the ViCare app. "E3" is shown on the display. | Use the ViCare app to check whether the "holiday at home" function is switched on, change it if necessary, or switch it off. |
 Operating instructions for room temperature controller
Rooms are too cold
| Cause | Remedy |
| The heating system is off. |
|
| Control unit or room temperature controller is not set correctly. |
|
| Only when operating with DHW heating: Priority for DHW heating is active ("  " is displayed). " is displayed). | Wait until the DHW cylinder has been heated up (" " disappears). In the case of operation with an instantaneous water heater, stop DHW draw-off. |
| No fuel. | With LPG: Check the fuel reserves and order more if necessary. With natural gas: Open the gas shut-off valve. If necessary, check with your gas supply utility. |
| " " is shown on the display. | Notify your heating contractor of the fault code shown. |
| " " and "CL" flash on the display. The burner does not start. | Reset the burner. Notify your heating contractor if the fault recurs.
Do not reset the burner several times in quick succession. Notify your heating contractor if a fault recurs. Your heating contractor will be able to analyse the cause and rectify the fault. |
| Air in the heating system. | Bleed radiators. |
| The burner is switched off. Blockage in the ventilation air supply or flue system. | Notify your local heating contractor. |
| The "holiday program" function is switched on via the ViCare app. "E3" is shown on the display. | Use the ViCare app to check whether the "holiday program" function is switched on, change it if necessary, or switch it off. |
"![]() " is shown
" is shown
| Cause | Remedy |
| Heating system fault | Notify your heating contractor of the fault code. |
There is no hot water
| Cause | Remedy |
| The heating system is switched off. |
|
| Control unit is not set correctly. | Check and correct the DHW temperature. |
| No fuel. | With LPG: With natural gas: |
| "" is shown on the display. | Notify your heating contractor of the fault code shown. |
| " " and "CL" flash on the display. The burner does not start. | Reset the burner fault. Notify your heating contractor if the fault recurs.
Do not reset the burner fault several times in quick succession. Notify your heating contractor if a fault recurs. Your heating contractor will be able to analyse the cause and rectify the fault. |
The DHW is too hot | |
| Cause | Remedy |
| The control unit is not set correctly. | Check and correct the DHW temperature. |
"![]() " and the fault code are flashing
" and the fault code are flashing
| Cause | Remedy |
| The burner does not start. | Reset the burner fault. Notify your heating contractor if the fault recurs.
Do not reset the burner fault several times in quick succession. Notify your heating contractor if a fault recurs. Your heating contractor will be able to analyse the cause and rectify the fault. |
Maintenance
Cleaning
The appliances can be cleaned with a commercially available domestic cleaning agent (non-scouring). Clean the surface of the programming unit with a microfibre cloth.
Inspection and maintenance
The inspection and maintenance of a heating system is prescribed by the Buildings Energy Act [Germany] and the DIN 4755, DVGW-TRGI 2018 and DIN EN 806-5 standards.
Regular maintenance ensures trouble-free, energy efficient, environmentally responsible and safe heating operation. Your heating system must be serviced by an authorised contractor at least every 2 years. For this, it is best to arrange an inspection and maintenance contract with your local contractor.
Appliance
Increased contamination raises the flue gas temperature and thereby increases energy losses. We recommend the appliance is cleaned annually.
DHW cylinder
Standard EN 806-5 specifies that maintenance and cleaning should be carried out no later than 2 years after commissioning and as required thereafter. Only a qualified contractor should clean the inside of the DHW cylinder and the DHW connections.
If any water treatment equipment (e.g. a sluice or injection system) is installed in the cold water supply of the DHW cylinder, ensure this is refilled in good time.
For this, observe the manufacturer's instructions.
Safety valve (DHW cylinder)
The function of the safety valve must be checked every six months by the user or a contractor through venting (see valve manufacturer's instructions). The valve seat may become contaminated. Water may drip from the safety valve during a heat-up process. The outlet is open to the atmosphere.
Please note Overpressure can cause damage. Do not close the safety valve.
Potable water filter (if installed)
To maintain high hygienic standards, proceed as follows:
- Replace filter element on non-back flushing filters every six months (visual inspection every two months).
- On back flushing filters, back flush every two months.
Damaged cables / lines
If there is damage to the connecting cables or lines of the appliance or externally installed accessories, these must be replaced with Viessmann cables or lines. For this, contact your qualified contractor.
Terminology
Operating program
The operating program enables you to define the following, for example:
- How you heat your rooms
- Whether you heat DHW
Heating curve
Heating curves illustrate the relationship between the outside temperature, the set room temperature and the flow temperature. The lower the outside temperature, the higher the flow temperature. In order to guarantee sufficient heat with minimum energy consumption at any outside temperature, the conditions of your building and system must be taken into consideration. The heating curve is adjusted by your contractor for this purpose.

Setting the slope and level, taking the heating curve as an example
Factory settings:
- Slope = 1.4
- Level = 0
The heating curves shown apply with the following settings:
- Heating curve level = 0
- Standard room temperature (set room temperature) = 20°C


For an outside temperature of −14°C:
- Underfloor heating system: Slope 0.2 to 0.8
- Low temperature heating system: Slope 0.8 to 1.6
- System with a flow temperature in excess of 75°C, slope 1.6 to 2.0
![]()

Note
Setting the slope or level too high or too low will not cause any damage to your heating system.
Both settings affect the level of the flow temperature, which may then be too low or unnecessarily high.
- If you change the slope: The steepness of the heating curves changes.
- If you change the level: The heating curves are shifted in parallel in a vertical direction.
- If you change the standard room temperature (set room temperature): The heating curves are shifted along the "Set room temperature" axis.
Heating circuit
A heating circuit is a sealed unvented circuit connecting the heat generator and the radiators, in which the heating water circulates.
A system may comprise several heating circuits. For example, one heating circuit for the rooms occupied by you and one heating circuit for the rooms of a separate apartment.
Heating circuit pump
Circulation pump for circulating the heating water in the heating circuit
Room temperature
- Standard room temperature or comfort room temperature: Set the standard room temperature or comfort room temperature for periods when you are at home during the day.
- Reduced room temperature: For periods when you will be absent or during the night, set the reduced room temperature; see "Heating mode".
Safety valve
Safety equipment that must be installed in the cold water pipe by your contractor. The safety valve opens automatically to prevent excess pressure in the DHW cylinder.
The heating circuits are also equipped with safety valves.
Set temperature
Specific temperature that should be reached, e.g. set DHW temperature for example.
Drinking water filter
A device that removes solids from the drinking water. The drinking water filter is built into the cold water pipework to the DHW cylinder.
Flow temperature
The flow temperature is the temperature at which the heating water enters a system component such as a heating circuit.
Time program
In the time programs you determine what your heating system should do at what time.
Documents / Resources
References

Download manual
Here you can download full pdf version of manual, it may contain additional safety instructions, warranty information, FCC rules, etc.
Advertisement


Need help?
Do you have a question about the VITODENS 050-W and is the answer not in the manual?
Questions and answers