
Related Manuals for Daikin REYQ-TAYDU


Summary of Contents for Daikin REYQ-TAYDU
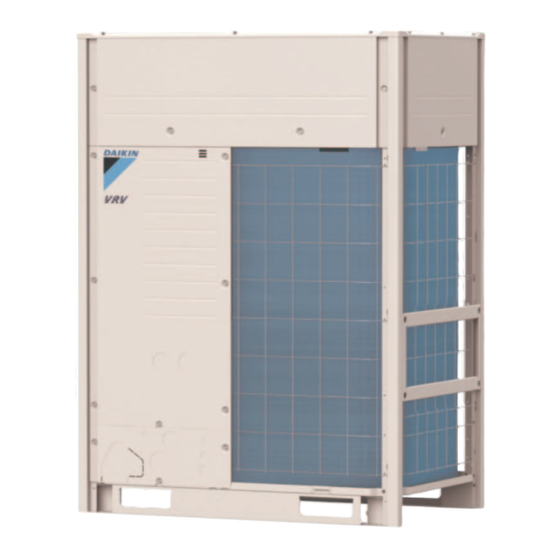
- Page 1 EDUS371704-N Installation REYQ-TAYDU, 460 V, 60 Hz REYQ-TAYDU, 460 V, 60 Hz REYQ-TATJU, 208/230 V, 60 Hz REYQ-TATJU, 208/230 V, 60 Hz...
-
Page 3: Table Of Contents
EDUS371704-N Installation of Outdoor Units 1. Features and Benefits ................2 2. Center of Gravity ..................3 2.1 REYQ-TAYDU....................3 2.2 REYQ-TATJU....................5 3. Foundation Drawing ...................7 4. REFNET Pipe System................8 4.1 Layout Example.................... 8 4.2 REFNET Joints and Headers ..............10 5. -
Page 4: Features And Benefits
• Refrigerant cooled inverted technology to avoid influence from ambient temperatures • Corrosion resistant 1000hr salt spray tested Daikin PE blue fin heat exchanger • Heat exchanger coil wraps around on all 4 sides of the unit to increase the surface area / efficiency •... -
Page 5: Center Of Gravity
EDUS371704-N Center of Gravity 2. Center of Gravity REYQ-TAYDU REYQ72TAYDU 4D090828A REYQ96TAYDU / REYQ120TAYDU 4D090829A Installation of Outdoor Units... - Page 6 Center of Gravity EDUS371704-N REYQ144TAYDU / REYQ168TAYDU 4D090830A Installation of Outdoor Units...
-
Page 7: Reyq-Tatju
EDUS371704-N Center of Gravity REYQ-TATJU REYQ72TATJU 4D090825A REYQ96TATJU / REYQ120TATJU 4D090826A Installation of Outdoor Units... - Page 8 Center of Gravity EDUS371704-N REYQ144TATJU / REYQ168TATJU 4D090827A Installation of Outdoor Units...
-
Page 9: Foundation Drawing
EDUS371704-N Foundation Drawing 3. Foundation Drawing REYQ72TAYDU / REYQ96TAYDU / REYQ120TAYDU / REYQ144TAYDU / REYQ168TAYDU REYQ72TATJU / REYQ96TATJU / REYQ120TATJU / REYQ144TATJU / REYQ168TATJU Installation of Outdoor Units... -
Page 10: Refnet Pipe System
2. Special purpose REFNET pipe components must be used for all the pipe work. For further details concerning choosing components, see REFNET and Piping Selection Rules. 3. The Daikin REFNET kits are supplied with insulation intended to fit over the main body of the REFNET joint after installation of the REFNET kit is complete. - Page 11 EDUS371704-N REFNET Pipe System 4.1.2 Equivalent Piping Length of Joints and Headers (Reference) φ 1/4 in. φ 3/8 in. φ 1/2 in. φ 5/8 in. φ 3/4 in. φ 7/8 in. φ 1 in. φ 1-1/8 in. φ 1-1/4 in. φ...
-
Page 12: Refnet Joints And Headers
REFNET Pipe System EDUS371704-N REFNET Joints and Headers 4.2.1 REFNET Joints For gas and liquid branch pipes Make sure that all branch pipes are fitted such that they branch either horizontally or vertically. When the size of the selected field piping is different from that of branch pipe then the connecting section should be cut with a pipe cutter as shown in the figure below. - Page 13 EDUS371704-N REFNET Pipe System When the number of indoor units to be connected to the branch pipes is less than the number of branch pipes available for connection then cap pipes should be fitted to the surplus branches. When the size of the selected field piping is different from that of branch pipe then the connecting section should be cut with a pipe cutter as shown in the figure below.
-
Page 14: Refnet Joint And Header
REFNET Joint and Header EDUS371704-N 5. REFNET Joint and Header REFNET Joint (Branch Kit) KHRP25A22T9 Installation of Outdoor Units... - Page 15 EDUS371704-N REFNET Joint and Header KHRP25A33T9 Installation of Outdoor Units...
- Page 16 REFNET Joint and Header EDUS371704-N KHRP25M72TU9 Installation of Outdoor Units...
- Page 17 EDUS371704-N REFNET Joint and Header KHRP25M73TU9 Installation of Outdoor Units...
- Page 18 REFNET Joint and Header EDUS371704-N KHRP26A22T9 Installation of Outdoor Units...
- Page 19 EDUS371704-N REFNET Joint and Header KHRP26A33T9 Installation of Outdoor Units...
- Page 20 REFNET Joint and Header EDUS371704-N KHRP26M72TU9 Installation of Outdoor Units...
- Page 21 EDUS371704-N REFNET Joint and Header KHRP25A22T9 / KHRP25A33T9 C: 3P203737-1 Installation of Outdoor Units...
- Page 22 REFNET Joint and Header EDUS371704-N C: 3P203737-1 Installation of Outdoor Units...
- Page 23 EDUS371704-N REFNET Joint and Header C: 3P203737-1 Installation of Outdoor Units...
- Page 24 REFNET Joint and Header EDUS371704-N C: 3P203737-1 Installation of Outdoor Units...
- Page 25 EDUS371704-N REFNET Joint and Header KHRP26A22T9 / KHRP26A33T9 C: 2P182411-1 Installation of Outdoor Units...
- Page 26 REFNET Joint and Header EDUS371704-N C: 2P182411-1 Installation of Outdoor Units...
- Page 27 EDUS371704-N REFNET Joint and Header C: 2P182411-1 Installation of Outdoor Units...
- Page 28 REFNET Joint and Header EDUS371704-N C: 2P182411-1 Installation of Outdoor Units...
- Page 29 EDUS371704-N REFNET Joint and Header KHRP25M72TU9 / KHRP25M73TU9 / KHRP26M72TU9 3P161697-1D Installation of Outdoor Units...
- Page 30 REFNET Joint and Header EDUS371704-N C: 3P161697-1D Installation of Outdoor Units...
- Page 31 EDUS371704-N REFNET Joint and Header 3P161697-1D Installation of Outdoor Units...
- Page 32 REFNET Joint and Header EDUS371704-N 3P161697-1D Installation of Outdoor Units...
-
Page 33: Refnet Header (Branch Kit)
EDUS371704-N REFNET Joint and Header REFNET Header (Branch Kit) KHRP25M33H9 Installation of Outdoor Units... - Page 34 REFNET Joint and Header EDUS371704-N KHRP25M72H9 Installation of Outdoor Units...
- Page 35 EDUS371704-N REFNET Joint and Header KHRP25M73HU9 Installation of Outdoor Units...
- Page 36 REFNET Joint and Header EDUS371704-N KHRP26M22H9 Installation of Outdoor Units...
- Page 37 EDUS371704-N REFNET Joint and Header KHRP26M33H9 Installation of Outdoor Units...
- Page 38 REFNET Joint and Header EDUS371704-N KHRP26M72H9 Installation of Outdoor Units...
- Page 39 EDUS371704-N REFNET Joint and Header KHRP25M33H9 / KHRP25M72H9 C: 3P113623-1D Installation of Outdoor Units...
- Page 40 REFNET Joint and Header EDUS371704-N C: 3P113623-1D Installation of Outdoor Units...
- Page 41 EDUS371704-N REFNET Joint and Header C: 3P113623-1D Installation of Outdoor Units...
- Page 42 REFNET Joint and Header EDUS371704-N C: 3P113623-1D Installation of Outdoor Units...
- Page 43 EDUS371704-N REFNET Joint and Header C: 3P113623-1D Installation of Outdoor Units...
- Page 44 REFNET Joint and Header EDUS371704-N KHRP26M22H9 / KHRP26M33H9 / KHRP26M72H9 C: 3P113151-1C Installation of Outdoor Units...
- Page 45 EDUS371704-N REFNET Joint and Header C: 3P113151-1C Installation of Outdoor Units...
- Page 46 REFNET Joint and Header EDUS371704-N C: 3P113151-1C Installation of Outdoor Units...
- Page 47 EDUS371704-N REFNET Joint and Header C: 3P113151-1C Installation of Outdoor Units...
- Page 48 REFNET Joint and Header EDUS371704-N C: 3P113151-1C Installation of Outdoor Units...
- Page 49 EDUS371704-N REFNET Joint and Header KHRP25M73HU9 C: 3P185500-1 Installation of Outdoor Units...
- Page 50 REFNET Joint and Header EDUS371704-N 3P185500-1 Installation of Outdoor Units...
- Page 51 EDUS371704-N REFNET Joint and Header 3P185500-1 Installation of Outdoor Units...
- Page 52 REFNET Joint and Header EDUS371704-N 3P185500-1 Installation of Outdoor Units...
-
Page 53: Outdoor Unit Multi Connection Piping Kit
EDUS371704-N REFNET Joint and Header Outdoor Unit Multi Connection Piping Kit BHFP26P100U Installation of Outdoor Units... - Page 54 REFNET Joint and Header EDUS371704-N Installation of Outdoor Units...
- Page 55 EDUS371704-N REFNET Joint and Header Installation of Outdoor Units...
- Page 56 REFNET Joint and Header EDUS371704-N C: 1P392285-1B Installation of Outdoor Units...
- Page 57 EDUS371704-N REFNET Joint and Header C: 1P392285-1B Installation of Outdoor Units...
- Page 58 REFNET Joint and Header EDUS371704-N C: 1P392285-1B Installation of Outdoor Units...
- Page 59 EDUS371704-N REFNET Joint and Header C: 1P392285-1B Installation of Outdoor Units...
- Page 60 REFNET Joint and Header EDUS371704-N C: 1P392286-1A Installation of Outdoor Units...
- Page 61 EDUS371704-N REFNET Joint and Header C: 1P392286-1A Installation of Outdoor Units...
- Page 62 REFNET Joint and Header EDUS371704-N 1P392286-1A Installation of Outdoor Units...
- Page 63 EDUS371704-N REFNET Joint and Header 1P392286-1A Installation of Outdoor Units...
- Page 64 REFNET Joint and Header EDUS371704-N BHFP26P151U Installation of Outdoor Units...
- Page 65 EDUS371704-N REFNET Joint and Header Installation of Outdoor Units...
- Page 66 REFNET Joint and Header EDUS371704-N Installation of Outdoor Units...
- Page 67 EDUS371704-N REFNET Joint and Header C: 1P392287-1B Installation of Outdoor Units...
- Page 68 REFNET Joint and Header EDUS371704-N C: 1P392287-1B Installation of Outdoor Units...
- Page 69 EDUS371704-N REFNET Joint and Header C: 1P392287-1B Installation of Outdoor Units...
- Page 70 REFNET Joint and Header EDUS371704-N C: 1P392287-1B Installation of Outdoor Units...
- Page 71 EDUS371704-N REFNET Joint and Header C: 1P392288-1A Installation of Outdoor Units...
- Page 72 REFNET Joint and Header EDUS371704-N C: 1P392288-1A Installation of Outdoor Units...
- Page 73 EDUS371704-N REFNET Joint and Header 1P392288-1A Installation of Outdoor Units...
- Page 74 REFNET Joint and Header EDUS371704-N 1P392288-1A Installation of Outdoor Units...
-
Page 75: Caution Label
EDUS371704-N Caution Label 6. Caution Label REYQ72TAYDU, REYQ72TATJU 2P385982-1A Installation of Outdoor Units... - Page 76 Caution Label EDUS371704-N 2P385982-1A Installation of Outdoor Units...
- Page 77 EDUS371704-N Caution Label 3P385986-1A Installation of Outdoor Units...
- Page 78 Caution Label EDUS371704-N 3P385986-1A Installation of Outdoor Units...
-
Page 79: Reyq96-168Taydu, Reyq96-168Tatju
EDUS371704-N Caution Label REYQ96-168TAYDU, REYQ96-168TATJU 3P385983-1A Installation of Outdoor Units... - Page 80 Caution Label EDUS371704-N 1P385984-1A Installation of Outdoor Units...
- Page 81 EDUS371704-N Caution Label 1P385984-1A Installation of Outdoor Units...
- Page 82 Caution Label EDUS371704-N 1P385984-1A Installation of Outdoor Units...
- Page 83 EDUS371704-N Caution Label 1P385984-1A Installation of Outdoor Units...
- Page 84 Caution Label EDUS371704-N 1P385984-1A Installation of Outdoor Units...
- Page 85 EDUS371704-N Caution Label 1P385984-1A Installation of Outdoor Units...
- Page 86 Caution Label EDUS371704-N 3P385987-1A Installation of Outdoor Units...
- Page 87 EDUS371704-N Caution Label 3P385987-1A Installation of Outdoor Units...
- Page 88 Caution Label EDUS371704-N Installation of Outdoor Units...
-
Page 89: Appendix 1. Installation Manual Reyq-Ta
EDUS371704-N Appendix 1. Installation Manual REYQ-TA 1. Installation Manual ..................i REYQ-TA... -
Page 90: Safety Considerations
Installation Manual EDUS371704-N 1. Installation Manual Safety considerations WARNING Read these Safety considerations for Installation carefully be- work. Installation must be done in accordance with this fore installing an air conditioner or heat pump. After complet- installation manual. Improper installation could result in ing the installation, make sure that the unit operates properly during the startup operation. -
Page 91: Codes And Regulations
EDUS371704-N Installation Manual CAUTION Corroding copper pipes or soldered parts may result in refrigerant leakage. (c) Near machinery emitting electromagnetic waves. Do not allow children to play on or around the unit or it the control system and cause the unit to malfunction. may result in injury. - Page 92 Installation Manual EDUS371704-N REYQ72TATJU REYQ288TATJU REYQ72TAYDU REYQ288TAYDU REYQ96TATJU REYQ312TATJU REYQ96TAYDU REYQ312TAYDU REYQ120TATJU REYQ336TATJU REYQ120TAYDU REYQ336TAYDU REYQ144TATJU REYQ360TATJU REYQ144TAYDU REYQ360TAYDU VRVIV System air conditioner REYQ168TATJU REYQ384TATJU REYQ168TAYDU REYQ384TAYDU Installation Manual REYQ192TATJU REYQ408TATJU REYQ192TAYDU REYQ408TAYDU REYQ216TATJU REYQ432TATJU REYQ216TAYDU REYQ432TAYDU REYQ240TATJU REYQ456TATJU REYQ240TAYDU REYQ456TAYDU REYQ264TATJU REYQ264TAYDU...
-
Page 93: Introduction
EDUS371704-N Installation Manual 1. Introduction 1.1. General information inverter driven, heat pump system. Outdoor unit Refrigerant piping Branch Selector unit VRV indoor unit Cool/Heat selector (single Branch Selector unit only) User interface (dedicated depending on indoor unit type) To install the outdoor unit, the following accessory parts are also User interface (wireless, dedicated depending on indoor unit type) required. -
Page 94: Indoor Capacity Range
Installation Manual EDUS371704-N 1.3. Indoor capacity range Name Clamp (1) Clamp (2) Clamp (3) Vinyl tube Manuals, etc. 7 pcs. 1 pc. 1 pc. 5 pcs. 1 pc. each Operation Manual <Outdoor unit> Installation Manual ..... 36-93 Shape INDICATION label... -
Page 95: Main Components
EDUS371704-N Installation Manual It is therefore recommended to install the equipment and electric wires 3.2. keeping proper distances away from stereo equipment, personal computers, etc tions. 3.3. Main components For main components and function of the main components, refer to 4. -
Page 96: Selecting A Location In Cold Climates
Installation Manual EDUS371704-N 4.3. Selecting a location in cold climates 5. Dimensions and service space 5.1. Dimensions of outdoor unit NOTE REYQ72T When operating the unit in a low outdoor ambient temperature, be sure to follow the instructions described below. The following images are for reference only. -
Page 97: Service Space
EDUS371704-N Installation Manual 5.2. Service space <Front side> <Suction side> The space around the unit is adequate for servicing and the minimum Service and choose one of the possibilities). space or more or more 59 in. (1500 mm) 19-5/8 in. (500 mm) In case of an installation site where sides A+B+C+D have obsta- cles, the wall heights of sides A+C have no impact on service space of sides B+D on service space dimensions. -
Page 98: Inspecting, Handling And Unpacking The Unit
Installation Manual EDUS371704-N 6. Inspecting, handling and unpacking the unit 6.3. Unpacking 6.1. Inspection CAUTION At delivery, the unit must be checked and any damage must be re- ported immediately to the carrier’s claims agent. Remove the unit from its packing material. 6.2. -
Page 99: Method For Removing Shipping Plates
EDUS371704-N Installation Manual The height of the foundation must be at least 5-7/8 in. (150 mm ) 6.5. Method for removing shipping plates The shipping plates installed over the compressor legs for protecting In heavy snowfall areas, this height should be increased, depending the unit during transport must be removed. -
Page 100: Refrigerant Pipe Size And Allowable Pipe Length
Installation Manual EDUS371704-N 7. Refrigerant pipe size and allowable pipe length 7.3. Selection of piping size Determine the proper size referring to following tables and reference NOTE When installing the VRV outdoor unit in combination with the VRV DVS DOAS air handling unit, refer to the DVS DOAS Installation manual. 7.1. -
Page 101: Selection Of Refrigerant Branch Kits
EDUS371704-N Installation Manual 7.3.2. Piping between refrigerant branch kits or refrigerant branch kits and Branch Selector units: D joint b - see 7.3. Selection of piping size), select the proper branch kit model based on the total capacity of all indoor units connected Choose from the following table in accordance with the indoor unit after the refrigerant branch. -
Page 102: System Piping (Length) Limitations
Installation Manual EDUS371704-N 7.5. Outdoor unit : Branch Selector unit (multi) : Indoor units (cooling/heating First outdoor unit Outdoor unit selectable) : Branch Selector unit (single) multi connection : Indoor unit (cooling only) piping kit (*1) (*3) REFNET joint (A-E) (*1) “... - Page 103 EDUS371704-N Installation Manual Actual piping length 7 : a+b+c+ From outdoor unit (*4) to indoor unit (1000 m) allowable length multi connection pip- Actual piping length Outdoor unit ing kit to outdoor unit (in a multi system) From outdoor unit to Height difference indoor unit Actual piping length X Height difference between indoor units (H2)
- Page 104 Installation Manual EDUS371704-N Necessary conditions Upsize the liquid pipes b, c, d, e, f and g in the refrigerant branch kit for the indoor unit beyond 130 ft. (40 m). lows: If upsizing is impossible, the condi- 3/8 in. (9.5 mm) 1/2 in.
-
Page 105: Precautions On Refrigerant Piping
EDUS371704-N Installation Manual 8. Precautions on refrigerant piping Do not allow anything other than the designated refrigerant to get refrigerant gas leaks while working on the unit, ventilate the room thoroughly right away. Use R410A only when adding refrigerant. 1 Refrigerant piping Installation tools: Make sure to use installation tools (gauge manifold, charge hose, 2 Part to be brazed... - Page 106 Installation Manual EDUS371704-N Use the following procedure to remove the pinched piping: WARNING 1 Remove the valve cover and make sure that the stop valves are fully closed. the stop valves mounting plate with a protective plate to prevent from 1 Service port and service port cover 2 Stop valve...
- Page 107 EDUS371704-N Installation Manual Only proceed with piping work after considering the limitations on Remove the knockout hole on the bottom frame and lead out the installing listed here and in the chapter 8.2. Connecting the refriger- piping from the bottom frame. delivered with the kit.
-
Page 108: Guidelines For Handling Stop Valve
Installation Manual EDUS371704-N 2 Installation of the multi connection piping kit. create a rise of 8 in. (200 mm) or more in the suction gas and high/ low pressure gas line within a length of 6.5 ft. (2 m) from the kit. To indoor units Piping between outdoor units >... -
Page 109: Field Wiring
EDUS371704-N Installation Manual 8.3.2. How to use the stop valve After handling the stop valve, make sure to tighten the stop valve cover securely. For the tightening torque, refer to 8.3.2. How to use Tightening torques the stop valve. Stop Check for refrigerant leaks after tightening the stop valve cover. -
Page 110: Power Circuit, Safety Device And Cable Requirements
Installation Manual EDUS371704-N 9.2. Wiring connection example for whole system parts (terminal for power wiring, terminal for transmission wiring and ground terminal). mentary blackout or the power goes on and off while the product is operating, attach a reverse-phase protection circuit locally. Running the product in reverse-phase may break the compressor and other parts. -
Page 111: Leading Wire Procedure
EDUS371704-N Installation Manual 9.3. Leading wire procedure 9.4. Transmission wiring connection procedure The power wiring and ground wiring are passed out from the power wiring hole on the front (knock hole). tween outdoor unit and indoor unit, outdoor unit and outdoor unit of The transmission wiring is passed out from the wiring hole (knock other system, outdoor unit and outdoor unit of same system. -
Page 112: Power Wiring Connection Procedure
Installation Manual EDUS371704-N 9.5. Power wiring connection procedure Between outdoor unit and Branch Selector (indoor) unit Between outdoor unit and outdoor unit of other systems Be sure to connect the power supply wiring to the power supply ter- Between outdoor unit and DOAS unit minal block and hold it in place using the included clamp as shown The L1, L2 and L3 phases of the power wiring should be secured separately to the hook using the included clamp (1). -
Page 113: Procedure For Wiring Inside Units
EDUS371704-N Installation Manual 9.6. Procedure for Wiring Inside Units CAUTION Be sure to use crimp-style terminal with insulating sleeves for con- mission wiring using the included clamp (1), (2) and (3). Wire so that the ground wiring does not come into contact with the Power wire Crimp-style terminal compressor lead wiring. -
Page 114: Air Tight Test And Vacuum Drying
Installation Manual EDUS371704-N Precautions when knocking out knockout holes To punch out a knockout hole, hit it with a hammer. Open an appropriate hole as needed. After knocking out the holes, trim off the burr, then we recommend you to paint the edges and areas around the edges using the repair paint to prevent rusting. -
Page 115: Pipe Insulation
EDUS371704-N Installation Manual If there is a pressure drop, check for leaks, make repairs and perform 12. Checking of device and installation conditions the air tight test again. Be sure to check the followings. For those doing electrical work 1 Make sure there is no faulty transmission wiring or loosening of a nut. -
Page 116: Operating The Push Buttons And Dip Switches On The Printed Circuit Board
Installation Manual EDUS371704-N 1 Front panel 2 Inspection door 3 Main printed circuit board with 3 seven-segment display and 3 push buttons When no trouble occurs: lighted as indicated (8-10 minutes). Operate the switches and push buttons with an insulated stick (such as a closed ballpoint pen) to avoid touching of live parts. -
Page 117: Outdoor Unit
EDUS371704-N Installation Manual 13.2.2. Operating the DIP switches By operating the DIP switches it is possible to: nected to the system. What to do with DIP switch DS1 Result: mode 1 setting 10 is addressed and selected, return value is Cool/Heat selector (refer to the manual of the Cool/ monitored information. -
Page 118: Calculating The Additional Refrigerant Charge
Installation Manual EDUS371704-N 14.2. Calculating the additional refrigerant charge Parameter [D] Indoor unit FXMQ type NOTE capacity The refrigerant charge of the system must be less than 210 lbs. type (100 kg). This means that in case the calculated total refrigerant Refrigerant charge is equal to or more than 209 lbs. -
Page 119: Method For Adding Refrigerant
EDUS371704-N Installation Manual 14.3. Method for adding refrigerant 14.3.1. Flow chart Step 1 Calculate additional refrigerant charge amount: R (lbs. (kg)) Step 2+3 Close valves C and A Open valve B to the liquid line Disconnect the manifold from the suction gas line and the high/low pressure gas line Step 4a Refrigerant overcharge happened, recover... - Page 120 Installation Manual EDUS371704-N << Continuation of previous page Heating charging Cooling charging (“ 22” startup control) (“ 02” startup control) (“ 23” waiting for stable heating) (“ 03” waiting for stable cooling) “ 23 “ 03 Push BS2 within 5 minutes Push BS2 within 5 minutes Open valve A Open valve A...
- Page 121 EDUS371704-N Installation Manual If the additional refrigerant amount is smaller than 22 lbs. (10 kg), NOTE If the power of some units is turned off, the charging procedure can- below. If the additional refrigerant charge is larger than 22 lbs. (10 kg), In case of a multiple outdoor system, turn on the power of all out- perform step 3 till the end of the procedure.
- Page 122 Installation Manual EDUS371704-N - If the unit indicates , or , the ambient conditions are NOTE The refrigerant charging port is connected to the piping inside the automatic charging procedure. unit. The unit’s internal piping is already factory charged with refrig- INFORMATION erant, so be careful when connecting the charge hose.
-
Page 123: Checks Before Initial Start Up
EDUS371704-N Installation Manual Perform the test procedure as described in 15.4.2. Test operation on 14.3.4. Checks after adding refrigerant Are all stop valves open? Is the amount of refrigerant, that has been added, recorded on the INFORMATION refrigerant charge label? When a malfunction is detected during the procedure (e.g., in case of closed stop valve), a malfunction code will be displayed. - Page 124 Installation Manual EDUS371704-N 9 Stop valves Low noise operation can be set in mode 2. There are two Be sure that all stop valves are open. methods to activate low noise operation of the outdoor unit system. 10 Damaged equipment Check the inside of the unit on damaged components or squeezed pipes.
- Page 125 EDUS371704-N Installation Manual 15.2.2. Mode 2 If the system needs to be running under low noise opera- value is possible. tion or under power consumption limitation conditions when In general, normal operation can be resumed without special interven- changed. This setting will only be effective when the optional Default value=0.
- Page 126 Installation Manual EDUS371704-N consumption limitation) Default value=2. If the system always needs to be running under power Value Start time automatic low noise consumption limitation conditions, this setting activates and [2-26] 8:00 p.m. applied continuously. The level is according to the table. 10:00 p.m.
- Page 127 EDUS371704-N Installation Manual Default value=1. Default value=1. In case the outdoor unit is installed in the lowest position Value Cooling comfort setting (indoor units are installed on a higher position than outdoor [2-81] units) and the height difference between the highest indoor Mild (default) Other changes/limitations to the circuit apply, for more information see 7.5.
- Page 128 Installation Manual EDUS371704-N much heating under high outdoor ambient temperatures (e.g., 59°F To activate the powerful comfort setting under heating opera- (15°C)) as under low outdoor ambient temperatures (e.g., 23°F (–5°C)). Using this idea, the system automatically starts decreasing its re- frigerant temperature, automatically reducing the delivered capacity Quick Overshoot (during heating operation) or undershoot (during cooling...
- Page 129 EDUS371704-N Installation Manual Example: Automatic mode during cooling Example: Automatic mode during cooling 100% 100% 120°F (49°C) 115°F (46°C) 43°F (6°C) 37°F (3°C) 95°F (35°C) 36°F (2°C) A Actual load curve A Virtual load curve (default automatic mode peak capacity) B Virtual load curve (initial capacity automatic mode) B Load curve C Virtual target value (initial evaporation temperature...
-
Page 130: Test Operation
Installation Manual EDUS371704-N No matter which control is selected, variations on the behavior of the INFORMATION system are still possible due to protection controls to keep the unit operating under reliable conditions. The intentional target, however, put may be higher. This phenomenon originates from the compressor that requires a 50 hour run elapse before reaching smooth operation consumption and comfort, depending on the application type. -
Page 131: Malfunction Code List
EDUS371704-N Installation Manual The test operation is automatically carried out, the outdoor unit 15.4.3. Correcting after abnormal completion of the test display will indicate and the indication Test operation and operation Under centralized control will display on the user interface of The test operation is only completed if there is no malfunction code indoor units. - Page 132 Installation Manual EDUS371704-N Malfunction code Contents Solution Main Sub code code Master/sub 1/sub 2 01/02/03 Reverse connection of high/low pressure gas pipe and Check connection of high/low pressure gas pipe and suction gas pipe of Branch Selector unit. suction gas pipe. 01/03/05 Discharge temperature too high (R2T/R21T/R22T): Open stop valves.
- Page 133 EDUS371704-N Installation Manual Malfunction code Contents Solution Main Sub code code Master/sub 1/sub 2 06/08/10 Low pressure sensor malfunction: open circuit Check connection on printed circuit board or actuator. (S1NPL)-A1P (X31A) 07/09/11 Low pressure sensor malfunction: short circuit Check connection on printed circuit board or actuator. (S1NPL)-A1P (X31A) 14/15/16 Transmission trouble.
- Page 134 Installation Manual EDUS371704-N Malfunction code Contents Solution Main Sub code code Master/sub 1/sub 2 Connection malfunction over indoor units or type Check if other indoor units have malfunction and con- mismatch (R407C, Mini-split, etc). Correct the units combination. Assembly defect of indoor, Branch Selector and Check and modify the number of indoor units that outdoor units (e.g.
-
Page 135: Operation Of The Unit
EDUS371704-N Installation Manual For details refer to the wiring diagram labelled on the back of the 16. Operation of the unit Once the units are installed and test operation of outdoor units, Pay attention to the fan. It is dangerous to inspect the unit while the the system can start. -
Page 136: Disposal Requirements
Installation Manual EDUS371704-N the refrigerant from the system). Pay special attention to places, such as basements etc., where refrigerant can stay, since refrigerant is heavier than air. Procedure for checking maximum concentration 2 below and take whatever action is necessary to comply. 1 Calculate the amount of refrigerant (lbs. - Page 140 Improper installation can result in water or refrigerant leakage, electrical shock, fire or explosion. Use only those parts and accessories supplied or specified by Daikin. Ask a qualified installer or contractor to install those parts and accessories. Use of unauthorized parts and accessories or improper installation of parts and accessories can result in water or refrigerant leakage, electrical shock, fire or explosion.
Need help?
Do you have a question about the REYQ-TAYDU and is the answer not in the manual?
Questions and answers