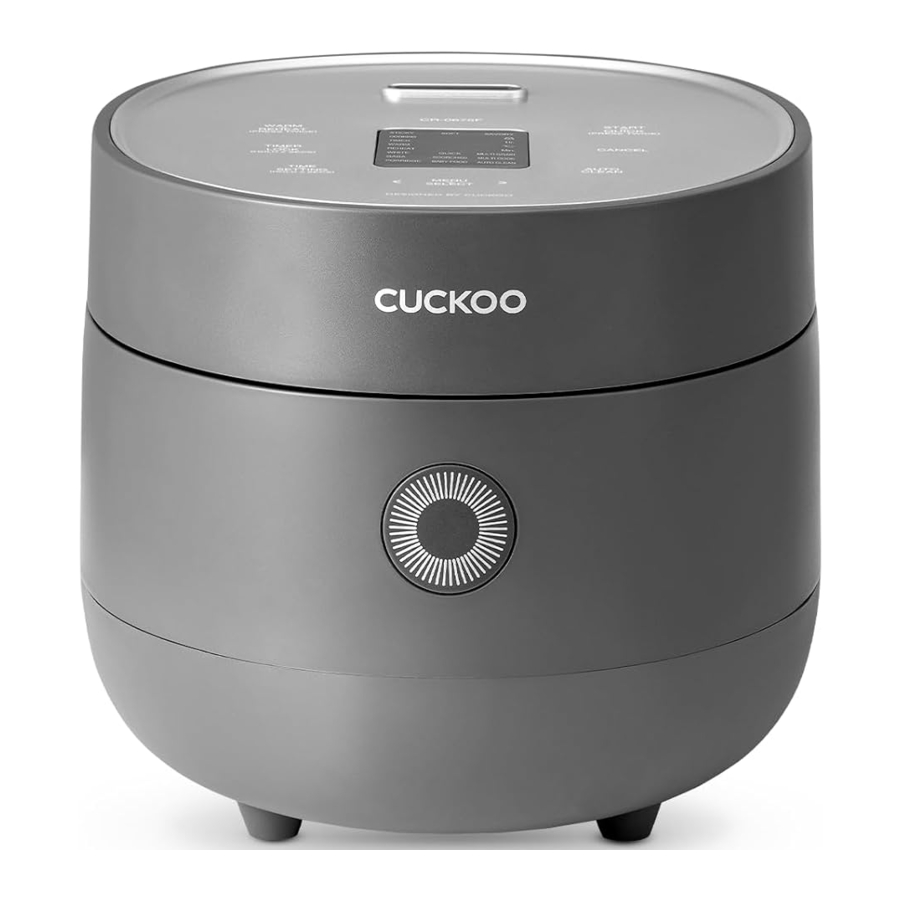
Cuckoo CR-0675F Series Manual
- User manual (52 pages) ,
- User manual (24 pages)
Advertisement
- 1 SHORT CORS INSTRUCTIONS
- 2 SPECIFICATIONS
- 3 NAME OF EACH PART
- 4 HOW TO CLEAN AND MAINTAIN
- 5 NAME AND FUNCTION OF EACH PART / ERROR CORD AND POSSIBLE CAUSE
- 6 PREPERATIONS FOR COOKING
- 7 HOW TO COOK
- 8 HOW TO USE "SCORCHED RICE"
- 9 HOW TO CUSTOMIZE YOUR RICE AND FLAVOR
- 10 HOW TO USE "GABA RICE"
- 11 HOW TO USE "MULTI COOK"
- 12 HOW TO USE "BABY FOOD"
- 13 HOW TO USE TIMER FUNCTION
- 14 TO KEEP COOKED RICE WARM AND TASTY
- 15 Troubleshooting
- 16 IMPORTANT SAFEGUARDS
- 17 SAFETY PRECAUTIONS
- 18 Documents / Resources
SHORT CORS INSTRUCTIONS
 Note:
Note:
- A short power-supply cord (or cord set) is to be provided to reduce the hazards resulting from becoming entangled in or tripping over a longer cord.
- Longer cord set or extension cords are available and may be used if care is exercised in their use.
- If a long cord set or extension cord is used.
- the marked electrical rating of the cord set or extension cord should be at least as great as the electrical rating of the appliance.
- if the appliance is of the grounded type, the extension cord should be a grounding-type three-wire cord, and
- the longer cord should be arranged so that it will not drape over the counter top or tabletop where it can be pulled on by children or tripped over accidentally.
This appliance has a polarized plug: (one blade is wider than the other).
As a safety feature, this plug will fit in a polarized outlet only only one way.
If the plug does not fit fully in the outlet, reverse the plug.
If it still does not fit, contact a qualified electrician.
Do not attempt to defeat this safety feature.

During use, the internal parts of the rice cooker and the area around the steam vent are hot.
Keep out of reach of children to avoid possible injury.
SPECIFICATIONS
| Model Name | CR-0675F | |
| Power Supply | AC 120V(AC Only), 60Hz | |
| Power Consumption (Approx) W | Cooking | 580W |
| Keeping Warm | 80W | |
| Cooking Capacity (Cups) | WHITE | 1~6 cups |
| WHITE QUICK | 1~4 cups | |
| MULTI GRAIN | 1~4 cups | |
| GABA | 1~4 cups | |
| SCORCHED | 2~4 cups | |
| Thick Porridge | 1~1.5 cups | |
| Thin Porridge | 0.5~1 cups | |
| Power Cord Length | 4 ft (1.2m) | |
| Dimension | Length | 12.75 in (32.3㎝) |
| Width | 9.4 in (23.8㎝) | |
| Height | 8.5 in (21.5㎝) | |
| Weight | 7.75 lb (3.5Kg) | |
NAME OF EACH PART

Accessories

How to assemble the steam cap
- As shown in the picture, fit the rubber gasket into the groove and insert it.


- Insert the steam cap into the hole first and then combine it.
![]()

- Fasten the steam cap clamp.
![]()
*The detaching method is in the reverse order of attaching

HOW TO CLEAN AND MAINTAIN
- Negligent cleaning may cause a bad smell while keeping the rice warm. Clean the lid frequently (Clean the rice cooker after pulling out the plug and waiting until the main body cools.)
- Wipe the main body and the lid with a dry dishcloth. Do not use any harsh chemicals such as bleach or thinners.
- The rice water left on the inner lid or in the inner pot may form a starch film but it is harmless.

Wipe any extra food material or moisture from the outside of the inner pot. Using a rough sponge, brush or abrasive material may result in the chipping of the non-stick coating.

If rice water remains on the inner lid, wipe the lid with a dry dishcloth. Since the edge of the lid is made of metal, clean it with care.

Condensation is designed to be gathered where the lid and the body of the unit connect. After using your cooker, wipe this area with a dry cloth.

If food material sticks to the temperature detector or thermal plate, remove it by using a moist cloth.
Do not clean the inner pot with any sharp cutlery (fork, spoons, chopsticks, etc.). This will cause the coating to chip or peel off.
How to Attach and detach the detachable lid

As shown in the picture on the right, you can attach it by holding the handle marked with the arrow with your thumb and index finger.
► when attaching the steam cap, press the steam cap firmly into the lid like in the picture to the left.
Before installing the detachable lid, make sure that the steam cap has been attached. If the steam cap is not attached, the detachable lid cannot be attached.
- How to Detach the Detachable Lid
![]()

- Gently pull the detachable cover.
- Push the Detachable Cover lever upwards with the other hand, and gently pull the Detachable Cover. Then, it will be detached.
- How to Attach the Detachable Lid
- Referring to the photo, push the detachable cover gently to the lid for attaching.
![]()

- Attach the detachable cover on the same direction as the phrase in the photo.
![]()

Because the detachable lid is hot during cooking or just after cooking, detach the lid after it cools down.
Considering the safety of the product and consumers, it has been designed that the lid will not be closed if the detachable lid is not attached. Be sure to attach the detachable lid before use.
NAME AND FUNCTION OF EACH PART / ERROR CORD AND POSSIBLE CAUSE
Name and function of each part

※ After plug the power cord and do nothing, display will show as above which indicate that the appliance is in 'Standby' mode. (Menus on 'Standby' mode display may differ as per customer setting)

※ Press 'Cancel' button to enter 'Standby' mode.
※ Press the button until you hear the buzzer sound. The image of display may different with actual display.
Error Code and Possible Cause
When the appliance has any problem or incorrectly used, below marks will show up.

Inner Pot is not inserted.

Temperature sensor problem ("_" will blink) (Consult the service center and dealer)

When the operation don't finish for a long time. (Consult the service center and dealer)

This indicates that there is a problem with the internal memory of MICOM. (Consult the service center and dealer)

This indicates that there is a problem with the external memory of MICOM. (Consult the service center and dealer)

This indicates that there is a problem with the environment sensor. (Consult the service center and dealer)

If the touch button is pressed for more than 8seconds, an error is displayed.
PREPERATIONS FOR COOKING
- Clean the inner pot and remove any moisture.
![]()

- Clean the Inner Pot with a soft dishcloth.
- Using a rough sponge may cause damage to the surface of the Inner Pot.
- Measure the rice correctly with a measuring cup.
![]()

- Recommended serving: 1 full cup of rice equals to one person. (Example: 2 cups for 2 persons, 4 cups for 4 persons)
- Clean the rice in a separate container until the water becomes clear.
- Put rinsed rice into the inner pot.
- Adjust the water amount in accordance with the menu.
- Place the inner pot on a flat surface and adjust the water amount up to the water level line.
- The water level line is marked on the inner pot.
- Adjustment of water height
- WHITE, WHITE QUICK, SCORCHED: Adjust water based on 'WHITE' water level line.
Max.6 persons for WHITE are available.
Max.4 persons for WHITE QUICK, SCORCHED are available. - MULTI GRAIN/GABA: Adjust water base on "Mixed/Brown, GABA" water level line. Max.4 persons for MULTI GRAIN and GABA are available
- Thick Porridge: Adjust water base on "THICK PORR." water level line. Max. 1.5 persons for porridge are available
- Thin Porridge: Adjust water base on "THIN PORR." water level line.
Max. 1 persons for porridge are available
- WHITE, WHITE QUICK, SCORCHED: Adjust water based on 'WHITE' water level line.
※ To cook hard grains such as beans or red beans, presoak or boil them first and cook on the Mixed Rice mode.
For 6 persons (1.08L) product

- To cook sticky rice or for old rice:
Pour more water than the required water level - To cook rice for 4people (4measuring cups):
Pour water up to water level 4. - When the rice is presoaked sufficiently or to overcook rice:
Pour less water than the required water level
- Put the inner pot into the main body and cover the inner lid.
Completely insert the inner pot with care.
- If alien materials like rice are attached to the bottom of the inner pot, rice may not cook or the cooker may not work correctly.
HOW TO COOK
- Press the "MENU/SELECT" button to select your desired cooking mode.
- Whenever the Menu/Selection button is pressed, the cooking options will be highlighted in sequential order from WHITE RICE→ WHITE RICE QUICK→ MULTIGRAIN→ GABA RICE→ SCORCHED → MULTI COOK→ PORRIDGE → BABY FOOD→ AUTO CLEAN.
- After WHITE RICE, MULTI GRAIN, GABA RICE settings have been used, your appliance will memorize your preference. Skip this step and press START/QUICK.
![]()
ex) Selection of WHITE rice

- Press the "START/QUICK" button to start cooking
![]()
ex) Cooking WHITE rice

- Press the TIME/SETTING button while WHITE RICE or MULTI GRAIN is selected, you can set your customized rice preference
- Rice Steaming (ex: WHITE RICE)
- When a number appears on the display it indicates how much time is left in the cooking cycle. The time generally indicates that it has started the rice steaming process and will finished in the time displayed.
- The finish time may vary depending on the menu.
![]()
ex) 10 mins of remaining time.

- Completion
- When cooking is completed, the cooker will beep and the KEEP WARM function will start.
- When cooking is complete, fluff the rice using the rice scoop. This will allow the rice to release the additional moisture and prevent odors from occurring as well discoloration.
![]()

| Cooking Time by Menu | ||||||||||
| MENU \ Category | WHITE RICE | WHITE RICE QUICK | MULTI GRAIN | GABA RICE | SCORCHED RICE | Thick Porridge | Thin Porridge | BABY FOOD | MULTI COOK | AUTO CLEAN |
| Capacity | 1~6 Persons | 1~4 Persons | 1~4 Persons | 1~4 Persons | 1~4 Persons | 1~1.5 Cups | 0.5~1 Cups | Refer to HOW TO USE "BABY FOOD" | Refer to HOW TO USE "MULTI COOK" | Up to 'WHITE rice' water level 2 line |
| Cooking Time | Approx. 36~54 Min | Approx. 28~36 Min | Approx. 58~63 Min | Approx. 63~87 Min | Approx. 49~63 Min | Approx. 63~72 Min | Approx. 55~74 Min | Approx. 24 Min | ||
How to use the cooking menus
| WHITE RICE | For short grain White Rice. | MULTI GRAIN | When you cook long rice or brown rice |
| GABA RICE | It is used when you want to eat brown rice or germinated brown rice. | SCORCHED RICE | For scorched rice. |
| MULTI COOK | To cook porridge, soup, tea, etc. by using the low temperature cooking function. | Porridge | It is used to cook various kinds of porridge. |
| BABY FOOD | To make a variety of Baby Food. | AUTO CLEAN | When removing any smells or sterilizing your appliance after cooking or warming. |
| WHITE RICE QUICK (Turbo function) |
| ||
Be sure to empty the dew dish located on the back side of the appliance after cooking.
The searing effect
When cooking the rice, it can become slightly yellow at the bottom of the Inner Pot, but this is normal. This is more prevalent in the "Preset" than just using the regular cooking options. It does not mean the appliance is defective.
How to use Automatic steam Cleaning function?

Add water to level 2 and then close the cover.
Method 1. Select the Automatic Steam Cleaning menu by pressing "Menu/Selection" button, and press "START/QUICK" button.
Method 2. Press the "Auto Clean" button in standby mode, and press "START/QUICK" button.
HOW TO USE "SCORCHED RICE"
How to use the SCORCHED RICE function
- Select the "SCORCHED RICE" by pressing the Menu/Selection button.
- Press the START/QUICK button to start cooking.
- Once cooking is complete, open the lid, scoop out the rice and enjoy your SCORCHED RICE.
- The SCORCHED RICE mode can serve up to 4 persons.
- Set the amount of water for cooking "WHITE rice."
- Do not wash the rice too clean for cooking. (Enough to opaque water)
- For SCORCHED RICE, place rice and water in the Inner Pot and leave it for about 30 minutes with the lid closed before cooking.
How to make your rice crispier in SCORCHED RICE
SCORCHED RICE menu option adds additional heat to the bottom of the inner pot causing the rice to become crispy. To make the rice crispier, follow the instructions below:

- Press and hold the TIME/SETTING button for 2 seconds while in Standby to enter into settings. Once in settings, press 3 more times to get to SCORCHED.
- Press the "<>" on the MENU/SELECT button until "On" appears. Once "On" appears, push either WARM/REHEAT or START/QUICK to save the setting.
- If you press CANCEL or do not press any button, the setting will be canceled and return to standby.
- To turn off the extra crispiness, repeat steps 1 and 2, but instead of selecting "On", select "--".
- When this product is shipped, this function is not preset. Set the function, if necessary.
HOW TO CUSTOMIZE YOUR RICE AND FLAVOR
How to customize your rice flavor and texture
This additional setting allows you to select a different texture or flavor profile while in White or multigrAin.

- To change your rice or flavor, select either WHITE or MULTIGRAIN.
- Once selected, press the TIME/SETTING button, this will allow you to select from sticky rice, soft rice, and savory rice.
- After selecting the desired rice taste, press the "START/QUICK" button to save the rice flavor and texture, and start cooking.
- After selecting the customized rice taste, press the "WARM/REHEAT" button to save the setting and start keeping warm.
Cuckoo Customized Cooking function
While cooking you can control the heating temperature (both high and low) depending on your preference.
Initialization is set up "  " get step by step as the case may be.
- High step: for cooking cereals, soft-boiled rice.
- Low step: for cooking the year's crop of rice.
How to use "Customized cooking function"
- Enter Warming Temperature Mode by pressing TIME/SETTING button for 2 seconds, and then enter "Customized Cooking function" setting mode by pressing the TIME/SETTING button twice. Available cooking options will be displayed in the initial "Customized Cooking function" settings.
- When you enter the "Customized cooking function" setting mode, the screen on the right is displayed.
![]()
- Select the temperature increase or decrease with the "MENU/SELECT" button and then press the "WARM/REHEAT" button or the "START/QUICK" button.

- If you press the "MENU/SELECT" button, the selection is repeated in the order of 0→ 1→ 2→ 3→ -3→ -2→ -1→ 0.
- After entering the "Customized cooking function" setting mode, if you do not press any button or just press the Cancel button, the function will be canceled and return to the standby mode.
When this product is shipped, this Cooking function is set to be at the level of 0. Set it if necessary.
- Menu adjustable with Customized Cooking: WHITE RICE, WHITE RICE QUICK, MULTI GRAIN, GABA RICE
HOW TO USE "GABA RICE"
What is germinated brown rice(gAbA rice)?
Brown rice has more nutrients than white rice. However, brown rice is tougher and harder to disgest. The GABA menu option boosts the amino acid in germinated brown rice and makes it softer so it can be easily digested.
Features of germinated brown rice
Germinated brown rice(GABA rice) promotes healthier nutrients and enhances taste. Germinated Brown rice also improves digestibility.
- Enhanced taste
- Better digestion and rich in nutrients
- Rich with dietary fiber
- Germinated brown rice(GABA rice) has rich GABA(Gamma Amino Butryc Acid)
GABA promotes metabolic efficiency in the liver and kidneys, lowers blood pressure, promotes brain function – these effects have been proved by medical studies
How to use the gAbA rice function
- In order to promote germination, soak Brown Rice for 16 hours in water. Before using the "GABA" cooking mode
- Rinse Brown Rice and place in a container, pour enough water to cover the rice.
- Soak for 16 hours (do not exceed the 16 hour limit). After the 16 hours, make sure to rinse the soaked rice again being careful not to disturbing the germinated sprouts on the grain.
- Unique smell may be generated according to the soaking time of pre-germination.
- After rinsing the soaked rice, pour rice into Inner Pot. Pour appropriated volume of water, and use "GABA" menu.
- In summer or in a warmer climate, odor may be present.
- Press "Menu/Selection" button to select "GABA".
- When the "GABA" is selected,"0 Hr." is indicated in the display.
![]()

- Press "TIME/SETTING" button to set time.
- If you press the "TIME/SETTING" button while selecting the GABA rice menu, the germination time is selected repeatedly in the order of 0 hour → 3 hours → 0 hour.
- Press the "START/QUICK" button.
![]()

- Pressing "START/QUICK" button will begin the "GABA"process, after which. cooking will begin immediately.
- During "GABA" mode, "Cooking" indicator will be lit together with the germination time left.
How to use the timer for gAbA rice
- Select GABA by pressing the "MENU/SELECT"button.
- Press "TIME/SETTING" button to set the time for GABA to be at "0 Hr". Press "TIMER"button to set the completing time for the menu. (In case of GABA, the preset cannot be set in 3 Hr. If you want preset the time, set the timer at "0 Hr" and set the time.)
- Press "TIME/SETTING"button to set the completing time for the menu.
- Press "TIMER/LOCK" or "START/QUICK"button.
- After setting the preset, if you do not press any button for 7 seconds, the preset starts.
Precautions for the gAbA rice mode
- If smaller germ is preferred, select the GABA Rice mode without the pre-germination step, set the time, and press Pressure Cook/Turbo button to cook (nutritions does not vary significantly by the size of germs).
- Keep the time short under hot weather. The extended time of germination in the high temperature can cause unpleasant smells.
- The GABA Rice mode serves up to 4 persons.
- Tap water can be used but drinkable water is recommended. For the best results, avoid using boiled water or cooled boiled water for germination.
- The result of germination can vary depending on the conditions of Brown Rice.
- Germinated brown rice(GABA rice) can vary depending on the Brown Rice. Use brown rice within 1 year from harvest. Avoid using brown rice thas has long been since it is polished. - On the GABA Rice mode, the timer is not available with 3H. Preset the GABA Rice mode after selecting the brown rice mode first.
- The cooking results can vary depending on the type of brown rice. You can adjust the amount of water to cook or use the Customized Cooking function.
- The sprouts may not be visible depending on the environments.
Button locking function
This is a function that allows you to set a button lock when cleaning or to prevent malfunction caused by children or pets.
- How to Set Button Lock
- When you press the "TIMER/LOCK" button for 2 seconds or longer in the standby mode, during cooking, presetting, keeping warm, or reheating, the button will be locked.
- When the button is locked, "
![]() " flashes on the screen.
" flashes on the screen. - While the button has been locked, if you press any button except for the "TIMER/LOCK" button, a buzzer will sound.
- How to Unlock the Button
- While the button has been locked, if the "TIMER/LOCK" button is pressed for 2 seconds or longer, the button will be unlocked.
- While the button has been locked, if you power off and then on, the button will be unlocked.
HOW TO USE "MULTI COOK"
How to use multi cook function and timer
- Press the "MENU/SELECT" button and select Multi cook menu.
- If the Multi cook menu is selected, the display shows '20 Mins'.
![]()

- Press the "TIME/SETTING" button to set the desired time.
- The default is 20 minutes, and can be set from 10 minutes to one and a half hours. (It increases or decreases in 5-minute increments.)
![]()

- Press the "START/QUICK" button to start the Multi cook menu.
- If the Multi cook function starts, the cooking status is marked and the remaining time is shown on the display.
- How to set timer the Multi cook function.
- Press the "MENU/SELECT" button to select the Multi cook menu. Press the "TIME/SETTING" button to set the Multi cook time.
- Press the "TIMER/LOCK" button.
- Set the timer by pressing the "TIME/SETTING" button. Upon setting multi-cook for one hour or longer, the timer can be set from 2 hours.
- Press the "TIMER/LOCK" button or the "START/QUICK" button. After setting the timer, if you do not press any button for 7 seconds, the timer starts.
How to use multi cook
| Food | Menu | Preparations | Procedure |
| Pumpkin Porridge | Multi cook | 500g pumpkins peeled, 100g glutinous rice flour, a teaspoon of sugar, a teaspoon of salt |
|
| Vegetable porridge | Rice of 1 person, 50g carrots, 50g onions, 30g green onions, a teaspoon of salt, a teaspoon of pepper |
| |
| Vegetable soup | 30g carrots, 30g onions, 30g potatoes, 30g Mushrooms, 20g sirloins, 100g vichyssoise, 1 tablespoon olive oil, a tea spoon of salt |
| |
| Jujube Tea | 180g jujubes, ½grain of gingers, a teaspoon of honey |
|
HOW TO USE "BABY FOOD"
How to use baby food and timer
- Press the "MENU/SELECT" button to select Baby Food.
- When Baby Food is selected, the display shows '10 minutes'.
![]()

- Press the "TIME/SETTING" button to set the desired time.
- If you press the "TIME/SETTING"button, the time increases by 5 minutes.
- The Baby Food time can be configured from 10 to 50 minutes.
- Press the "START/QUICK" button to start the Baby Food menu.
- Once the Baby Food menu starts, the cooking status and the remaining time is displayed.
- How to set timer the Baby Food menu.
- Press the "MENU/SELECT" button to select the Baby Food menu. Press the "TIME/SETTING" button to set the Baby Food time.
- Press the "TIMER/LOCK" button.
- Set the timer by pressing the "TIME/SETTING" button.
- Press the "TIMER/LOCK" button or the "START/QUICK" button. After setting the timer, if you do not press any button for 7 seconds, the timer starts.
Baby food how to Cook
| Food | Menu | Preparations | Procedure |
| Sweet Potato & Apple Porridge | Baby Food | Sweet potato 70g, apple 70g, water 1cup and some honey |
|
| Soft rice with tuna and vegetable | 50g of rice, 30g of tuna(can), 10g of bell pepper, 10g of carrot, 1/2 cup of water, butter, little bit of laver powder |
|
HOW TO USE TIMER FUNCTION
How to use the timer function
- Press the TIMER/LOCK button.
- Select your desired menu with the MENU/SELECT button.
Selectable menu: WHITE RICE, MULTI GRAIN, SCORCHED RICE, PORRIDGE, AUTO CLEAN
![]()
- Set the time by pressing the TIME/SETTING button.
Each time you press the time button, 10 minutes will be added to the time.
The range of available preset time is from 1h to 12h 50mins. - Press "START/QUICK" button.
![]()
After setting the timer, if you do not press any button for 7 seconds, the timer starts. When the timer setting is completed, "TIMER," and "COOKING" flash 3 times and then light up. After the timer time, cooking is completed. (The time can vary depending on the amount and conditions.)


Precautions for the timer function
- When you use the Timer function
Dry or old rice are not recommended for cooking.
Follow the provided instructions and refer to the water level on the Inner Pot for best results when adding water.
Rice may be scorched or suffer the searing effect if the amount of the content is excessive or the timer time is inordinately long. - The change of Time
To change the time, cancel the mode and restart. - If setup time is shorter than timer time
If setup time is shorter than timer time, the cooking starts immediately.
TO KEEP COOKED RICE WARM AND TASTY
After cooking
- If you want to have warmer rice, press the Keep Warm/Reheat button to start the mode. You can have warm and nice rice after 9 minutes of reheating.


|
 Hr." will appear on the screen. (Warming hot rice with the appliance when it is not heated can cause unpleasant smell or discoloration.)
Precautions for warming
| It is recommended to evenly stir the cooked rice after cooking. (For a small quantity of rice, pile the rice in the center area of the Inner Pot to keep warm) | Keeping rice warm for a long time may cause the rice to be discolored or develop an oder. So, it is recommended to keep warm for less than 12 hours. Pressurized boiled rice is espeically vulnerable to discoloration than normally cooked cooked rice. 24 hours after keeping the cooked rice warm, the passed time blinks on the display. |
| Do not keep rice scooper or wooden scooper in the Inner Pot while keeping the cooked rice warm. This may cause bacteria to formulate. | |
| Do not mix too small quantity of rice or leftovers with the rice under keeping warm. Doing so may develop an odeor. (Use a microwave oven for the cold rice.) | The warming status of mixed/Brown Rice is worse than plain rice. Do not keep it warm if at all possible. The rice on the edge of the Inner Pot or the bottom of the steam outlet may turn plain or swollen. In this case, stir and mix the rice. |
How to adjust the Warm temperature
if the "warm" temperature setting is incorrect, there is a chance the rice can become discolored.
If this happens, simply adjust the temperature. For more detailed information, please consult the customer service.
- To enter the "Warm Temp" setting mode in Standby mode, press the TIME/SETTING button for 3 seconds.
- When entering the "Warm Temperature" setting mode, the currently set warming temperature is displayed.
![]()
- Select the desired warming temperature with the MENU/SELECT button and then press the WARM/REHEAT button or the START/QUICK button.
- After entering the "Warm Temperature" setting mode, if you do not press any button or just press the Cancel button, the function will be canceled and return to the standby mode.

※ When this product is shipped, the temperature is set to "74°C". Set this function if necessary.
To adjust the warm temperature while keeping rice warm, press the "TIME/SETTING" button for over 2 seconds and adjust the warm temperature.
- In case of sour smell or soft-boiled rice: The warming temperature might be too low. Raise the temperature by 1-2℃.
- In case of yellowish or dry rice: The warming temperature might be too high. Lower the temperature by 1-2℃.
How to adjust the Customized Warm function
This function is used in case that water runs when you open the inner lid while keeping warm or the cooked rice is swelled up.
- Press the TIME/SETTING button in the standby mode for more than 2 seconds to enter the "Warm Temperature" setting mode, and then press the TIME/SETTING button once to enter the "Customized Warm function" setting mode.
![]()
- When you enter the "Customized Warm function" setting mode, the currently set custom warming state is displayed.
- Select the desired customized step with the MENU/SELECT button and then press the WARM/REHEAT button or the START/QUICK button.
- After entering the "Customized Warm function" setting mode, if you do not press any button or just press the Cancel button, the function will be canceled and return to the standby mode.
![]()


※ When this product is shipped, this function is set to be the level of 0. Set it if necessary.
- If water flows out too much when the lid is opened, set the customized warm option 1 to 2 levels higher.
- If the rice on the edge is overcooked, set the customized warm option 1 to 2 levels higher.
Unpleasant smells during warming
- Keep the appliance clean. Be sure to keep the lid clean to avoid any unpleasant smell.
- Even though the product looks clean, bacteria can inhabit all over the place and cause odor when keeping warm. If it smells too much, add approximately water for 2 servings of white rice to the scale in the inner pot and put 1 tablespoon of vinegar, close the lid, select Auto Clean, and press the START/QUICK button. After completion, wash the inner pot thoroughly.
- To prevent any unpleasant smell, be sure to wash the Inner Pot after cooking foods with strong flavors.
Troubleshooting
▼ In case the appliance does not work properly, check the following lists before consulting the dealer
| Symptoms | Things to check | Possible solution |
| Rice is not cooked |
|
|
| Rice is half-cooked or layered. |
|
|
| Beans (Mixed Rice) are half-cooked. |
|
|
| If rice is overcooked or too starchy. |
|
|
| If water overflows during cooking. |
|
|
| When it smells during warming. |
|
|
 is displayed. is displayed. | • " " indicats that there is a problem with the Temperature Sensor. " indicats that there is a problem with the Temperature Sensor. |
|
| Warming time blinks during warming. |
|
|
| If brown rice is not properly germinated. |
|
|
 appears on the screen. appears on the screen. |
|
|
| Rice is too scorched. |
|
|
| Unpleasant smells occur after cooking or during warming. |
|
|
| "Ticking" sounds is heard during cooking, warming or reheating |
|
|
 appears on the screen. appears on the screen. |
|
|
 appears on the screen appears on the screen |
|
|
 appears on the screen without cooking being finished for a long time. appears on the screen without cooking being finished for a long time. |
|
|
| When the button is not pressed |
|
|
| When the lid cannot be closed  |
|
|
| If steam comes out of the lid |
|
|
 " appears on the display by pressing the START/QUICK button after selecting the desired mode.
 "on the screen indicates that the appliance is not properly functioning due to a problem such as a disconnection of the heater or shortage of power. Unplug the appliance and consult the dealer and customer service center.
IMPORTANT SAFEGUARDS
- Read all instructions.
- Do not touch hot surfaces. Use handles or knobs.
- To protect against electrical shock do not immerse cord, plugs, or (state specific part or parts in question) in water or other liquid.
- Close supervision is necessary when any appliance is used by or near children.
- Unplug from outlet when not in use and before cleaning. Allow to cool before putting on or taking off parts.
- Do not operate any appliance with a damaged cord or plug or after the appliance malfunctions or has been damaged in any manner. Return appliance to the nearest authorized service facility for examination, repair, or adjustment.
- The use of accessory attachments not recommended by the appliance manufacturer may cause injuries.
- Do not use outdoors (this item may be omitted if the product is specifically intended for outdoor use).
- Do not let cord hang over edge of table or counter, or touch hot surfaces.
- Do not place on or near a hot gas or electric burner, or in a heated oven.
- Extreme caution must be used when moving an appliance containing hot oil or other hot liquids.
- Always attach plug to appliance first, then plug cord into the wall outlet. To disconnect, turn any control to "off", then remove plug from wall outlet.
- Do not use appliance for other than intended use.
- Save these Instructions.
- Do not immerse in water.
- Risk of electric shock.
- Cook only removable container.
SAFETY PRECAUTIONS
- Read the following product safety guide carefully to prevent any accidents and/or serious danger.
- 'Warning' and 'Caution' are different as follows.

This means that the action it describes may result in death or severe injury.
This means that the action it describes may result in injury or property damage.

- This sign is intended to remind and alert that something may cause problems under the certain situation.
- Please read and follow the instruction to avoid any harmful situation.
 Indicates a prohibition
Indicates an instruction
Do not
Do not use damaged power cord, plug, or loose socket.

- Please check the power cord frequently for damage.
- Serious damage can cause electric shock or fire.
- If the plug is damaged, contact the dealer or a service center.
Do not cover the automatic steam outlet or pressure weight with your hand or face.

- It can cause burns.
- Especially be careful to keep it out of children's reach.
Do not use the cooker near hot things such as stove, gas stove or direct ray of light.

- It can cause an electric shock, fire, deformation, malfunction, or discoloration. Please check the power cord and plug frequently.
Don't spray or put any insecticides or chemicals.

- It can cause an electric shock or fire.
- If cockroaches or any insects get inside the cooker, please call a dealer or a service center.
Please pay careful attention against water and chemicals.

- It can cause an electric shock or fire.
Do not open the top cover while in heating and cooking.

- It can cause burns.
Use a single socket with the rated current above 15A.

- Using several lines in one socket can cause overheating or fire. Please check the power cord and plug frequently.
- Use an extension cord with the rated current above 15A.
Please pay careful attention against water and chemicals
- It can cause an electric shock or fire.
Do not use any other metal objects such as aluminum foil on the outer surface of the inner pot
- It can cause an electric shock or fire
Do not use pots that are not designed for the cooker.
do not use abnormal pot and do not use without the innerpot.

- It can cause an electric shock or fire.
Do not use it without the inner pot.

- It can cause electric shock or malfunction.
- Do not pour rice or water without the inner pot.
- If rice or water gets in then do not turn the product over or shake it, please contact the dealer or service center.
Do not cover the automatic steam outlet with a duster, a towel, or apron, etc.

- It can cause deformation or a breakdown.
- It can cause an explosion by pressure.
Do not bend, tie, or pull the power cord by force.

- It can cause an electric shock or short circuit resulting in fire. Please check the power cord and plug frequently.
Remove an alien substance on plug with the clean cloth.
- It can cause fire.
Do not change, extend or connect the power cord without the advice of a technical expert.
- It can cause an electric shock or fire.
Do not move the product by pulling or using the power cord.
- Electric short might cause fire.
Do not clean the product with water or any liquid types.

- It can cause an electric shock or fire.
- If it contacts water, please separate power cord and contact dealer or service center.
Do not alter, reassemble, disassemble or repair.

- It can cause fire, electric shock or injury.
- For repair, contact dealer or the service center.
Do not insert metal objects such as pins and wires or any other external substances in the automatic steam exhaust outlet or any other slot.

- It can cause an electric shock or fire.
- Especially be careful to keep it out of reach of children.
Do not put a foreign substance such as a metal stick into the steam cap or the product. (extra caution with children.)
- It can cause an electric shock or fire.
The device is not intended for use by anyone (including children) who lacks physical, sensory, mental skills, or experience and knowledge that cannot safely use the device without supervision or instruction.

- Don't let children play with the device.
- It causes electric shock, burns, etc.
Do not over unplug and plug the power cord over and over.
- It can cause an electric shock or fire.
Be careful both plug and power cord not to be shocked by animal attack or sharp metal materials.

- Damages by impact can cause an electric shock or fire.
Indication
Do not use on a rice chest or a shelf.

- Do not press the power code between furniture. It can cause an electric shock resulting in fire.
- When use on furniture automatic steam releasing can cause damage, fire and an electric shock.
Attach the detachable Cover without fail before you use the product.

- If you use the product without the Detachable Cover, it may cause electric shock, fire, steam leak and a disorder of the product
Be careful not to harm your hand when opening the cover.

- Do not leave the cover opened. It might cause accident.
Do not
When you pull out the power plug, don't pull the power cord. Please, surely pull out the power plug.

- It can cause an electric shock.
Please clean the body and other parts after cooking.

- If you cook and warm rice after making a steamed dish, the smell may permeate the rice.
- Refer to How to clean and maintain and clean it before use.
During warming, close the lid and then connect thepower supply.
- It may cause a smell of rice or discoloration.
To clean the product, wait until it cools down.
- It may cause a burn by touching the heated part.
Clean any dust or alien substance off the temperature sensor, heating plate and inner pot.

- It can cause a system problem or fire.
Do not press heavy things on the power cord.
- It can cause an electric shock or fire.
Do not plug or pull out the power cord with wet hands.
- If you pull the Power Plug out with a wet hand, it may cause electric shock.
- If you excessively pull the Power Plug, it may cause electrical short and electric shock due to a disorder at the Power Cord.
Connect the power connector (figure 1) to the main body first and then connect the power plug (figure 2) to the outlet

- It can cause an electric shock or fire
Wipe off any excessive water on the cooker after cooking.

- It can cause odor and discoloration. Wipe off water that is left behind from dew.
When you clean the product, wash the inner Pot and the detachable Cover with neutral detergent, and dry them. Wipe the product with a dry and clean cloth, and dry it.

Be careful with burn due to the steam and heat from the inside of the product immediately after cooking.
Insert the power connector into the power plug.

Do not
Use the product on the flat surfaces do not use on a cushion. Please avoid using it on an unstable location prone to falling down.

- It can cause malfunction or a fire. Please check the power cord and plug frequently.
Don't use for various purpose for inner pot. And do not heat up the inner pot on the gas stove.

- It can cause deformation of the inner pot.
- It can cause to spill the inner coating.
Do not place on rough top or tilted top.

- It can cause burns or breakdowns.
- Be careful to install the power cord to pass without disruption.
Do not use near wall or furniture. otherwise wall or furnituremay be damaged, discolored or deformed due to vapor or heat.
- When using in drawer cabinet etc, ensure that no vapor entersit.
Recommended type of scrubber to clean the inner pot (inside, outside)
| Available | Unavailable |
| Cotton wool, Sponge wool, Microfiber, Mesh wool | Blue, Green scrubber (Abrasive material), Iron, Stain wool, Other metallic materials |
- If you do not use a suitable scrubber for cleaning, the inner pot coating may be damaged and peeled off.
Please use the cooker for it's intended purpose.
- It can cause malfunction or smell.
Please contact a dealer or service center when there is a strange smell or smoke.
- First pull out the power cord. And contact dealer or the service center.
Use AC 120v only.
- It can cause electric shock and fire.
- It can cause malfunctions.
Please pull out the plug when not in use.

- It can cause electric shocks or fire.
Do not touch the metallic surface of the inner pot and heatingplate after cooking or warming

- You may get a burn by heat.
Please call customer service if the inner pot coating peels off.

- Inner pot coating may wear away after long use.
- When cleaning the inner pot, do not use tough scrubber, metallic scrubber, brush, abrasive metallic etc.
Do not use the cooker near magnetic field.

- It can cause burns or breakdown.
Do not drop or impact the cooker.

- It can cause a safety problem.
- Do not apply excessive force to or drop the product.
Do not fill the inner Pot for more than its maximum capacity.
- It may cause a malfunction leading to issues such as overflow of contents or poor cooking.
if possible, only use warming function when cooking white rice. other foods are easily discolored.
Take out the rice shovel before keeping warm.
- It may cause odor or discoloration.
Documents / ResourcesDownload manual
Here you can download full pdf version of manual, it may contain additional safety instructions, warranty information, FCC rules, etc.
Advertisement


Need help?
Do you have a question about the CR-0675F Series and is the answer not in the manual?
Questions and answers