Advertisement
- 1 Introduction
- 2 Safety Measures and Precautions for use
- 3 Product Overview
-
4
Quick Start Guide
- 4.1 Removable Dosing Tube with Spring Loaded Knocker
- 4.2 Power Button & RPM Control
- 4.3 Hopper
- 4.4 Hopper Finger Guard + Single Dose Feed
- 4.5 Active Ionisation Needles
- 4.6 Grind Settings & Calibration
- 4.7 flat Burr Grind Settings Chart
- 4.8 flat Burr Assembly
- 4.9 flat Burr Reassembly
- 4.10 Burr Seasoning
- 4.11 Cleaning and Maintenance
- 5 Technical Specifications
- 6 Documents / Resources
Introduction
The Varia VS6 is the latest entry to the commercial/prosumer space of grinders. VS6 features a revolutionary new internal assembly that allows for interchangeability between a 58mm flat burr to a 63mm conical burr set within seconds and with no calibration needed. (Conical burr set purchased separately).
The VS6 uses a 300W brushless AC motor system with planetary gearbox and Variable RPM control from 500-1600RPM. The VS6 also features active static ionization needles to reduce static and a removable dosing chute.
In addition, the VS6 features increased capacity to 60-80 grams and is still a zero retention-focused grinder with our 76.5-degree sloped architecture.
Safety Measures and Precautions for use
Please take time to familiarise yourself with the Varia VS6 safety measures and operational guidelines detailed within this manual before operating the grinder.

ELECTRICAL SAFETY: Failure to follow these instructions/guidelines can result in electrical shock, fire, or cause serious injury and/or death.
- POWER OUTLET REQUIREMENT: that your operating power supply and plug outlet type are compatible with the Varia VS6 purchased.
- POWER CORD SAFETY: Do not allow the power cord to hang over the bench-top, as small children could suffer injury if the grinder is accidentally pulled over onto them. If there is any damage to the power supply cord or any other parts, please stop using this product immediately. If the power supply cord is damaged, it must be replaced by the manufacturer, its service agent or a qualified service person. DO NOT disassemble, damage or replace any part or component of this product at will or use it forcibly.
- SHARP BURRS: The grinding burrs are very sharp. Take extra care when cleaning, servicing, or removing this part. See section "Cleaning and Maintenance" for detailed instructions. Never leave a burr set unattended on a bench, and always store securely out of reach of children and within a securely sealed protective container.
- FINGER GUARD: Ensure the finger guard is installed within the bean hopper before operating the grinder.
- FINGER SAFETY: Do not put your fingers into the hopper or grounds chute when the motor is running or when the power supply is plugged in.
- HAIR/CLOTHING SAFETY: Never allow long hair or loose clothing near the burr housing.
- HOPPER USAGE: Only operate with the hopper in place. Exposed burrs can cause injury to fingers, even if burrs are stationary.
- CLEANING SAFETY: Do not attempt to clean burrs while the grinder is switched on or operational. If cleaning with a vacuum cleaner, please remove the 4 x springs below the outer burr.
- FOREIGN OBJECTS: Coffee beans may contain foreign objects such as stones or pebbles. Always check your supply for any foreign objects before grinding.
- PRE-GROUND COFFEE: Do not attempt to grind pre-ground coffee.
- COMMERCIAL USE: Varia VS6 is designed for commercial and home use. Continuous use is allowed.
- OPERATING ENVIRONMENT: Place your Varia VS6 body and power cord in a dry area, free from any potential water/liquid situations or any heat sources. Varia VS6 MUST BE plugged into a grounded (earthed) power outlet.
- INTENDED USE: Do not use Varia VS6 for anything other than its intended purpose. This appliance is only intended for use in the home and workplace. Never use Varia VS6 for grinding grains, spices, nuts, or other food items.
- UTENSIL USAGE: Do not insert any utensils into the Varia VS6.
- WARRANTY DISCLAIMER: The one-year warranty will be voided if the product is used for something other than its intended purpose, and it could result in injury.
- PACKAGING DISPOSAL: Please take care in disposing of all packaging materials responsibly. Plastic bags are a potential hazard as they can suffocate young children if not disposed of safely.
- POWER OUTLET REQUIREMENT: Varia VS6 MUST BE plugged into a grounded (earthed) power outlet.
- BOTTOM COVER: Do not move the bottom cover from the main body or disassemble the grinder in any way other than to replace the burr set. Unauthorized repairs will void the manufacturer's warranty.
- OPERATING ENVIRONMENT: Do not operate Varia VS6 in the presence of explosive and/or flammable fumes, heat sources, or naked flames.
- DO NOT let the power cord touch hot surfaces. DO NOT remove ground earth prong from plug.
- UNAUTHORIZED REPAIRS: Only authorized service agents are permitted to repair Varia VS6. Unauthorized repairs will void the manufacturer's warranty.
- WE RECOMMEND the motor is switched OFF before loading beans.
- SAFETY FEATURE: VS6 will automatically power off after 30 seconds of completing a grind cycle, if sensors detect NO COFFEE in the grind chamber.
- DO NOT wash any Varia VS6 parts in the DISHWASHER.
- DO NOT operate this product in wet/damp conditions or place Varia VS6 near or onto wet surfaces or into water. Do not operate with wet hands.
- This appliance is not intended for use by persons (including children) with reduced sensory, physical or mental capabilities, or lack of experience and knowledge, unless they have been given supervision or instruction concerning use of the appliance by a person responsible for their safety. Children should be supervised to ensure that they do not play with the appliance.
- This appliance is intended to be used within a household or similar applications such as:
- Staff kitchen areas in shops or hospitality premises, offices, and other working environments.
- Guest houses; by clients in hotels, motels and other residential type environments; bed and breakfast type environments.
- WARRANTY DISCLAIMER: The manufacturer will not be held responsible for any damage resulting from failure to comply with the stated safety measures above.
Failure to follow these instruction/guidelines can result in electrical shock, fire or cause serious injury and or death. The manufacturer will not be held responsible for any damage resulting from failure to comply with the stated safety measures above.
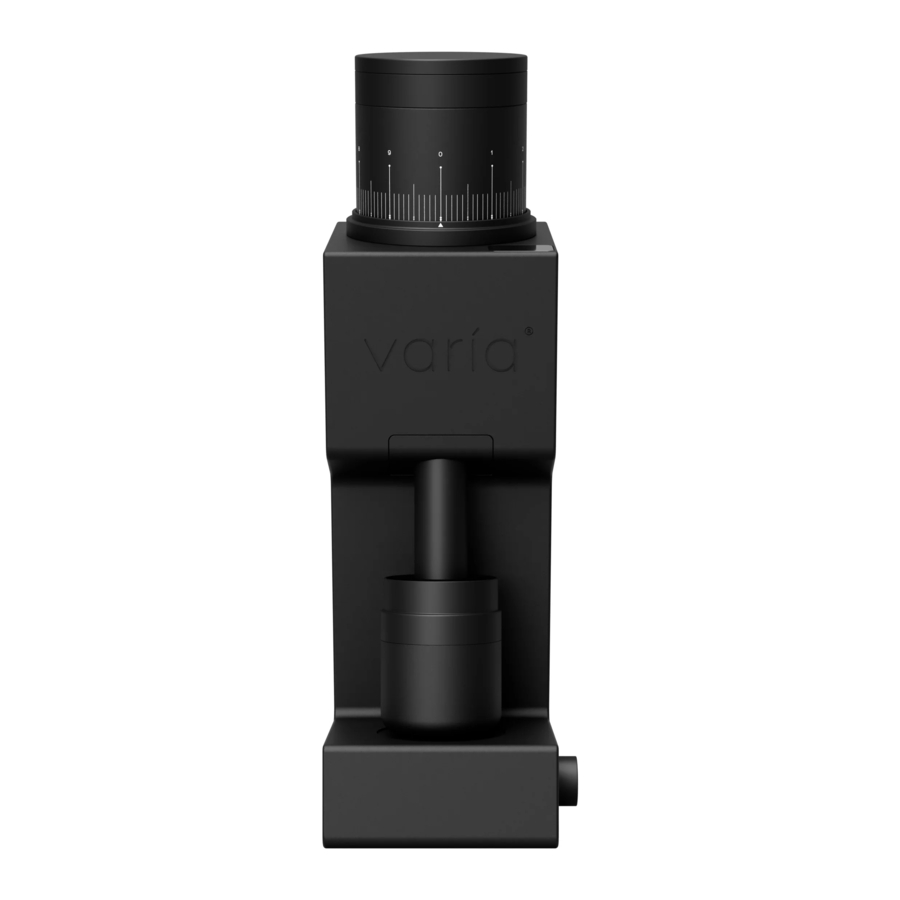
Product Overview
The Varia VS6 is the latest entry to the commercial/prosumer space of grinders. VS6 features a revolutionary new internal assembly that allows for interchangeability between a 58mm flat burr to a 63mm conical burr set within seconds and with no calibration needed. (Conical burr set purchased separately).
The VS6 uses a 300W brushless AC motor system with planetary gearbox and variable RPM control from 500-1600RPM.
Additionally, the VS6 features active static ionization needles to reduce static and a removable dosing chute.
It has an increased capacity of 60- 80 grams and is designed with a zero retention focus and a 76.5-degree sloped architecture.

- Hopper Lid (Magnetic)
- Single Dose Feed Collar
- Hopper
- Hopper Alignment Collar
- RPM Display screen
- Main Body
- Grounds Dosing Chute
- Dosing Cup (Magnetic)
- Magnetic Cup Dock
- Power Switch/RPM control

DO NOT REMOVE BOTTOM COVER FROM MAIN BODY.
ONLY authorised service agents are permitted to repair Varia VS6. Unauthorised repairs will void the manufacturers warranty. In the event that repairs are necessary please contact your point of sale representative or email support@variabrewing.com
Quick Start Guide
- Unboxing the Grinder:
Remove VS6 carry case from transit carton. Safety dispose of carton.
![]()
VS6 case contains;
Grinder Body, Hopper, Dosing Cup, Single Dose Feed Collar, Magnetic Grounds Chute, Hopper Lid, AC Cable, and Spare Parts bag. - Placement:
Place your Varia VS6 into position on a stable/flat work top. Ensure it is level and has acceptable work space on front and sides.
![]()
- Power Requirements:
Check the power requirements for your specific model (100/120V or 220/240V) match your supply.
Check that the power plug is compatible with your power supply output.
Connect the power cord to rear of VS6 - and plug into compatible power outlet and switch on power.
![]()


ENSURE that your power supply voltage is the same as marked on the underside of your VS6. Check the plug type matches your power outlet. NEVER use a plug adapter.
- Check locking nut:
Remove hopper from body (rotate anti-clockwise). Check that the locking nut on the assembly is tight, as vibrations during shipment could cause this to loosen.
![]()
- Hopper Install and calibration:
Carefully replace hopper (rotate clockwise) back onto body grinder body. Care not to cross thread.
To recalibrate your Varia VS6,

- Rotate the hopper in a clockwise direction until you reach '0'.
- This is now your calibration 'zero point'.
- Connect single dose feed collar and hopper lid:
Gently push collar into hopper, aligning to magnets.
Attach Lid using magnets if required.
![]()
Now you are ready to set your grind setting.


DO NOT POWER ON the grinder when the hopper is at its tightest setting as you will cause damage to the burrs.
Removable Dosing Tube with Spring Loaded Knocker
The spring-loaded knocker interface of the VS6 is magnetically attached to the grinder body for easy assembly and disassembly. It is aligned using two rails on each side of the knocker, which correspond to cut outs on the knocker part. To disassemble, simply pull the interface out. To replace, push it back onto the rails until you feel the magnets connect.

FINGER SAFETY: Do not put your fingers into or up inside grounds chute when the motor is running or when the power supply is plugged in.
The VS6 features a removable dosing tube interface, designed for effortless cleaning. Additionally, it includes a built-in spring-loaded knocker to dislodge any loose grounds or static build-up from the dosing chute. To activate the spring-loaded knocker, simply pinch the tube and gently pull it down, then release quickly to allow the tube to recoil back to its starting position, effectively knocking the grounds.

Power Button & RPM Control
The VS6 is equipped with a multifunctional power ON/OFF button, also serving as the RPM control.
To operate the grinder, simply;

- Press once to POWER ON – the LED display will show '0000' then;
- Rotate RPM control dial to the desired RPM. The VS6 will start at 500RPM – with 100RPM adjustments permitted to 1600RPM.
- To POWER OFF the VS6, press the button once more.
Hopper
The VS6 hopper features a automatic (magnetic) power cut-off safety system. When the hopper is removed from the grinder chamber thread, the sensor will cut-off power to the motor, this precaution ensures your safety while disassembling the grinder.
We recommend that you always disconnect the power supply plug during disassembly of the grinder hopper and burr chamber.
SAFETY FEATURE: The grinder will automatically power off after 30 seconds of completing a grind cycle, if sensors detect NO COFFEE in the grind chamber.

Hopper Finger Guard + Single Dose Feed
The VS6 is equipped with a removable lid and a single dose feed collar for added convenience. To assemble, carefully push the single dose feed collar onto the hopper, align to magnets. In highvolume environments, the single dose feed collar can be used independently without the top lid for efficient operation.
NEVER ALLOW fingers, long hair or loose clothing to enter the hopper when the motor is running or when the power supply is plugged in.

Active Ionisation Needles
The VS6 grinder is equipped with active ionisation needles, innovative components designed to enhance the grinding process and improve the quality of your coffee. These needles, positioned within the grinder's grounds chute, serve a crucial role neutralising static electricity that can occur during grinding.
The active ionisation needles work by emitting ions, which counteract the static charge and promote the smooth flow of coffee grounds through the grinder's chute. By reducing static electricity, the needles contribute to a more consistent and uniform grind, ensuring optimal extraction and flavour in every cup of coffee. With the VS6 grinder's active ionisation needles, you can enjoy a superior coffee experience with rich, flavorful brews every time.

Safety Precautions: Active Ionisation Needles
To ensure safe operation and prevent damage to your VS6 grinder, please adhere to the following guidelines regarding the active ionisation needles:
- DO NOT Touch the Needles: Under no circumstances should you touch the active ionisation needles with your fingers or any other objects. These needles are delicate electrical components and should only be handled by qualified technicians.
- Turn Off Power Before Cleaning: Before attempting to clean the grinder, including the active ionisation needles, always ensure that the power to the appliance is turned off. Failure to do so could result in electric shock or damage to the appliance.
- Use Soft Brush for Cleaning: When cleaning the active ionisation needles, use only the soft brush provided with the grinder. Do not use any other cleaning tools or materials, as they may damage the needles or interfere with their function.
- Avoid Contact with Moisture: Keep the active ionisation needles dry at all times. Avoid exposing them to water or any other liquids, as moisture can compromise their electrical properties and pose a risk of electric shock.
- Professional Maintenance Only: If the active ionisation needles require servicing or replacement, contact a qualified technician or the manufacturer for assistance. Do not attempt to repair or modify the needles yourself, as this could result in injury or further damage to the appliance.
By following these safety precautions, you can maintain the integrity of the active ionisation needles and enjoy consistent grinding performance from your VS6 grinder.
Grind Settings & Calibration
- To calibrate your Varia VS6, rotate the hopper in a clock-wise direction until you reach "0" (zero point). (When factory new, this maximum tightness may vary from a seasoned thread after use).
DO NOT turn the grinder on while the hopper is set to the tightest setting as this could cause damage to the burrs as a result of the edges contacting. - This is now your calibration "zero point" and you are now ready to set your grind setting (see flat Burr Grind Settings Chart).
Grind Size Adjustment Markings
The hopper of the VS6 is equipped with an intuitive adjustment marking system for grind settings. Each small line on the hopper represents a 5-micron adjustment in particle size, allowing for precise control over the grind.
Additionally, the VS6 features a revolution counter that tracks each full turn of the hopper, from the finest setting (1 dots) to the coarsest (6 dots). This enables users to quickly navigate to their preferred settings by counting the number of revolutions.

NOTE : After grinding larger grind sizes (suitable for pour over), making a setting adjustment for a finer grind may result in a noise, from the burrs touching - this noise is caused by residual coffee particles present on the burrs. It will not damage the grinder, it's quite normal with all flat burr grinders.
To stop the noise, adjust to a slightly finer setting, then back to desired setting.
flat Burr Grind Settings Chart
The flat Burr can be adjusted to deliver the following grind particle sizes.
- Turkish: 1 to 2
- Espresso: 2 to 5
- Mokapot: 5 to 7
- Pour Over: 7 to 10
- French Press: 10 to 14
- Cold Brew: 14 to 20
NOTE: These settings should only be used as a guide/reference.
Settings for optimal results may differ depending on the bean type, roast degree, coffee dosage and brew method.

DO NOT GRIND FROM 0–1
DO NOT turn the grinder on while the hopper is set to the tightest setting as this could cause damage to the burrs as a result of the edges contacting.
flat Burr Assembly

- Ring bearing
- Upper burr chamber
- Set nut
- flat washer
- Lower burr
- Thin washer
- Driveshaft
 SECURING LOCKING NUT
To securely tighten the locking nut - use the open end wrench to restrain the driveshaft while tightening the locking nut (anti-clockwise direction) using the locking nut wrench.

flat Burr Reassembly

- Place a thin washer F on top of the driveshaft G. Replace the 4 x springs I back into the burr chamber.
- Slide the lower burr E onto the driveshaft G, lining up with the corresponding flat side on the driveshaft G.
- Replace the flat washer D on top of the lower burr.
- Replace the set nut C onto the driveshaft thread and use the locking nut wrench (in an anti-clockwise direction) while restraining the driveshaft with the open wrench, to securely tighten.
- Replace the new or cleaned upper burr B into the burr chamber.
- Replace the ring bearing A on top of the upper burr housing - ensuring this ring bearing fits inside the cavity before the next step.
- Replace the adjustment collar and hopper and tighten the hopper (in a clockwise direction) to "0" zero point.
- Now, dial in your required grind setting.
- Lastly, replace your lid and power supply and you are ready to grind.
Burr Seasoning
Please be aware that your grind setting alignment may change after burr seasoning. Static retention will also be higher than normal until charge is absorbed. This will be reduced after grinding your first 2kg of coffee through the Varia VS6 and as the body discharges any residual static.
The finger guard, designed to keep fingers away from the sharp burrs, must remain intact. Ensure fingers, loose clothing, and long hair are kept a safe distance from the hopper opening while operating or on standby.
Cleaning and Maintenance
Power must be TURNED OFF while cleaning this product. The grinder body and base must NOT be immersed or submerged in water or washed with water to clean. Cleaning grinder body: Please use a moist cloth/towel to wipe the body, ensuring that the cloth/towel is not wet, as no water should enter the body. Ensure that once cleaned, the surfaces are dried again. We recommend you discuss this procedure with your reseller if you are not familiar or confident in replacing a burr set.
While CHANGING or CLEANING BURRS, make sure the following parts are completely brushed/wiped clean of ground coffee: Grind chamber, burrs, bearing, upper burr chamber, flat washer and threads on the set nut, driveshaft, body, and hopper. If NOT brushed clean, an actual 'zero point' may not be attained upon reassembly, resulting in an inaccurate calibration.
PLEASE NOTE that after replacing a burr set, any performance changes to the grind settings will be a result of incorrect disassembly and/or reassembly. In this instance, your warranty will not cover any additional costs related to reinstating the Varia VS6 to factory grind settings and/or performance.
DISCONNECT THE POWER SUPPLY by unplugging VS6 from power socket before cleaning or disassembly.
Technical Specifications
| Manufacturer | Varia Brewing Limited | |
| Model name | Varia – VS6 | |
| Voltage | 100/120V or 220/240V versions | |
| Colour options | Black/White | |
| Burr Size/type | 58mm flat burr | |
| Base material | ADC12 die cast and machined aluminium | |
| Burr material hardness | High nitrogen 420 Stainless Steel SUS420 | |
| Burr life | 250 kilograms | |
| Grind adjustment & scale | Stepless adjustment/(5 Micron) relative vertical burr shift or 0.005mm per increment | |
| Retention (10g Dose) | < 0.1g | |
| Grind speed | 500-1600 RPM | |
| Hopper capacity | 80g | |
| Grinder construction material | ADC12 die cast and machined aluminium | |
| Motor | 300W AC brushless motor | |
| Dimensions | 192 x 130 x 404mm | |
| Weight (Net) | 10.7 kg | |
| VS6 case contains | Grinder Body, Hopper, Dosing Cup, Single Dose Feed Collar, Magnetic Grounds Chute, Hopper Lid, AC Cable, and Spare Parts bag. | |
| Spare Parts bag checklist | 3 x 0.1mm Washers 4 x Chamber Springs 1 x Locking Nut Wrench 1 x Open Wrench (for flat Burr) 1 x Brush 1 x Silicone Bellows 1 x RDT Spray Bottle 4 x Bottom Plate Screws 2 x Spring Loaded Knocker Screws 2 x Spring Loaded Knocker Spring 4 x Silicone Feet | |
Documents / Resources
References
Download manual
Here you can download full pdf version of manual, it may contain additional safety instructions, warranty information, FCC rules, etc.
Advertisement


Need help?
Do you have a question about the VS6 and is the answer not in the manual?
Questions and answers