Advertisement
- 1 LETTER FROM TWOTREES
- 2 SAFETY GUIDELINES
- 3 PRECAUTIONS
- 4 PART LIST
- 5 MAIN PARAMETERS
- 6 ASSEMBLY
- 7 WIRING
- 8 ADJUSTMENT
- 9 REFERENCE OF MATERIALS
- 10 ADJUST THE FOCUS
- 11 MEET YOUR TTS-55 PRO)(TTS-10 PRO)
- 12 HOW TO START?
- 13 CONNECT PC
- 14 GRBL INTRODUCTION
- 15 TEST BEFORE USE
- 16 APP CONNECTION
- 17 AFTER-SALES SERVICE
- 18 Documents / Resources
LETTER FROM TWOTREES
It's customer-oriented idea, continuous innovation and pursuit of excellence that enable everybody to have wonderful experience in using process. We believe that this manual will be helpful. Hope you enjoy the good time with TwoTrees.
If you have any problems, please feel free to contact us via:
Website: www.twotrees3d.com
Facebook: https://www.facebook.com/twotrees3d
For general inquiry: info@twotrees3d.com
For technical support: service@twotrees3d.com
We will contact you within 24 hours.
SAFETY GUIDELINES

Laser engraving machine cannot directly carve or cut material that reflects the light, may cause injury. The product has a high engraving speed and is not recommended for industrial cutting. And the laser head is consumable. Do not operate the laser head directly with your hands. Please wear goggles. The laser diode is a sensitive component, please prevent static damage. (This product has an electrostatic protection design.but there is still a possibility of damage). We do not assume any responsibility for any improper use of this equipment or any damage or damage caused by improper use. The operator is obligated to use this laser engraving machine only in accordance with its designated purpose, instructions in its manual, and relevant requirements and regulations.
PRECAUTIONS
 | Avoid looking steadily at the laser, which may damage your eyes. |
 | Avoid touching directly when the machine is working. |
 | You can place a metal plate under the engraved or cut object to prevent your table being burned through. |
 | Avoid combustible object or gas. |
 | Keep it away from children or pregnant women. |
 | Do Not take apart the laser without instructions. |
 | Do Not use it on material that reflects the light. |
 | Protective eyewear should be worn by anyone nearby during use. |
 | Turn off the power when not use. |
 | Nearby objects present a risk of pinching or crushing injury. |
 Please follow the instruction, due to misuse will be at your own risk.
PART LIST


MAIN PARAMETERS
| Model | TTS Pro |
| Machine Size | 570*510*150 mm |
| Machine Weight | 3 kg |
| Engraving Size | 300*300 mm |
| Laser Wavelength | 445±5 nm |
| Engraving Accuracy | 0.1 mm |
| Engraving Speed | 30000mm / min |
| Software Support System | Mac, Windows |
| Material | Aluminum Profile + Plastic Parts |
| Electrical Requirement | (TTS-55PRO12V4ADC)(TTS-10PRO24V4ADC) |
| Laser Power | DB-5500 / DB-10000mW (Optional) |
| File Format | NC,BMP,JPG,PNG,GCODE,ETC |
| Supported Software | LaserGRBL (Windows), Lightburn (Common) |
| Power Type | USA / EU Plug (Optional) |
| Software Support Languages | Chinese, English, Italian, French, German |
| Working Environment | RHTemperature 5-40℃, Humidity 20-60%RH |
| Engraving Method | USB Connect PC, TF Card (APP, Webpage control) |
| Engraving Materials | Wood, Plastic, Paper, Leather, Sponge Paper, Alumina |
| Engraving Mode | Image carving / Text carving / Scanning carving / |
| Contour carving / Pixel carving |
ASSEMBLY
- Install the frames After assembly of frames
Note:
The position of each frame cannot be changed.
The countersunk head pore (the enlarged part) of Y-axis front profile faces inside.

- Install the frames
Screw M5*20 x 4
The countersunk head pore of Y-axis front profile faces inside. And the graduated side faces up. The profile scale is used to measure the sizeof the engraved object.

- Install the frames


- First you need to install the frame while you don't need to tighten the screws;
- Make sure all profiles align.
- Install the foot pads
Screw M5*10 x 4- Push the foot pads in. First tighten the screw M5*10 in blue area, and then ighten the screw M5*20 in green area
Screw M5*20 x 4 - Finally, tighten the M5*20 screws in red area. Note: Please follow the steps above to tighten the M5*20 screws.

- Push the foot pads in. First tighten the screw M5*10 in blue area, and then ighten the screw M5*20 in green area

Check whether the POM wheel of the left and right parts of the Y-axis fits the profile and whether the movement is smooth and there is no jam

Note:
- It is the most appropriate position to feel a little friction between the POM wheel and the profile when rotating the POM wheel.
- If the wheel rotates in the air and does not fit the profile, the eccentric nut can be adjusted clockwise from the direction of the screw head with an open-end wrench.
- Put the synchronous belt of the carriage on the synchronous wheel of the X-axis motor
Carriage and lifting module X1
![]()

- Push the carriage into the X-axis beam
- The carriage pushes into the side of the X-axis white terminal.

- The frame seal is at the bottom, and the cables tobe placed in the seal
![]()
- The wire is between the X-axis beam and the pom wheel
- The carriage pushes into the side of the X-axis white terminal.
- Place the assembled carriage on the machine frame and hand-tighten the screws, then assemble the tensioner.

- Fixed X-axis beam
First screw two M4 * 50 screws to fix X axis beam (not too tight, adjust X axis beam parallel)

- Tensioner Installation
- You need to disassemble the tensioner first, unscrew the hand screw of the tensioner to take out the Tensioner Inner Parts and unscrew the top screw to take out the idler.

- Put the timing belt of the carriage on the idler of the tensioner, and then lock the screw to the inner part of the tensioner

- Push the tensioner internals into the tensioner housing shell (Tensioner has a fixed slot, pay attention to the installation method)

- Lock up the tensioner retaining screws

- You need to disassemble the tensioner first, unscrew the hand screw of the tensioner to take out the Tensioner Inner Parts and unscrew the top screw to take out the idler.


- Adjust the X-axis beam to make sure it is parallel with the front and back frame.
Note: When installing, please make sure that the X-axis beam is parallel to the front and rear beam profiles. You can use the rectangle on the scale for auxiliary adjustment. Without parallelism, the Y-axis will be difficult to move and affect the engraving effect.


- Tighten the X-axis synchronous belt.
Note: Install the laser module at a vertical angle (90°).
Note: Synchronous belt needs to be tightened, otherwise it may cause the problem of engraving misalignment.

Note:

- It is the most appropriate position to feel a little friction between the POM wheel and the profile when rotating the POM wheel.
- If the wheel rotates in the air and does not fit the profile, the eccentric nut can be adjusted clockwise from the direction of the screw head with an open-end wrench.


- Install the bellows holder and Fixed-length column holder


- Install the motherboard box


- Install the bellows


WIRING

Note: Incorrect connection between X-axis and Y1 motor line will lead to abnormal movement.
ADJUSTMENT
Method to adjust the synchronous belts on both sides
If they loose, first loosen the pressing screws on both sides, then fasten the synchronous belt, and push the pressing screws to the corner and tighten them.

REFERENCE OF MATERIALS
For engraving:
| Material | TTS 5.5Pro Speed (mm/min) | TTS 5.5Pro Power (%) | TTS 10Pro Speed (mm/min) | TTS 10Pro Power (%) | Times |
| Plywood | 1500 | 20 | 3000 | 40 | 1 |
| Acrylic | 1500 | 20 | 3000 | 40 | 1 |
| Leather | 3000 | 10 | 6000 | 10 | 1 |
| Electroplated coating | 300 | 100 | 500 | 100 | 1 |
| Powder coating | 1500 | 100 | 3000 | 100 | 1 |
| Anodic alumina | 1500 | 80 | 3000 | 40 | 1 |
| Stainless steel | 1000 | 100 | 1500 | 100 | 1 |
| MDF | 1500 | 60 | 3000 | 60 | 1 |
| Peddle | 1500 | 100 | 3000 | 100 | 1 |
| Plastic sheet | 1500 | 40 | 3000 | 40 | 1 |
| Cardboard | 1500 | 50 | 3000 | 50 | 1 |
For Cutting:
| Material | TTS 5.5Pro Speed (mm/min) | TTS 5.5Pro Times | TTS 10Pro Speed (mm/min) | TTS 10Pro Times | Power (%) |
| Plywood 1mm | 200 | 1 | 100 | 1 | 100 |
| Plywood 2mm | 100 | 1 | 150 | 1 | 100 |
| Plywood 3mm | 100 | 2-3 | 150 | 1-2 | 100 |
| Plywood 4mm | 100 | 2-3 | 150 | 1-2 | 100 |
| Plywood 5mm | 100 | 2-3 | 150 | 3 | 100 |
| Plywood 6mm | 100 | 3-4 | 150 | 2-3 | 100 |
| Plywood 7-8mm | 100 | 3—4 | 150 | 2—3 | 100 |
| Acrylic 1mm | 100 | 1 | 150 | 1 | 100 |
| Acrylic 3mm | 100 | 2-3 | 150 | 1-2 | 100 |
| Acrylic 6mm | 100 | 3-5 | 150 | 2-3 | 100 |
Note:
The energy value is set to 500, and the laser intensity accounts for 50% of the power. The energy value is set to 1000, and the proportion of laser intensity to power is 100%. The larger the energy, the faster the speed can be set. The above parameters only for reference. Due to the different properties of the materials, please adjust the parameter values according to the actual situations.
ADJUST THE FOCUS
TTS-55 PRO

Focus adjustment before engraving: Before engraving, the focus need to be adjusted. The focus needs to be on the surface of the engraved object. It can use a fixed-focus column for auxiliary adjustment. Place the fixed-focus column between the engraved object and the adjustment block, and rotate the Z-axis lifting module to make the laser module stick on the 1st steps of the fixed focus column.
Focus adjustment before cutting: (Be careful of damage to the laser hood by impact)
Before cutting, the focus needs to be in the middle of the fault of the engraved object, so according to different plate thicknesses, the corresponding focus should be set, and the Z-axis lifting module should be rotated to adjust. Assuming the object is 2mm, use the 2nd step of the fixed focus column; The object is 4mm, using the 3rd step of the fixed focus column; The object is 6mm, using the 4th step of the fixed focus column.

TTS-10 PRO

Focus adjustment before engraving: Before engraving, you need to adjust the focus. The focus needs to be on the surface of the engraved object. The height of the fixed-focus column is 23mm. You can use the fixed-focus column for auxiliary adjustment. Place the fixed-focus column between the engraving object and the adjustment block, and rotate the Z axis. The lifting module makes the laser module stick to the fixed focus column; the laser module and the engraving object keep 50mm, and the adjusting block and the engraving object keep 23mm.
Focus adjustment before cutting: (the laser module protective cover needs to be removed)
Before cutting, the focus needs to be in the middle of the fault of the engraved object, so according to different plate thicknesses, the corresponding focus should be set, and the Z-axis lifting module should be rotated to adjust Assuming the object is 2mm, use the second step of the fixed focus column, and keep the adjustment block 22mm from the engraved object. The object is 4mm, the third step of the fixed focus column is used, and the adjustment block is kept 21mm from the engraved object

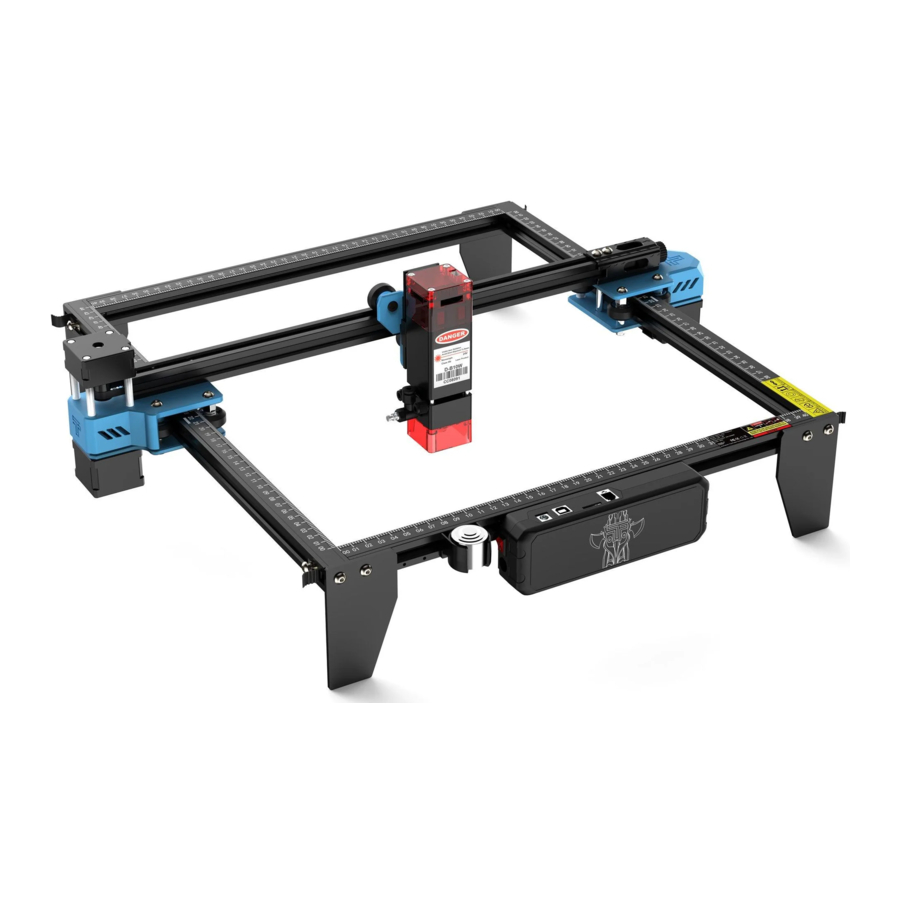
MEET YOUR TTS-55 PRO)(TTS-10 PRO)
Machine Introduction

Motherboard Introduction

HOW TO START?
Assemble the machine
Install the control software on the computer
Install the driver on the computer
Connect the machine to the computer
How to Assemble the machine
- Read the product manual in detail and follow the steps in the manual to assemble the machine.
- Tutorial Video Watch it on Youtube!
www.youtube.com
Search : TWO TREES Official
Watch video
![]()

How to Install control software
Downloaded in LaserGRBL website, it's free.
http://lasergrbl.com/download/ (The installation package is also available on the TF card from the manufacturer)
LaserGRBL For Windows
LightBurn is a paid software, only 30 days for free.
https://lightburnsoftware.com/ (The installation package is also available on the TF card from the manufacturer)
LightBurn For Windows, MAC
How to Install driver on computer
Driver Name: CH340SER.EXE
Where is the program?

- The TF card attached by the manufacturer.
Search: CH340SER - Open the LaserGRBL software on your computer
The "Tools" menu of the LaserGRBL software.
Note: Install the driver unsuccessfully will cause the computer to fail to connect to the machine
![]()

How to connect the Machine & the computer
Operating steps:
- Turn on the machine.
- Connect the machine to the computer with the USB cable.
- Open LaserGRBL software
- In the COM checkbox, choose the COM number of the machine. (usually not COM1)
- In the Baud checkbox, choose 115200.
- Click on the "Connect" button to connect successfully. (detailed operation)
![]()
Please check the back of the manual for
![]()
- Open LightBurn software(Activated)
- Choose "Create manually".
![]()
- Choose "GRBL",NEXT.
![]()
- Choose "Serial/USB".
![]()
- Set the length of the working area.
- Set Origin: Front left.
- Turn off auto "home", NEXT.
![]()
- In the COM checkbox, choose the COM number of the machine. (usually not COM1, MAC not showing COM)
- Choose "Create manually".


Engraving Learning Process!
Learn to use LaserGRBL or lightburn.on websites
Learn to focus laser via manual or video
Test speed and power (Results for different materials)
Communicate and share via Facebook and YouTube
CONNECT PC

- Connect the machine with the computer installed with LaserGRBL software with USB data cable.
- Plug in the power.
- Open LaserGRBL on the computer.
- Select the specific port number and baud rate——115200 (Figure A.10)
- Click the lightning sign. When the lightning sign changes to the red "X" and the direction sign is lit, it indicates that the connection is successful. (Figure A.11) Generally, the COM port does not need to be selected manually, unless multiple serial port devices are connected to the computer, you can find the port of the machine in the device manager of the windows system (as shown in Figure A.09). A simpler way is to try the displayed port number one by one.
Note: If you cannot find the correct port in the "Ports", you may need to Method 1: Click "Tools" in the menu to install CH340 driver (This function is not available in some software versions); Method 2: Copy the "CH340ser. Exe" file in the TF Card (USB flash disk) to the computer and install it.
GRBL INTRODUCTION
- Software Downloading
LaserGRBL is one of the most popular DIY laser engraving software, which can be downloaded in LaserGRBL website http://lasergrbl.com/download/ (The installation package is also available on the TF card from the manufacturer or USB flash disk). Brief introduction: LaserGRBL is easy to use. However, LaserGRBL only supports Windows system (Win XP/Win 7/Win 8/XP/Win 10). For Mac users, you can also choose LightBurn, which is also an impressive engraving software, but it's not free. And this software also supports Windows system.
Note: The engraving machine needs to be connected with the computer during engraving, and the software of the engraving machine cannot be turned off. - Software Installation
Double click the software installation package to start the software installation and click "Next" until the installation is complete.


- Language
Click "Language" on the menu at the top to select the language you need.


- Load Engraving File
Click "File" and "Open File" in turn, as shown in figure 8.1, and then select the graph you want to engrave. LaserGRBL supports files in the formats of NC, BMP, JPG, PNG, etc.


- Set picture parameters, engraving mode and engraving quality.

- LaserGRBL can adjust the sharpness, brightness, contrast, highlight and other properties of the target graph. We can preview window effect during adjustment, and adjust the effect to your satisfaction.
- In the engraving mode, "Line-to-line Tracking" and "1Bit Shaking" can usually be chosen;"1Bit Shaking" is more suitable for carving grayscale graph. Please Choose "Vector Diagram" or "Center Line" if you need cutting.
- Engraving quality essentially refers to the line width of laser scanning. This parameter mainly depends on the size of the laser spot of the engraving machine.
Note: The recommended engraving quality range is 12-15. Different materials have different reactions to laser irradiation, so the specific value depends on the specific engraving material. - At the bottom of the preview window, the graph can also be rotated, mirrored, cut and so on. After completing the above settings, click next to enter the settings of engraving speed, engraving energy, and engraving size.

- Set engraving speed, engraving energy, and engraving size
- The recommended engraving speed is 1000, which is considered to be a relative appropriate value after repeated experiments. Of course, you can increase or decrease this speed according to your preference. A faster engraving speed will save time but lead to the decline in the engraving effect. Slower speed is the opposite.
- In laser mode, there are two instructions: M3 and M4. M4 instruction is recommended for engraving in "1bit jitter" mode, and M3 instruction is recommended for other cases. If you have only M3 instruction on the laser, please check whether the laser mode is used in the GRBL configuration. Please refer to the official instructions of LaserGRBL for GRBL configuration.
- Choice of engraving energy. Choose it according to different materials.
- Finally, set the size and click the "Create" button to complete the setting of all engraving parameters.


Save GCODE file
Click "File" in the menu at the top of the software interface, enter the drop-down menu, and select "Save". Copy the saved.nc file to the TF card and insert the TF card into the engraver to use the file to engrave your work. Use the "MKSLaserTool" software in TF to add preview codes to Gcode files.
TEST BEFORE USE

- Turn on the machine, and connect it to the computer.
- Movement test: Control the machine to move up, down, left and right on the software, to check whether the direction and distance are right.(Fig. A01)
- Laser emission test: Software import custom icons, then click to sent out laser(weak laser). Wear goggles and observe whether the laser module emits blue light.(Fig. A02)
- Test the files in the TF card:
Note: laser will generate heat and glare, which may cause harm. Please follow the instructions to avoid injury.
- After the laser head has been used for a period of time, it is necessary to clean the lens of the light outlet under the laser head to ensure normal cutting ability
- Wiping the lens must be done after the machine is powered off, otherwise the laser will hurt people
- After wiping the lens, please dry it naturally for about 3-5 minutes and wait for the lens to dry before powering it on, otherwise the light will cause the lens to break
- You can watch the video tutorial by scanning the QR code of the manual
APP CONNECTION
The WIFI of this machine is a signal sent by the ESP32 chip of the main board. The machine has been set up when the machine leaves the factory. After the machine is turned on, the main board will send out the WIFI network with the name Laser_XXXXX (XXXXX refers to the serial number of the main board, the serial number of each machine). all different)

- Open the Laser_XXXXX network found by the mobile phone connection, enter the password 12345678, and connect to the network.
- Open the APP and enter the connection options interface. Enter the IP address: 192.168.4.1 and click connect.
- After the APP slicing is completed, you need to insert the TF card into the motherboard when uploading files. If the upload fails, please confirm whether the TF card is normal.
AFTER-SALES SERVICE
The guarantee period is 12 months from the date of purchase.
- Missing/Damaged/Defective Parts Within 7 days of the date of receipt, we will replace any parts for free of charge including shipping fees. After 7 days of the date of receipt, we will replace any parts for free of charge. But you need to pay the shipping fees.
- Customer Damaged Parts: You need to pay for the cost of the parts and the shipping fees.
- Courier company loss, missing, damaged, and defective parts.
- Lost or damaged shipments must be reported to the carrier within the carrier's claim window, and you need to inform us within 7 days of the date of receipt.
- For any parts lost or damaged during shipping, you need to take photos or video and send them to us.
- Once the Carrier dispute is settled, please provide us with all communications with the carrier. It is the customer's responsibility to keep us up to date with ALL communication with the carrier.
- For Missing Parts, you need to fill out a Service Ticket.
- For Damaged Parts, you need to fill out a Service Ticket and send us the photos or video.
- If the part is one of the LCD Panel, Power Supply or Mainboard, you need to ship the part back to us and we will send a new one.
TEL: +0086-0755-23987110
Http: www.twotrees3d.com
E-mail: service@twotrees3d.com
Facebook: https://www.facebook.com/twotrees3d
Address: Room 402, Building 11, No.9 Qilin Road, Nankeng Community,
Bantian Street, Longgang District, Shenzhen, Guangdong, China, 518000
TTS memory card short link: https://bit.ly/3yQAJyt
Youtube channel short link: https://reurl.cc/VjQa1n
Documents / Resources
References
![www.twotrees3d.com]() Twotrees | Home - Twotrees | CNC Routers, Laser Engravers & 3D Printers - Unleash Your Creativity
Twotrees | Home - Twotrees | CNC Routers, Laser Engravers & 3D Printers - Unleash Your Creativity![www.youtube.com]() YouTube
YouTube![lasergrbl.com]() Download – LaserGRBL
Download – LaserGRBL![lightburnsoftware.com]() LightBurn Software
LightBurn Software![bit.ly]() My Files
My Files![reurl.cc]() TWO TREES Official
TWO TREES Official

Download manual
Here you can download full pdf version of manual, it may contain additional safety instructions, warranty information, FCC rules, etc.
Advertisement


Need help?
Do you have a question about the TTS Pro and is the answer not in the manual?
Questions and answers