Samsung HW-K550, HW-K551 Manual
- User manual (578 pages) ,
- User manual (67 pages) ,
- User manual (69 pages)
Advertisement
- 1 CHECKING THE COMPONENTS
- 2 CONNECTING ELECTRICAL POWER
- 3 CONNECTING THE SUBWOOFER TO THE SOUNDBAR MAIN UNIT
- 4 CONNECTING TO YOUR TV
- 5 CONNECTION VIA BLUETOOTH
- 6 CONNECTING TO AN EXTERNAL DEVICE
- 7 SOFTWARE UPDATE
- 8 INSTALLING THE WALL MOUNT
- 9 DETACHING THE SOUNDBAR FROM THE WALL
- 10 REMOTE CONTROL BUTTONS & FEATURES
- 11 TROUBLESHOOTING
- 12 OPEN SOURCE LICENSE NOTICE
- 13 IMPORTANT NOTE ABOUT SERVICE
- 14 SPECIFICATIONS
- 15 SAFETY INFORMATION
- 16 PRECAUTIONS
- 17 Documents / Resources
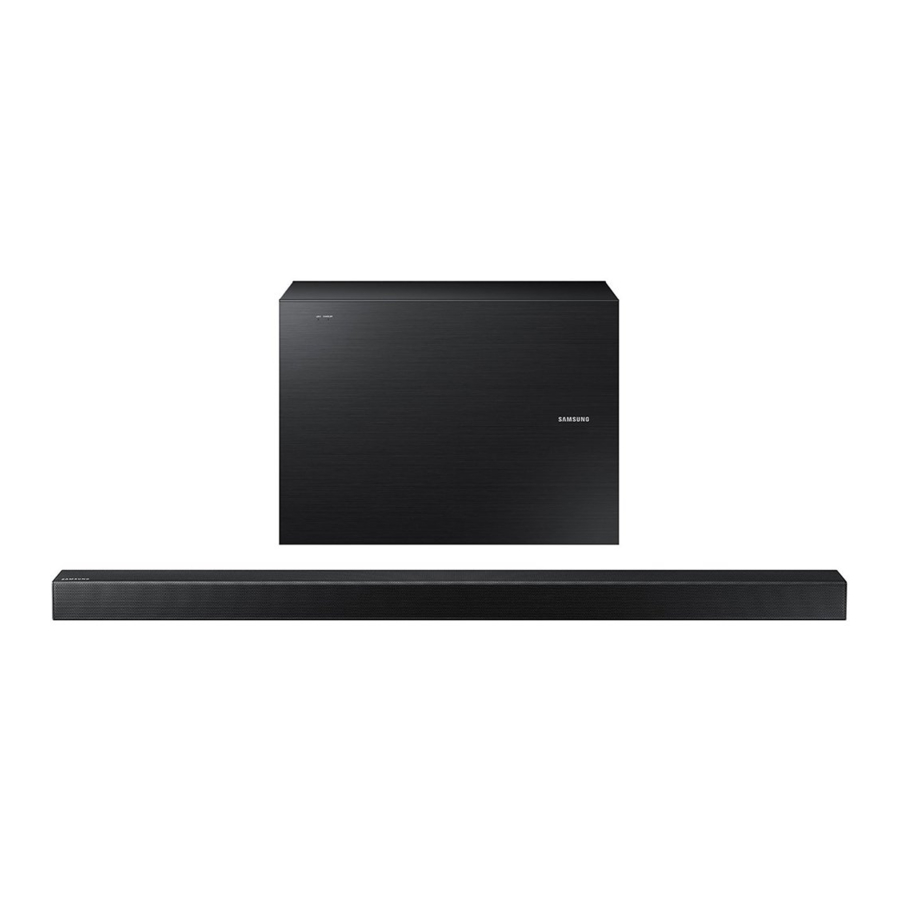
CHECKING THE COMPONENTS

 Micro USB to USB adapter and HDMI cables are sold separately.
To purchase, contact a Samsung Service Center or Samsung Customer Care.
CONNECTING ELECTRICAL POWER
Use the power components (1, 2, 3) to connect the power supplies in the following order: Subwoofer →Soundbar Main Unit
For more information about the power supply and power consumption, refer to the label attached to the product. (Label: Bottom of Soundbar main unit)

Make sure to rest the AC/DC Adapter flat on a table or the floor. If you place the AC/DC Adapter so that it is hanging with the AC cord input facing upwards, water or other foreign substances could enter the Adapter and cause the Adapter to malfunction.
CONNECTING THE SUBWOOFER TO THE SOUNDBAR MAIN UNIT
You can enjoy rich bass tones and better sound quality by linking the subwoofer to the Soundbar main unit.

The Soundbar main unit and subwoofer should link (connect wirelessly) automatically when the Soundbar main unit and subwoofer are turned on. When auto-connection is complete, the blue indicator on the front of the subwoofer stops blinking and glows blue continuously.
If the indicator on the front of the subwoofer displays in red or flashes in blue, the subwoofer has not automatically connected. If this occurs, follow the directions below to connect the subwoofer manually.

Before you begin, put the battery into the remote.

- Plug the power cords of the Soundbar main unit and subwoofer into an AC wall outlet.
- Press the ID SET button on the back of the subwoofer for 5 seconds. The red indicator on the front of the subwoofer turns off and the blue indicator flashes rapidly.
- Press the
![]() button on your remote control for 5 seconds while the Soundbar main unit is turned OFF.
button on your remote control for 5 seconds while the Soundbar main unit is turned OFF. - The ID SET message appears on the display of the Soundbar main unit for a short period of time, and then disappears.

- While the subwoofer's indicator is flashing blue, press the
![]() button on your remote control or on the right side of Soundbar main unit to turn on the Soundbar main unit.
button on your remote control or on the right side of Soundbar main unit to turn on the Soundbar main unit. - The connection is complete if the indicator on the front of the subwoofer stops flashing and glows continuously.

If the connection process fails, the blue indicator will flash continuously. Go to Step 2 and start again.
Expand to true wireless surround sound by connecting the Samsung Wireless Rear Speaker Kit (SWA-8000S) to your Soundbar. (Sold separately)
For further information, refer to the Web Manual.
CONNECTING TO YOUR TV
You can enjoy TV sound after connecting the Soundbar to your TV with or without a cable.
Before you begin, put the battery into the remote.
Method 1. Connecting with a Cable

- Connect the DIGITAL AUDIO IN (OPTICAL) jack on the Soundbar to the OPTICAL OUT jack of the TV with a digital optical cable.
- Press the
![]() button on the right side of the Soundbar or the SOURCE button on the remote control to select the D.IN mode.
button on the right side of the Soundbar or the SOURCE button on the remote control to select the D.IN mode.
![]()

If TV sound is not output, press the ![]() button on the right side of your Soundbar or the SOURCE button on the remote control to select the D.IN mode on Soundbar main unit display.
button on the right side of your Soundbar or the SOURCE button on the remote control to select the D.IN mode on Soundbar main unit display.
If the Soundbar main unit display does not change to D.IN, disconnect the HDMI cable.
Press the  button on the remote control for 5 seconds to turn Auto Power Link on or off. (Auto Power Link is set to ON by default.)
Method 2. TV SoundConnect (Linking to a Samsung TV with Bluetooth)
- Turn on your Samsung TV and the Soundbar.
- Select TV mode in your Soundbar's display by pressing the
![]() button on the right side of the Soundbar or the SOURCE button on your remote control. (Modes are displayed in the following order: D.IN → AUX → HDMI → BT → TV → USB.)
button on the right side of the Soundbar or the SOURCE button on your remote control. (Modes are displayed in the following order: D.IN → AUX → HDMI → BT → TV → USB.)

- When the connection message shown below appears on the TV screen, select <Yes> with your TV remote control.

- The Soundbar outputs TV sound.


If the TV SoundConnect linking process fails, navigate to SoundConnect in the TV's Sound menu, select Add New Device, and set Add New Device to ON. Then, try again.
If your Soundbar is connected to your TV through TV SoundConnect, you can conveniently control the volume with the Soundbar's remote or the TV's remote. You can also have the Soundbar turn on and off automatically when you turn the TV on or off by setting the Bluetooth POWER On function to On.
The TV SoundConnect (Soundshare) function is only available in some Samsung TV products released since 2012.
If you want to disconnect the existing connection to your TV and establish a new connection to another TV, press the  button on your remote control for more than 5 seconds.
In the TV SoundConnect mode, the Soundbar cannot be paired to another Bluetooth device.
Do not place electronic devices or metallic objects on top of the product. e.g., Wired/wireless router, set-top box, or modem.
Placing the product on the floor may degrade wireless network performance, depending on the floor material.
CONNECTION VIA BLUETOOTH
You can connect a Bluetooth device to the Soundbar and enjoy music with stereo sound, all without wires!
It is not possible to connect multiple Bluetooth devices at the same time.

- Press the
![]() button on the right side of the Soundbar or the SOURCE button on the remote control to select BT.
button on the right side of the Soundbar or the SOURCE button on the remote control to select BT. - Select the Bluetooth menu on the Bluetooth device you want to connect. (Refer to the Bluetooth device's user manual.)
- Select "[AV] Samsung Soundbar Kxxx K-Series" from the list.
- When the connection is established between the Soundbar and Bluetooth device, the front display window of the Soundbar displays [Bluetooth device name] → BT.
- Play music on the connected device.
[If failed to connect to the Bluetooth device / If device searching is needed again]
- Delete the previous "[AV] Samsung Soundbar Kxxx K-Series" found by the Bluetooth device and have it search for the Soundbar again.
If asked for a PIN code when connecting a Bluetooth device, enter <0000>.
In Bluetooth connection mode, the Bluetooth connection will be lost if the distance between the Soundbar and the Bluetooth device exceeds 32.8 ft.
The Soundbar automatically turns off after 5 minutes in the Ready state.
The Soundbar may not perform Bluetooth search or connection correctly under the following circumstances:
- If there is a strong electrical field around the Soundbar.
- If several Bluetooth devices are simultaneously paired with the Soundbar.
- If the Bluetooth device is turned off, not in place, or malfunctions.
Electronic devices may cause radio interference. Devices that generate electromagnetic waves must be kept away from the Soundbar main unit - e.g., microwaves, wireless LAN devices, etc.
Disconnecting the Soundbar from the Bluetooth device
Press the SOURCE button on the remote control or the ![]() button on the product's right side to switch from BT to another mode or turn off the Soundbar.
button on the product's right side to switch from BT to another mode or turn off the Soundbar.
- The connected Bluetooth device will wait a certain amount of time for a response from the Soundbar before terminating the connection. (Disconnection time may differ, depending on the Bluetooth device)
CONNECTING TO AN EXTERNAL DEVICE
Optical Cable
You can enjoy sound from separate external devices such as a BD player/game console/set-top box, etc. by connecting them to your Soundbar.

- Connect an Optical Cable as shown in the illustration above.
- Press the
![]() button on the right side of your Soundbar or the SOURCE button on your remote control to select D.IN mode.
button on the right side of your Soundbar or the SOURCE button on your remote control to select D.IN mode. - The Soundbar shows D.IN on its display and outputs sound from the external device.
USB
You can play music files located on USB storage devices through the Soundbar.

- Connect a Micro USB to USB adapter cable with a male USB 2.0 Micro USB plug (Type B) on one end and a standard female 2.0 USB jack (Type A) on the other end to the micro USB jack on your Soundbar.
The Micro USB to USB adapter cable is sold separately. To purchase, contact a Samsung Service Center or Samsung Customer Care.
- Connect your USB device to the female end of the adapter cable.
- Press the
![]() button on the main unit's right side or the SOURCE button on the remote control to select the USB mode.
button on the main unit's right side or the SOURCE button on the remote control to select the USB mode. - USB appears on the display screen.
- The Soundbar connection to the USB device is complete.
- The Soundbar automatically turns off (Auto Power Off) if no USB device has been connected for more than 5 minutes.
SOFTWARE UPDATE
Samsung may offer updates for the Soundbar's system firmware in the future.

If an update is offered, you can update the firmware by connecting a USB device with the firmware update stored on it to the USB port on your Soundbar.
For more information about how to download update files, go to the Samsung Electronics website at (samsung.com/sec) → search for the model name → download the firmware from the customer support menu option. The option name can vary.
INSTALLING THE WALL MOUNT
You can use the wall mount bracket to mount this unit on a wall.
Installation Precautions
- Install on a vertical wall only.
- Do not install the Soundbar system in a location with high temperature and/or humidity. Install the system on a stable wall that can bear the weight of the Soundbar main unit.
- Check the strength of the wall. To install the Soundbar system on a wall that may not bear the Soundbar main unit weight, reinforce the wall before installation. If this is not possible, install the system on another wall, one stable enough to bear the weight of the Soundbar main unit.
- Purchase and use the fixing screws or anchors appropriate for the kind of wall you have (plaster board, iron board, wood, etc.). If possible, fix the support screws into wall studs.
- Purchase wall mounting screws according to the type and thickness of the wall you will mount the Soundbar on.
- Diameter: M5
- Length: 1 3/8 inches or longer recommended.
- Connect cables from the unit to external devices before you install it on the wall.
- Make sure the unit is turned off and unplugged before you install it. Otherwise, it may cause an electric shock.
Wallmount Components


Wall Mount Guide
- Place the Wall Mount Guide against the wall surface.
- The Wall Mount Guide must be level.
- If your TV is mounted on the wall, install the Soundbar at least 2 inches (5 cm) below the TV.


- Align the Paper Template's Center Line with the center of your TV (if you are mounting the Soundbar below your TV), and then fix the Wall Mount Guide to the wall using tape.
If you are not mounting below a TV, place the Center Line in the center of the installation area.

- Push a pen tip or sharpened pencil tip through the center of the A-TYPE images on each end of the Guide to mark the holes for the supporting screws, and then remove the Wall Mount Guide.
- Using an appropriately sized drill bit, drill a hole in the wall at each marking.
If the markings do not correspond to the positions of studs, make sure you insert appropriate anchors or mollies into the holes before you insert the support screws. If you use anchors or mollies, make sure the holes you drill are large enough for the anchors or mollies you use.

- Push a screw (not supplied) through each Holder-Screw, and then screw each screw firmly into a support screw hole.

- Use the two Screws (M4 x L12) to attach both Bracket-Wall Mount L and R to the Soundbar's bottom. For a proper fit, make sure to align the bumps on the Soundbar to the holes on the brackets.
![]()


- When assembling, make sure the hanger parts of the Bracket-Wall Mounts are located behind the rear of the Soundbar. See the illustration below.
![]()
- The left and right mounts are different shapes. Make sure to position them correctly.


- Install the Soundbar with the attached Bracket-Wall Mounts by hanging the Bracket-Wall Mounts on the Holder-Screws on the wall.


- Slightly tilt the Soundbar to insert both Holder-Screw heads into Bracket-Wall Mount holes. Push the Soundbar in the direction of the arrow to make sure both sides are firmly fixed.


DETACHING THE SOUNDBAR FROM THE WALL
- To separate the Soundbar from the wall, push it in the direction of the arrow, lift up the left side slightly, and then pull it away from the wall as shown.


Do not hang onto the installed unit and avoid striking or dropping the unit.
Secure the unit firmly to the wall so that it does not fall off. If the unit falls off, it may cause an injury or damage the product.
When the unit is installed on a wall, please make sure that children do not pull any of the connecting cables, as this may cause it to fall.
For the optimal performance of a wall mount installation, install the speaker system at least 2 inches (5 cm) below the TV if the TV is mounted on the wall.
For your safety, if you do not mount the unit on the wall, install it on a secure, flat surface where it is unlikely to fall.
REMOTE CONTROL BUTTONS & FEATURES
Inserting Battery before using the Remote Control

- Use a suitable coin to turn the remote control's battery cover counterclockwise to remove it as shown in the figure below.
- Insert a 3V lithium battery. Keep the positive (+) pole facing up when inserting the battery. Put the battery cover on, and then align the '●' marks side by side as shown in the figure below.
- Use a suitable coin to turn the remote control battery cover clockwise as far as it will go to fix it in place.
Controlling the Soundbar using Your TV Remote Control
- Press and hold the
![]() SOUND button for more than 5 seconds while the Soundbar is turned on.
SOUND button for more than 5 seconds while the Soundbar is turned on. - "ON - TV REMOTE" appears on the Soundbar's display.
- In the TV's menu, set the TV speaker to external speaker.
This function is not available when the Soundbar is in TV ARC mode or in HDMI mode.
Only the VOL +/- and ![]() buttons are available to control the Soundbar.
buttons are available to control the Soundbar.
TV menus differ by manufacturer and model. Refer to the TV's user manual for further information.
Manufacturers supporting this function:
- VIZIO, LG, Sony, Sharp, PHILIPS, PANASONIC, TOSHIBA, GRUNDIG, Hisense, RCA
- This function may not be compatible with your TV's remote depending on the remote control's manufacturer.
To turn off this function, press the ![]() SOUND button for 5 seconds. "OFF - TV REMOTE" appears on the Soundbar's display.
SOUND button for 5 seconds. "OFF - TV REMOTE" appears on the Soundbar's display.

 |  Power | Turns the Soundbar on and off. |
 |  SOURCE | Press to select a source connected to the Soundbar. |
 |  Mute | Sets the volume temporarily to 0. Press again to cancel. |
 |  Volume | Adjusts the volume level of the unit. |
 |  Play / Pause | Press the Press the |
 Skip Forward | Selects the next file. | |
 Skip Back | Selects the previous file. | |
 Repeat | Press to set the Repeat function during music playback from a USB device.
| |
 |  Surround Sound | The Surround Sound function adds depth and a sense of space to sound. Each time you press this button, Surround Sound ON and OFF alternates. |
 |  Bluetooth POWER | Press to turn the Bluetooth POWER On function on and off. When the Bluetooth POWER On function is on, ON - BLUETOOTH POWER appears in the Soundbar's display. |
 |  SOUND EFFECT | You can select from 6 sound modes: STANDARD, MUSIC, CLEAR VOICE, SPORTS, MOVIE, and NIGHT.
|
 |  SOUND CONTROL | You can select TREBLE, BASS, SUBWOOFER LEVEL or AUDIO SYNC.
|
 buttons to adjust the TREBLE or BASS volume from -6 ~ +6, SUBWOOFER LEVEL volume from -12, -6 ~ +6.
TROUBLESHOOTING
Before seeking assistance, check the following.
The unit will not turn on
Is the power cord plugged into the outlet?
→ Connect the power plug to the outlet.
A function does not work when the button is pressed
Is there static electricity in the air?
→ Disconnect the power plug and connect it again.
Sound is not produced
Is the Mute function on?
→ Press the ![]() (Mute) button to cancel the function.
(Mute) button to cancel the function.
Is the volume set to minimum?
→ Adjust the Volume.
The remote control does not work
Are the battery drained?
→ Replace with new battery.
Is the distance between the remote control and Soundbar main unit too far?
→ Move the remote control closer to the Soundbar main unit.
The TV SoundConnect (TV pairing) failed
Does your TV support TV SoundConnect?
→ TV SoundConnect is supported by some Samsung TVs released from 2012 on. Check your TV to see if it supports TV SoundConnect.
Is your TV firmware the latest version?
→ Update your TV with the latest firmware.
Does an error occur when connecting?
→ Contact the Samsung Call Center.
→ Reset TV SoundConnect and connect again. To reset the TV SoundConnect connection, press and hold the  button for 5 seconds.
The red LED on the subwoofer blinks and the subwoofer is not producing sound.
This issue can occur if the subwoofer is not connected to the Soundbar main unit.
→ Try to connect your subwoofer again.
OPEN SOURCE LICENSE NOTICE
To send inquiries and requests regarding open sources, contact Samsung via Email (oss.request@samsung.com).
IMPORTANT NOTE ABOUT SERVICE
- Figures and illustrations in this User Manual are provided for reference only and may differ from actual product appearance.
- An administration fee may be charged if either:
- An engineer is called out to your home at your request and there is no defect in the product.
- You bring the unit to a repair center and there is no defect in the product.
- You will be advised of the amount of the administration fee before any work is done or a home visit is made.
- If you have a problem with this product, we strongly recommend you read the appropriate section of this manual, visit the Support page for your product at www.samsung.com, or call Samsung Product Support (1-800-726-7864) to find an answer before you contact a service center for a repair.
SPECIFICATIONS
| GENERAL | USB | 5V / 0.5A | |
| Weight | Soundbar Main Unit | 5.7 lbs (2.6 kg) | |
| Subwoofer (PS-WK550/ PS-WK551) | 15.0 lbs (6.8 kg) | ||
| Dimensions (W x H x D) | Soundbar Main Unit | 39.8 x 2.1 x 3.4 inches (1010.5 x 54.0 x 87.5 mm) | |
| Subwoofer (PS-WK550/ PS-WK551) | 17.8 x 13.2 x 6.1 inches (452.0 x 335.0 x 154.0 mm) | ||
| Operating Temperature Range | +41°F to +95°F (+5°C to +35°C) | ||
| Operating Humidity Range | 10% to 75% | ||
| AMPLIFIER | Rated Output Power | Soundbar Main Unit | 30W x 6, 6 ohm, THD≦10% |
| Subwoofer (PS-WK550/ PS-WK551) | 160W, 3 ohm, THD≦10% | ||
| Supported play formats | LPCM 2ch, Dolby Digital, DTS | ||
- DTS 2.0 sound is played in DTS format.
- Nominal specifications
- Samsung Electronics Co., Ltd reserves the right to change the specifications without notice.
- Weight and dimensions are approximate.
- For more information about the power supply and power consumption, refer to the label attached to the product. (Label: Bottom of main unit)
- Dispose unwanted electronics through an approved recycler.
To find the nearest recycling location, go to our website: www.samsung.com/recyclingdirect or call (877) 278 - 0799
LIMITED WARRANTY TO ORIGINAL PURCHASER
This SAMSUNG brand product, as supplied and distributed by SAMSUNG and delivered new, in the original carton to the original consumer purchaser, is warranted by SAMSUNG against manufacturing defects in materials and workmanship for a limited warranty period of:
One (1) Year Parts and Labor
(*90 Days Parts and Labor for Commercial Use)
For a list of Samsung authorized retailers, please go to: http://www.samsung.com/us/peaceofmind/authorized_resellers.html.
The party responsible for product compliance:
Samsung Electronics Co., LTD.
America QA lab of Samsung
19 Chapin Rd. Building D,
Pine Brook, New Jersey 07058
Questions or Comments?
| COUNTRY | CALL | OR VISIT US ONLINE AT | WRITE |
| IN THE US | 1-800-SAMSUNG (726-7864) | www.samsung.com/us/support | Samsung Electronics America, Inc. 85 Challenger Road Ridgefield Park, NJ 07660 |
SAFETY INFORMATION
 The following also applies to the Wireless Subwoofer (PS-WK550/PS-WK551).
SAFETY WARNINGS
TO REDUCE THE RISK OF ELECTRIC SHOCK, DO NOT REMOVE THE COVER (OR BACK).
NO USER-SERVICEABLE PARTS ARE INSIDE. REFER SERVICING TO QUALIFIED SERVICE PERSONNEL.

RISK OF ELECTRIC SHOCK. DO NOT OPEN.
 This symbol indicates that high voltage is present inside. It is dangerous to make any kind of contact with any internal part of this product.
 This symbol indicates that this product comes with important literature concerning operation and maintenance.
 | Class II product: This symbol indicates that a safety connection to electrical earth (ground) is not required. | |||
 | AC voltage: Rated voltage marked with this symbol is AC voltage. | |||
 | DC voltage: Rated voltage marked with this symbol is DC voltage. | |||
 |  Consult Instructions for use: This symbol instructs the user to consult the user manual for further safety related information. | |||

- To reduce the risk of fire or electric shock, do not expose this appliance to rain or moisture.
- To prevent injury, this apparatus must be securely attached to the floor/wall in accordance with the installation instructions.
- This product contains chemicals known to the State of California to cause cancer and birth defects or other reproductive harm.
- Do not expose this apparatus to dripping or splashing. Do not put objects filled with liquids, such as vases on the apparatus.
- To turn this apparatus off completely, you must pull the power plug out of the wall socket. Consequently, the power plug must be easily and readily accessible at all times.
Important Safety Instructions
Read these operating instructions carefully before using the unit. Follow all the safety instructions listed below. Keep these operating instructions handy for future reference.
- Read these instructions.
- Keep these Instructions.
- Heed all warnings.
- Follow all instructions.
- Do not use this apparatus near water.
- Clean only with dry cloth.
- Do not block any ventilation openings. Install in accordance with the manufacturer's instructions.
- Do not install near any heat sources such as radiators, heat registers, stoves, or other apparatus (including amplifiers) that produce heat.
- Do not defeat the safety purpose of the polarized or grounding-type plug. A polarized plug has two blades with one wider than the other. A grounding type plug has two blades and a third grounding prong. The wide blade or the third prong are provided for your safety. If the provided plug does not fit into your outlet, consult an electrician for replacement of the obsolete outlet.
- Protect the power cord from being walked on or pinched particularly at plugs, convenience receptacles, and the point where they exit from the apparatus.
- Only use attachments/accessories specified by the manufacturer.
![]()
Use only with the cart, stand, tripod, bracket, or table specified by the manufacturer, or sold with the apparatus. When a cart is used, use caution when moving the cart/apparatus combination to avoid injury from tip-over.- Unplug this apparatus during lightning storms or when unused for long periods of time.
- Refer all servicing to qualified service personnel. Servicing is required when the apparatus has been damaged in any way, such as power-supply cord or plug is damaged, liquid has been spilled or objects have fallen into the apparatus, the apparatus has been exposed to rain or moisture, does not operate normally, or has been dropped.

PRECAUTIONS
- Ensure that the AC power supply in your house complies with the power requirements listed on the identification sticker located on the back of your product. Install your product horizontally, on a suitable base (furniture), with enough space around it for ventilation (3~4 inches). Make sure the ventilation slots are not covered. Do not place the unit on amplifiers or other equipment which may become hot. This unit is designed for continuous use. To fully turn off the unit, disconnect the AC plug from the wall outlet. Unplug the unit if you intend to leave it unused for a long period of time.
- During thunderstorms, disconnect the AC plug from the wall outlet. Voltage peaks due to lightning could damage the unit.
- Do not expose the unit to direct sunlight or other heat sources. This could lead to overheating and cause the unit to malfunction.
- Protect the product from moisture (i.e. vases), and excess heat (e.g. a fireplace) or equipment creating strong magnetic or electric fields. Unplug the power cable from the AC wall socket if the unit malfunctions. Your product is not intended for industrial use. It is for personal use only. Condensation may occur if your product has been stored in cold temperatures. If transporting the unit during the winter, wait approximately 2 hours until the unit has reached room temperature before using.
- The battery used with this product contains chemicals that are harmful to the environment. Do not dispose of the battery in the general household trash. Do not expose the battery to excess heat, direct sunlight, or fire. Do not short circuit, disassemble, or overheat the battery. Danger of explosion if the battery is replaced incorrectly. Replace only with the same or equivalent type.
DO NOT INGEST BATTERY. CHEMICAL BURN HAZARD.
The remote control supplied with this product contains a coin/button cell battery. If the coin/button cell battery is swallowed, it can cause severe internal burns in just 2 hours and can lead to death. Keep new and used batteries away from children. If the battery compartment does not close securely, stop using the remote and make sure to keep it away from children. If you think the battery might have been swallowed or placed inside any part of the body, seek immediate medical attention.
CALIFORNIA USA ONLY
This perchlorate warning applies only to primary CR ( Manganese Dioxide )
Lithium coin cells in the product sold or distributed ONLY in California USA
" Perchlorate Material - special handling may apply,
Documents / Resources
References
Samsung 대한민국 | 모바일 | TV | 가전 | IT
![www.samsung.com]() Samsung US | Mobile | TV | Home Electronics | Home Appliances | Samsung US
Samsung US | Mobile | TV | Home Electronics | Home Appliances | Samsung US![www.samsung.com]() How to Recycle | Sustainability | Samsung US
How to Recycle | Sustainability | Samsung US![www.samsung.com]() Store | Samsung US
Store | Samsung US![www.samsung.com]() Samsung Authorized Resellers | Samsung US
Samsung Authorized Resellers | Samsung US![www.samsung.com]() Support Home | Official Samsung Support US
Support Home | Official Samsung Support US![www.dtsc.ca.gov]() http://www.dtsc.ca.gov/hazardouswaste/perchlorate
http://www.dtsc.ca.gov/hazardouswaste/perchlorate

Download manual
Here you can download full pdf version of manual, it may contain additional safety instructions, warranty information, FCC rules, etc.
Advertisement


Need help?
Do you have a question about the HW-K550 and is the answer not in the manual?
Questions and answers