Table of Contents
Advertisement
Available languages
Available languages
Quick Links
Item # 1007 316 245
Model # JLW1702AX-01/OR
Item # 1007 316 238
Model # JLW1702AX-01/MB
Item # 1007 316 242
Model # JLW1702AX-02/SL
USE AND CARE GUIDE
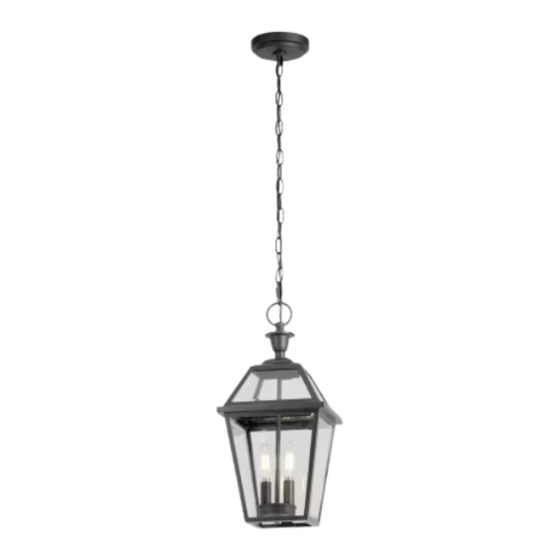
GLENNEYRE 2-LIGHT EXTERIOR PENDANT
Questions, problems, missing parts? Before returning to the store,
call Home Decorators Collection Customer Service
8 a.m. - 7 p.m., EST, Monday - Friday, 9 a.m. - 6 p.m., EST, Saturday
1-800-986-3460
HOMEDEPOT.COM/HOMEDECORATORS
THANK YOU
We appreciate the trust and confidence you have placed in Home Decorators Collection through the purchase of this
pendant . We strive to continually create quality products designed to enhance your home. Visit us online to see our
full line of products available for your home improvement needs. Thank you for choosing Home Decorators Collection!
Advertisement
Table of Contents

Related Manuals for Home Decorators Collection GLENNEYRE JLW1702AX-01/OR


Summary of Contents for Home Decorators Collection GLENNEYRE JLW1702AX-01/OR
- Page 1 THANK YOU We appreciate the trust and confidence you have placed in Home Decorators Collection through the purchase of this pendant . We strive to continually create quality products designed to enhance your home. Visit us online to see our...
-
Page 2: Table Of Contents
Table of Contents Tools Required ........... 3 Table of Contents ......... 2 Hardware Included ........3 Safety Information ........ 2 Package Contents ........4 Warranty ..........2 Installation ........... 5 What is Covered ......... 2 Care and Cleaning ....... 7 What is Not Covered ........ -
Page 3: Pre-Installation
Pre-Installation PLANNING INSTALLATION Read all the instructions before assembly. Before starting installation of this fixture or removal of a previous fixture, disconnect the power by turning off the circuit breaker or by removing the fuse from the fuse box. To avoid damaging this product, assemble it on a soft, non-abrasive surface such as carpet or cardboard. -
Page 4: Package Contents
Pre-Installation (continued) PACKAGE CONTENTS Part Description Quantity Loop Top Cover Socket Pan Screw (8 mm) Fixture Frame... -
Page 5: Installation
Installation Attaching the fixture frame Installing bulbs to the top cover □ Install two 60-Watt maximum, candelabra base □ Align the fixture frame (D) under the top cover (B). bulbs (sold separately) into the sockets (C). □ Use a Phillips screwdriver to screw the pan NOTE: You can use LED equivalent screws (C) into the holes on the top cover (B). -
Page 6: Making The Electrical Connections
Installation (continued) Determining the correct length Making the electrical of chain connections □ Use pliers and a screwdriver to twist open the link at □ Weave the fixture wires up through the chain the end of the chain (JJ). Remove the open links. (JJ), the ring (HH), the canopy (AA), the screw collar loop (II), and the nipple (GG). -
Page 7: Care And Cleaning
Installation (continued) Securing the canopy Applying caulk □ □ Caulk the space between the wall and the full Place the canopy (AA) over the mounting nipple (GG), and ensure it is flush with the ceiling. area of the canopy (AA) to prevent water seeping into the outlet box. - Page 8 Questions, problems, missing parts? Before returning to the store, call Home Decorators Collection Customer Service 8 a.m. - 7 p.m., EST, Monday - Friday, 9 a.m. - 6 p.m., EST, Saturday 1-800-986-3460 HOMEDEPOT.COM/HOMEDECORATORS Retain this manual for future use.
- Page 9 HOMEDEPOT.COM/HOMEDECORATORS GRACIAS POR TU COMPRA. Agradecemos la confianza que ha tenido en Home Decorators Collection a traves de de la compra de esta exteriores lampara. Nos esforzamos para continuamente crear productos de calidad diseñados para mejorar tu hogar. Visítanos por Internet para ver nuestra línea completa de productos disponibles para las necesidades de mejoras de tu hogar.
-
Page 10: Información De Seguridad
Índice Herraminentas Necesarias....... 11 Índice ..........10 Hardware Incluido ........11 Información de Seguridad ....10 Contenido del Paquete ......12 Garantía ..........10 Instalación ..........13 Lo que esta Cubierto ........ 10 Mantenimiento y Limpieza ....15 Lo que (no) esta Cubierto ......10 Solución de Problemas ......15 Pre-Instalación ........ -
Page 11: Planificación De La Instalación
Pre-Instalación PLANIFICACIÓN DE LA INSTALACIÓN Lee todas las instrucciones antes de ensamblar. Antes de comenzar la instalación o de quitar la instalación anterior, desconecte la alimentacion apagando el interruptor del circuito o quitando el fusible en la caja de fusible. Para evitar dañar el artículo, ensámblalo sobre una superficie suave, no abrasiva, como por ejemplo una alfombra o cartón. -
Page 12: Contenido Del Paquete
Pre-Instalación (continuación) CONTENIDO DEL PAQUETE Pieza Descripción Cantidad Lazo Cubierta Superior Portalámpara Tornillo Pan (8 mm) Bastidor de Fijación... - Page 13 Installation Coloque el bastidor de Instalar las bombillas fijación en la cubierta superior □ Instale dos bombillas candelabra base medio de 60 □ Linee el bastidor de fijación (D) bajo la Vatios máximo (vendido por separado) en las cubierta superior (B). portalámparas (C).
- Page 14 Instalación (continuación) Determinando la longitud Hacer las conexiones correcta de la cadena eléctricos □ □ Use pinzas y un destornillador para torcer y abrir los Entrelace los cables de la la instalación a enlaces encima de la cadena (JJ). Quite los enlaces través de la cadena (JJ), del anillo (HH), del o argollas abiertas.
-
Page 15: Mantenimiento Y Limpieza
Instalación (continuación) Asegurando el dosel Aplicar el calafateado □ Coloque el dosel (AA) sobre la boquilla de montaje □ Llenar el espacio entre la pared y toda la zona (GG) y asegúrese de que esté al ras con el techo. del techo (AA) para evitar que el agua penetre en la Caja de alambre . - Page 16 Preguntas, problemas o piezas faltantes? Antes de regresar a la tienda, llama al Servicio al Cliente de Home Decorators Collection de Lunes a Viernes entre 8 a.m. y 7 p.m., El Sábado entre 9 a.m. y 6 p.m., (hora del Este de EE. UU.) 1-800-986-3460 HOMEDEPOT.COM/HOMEDECORATORS...
- Page 17 HOMEDEPOT.COM/HOMEDECORATORS MERCI Nous vous remercions de la confiance que vous avez place en Home Decorators Collection en achetant ce luminaire de lustre. Nous nous efforçons en permanence de créer des produits de qualité conçus pour perfectionner votre maison. Vous pouvez visiter notre site en ligne pour consulter notre gamme complète de produits pour vos besoins...
-
Page 18: Consignes De Sécurité
Table des Matières Outils Requis ..........19 Table des matières ......18 Materiel Inclus ......... 19 Consignes de sécurité ....... 18 Contenu de l'emballage ......20 Garantie ..........18 Installation ..........21 Ce qui est couvert ........18 Entretien et Nettoyage ......23 Ce qui est couvert (et pas) ....... -
Page 19: Planification De L'installation
Pré-Installation PLANIFICATION DE L'INSTALLATION Lisez toutes les instructions avant de procéder à l’assemblage. Avant de commencer à installer ce luminaire ou d’enlever l’ancien luminaire, déconnectez le courant en eteignant le disjoncteur ou en enlevant le fusible correspondent du coffret à fusibles. Pour éviter d’endommager ce produit, assemblez-le sur une surface molle et non abrasive telle qu’un tapis ou un carton. -
Page 20: Contenu De L'emballage
Pré-Installation (suite) CONTENU DE L'EMBALLAGE Pièce Description Quantité Boucle Cache Supérieur Douille Vis de Pan (8 mm) Cadre du Luminaire... -
Page 21: Installation
Installation Fixer le cadre du luminaire Installer ampoules au cache supérieur □ □ Placer deux ampoules douilles incandescence de Fixer le cadre du luminaire (D) au cache 60 watt au maximum et de culot moyen (vendues supérieur (B). séparément) dans l’assemblage de les douilles □... -
Page 22: Faire Les Connexions Électriques
Installation (suite) Déterminer la bonne longueur de Faire les connexions chaîne électriques □ □ Utilisez des pinces et un tournevis pour ouvrir les Faire monter les fils du luminaire au travers anneaux en haut de la chaîne (JJ). Retirer les anneaux de la chaîne (JJ), de l’bague (HH), du ouverts. -
Page 23: Entretien Et Nettoyage
Installation (suite) Fixer le plafonnier Appliquer le calfeutrage □ □ Placer le plafonnier (AA) sur le raccord fileté de Remplir l'espace entre le mur et toute la zone montage (GG) et s'assurer qu’il est aligné sur le du plafonnier (AA) pour empêcher l'eau de plafond. - Page 24 Questions, problèmes, pièces manquantes? Avant de retourner au magasin, veuillez communiquez avec le service à la clientèle Home Decorators Collection Du lundi au vendredi : 8h – 19h, HNE; le samedi : 9h - 18h, HNE 1-800-986-3460 HOMEDEPOT.COM/HOMEDECORATORS Conservez ce guide pour un usage ulterieur.
Need help?
Do you have a question about the GLENNEYRE JLW1702AX-01/OR and is the answer not in the manual?
Questions and answers